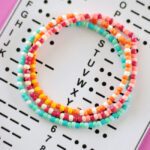
Stretchy Morse Code Bracelets
These stretchy Morse code bracelets are easy to make and fun to customize! Made from seed beads and stretchy cord. Make a stack to wear today!
Pin Recipe
Yield: 1 bracelet
Cost: $1
Equipment
- scissors
Materials
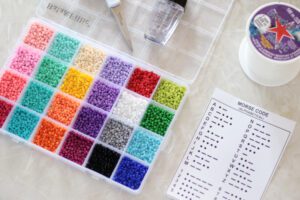
- Morse code chart (click to print)
- 18" piece 0.7mm Stretch Magic Cord
- 3 mm seed beads
- masking tape
- clear nail polish or E6000 glue
Instructions
- Print off the Morse code chart (it prints 4 to a page so it's great to use for group crafts).

- You can use any kind of bead that you'd like. I like 3mm seed beads.
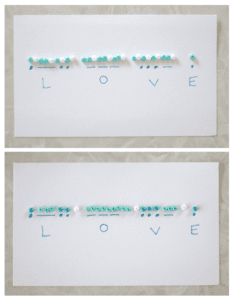
- There are quite a few ways that you can create your Morse code pattern: You can use a single bead for the dots and double beads for the dashes with a contrasting bead as a spacer in between each character.Another way is to select two colors and use one color for the dots and the second color for the dashes with a spacer bead between each letter instead of each character.Whatever you choose to do, just make sure that you are consistent.
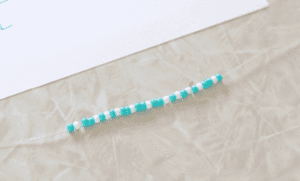
- Cut an 18" piece of Stretch Magic clear elastic cording. Tape the left end to your work surface with a piece of masking tape.String the beads onto the cording.Once you've finished spelling out your word, add beads on both sides until desired bracelet size is achieved.
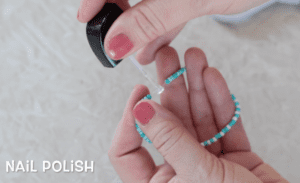
- Tie a few knots to secure the bracelet. There are many ways to do this. You can watch my video for a better visual on how I tie my knot. Secure the knot with a dab of clear nail polish or glue and let dry.
- Continue to make bracelets until you have a colorful stack to wear!

Video
Notes
Helpful tips when making these with a group:
- Give each person a paper plate to work on. If the beads spill they won't go all over the table or floor.
- 18" is a good all-around length for the stretchy cording. You can also measure around your wrist and add 12". This allows for plenty of wiggle room to string the beads and tie a knot.
- Use nail polish to secure the knot (it dries faster than glue).
- Have index cards and paper out so that they can lay out their beads before stringing them (optional).
- Have an adult tie the knots if making these with tweens.
