
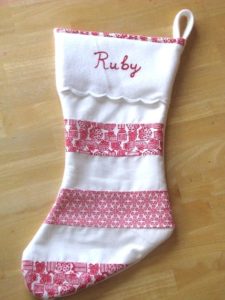
Scalloped Stocking Tutorial
If you've ever been intimidated by making stockings for you family, this is the pattern for you! Made out of cotton and felt, you can whip up a scalloped stocking using our tutorial in no time!
Cost: $2
Equipment
- sewing machine
- scissors
- pins
- pen or pencil
Materials
- old stocking
- paper newspaper or craft paper
- felt
- cotton fabric
Instructions
- To create a pattern, I trace around an old stocking our onto craft or newspaper.
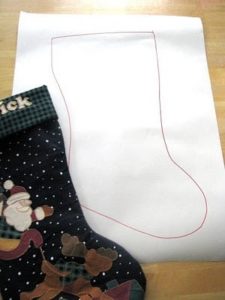
- Draw a simple freehand drawing about 5" down across the stocking for a scallop pattern (you will use this later).
- You will need 2 stocking pieces of felt cut out from your pattern, and 1 piece of fabric for a total of 3.

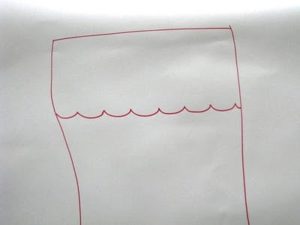
- Cut out the scallop pattern and use it to cut 2 pieces of felt for each stocking. Yes, 2 pieces of scalloped trim for each stocking. One piece isn't thick enough, so you will stack them together. Sew the scallop piece along the bottom (scalloped) portion.
- Go back to the scalloped pattern piece and cut out the top 2". This will be your pattern for the stocking trim.
- Lay the scalloped felt piece flush with 1 felt stocking piece and the cotton piece.
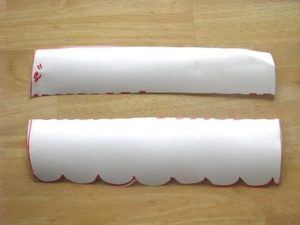
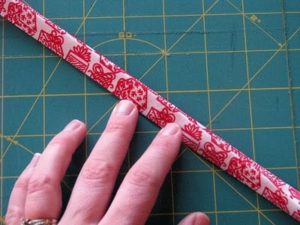
- Fold trim piece in half and press. Open it up and press each side in towards the center fold.
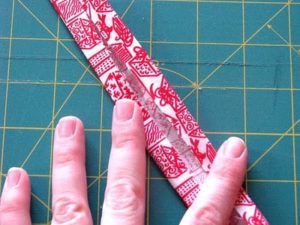
- Press again.
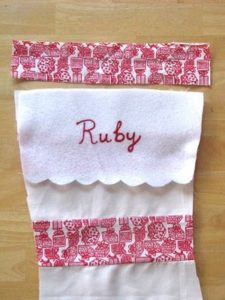
- Pin the trim across the top edge, creating a sandwich of fabric (bottom layer is felt, middle layer is cotton, and top layer is felt scallop piece) Stitch across.
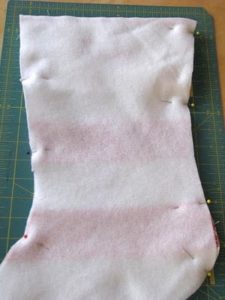
- Then add the 2nd piece of stocking felt on top, pinning around 3 sides and leaving the top open. Stitch around, clipping corners. Turn it right side out.
- Using some remaining fabric or felt scraps, cut a 2.5"x8" strip and press and stitch in the same manner that you did for the stocking trim. Fold in half and machine stitch it into place, about 1" down from the top edge.
Notes
Note: to add lettering, hand stitch the names or add using puffy paint. I used puffy paint and freehanded the names the night before I sewed my stockings together.