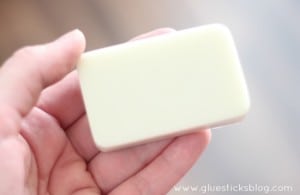
Homemade Lotion Bars
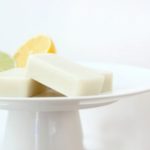
Coconut oil, shea butter, Vitamin E, beeswax, and essential oils combine to create luxurious DIY lotion bars to combat dry hands. Warm a bar with your hands for a few seconds then rub across dry skin. To use on feet, rub the lotion bar across heels and bottom of feet, and put on a pair of socks before going to bed.
Yield: 3 bars
Cost: Under $10
Equipment
- glass pour measuring cup
- small baking sheet
- lotion bar mold (silicone soap molds work great)
Materials
- 2 ounces coconut oil
- 2 ounces shea butter
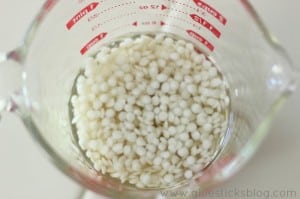
- 2 ounces bees wax pellets
- 2 capsules vitamin E oil
- essential oils for scent optional
Instructions
- Fill a sauce pan with about 2" of water and bring to a boil. Place a mason jar or smaller pot inside (double boiler**) and add your shea butter, beeswax, and coconut oil and heat until melted.
- Transfer to a pourable measuring cup. Cut the tip off of the vitamin E capsule and add it to your liquid mixture.
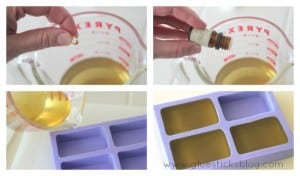
- Add essential oils, to your liking. As a reference, I used about 15 drops of each of the lemon and lime essential oils. Stir. If your mixture is lightly scented, add a few more drops and give it another whiff. If it smells just right, add a couple of more drops as it sometimes seems to lose potency when it has hardened.
- Pour your mixture into your molds.
- Allow lotion bars to sit until the tops start to look solid (about 15 minutes). Carefully move to the refrigerator and allow to set completely about 30 minutes.
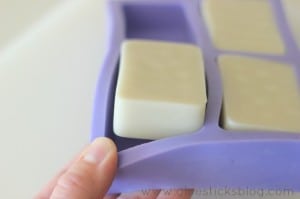
- Pop your lotion bars out of the molds. Store solid lotion bars at room temperature for a long shelf life.
Video
Notes
To use, wrap your fingers around a bar. The warmth of your skin will activate the oils and leave a soft and smooth residue. A little bit goes a long way. Rub into your hands and allow it to absorb. Your hands will thank you!