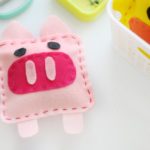
Pig Softie Sewing Pattern For Kids
Make your own pig softie! A simple sewing project for kids using scrap felt and a needle and thread! Such a sweet and simple way to make your own stuffed animal!
Yield: 1 softie
Cost: $1
Equipment
- pins
- scissors
Materials
- printable pig softie template
- felt scraps
- stuffing (polyester fiber fill)
- hot glue or fabric glue
Instructions
- Cut out pig softie templates. Pin each template to the felt and cut out the necessary pieces.
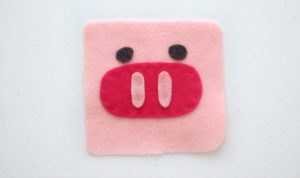
- Place the snout piece onto one of the squares of felt. Pin into place.Thread a needle with a long piece of thread. If using embroidery floss, seperate the strand of floss into two sections (each section will have 3 strings of floss). Use one section for sewing.Tie a knot on the end. Stitch around the snout. Tie a knot on the back when you are finished and cut the thread.
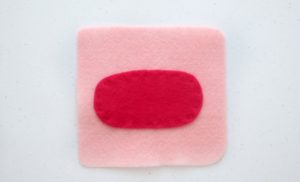
- Glue the eyes and nostrils onto the snout using hot glue or fabric glue.
- Set the front of the softie to the side. Place the second square onto your work surface. Place ears and legs over the square.
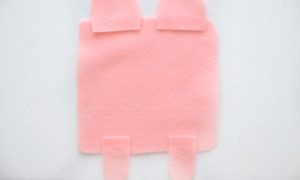
- Place the front piece on top, sandwiching the ears and feet in between. Add a few pins to keep everything together.
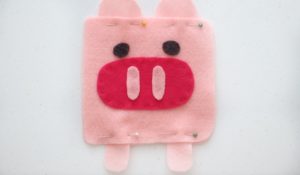
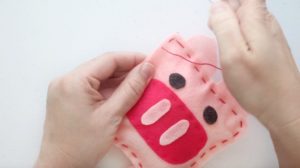
- Stitch around 3 sides, leaving one side open. Stuff pig with a small handfull of stuffing.
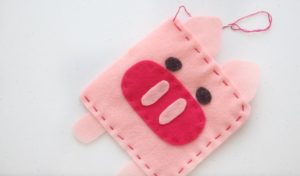
- Stitch the opening closed.
Video
Notes
You can sew your entire project or glue your entire project. We used a combination of sewing and gluing. Hot glue works best when gluing felt, but fabric glue is safer for kids (prevents burns). If using fabric glue, allow some time for the pieces to dry.