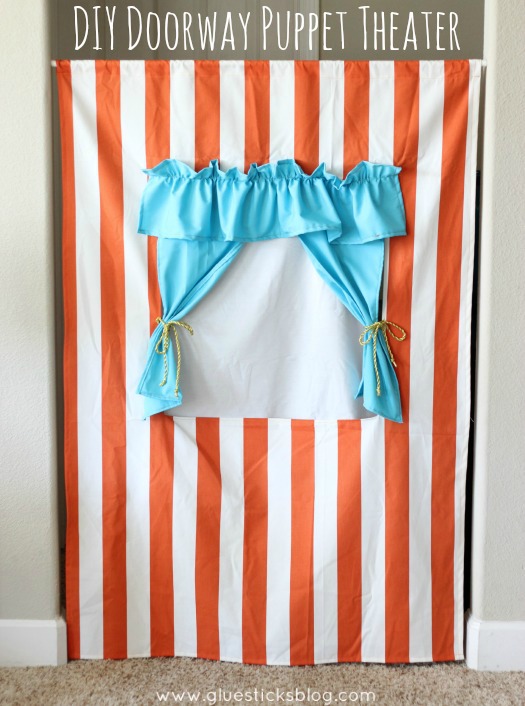
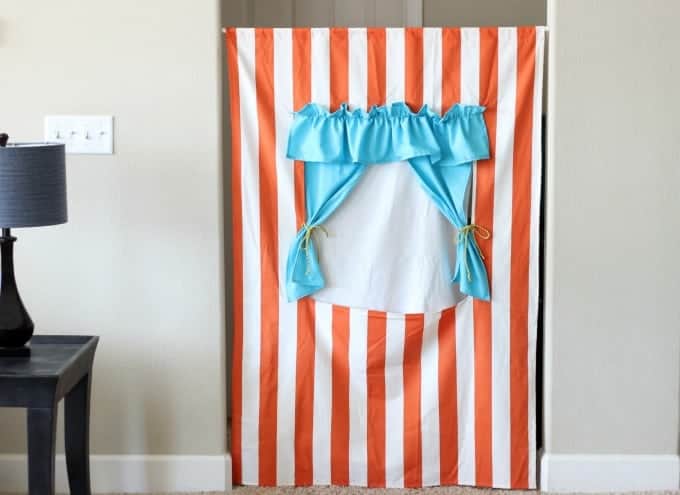
This doorway puppet theater is made to hang with a tension rod! It also folds up for easy storage and provides hours of imaginative play! DIY one today and let the show begin! This shop has been compensated by Collective Bias Inc. and it's advertiser: All opinions are mine alone. This post contains an affiliate link.
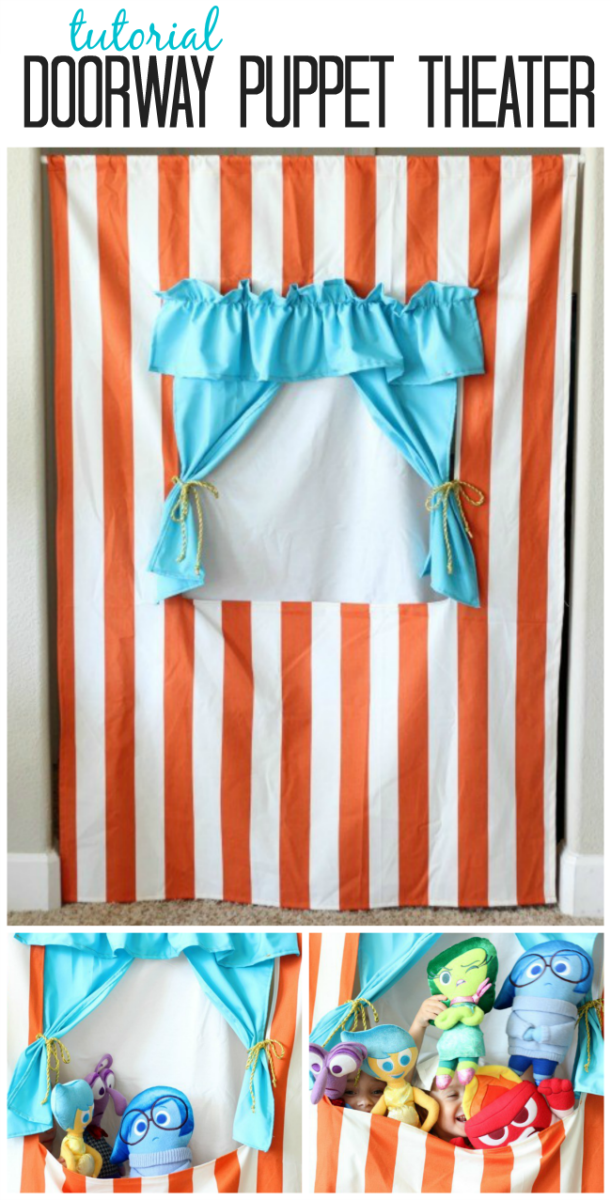
My girls love to put on a good show. Dancing, singing, magic, theater; it doesn't matter. If you are willing to be an audience member they'll have a show to share with you. My sister made them a doorway puppet theater years ago, but it was beginning to fall apart. It was time for a bold and bright update so I got busy!
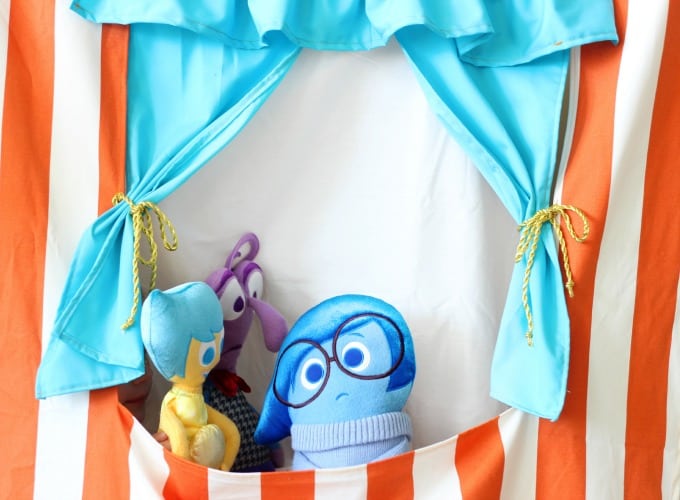
Inside Out sparks so many emotions and thought-provoking conversations with children. Every baby begins with Joy, but then Sadness, Anger, Disgust, and Fear make their appearance and create the different emotions and reactions to everyday life. I loved the movie because it shows how they all work together to bring out the best in each person. We can't live life with Joy alone. There is a part to play for every emotion. Even Fear and Sadness because they keep us balanced, and keep us safe.


You can use a doorway puppet theatre to help your kids sort through their big emotions too.

How to make a Doorway Puppet Theater
Supplies to make a doorway puppet theatre:
- 2 yards fabric for main
- 1-yard coordinating fabric for curtains and ruffle
- 22"x27" fabric scrap for the window backing
- Ribbon 2 (30") pieces
- Thread
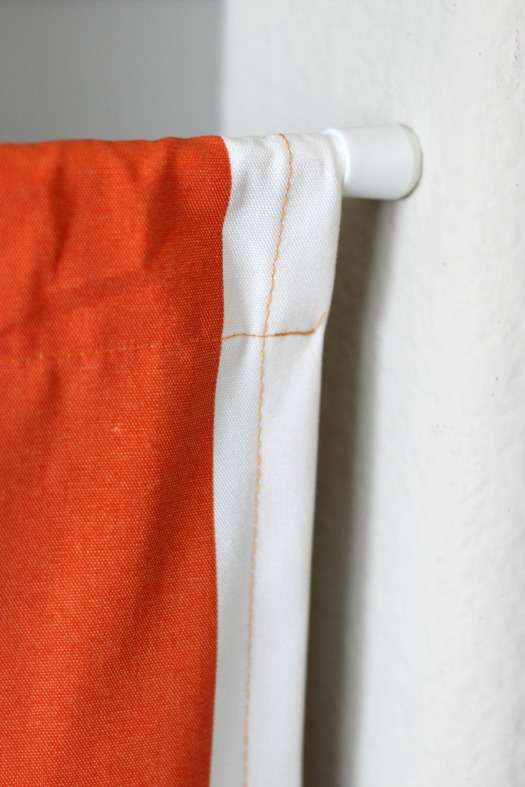
- Tension Rod
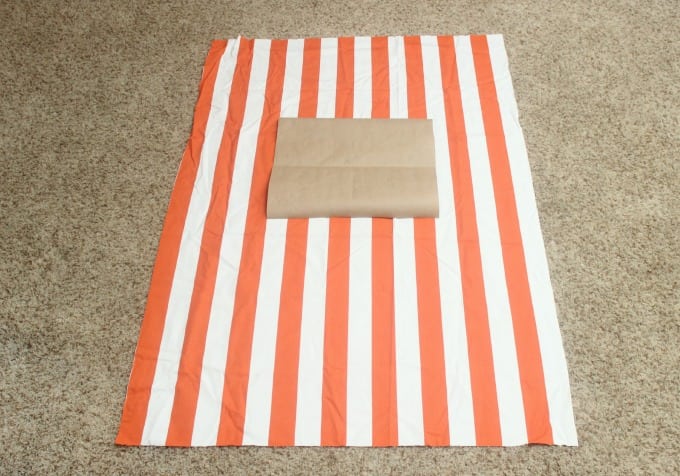
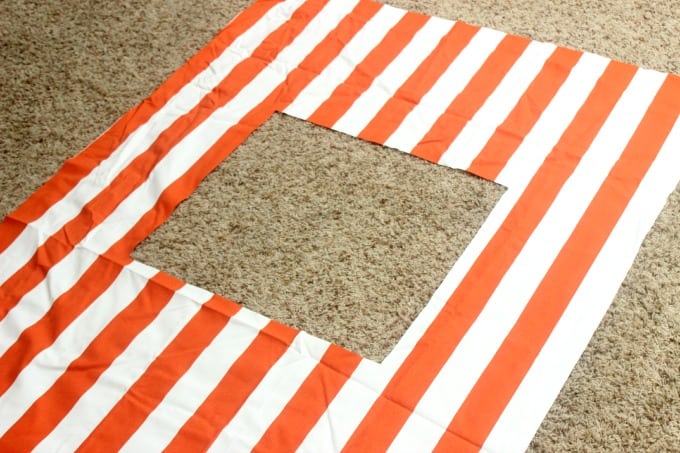
Cut your main piece for the puppet theatre to the width of your doorway and 60" tall. A sturdy home decor fabric, corduroy, light denim, or duck cloth would work best. My doorway was slightly wider than an average door (42"). Just measure the spot you are planning on using the puppet theater the most and go with that measurement.
Measure 26" up from the bottom of the main piece and mark it with a pin.
Cut a 20"x20"* square out of a newspaper or a paper bag to use as a pattern and place that on your main fabric for the window. Center the square and line up the bottom of it with the pin.
*If your doorway is a lot narrower than mine, you can adjust the window for the doorway puppet theatre to be smaller if a 20" window seems too wide. Ex: Cut an 18" window and adjust the curtains, etc. to reflect the smaller measurement.
Now it's time to hem and finish the inside of the doorway puppet theatre window!
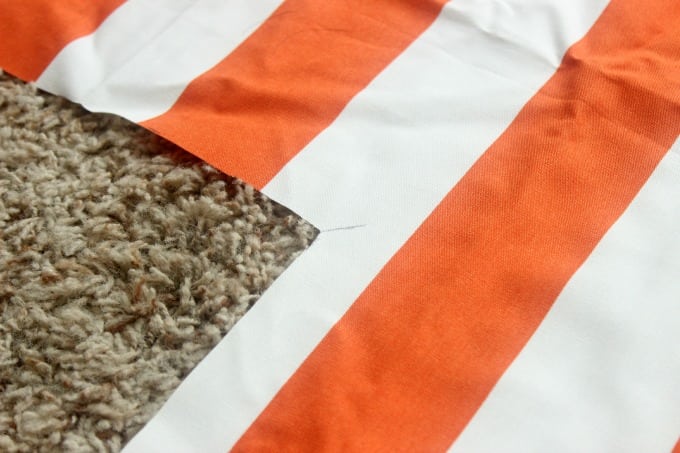
Fold each flap over ½" and press. Fold once more, press, and pin in place.
Now to finish the bottom and the sides!
Fold the bottom and sides of your main piece ½" and press. Fold again, pin, and sew all 3 sides.
Ready to finish the top of the doorway puppet theater?
Finishing Touches to make your doorway puppet theatre stand out:
Doorway Puppet Theatre Curtains
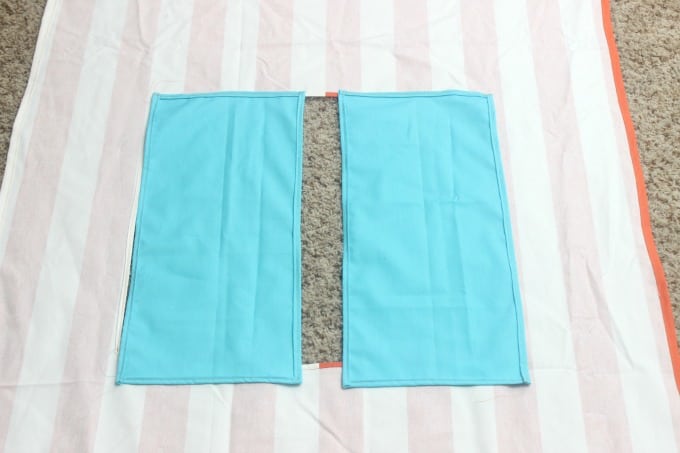
Cut 2 (12"x24") rectangles. Double hem ½" on all 4 sides.
Set aside.
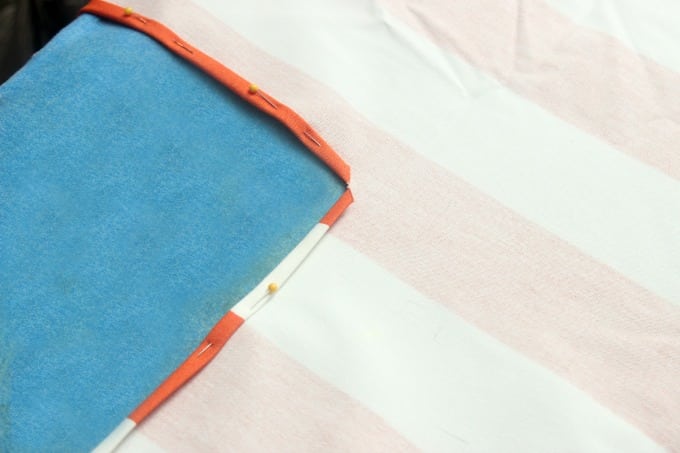
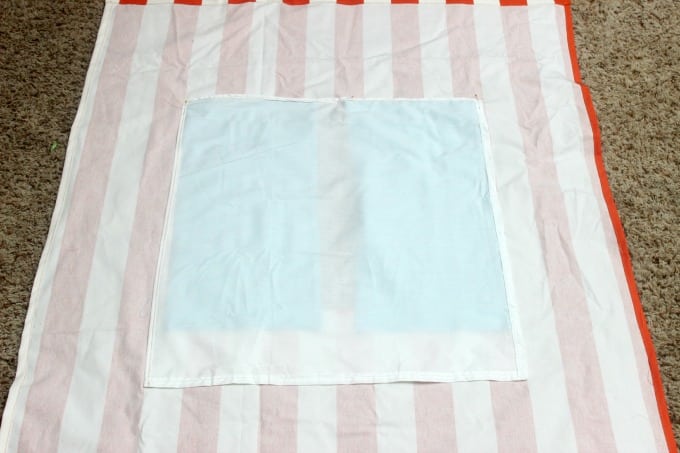
Window Backing
The window backing is just a solid piece of fabric (I used white) to hide the kids behind the window! It hangs down behind and the kids hold their puppets up in front of it.
Cut out a 22"x27" piece of fabric. Hem all 4 sides with a double ½" hem.
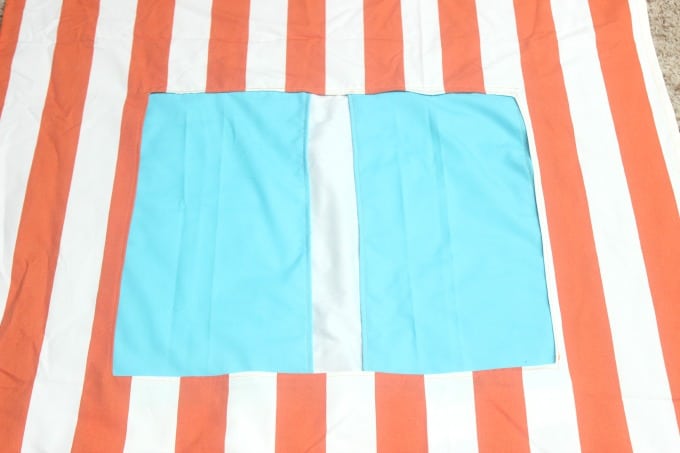
Now it's time to sandwich the main fabric, window backing and curtains.
Turn your main fabric over so that the right side is facing down.
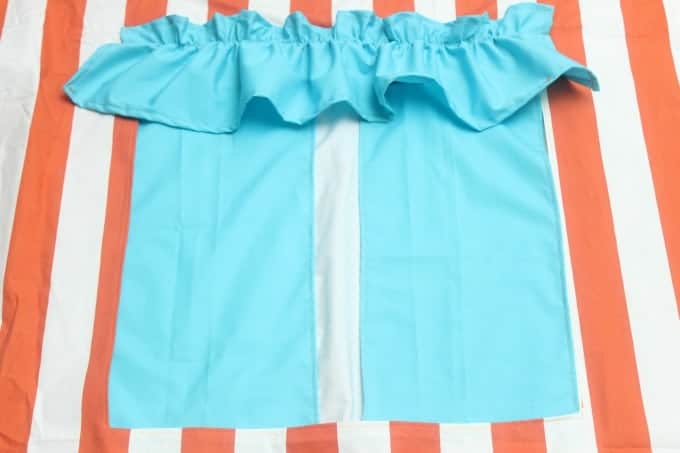
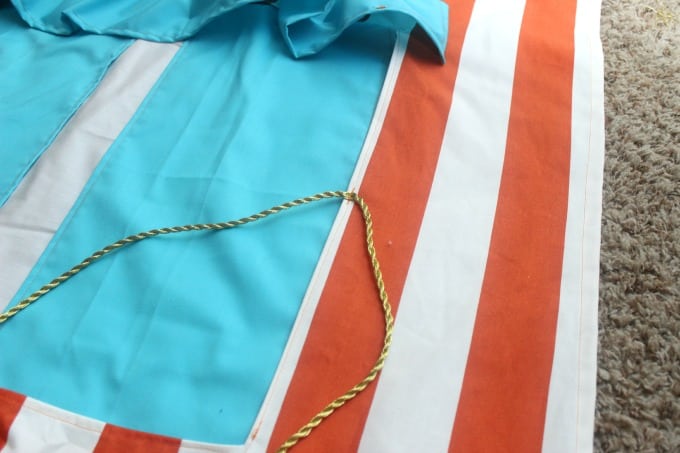
Doorway Puppet Theatre Window Ruffle
Cut out a 42" x 10" strip of fabric. Double hem all 4 sides ½". Create gathering (basting) threads by setting your machine to the widest stitch (my setting was a 4) and sewing 2" from the top 2 times, leaving a few inches of thread on the ends for pulling the gathers. If that doesn't make sense, you can check this out.


2 Sewing Projects For Messy Eaters
10 Minute Teddy Bear Sleeping Bag


Kathy says
Thanks so much for sharing this pattern. I made one for my grandkids while they're sheltering in place! Variation: I added a casing behind the bottom of the "stage." This allowed for a second spring rod and makes the stage more rigid for the puppeteers.
Brandy says
Great idea! The middle tends to sag with lots of puppet play!
Kiersten says
I made my puppet theater before you made this tutorial and it’s almost exactly the same. I put the curtains on the outside, though. Also, I need to add the curtain in the back. I always think I should do that and then I get lazy. I did want to make a couple of suggestions, though. I cut the hole out with pinking shears. Also, I added a casing for another tension rod just underneath the opening. It helps it hang well.
Brandy says
I remember you making that one for your kids for Christmas one year, right?! You asked Stacy and I about it after seeing the one that I made for my Nelson nieces and nephews for Christmas in 2009, which was exactly like the one that Stacy made my kids a few years before. I didn't have a tutorial then and remember searching online for something similar for you to use! I'm glad it worked out! The one that Stacy made eventually fell a part and the girls were still little so I made another one and actually took photos that time, ha! They still use it!