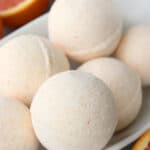
DIY Bath Bombs
DIY bath bombs are a luxurious gift to make, easy to customize, and only require a few ingredients!
Pin Recipe
Yield: 3 bath bombs
Cost: under $20
Equipment
- bowl
- whisk
- measuring cups/spoons
- bath bomb mold
Materials
- ½ cup baking soda
- ¼ cup epsom salt
- ¼ cup cornstarch
- ¼ cup citric acid
- 2 teaspoon coconut oil in liquid form
- 1 teaspoon essential oil
- 1 ½ teaspoons rubbing alcohol, water or witch hazel divided, see notes
- food coloring
Instructions
- Combine baking soda, cornstarch, and citric acid in a mixing bowl. Set aside.
- Mix Epsom salt with a few drops of food coloring in a small bowl. Stir thoroughly until the salt turns the color of the food coloring*.* I like adding the food coloring to the salt so that I get flecks (sprinkles) of color throughout the bath bomb. Alternatively, you can add the food coloring when you add the wet ingredients.
- In another small bowl, combine melted coconut oil, essential oil, and 1 teaspoon of rubbing alcohol (or water).
- Slowly add the liquids to the dry ingredients, whisking to combine.
- The mixture should feel like sand, slightly moist, but not wet. It should come together slightly when you squeeze it. If necessary, add the additional ½ teaspoon of rubbing alcohol or water.
- Fill both sides of your bath bomb mold with the mixture and press them together tightly. Let it sit for a few seconds. Gently tap the mold with a spoon to loosen it, then remove it one side at a time.
- Place the bath bombs on a baking sheet and let them dry for at least 24 hours. At first, your bath bombs will seem very delicate. Give them a couple of days to REALLY dry out before packaging, and you'll notice that they harden nicely and can be placed in a container together.
Video
Notes
- Liquids. Rubbing alcohol won't cause the mixture to react prematurely, but it does evaporate, so you need to work quickly to form the bombs in the molds before the mixture dries out. Witch hazel and water add more moisture, so if using them, add the liquid slowly while whisking it into the dry ingredients to prevent premature reaction.
- Let them dry for at least 24 hours. Once they are fully dry, they aren't brittle and can be packaged in cellophane for gift giving.
