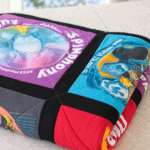
How to Make a T-Shirt Quilt
Turn 30 meaningful T-shirt designs into a twin-size memory quilt with this step-by-step tutorial. Learn how to stabilize T-shirt fabric with sheer-weight interfacing, cut uniform blocks, sew sashing and borders, layer the quilt, and finish it with machine quilting or ties.
Pin Recipe
Yield: 1 twin sized quilt
Cost: varies
Equipment
- sewing machine
- iron and ironing board
- walking foot
- rotary mat and cutter
- quilting ruler
Materials
- 30 t-shirts prepared as instructed
- thread
- 2 yards sashing fabric
- 72"x90" cotton batting
- 5-6 yards backing fabric such as flannel
- 1 yard binding fabric
- basting spray or safety pins for assembling quilt
- embroidery thread or yarn optional for tying quilt instead of quilting
Instructions
- Choose the T-shirts: Select shirts with meaningful designs and plan for 30 blocks arranged in 5 columns and 6 rows. Use one side of 30 shirts, both sides of 15 shirts, or a combination that provides 30 usable blocks. Arrange the shirts to balance the colors and graphics.
- Prepare and cut the shirts: Cut up both side seams, remove the sleeves, and separate the front and back at the shoulders. Cut straight across the neckline to remove the collar. Leave enough fabric around each design to create a rough piece approximately 15” × 15”.
- Apply fusible interfacing: Cut interfacing to fit the back of each roughly 15” × 15” T-shirt piece. Follow the manufacturer's instructions for pressing temperature, timing, steam, and cooling. Allow the pieces to cool before trimming.
- Trim the blocks: Use a quilting ruler and rotary cutter to trim each piece to 13” × 13”. Check that important words, logos, and graphics won't be cut off. A cardboard template can also help create uniform blocks.
- Arrange the quilt layout: Arrange the 30 blocks in 5 columns and 6 rows. Move the pieces until the colors and designs look balanced. Take a photo of the layout so you can refer to it while sewing.
- Sew the blocks together: Cut sashing strips 2” wide. With ¼” seam allowances, the finished sashing will measure approximately 1½” wide. Sew the blocks into rows, adding sashing between the blocks. Use consistent ¼” seam allowances and avoid stretching the fabric. Sew the rows together with long strips of sashing between them.
- Add the border: Cut border strips 2” wide for a finished border approximately 1½” wide. Sew the border pieces around the outside, keeping the edges aligned and the fabric flat.
- Prepare the backing and batting: Measure the quilt top and prepare backing fabric large enough to cover it. Piece the backing if necessary. Check that the 72” × 90” batting extends beyond the quilt top a bit on every side, and smooth wrinkles from the backing.
- Layer and baste the quilt: Lay the backing on a flat surface with the wrong side facing up. Smooth the batting over the backing, then position the quilt top right side up. Secure the layers with safety pins or basting spray. If using spray, baste the backing to the batting first, then baste the batting to the quilt top. Smooth the layers from the center outward.
- Quilt the layers together: Machine quilt the layers or tie the quilt. For machine quilting use a simple design. Keep the quilt supported and sew slowly. If tying the quilt, use embroidery floss, quilt thread, or yarn and a large-eyed needle.
- Trim the edges and prepare the binding: After quilting, trim excess batting and backing so the edges are even with the quilt top. Cut binding strips and sew them together as needed to create enough binding to cover the raw edges (see blog post for link to binding tutorial).
- Sew the binding to the quilt: Attach the binding around the quilt's outside edge, carefully working around the corners (see blog post for link to binding tutorial).
Video
Notes
This layout uses 30 blocks in 5 columns and 6 rows.
- Each T-shirt block is trimmed to 13” × 13” after interfacing is applied.
- Sashing and borders are optional; changing them will affect the finished quilt dimensions.
- Lightweight or sheer-weight interfacing helps stabilize stretchy knit fabric.
- Flannel makes a soft backing, but cotton quilting fabric or a suitable sheet can also work.
- A walking foot is helpful for quilting multiple layers on a home sewing machine.
- Check the batting manufacturer's instructions before tying the quilt.
- The cost depends on the supplies you already have and the materials you purchase. The goal for this project was to stay under $100 by using supplies already on hand when possible.
