Gluesticks Blog

  • About
    • About Me
    • Contact Me
    • Terms and Privacy Policy
  • Sewing
    • My Book
    • Kids Sewing Projects
    • All Sewing Projects
  • Crafts
    • Kids Crafts
    • Paper Crafts
    • Free Printables
    • All Crafts
  • Holidays
    • Christmas
    • Halloween
    • Patriotic Holidays
    • Easter
    • St. Patrick’s Day
    • Valentine’s Day
    • Gift Ideas
      • Teacher Gifts
      • All Gift Ideas
    • Parties
  • Home
    • Home Decor Projects
    • Cleaning & Organizing
    • Gardening
    • Motherhood
  • Recipes
    • Kids in the Kitchen
    • Appetizer Recipes
    • Bread Recipes
    • Dessert Recipes
      • Cake Recipes
      • Cookie Recipes
      • All Dessert
    • Main Dish Recipes
    • Slow Cooker
    • Sides & Salads
    • Holiday Recipes
    • All Recipes

July 22, 2023 By Brandy Leave a Comment

Home » Sewing

Easy Bunny Ear Scrunchie Tutorial (+ Video)

Filed Under: Craft Tutorials, Sewing

Jump to Project

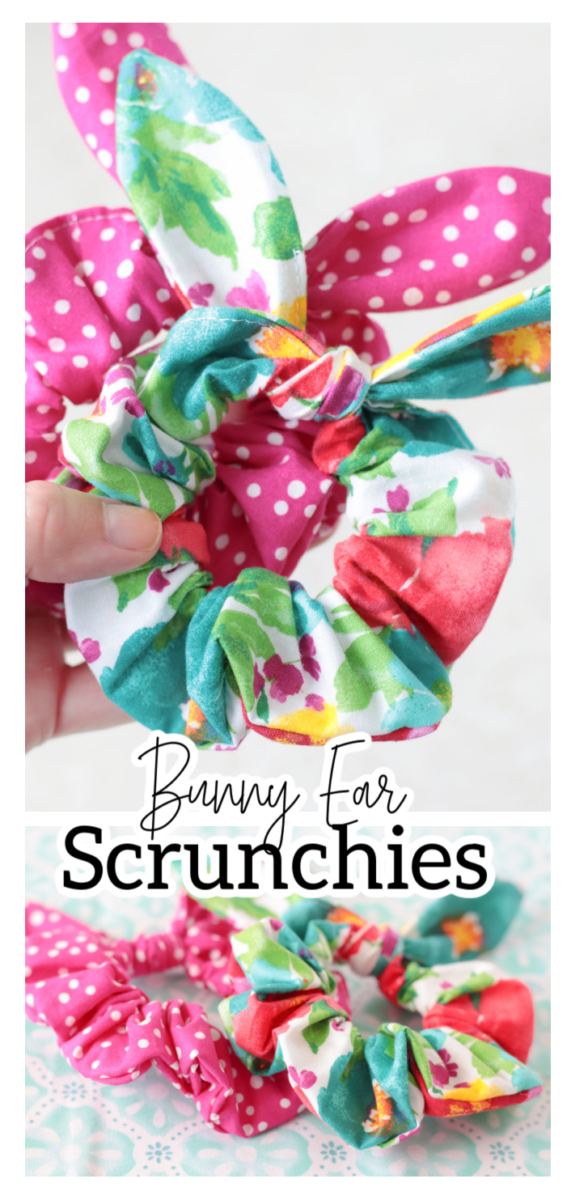
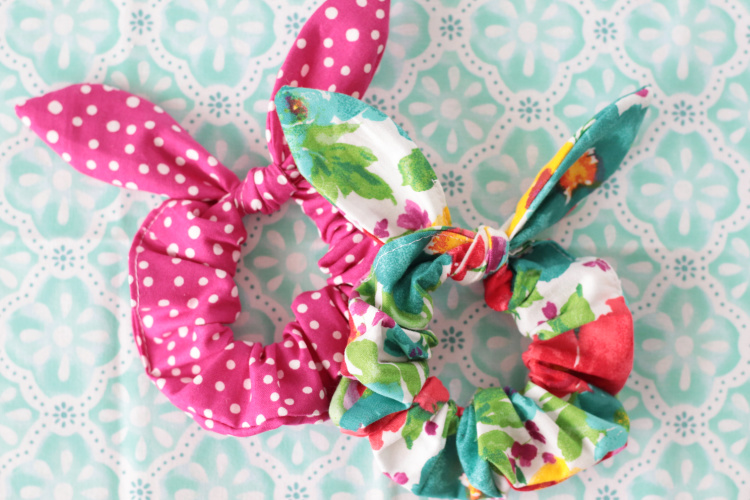
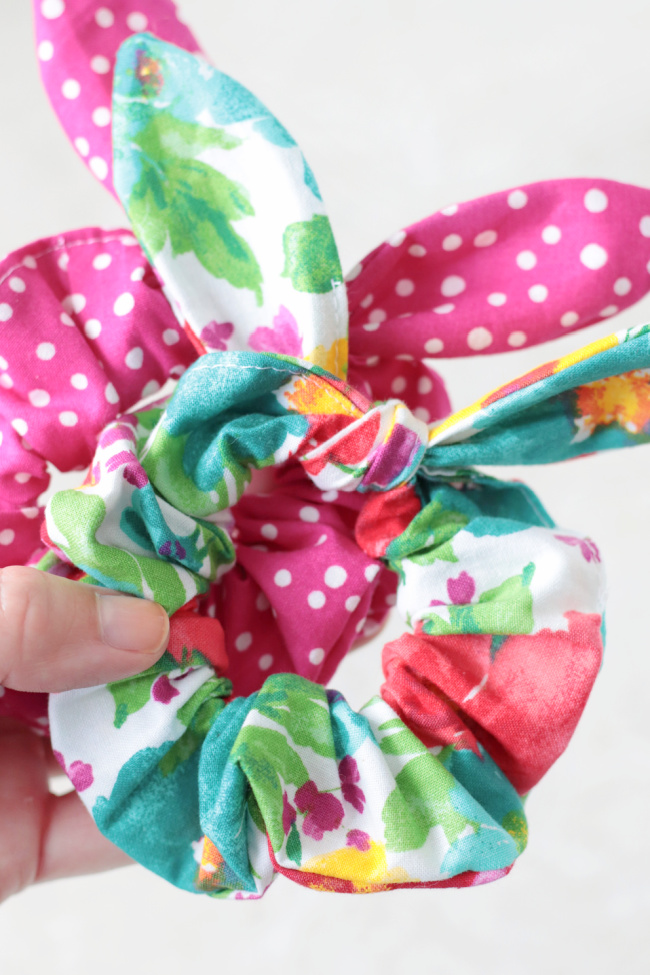
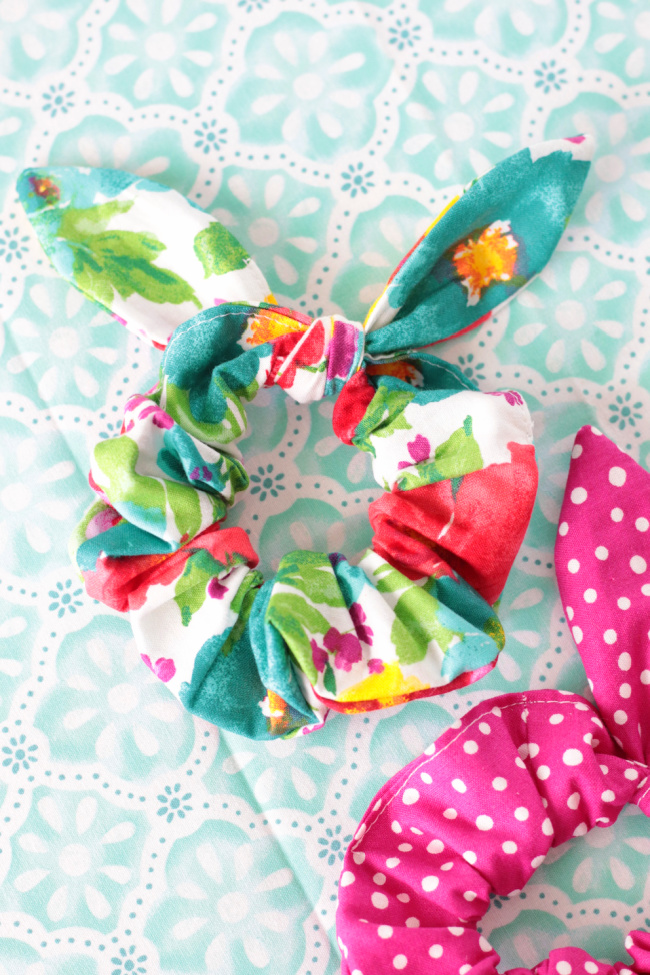
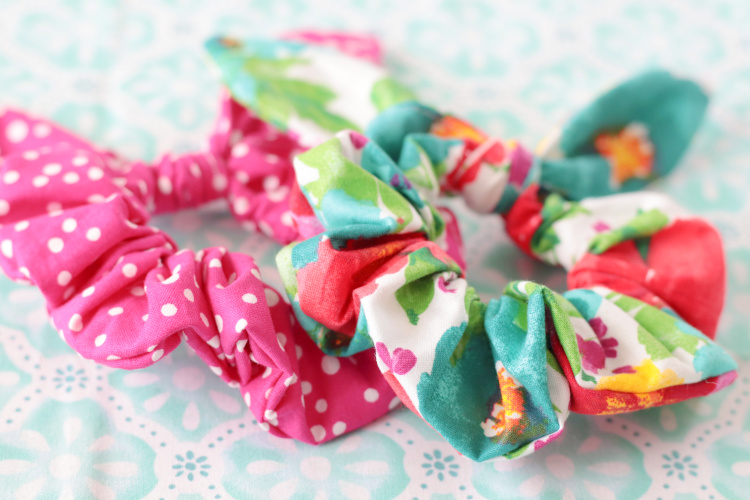
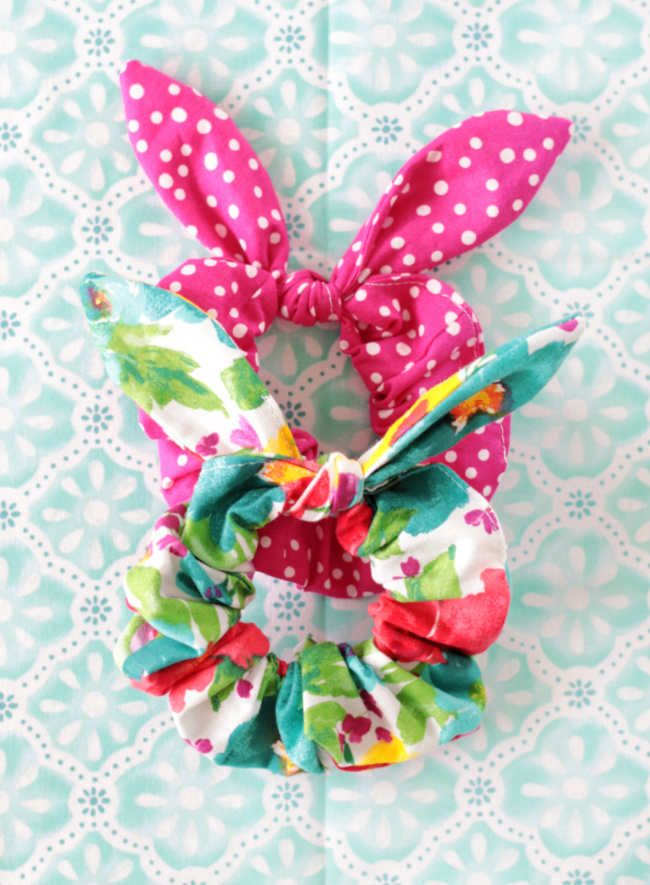
Make a bunny ear scrunchie with this easy tutorial! A fabric tutorial with a cute tie. These make great gifts and are a great scrap fabric project!

You might also like our original scrunchie tutorial or our stash scrunchies (scrunchie a zipper!).

I use the terms “bunny ear” and “tie” interchangeably in this tutorial. Sometimes it makes more sense to call it a tie.

hand holding two bunny ear scrunchies

Watch our step by step video!

two bunny ear scrunchies

Easy Bunny Ear Scrunchie

If you’ve mastered our original scrunchie pattern you might be ready to take it up a notch and make these cute bunny ear scrunchies (tied scrunchies)! These are so fun and EASY to make! Make sure to watch my video before starting, it really does give the best visual tutorial. The video should show up under the first image in this blog post.

hand holding two scrunchies

Bunny Ear SCRUNCHIE SUPPLIES

The supplies are super basic! You’ll need:

  • Cutting template: print and cutout template. Pin to fabric then cut out 2 pieces.
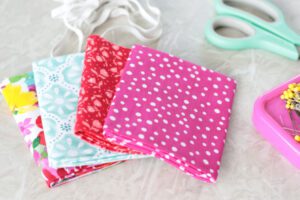
  • Scrunchie Fabric: see my cutting guide below for making scrunchies in 2 sizes. My favorite fabrics to use are quilter’s cotton (this is the easiest to work with), muslin, knit, and lightweight denim.
  • Elastic: 1/4″ or 1/8″ wide elastic is my favorite for making scrunchies.
  • Safety Pins
  • Pins
  • Scissors
  • Measuring Tape
  • Sewing Machine/Coordinating Thread

bunny ear scrunchie

FABRIC CUTTING GUIDE

Make scrunchies in 2 sizes with this guide!

Note: I use a 9″ piece of elastic for all scrunchie sizes. Only the fabric length and width vary. You can enlarge or lengthen the tie to create a different look if you’d like.

Regular (this is the size that I usually make): 4″ x 20″ for the scrunchie and 4″ x 24″ piece of fabric for the tie (cut 2 from that piece of fabric).

Large (my stash scrunchies are this size): 4.5″ x 28″ and 4″ x 24″ piece for the tie (cut 2 from that piece of fabric)

two tied scrunchies

3 More Beginner Sewing Projects

Soft Soled Fabric Baby Shoes

Easy Lavender Sachets

10-Minute Fleece Bunny

polka dot and floral bunny ear scrunchies

How To Make a Bunny Ear Scrunchie

two bunny ear scrunchies
Print
5 from 1 vote

Bunny Ear Scrunchie

Make a bunny ear scrunchie with this easy tutorial! A fabric tutorial with a cute tie. These are a great scrap fabric project!
Prep Time5 minutes mins
Active Time15 minutes mins
Total Time20 minutes mins
Yield: 1 scrunchie
Cost: Under $1

Equipment

  • scissors
  • sewing pins
  • safety pins
  • measuring tape
  • sewing machine

Materials

  • cutting template
  • 1 9" piece of 1/4" elastic
  • 1 20" x 4" rectangle of fabric for scrunchie
  • 1 24"x4" piece of fabric for tie (bunny ears) cut 2 from fabric
  • coordinating thread

Instructions

  • Watch my step-by-step video (it displays under the first photo in the post) before beginning this sewing project.
    Seam allowances: 3/8"
    Gather supplies.
    fabric, elastic, scissors and pins
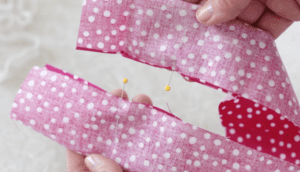
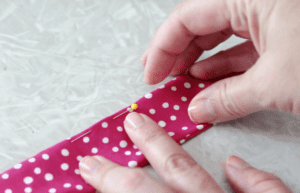
  • Fold the fabric in half with the wrong side of the fabric facing you. Once folded it should measure 20" x 2".
    Mark 3" from each end of the scrunchie fabric.
    Mark it with a pin on each side.
    fabric folded in half with pins
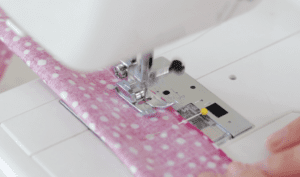
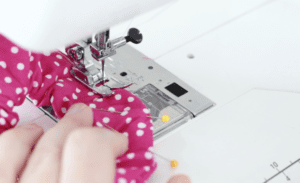
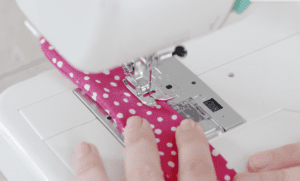
  • Begin sewing the side seam at one pin and end once you reach the other pin. The ends should be open.
    TURN SCRUNCHIE RIGHT-SIDE-OUT.
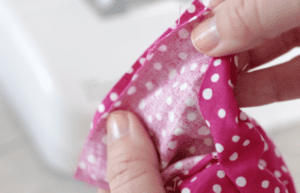
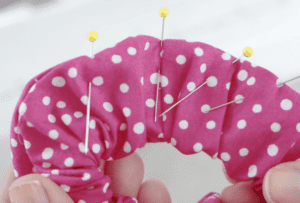
  • Bring the ends of the scrunchie together, lining up the top of the fabric with the right sides facing and the inside of the fabric facing you.
    Pin in place.
    scrunchie ends together
  • Stitch across the top.
    sewing fabric in sewing machine
  • Attach a safety pin on both sides of the piece of elastic.
    Attach one end of the elastic with the safety pin inside the opening of the scrunchie.
    Feed the other end of the elastic through the tube until it comes out the other side.
    Remove safety pins.
  • Tie the ends of the elastic into a double knot.
    hands tying elastic into a knot
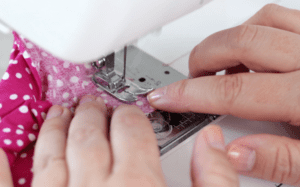
  • Fold raw edges over, lining them up with the seam and pin into place.
    pins in scrunchie
  • Top stitch the opening closed.
    scrunchie being sewn in sewing machine
  • To make the bunny ears, cut out 2 pieces of fabric from the cutting template.
    Place both pieces together with the wrong side of the fabric facing out.
    hands adding pins into fabric
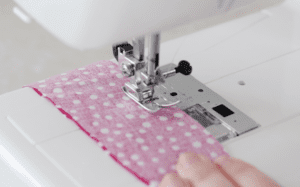
  • Stitch around the edge of the bunny ear, leaving a 2" opening along the side.
    sewing machine sewing scrunchie tie
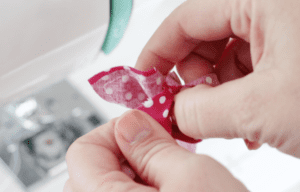
  • Turn right side out.
    hand turning scrunchie tie right side out
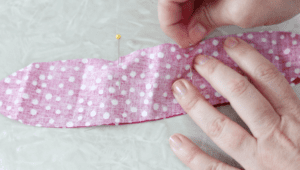
  • Fold raw edges over and pin.
    pin in fabric
  • Top stitch over the opening.
    sewing machine top stitching fabric
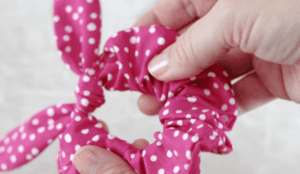
  • Tie the tie onto the scrunchie to create the bunny ears.
    hands holding bunny ear scrunchie

Video

Notes

FABRIC CUTTING GUIDE

Make scrunchies in 2 sizes with this guide!
Note: I use a 9″ piece of elastic for all scrunchie sizes. Only the fabric length and width vary. You can enlarge or lengthen the tie to create a different look if you'd like.
Regular (this is the size that I usually make): 4″ x 20″
Large (my stash scrunchies are this size): 4.5″ x 28″

HELPFUL TUTORIAL LINKS FOR MAKING ZIPPER SCRUNCHIES

How To Turn Fabric Right Side Out with a Safety Pin

How to Do an Invisible Stitch: If you’d prefer to hand stitch your scrunchie closed vs. top stitching it.

Print Friendly, PDF & Email

Related

Share
Pin

About Brandy

Welcome! I'm Brandy, mother to 5 darling kiddos and a cute black lab named Toby. My husband is in the Coast Guard so we've lived all over the place, turning each house into a home. I love baking, sewing, making cute things with my kids, and sharing what I've learned with all of you!

Disclaimer: I am a participant in the Amazon Services LLC Associates Program, an affiliate advertising program designed to provide a means for me to earn fees by linking to Amazon.com without any additional cost to you. As an Amazon Associate, I earn from qualifying purchases.

Previous Post: « Make a Scrunchie in 10 Minutes! (+ Video)
Next Post: Ritz Rolo Turtles (+ Video) »

Reader Interactions

5 from 1 vote (1 rating without comment)

Leave a Reply Cancel reply

Your email address will not be published. Required fields are marked *

Recipe Rating


This site uses Akismet to reduce spam. Learn how your comment data is processed.

Primary Sidebar

I'm Brandy! I love to create and share my ideas through easy-to-follow recipes and tutorials. MORE ABOUT ME

Follow Along

  • Facebook
  • Instagram
  • Pinterest

Disclaimer: I am a participant in the Amazon Services LLC Associates program. As an Amazon Associate, I earn from qualifying purchases, at no cost to my readers.

My Amazon Store

Get My Best Projects and Recipes!

My Sewing Book for Kids!

kids sewing book cover
  • Home
  • Website Accessibility
  • My Book
  • Privacy Policy

Copyright © 2025 Log in

Gluesticks blog logoLogo Header Menu
  • About
    • About Me
    • Contact Me
    • Terms and Privacy Policy
  • Sewing
    • My Book
    • Kids Sewing Projects
    • All Sewing Projects
  • Crafts
    • Kids Crafts
    • Paper Crafts
    • Free Printables
    • All Crafts
  • Holidays
    • Christmas
    • Halloween
    • Patriotic Holidays
    • Easter
    • St. Patrick’s Day
    • Valentine’s Day
    • Gift Ideas
      • Teacher Gifts
      • All Gift Ideas
    • Parties
  • Home
    • Home Decor Projects
    • Cleaning & Organizing
    • Gardening
    • Motherhood
  • Recipes
    • Kids in the Kitchen
    • Appetizer Recipes
    • Bread Recipes
    • Dessert Recipes
      • Cake Recipes
      • Cookie Recipes
      • All Dessert
    • Main Dish Recipes
    • Slow Cooker
    • Sides & Salads
    • Holiday Recipes
    • All Recipes

Rate This Recipe

Your vote:


A rating is required
A name is required
An email is required

Recipe Ratings without Comment

Something went wrong. Please try again.