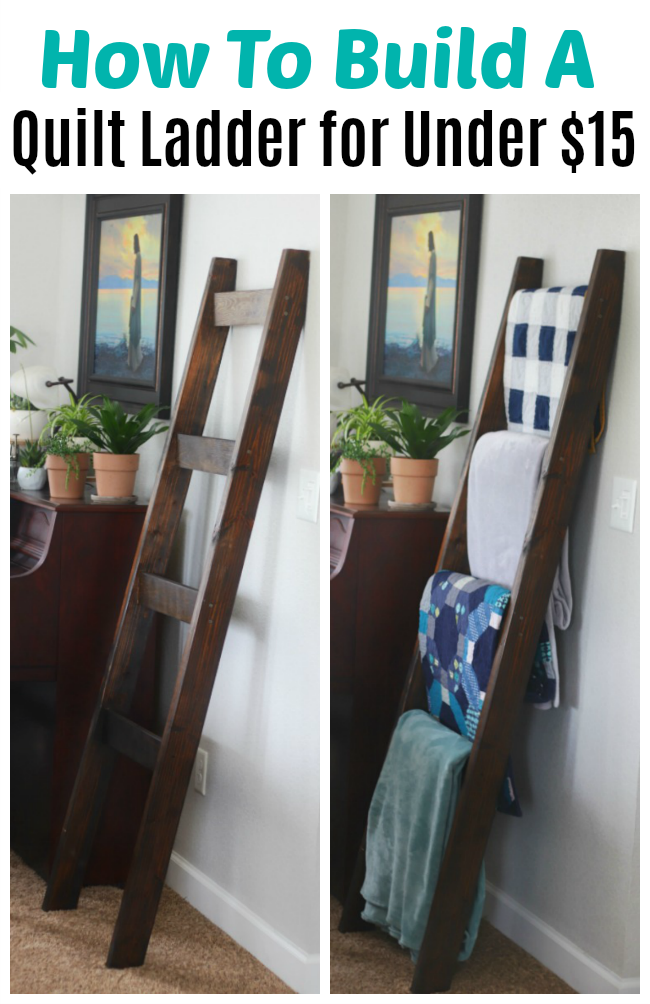
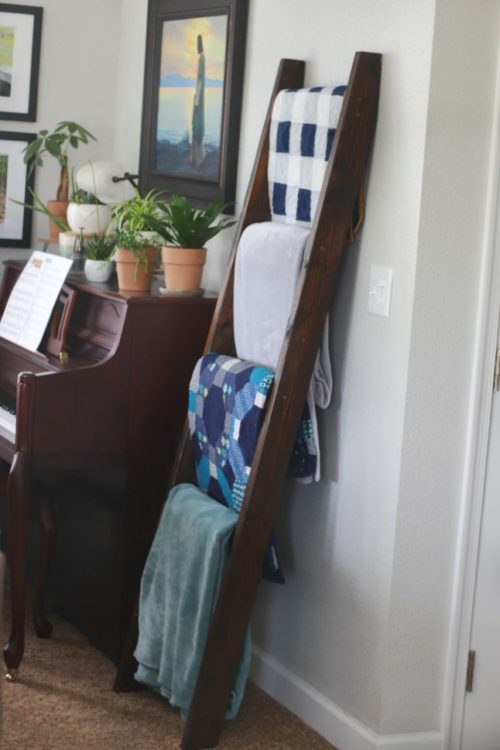
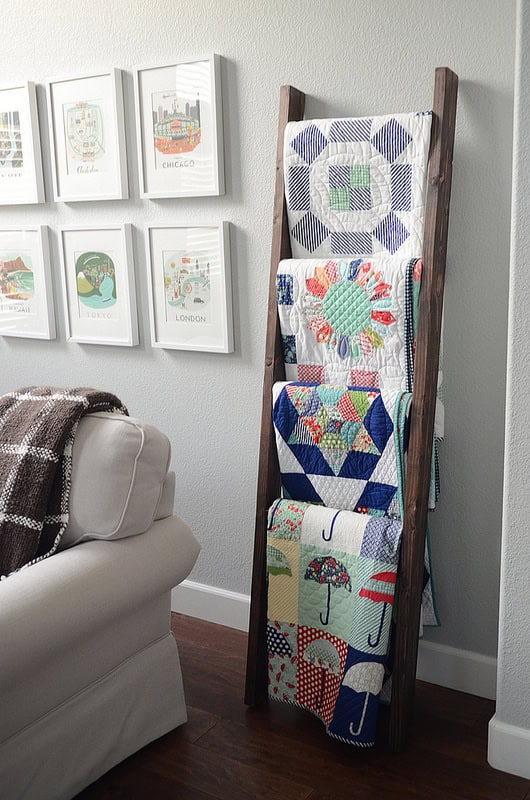
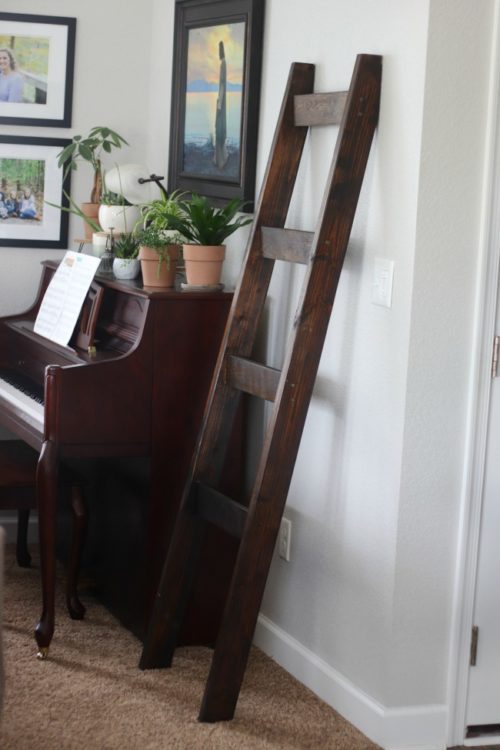
Make a beautiful wooden blanket ladder for under $15. It's an easy DIY project that will allow you to display beautiful quilts or blankets in the open and make them easily accessible. This post contains an affiliate link.
This post was originally shared in 2015. Our blanket ladder is still holding strong and used in our home.
There were probably a hundred things my husband would rather have spent his Saturday afternoon working on, but he moved my blanket ladder to the top of his list and I absolutely love it!
I saw this one on Thimble Blossoms and fell in love. I showed it to him and we came up with the dimensions that we thought would work.
DIY Blanket Ladder Tutorial
He was able to cut the wood and put it together in about an hour and then we sanded and stained it.
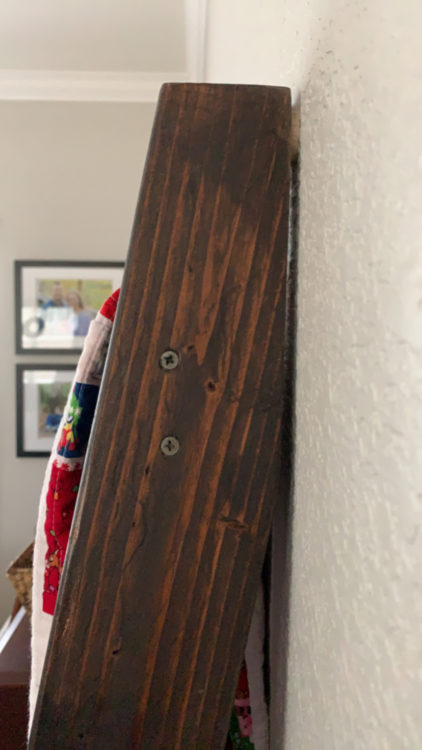
He angled the back so that the blanket ladder lays flush against the wall, and I added felt pads so that the stain didn't rub off on the paint. Note: Cutting the wood on an angle is not mandatory. It can still be placed against the wall without cutting the wood to sit flush.
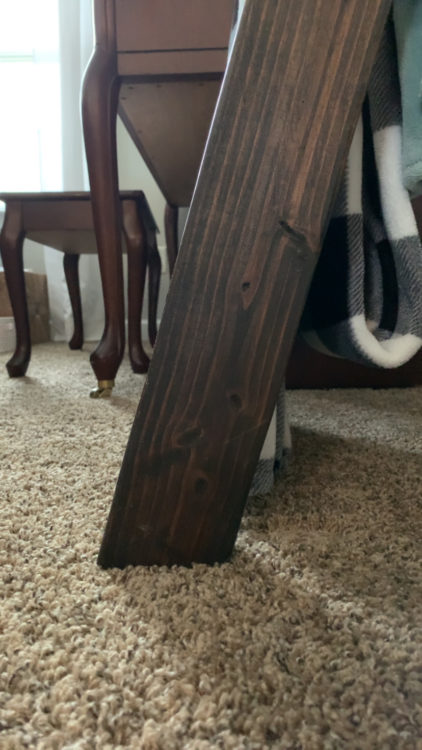
He also angled the feet so that it sat flush against the floor. Just simple cuts on the saw will take care of this!
How to Make a Blanket Ladder for Under $15
If you aren't up for making your own, here's a beautiful one using barn wood that you can purchase. But for $15, this homemade one is a great, affordable, option so let's get started!
Blanket Ladder Supply List
- 2 (6' length) 2x4's
- 4 (18" length) 1x4's for the ladder rungs.
- wood screws
- tape measure
- miter saw
- Stain: Minwax Jacobean (dark walnut stain)
- paint brush/old rag (to apply stain)
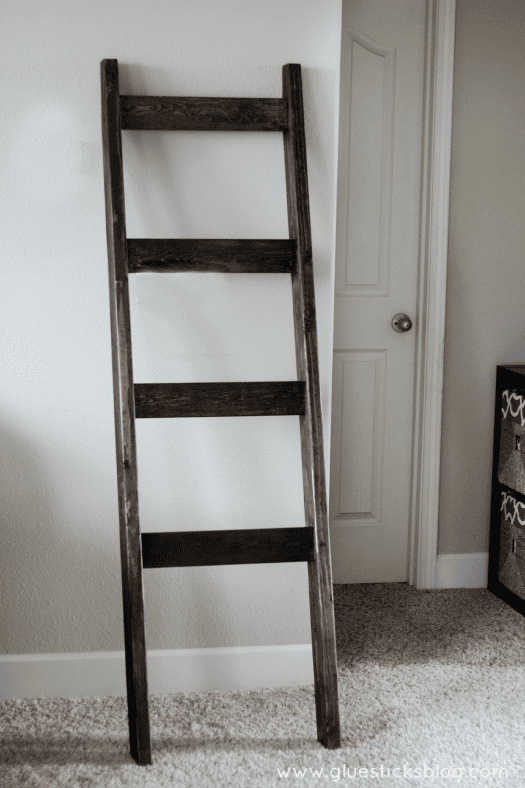
dimensions we used to make this blanket ladder
You'll need 2 (6') 2x4s and 4 (18") 1x4s.
If you don't own a saw you can have your local hardware store like Lowe's or Home Depot cut the boards for you. The first few cuts are free.
If you'd like the ladder to lay flush against the wall you can cut the 2x4's on an angle. See photos above to see the angles against the wall and floor). I asked my husband what angle he cut them at, but it's been so long that he doesn't remember.
Note: Cutting the wood on an angle is not mandatory. It can still be placed against the wall without cutting the wood to sit flush. I just liked the added stability.
Blanket Ladder Instructions
- Cut wood to size.
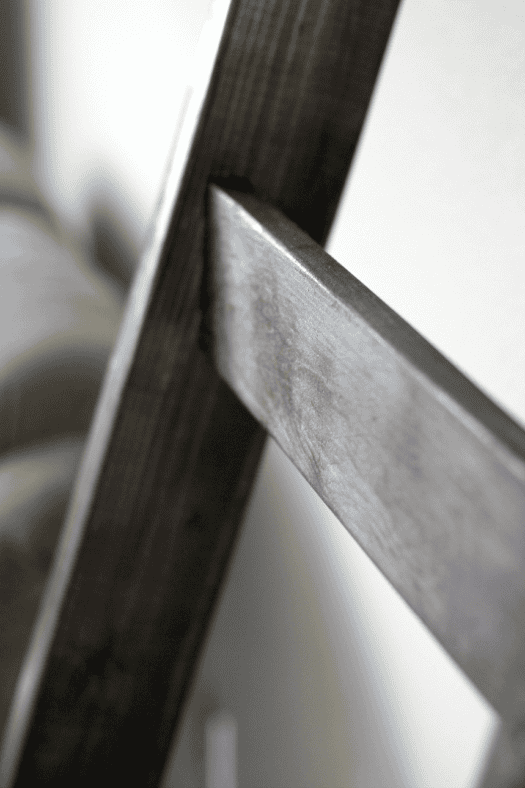
- Screw rungs in at a slight angle (tipping forward) so that the quilts have dimension instead of laying flat. (see photo above)
- The top rung should be 3" from the top and each rung below is spaced 11.5" down.
- After screwing and assembling the ladder apply a coat of stain (my favorite shade is Minwax Jacobean. I've used this for other projects too) and let it dry for 8 hours. Then apply a clear coat of spray lacquer (optional) and let it dry for 2 hours.
I'm not sure how much this would have cost to purchase, but we made it for under $15. We had to buy a can of stain, otherwise, this would have been a $10 project!
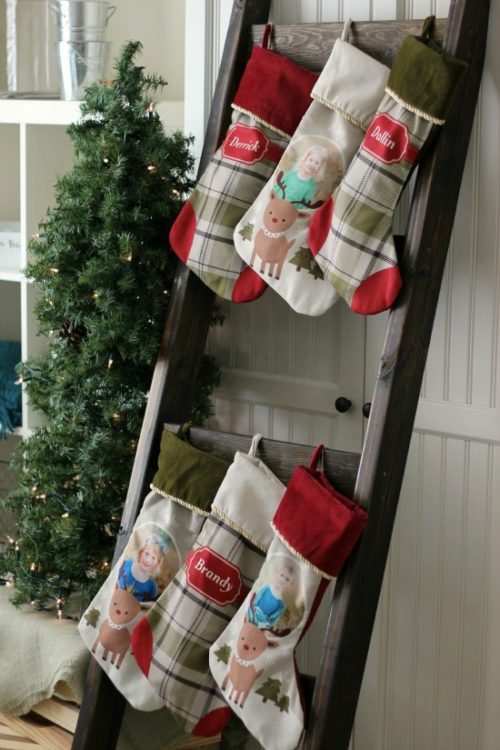
How To Use a Blanket Ladder As a Stocking Hanger/Ladder


Zerelda Hammer says
Do you know the angle you cut the top part of your 2x4's? I see someone mentioned 11 degrees for the bottom at the floor. We have vinyl planking on our floors. Do you think we might need to secure the ladder to the wall so that it won't slide away, or will it stay put with the correctly cut angles at the top & bottom? Thanks so much.
Brandy says
Hi! I'm not sure what angle they are cut at. My husband kind of eye balled it, but I need to ask him to see if he can figure it out. You don't need to cut them at the top, I've seen some made with just 2x4's. We just cut them so that they'd sit more flush. As far as the bottom, I think it helps them be more stable and our ladder sits perfectly against our new LVP floors (vinyl) without slipping!
ZERELDA OR Daniel HAMMER says
I love the way the top of this is angled so that it won't slide away from the wall. We're going to use your plans to make two of these for displaying my quilts. Thanks!
Peggy says
I love this idea. This is going to be my project for Saturday. I have many afghans just folded in a corner. What a great way to display them!