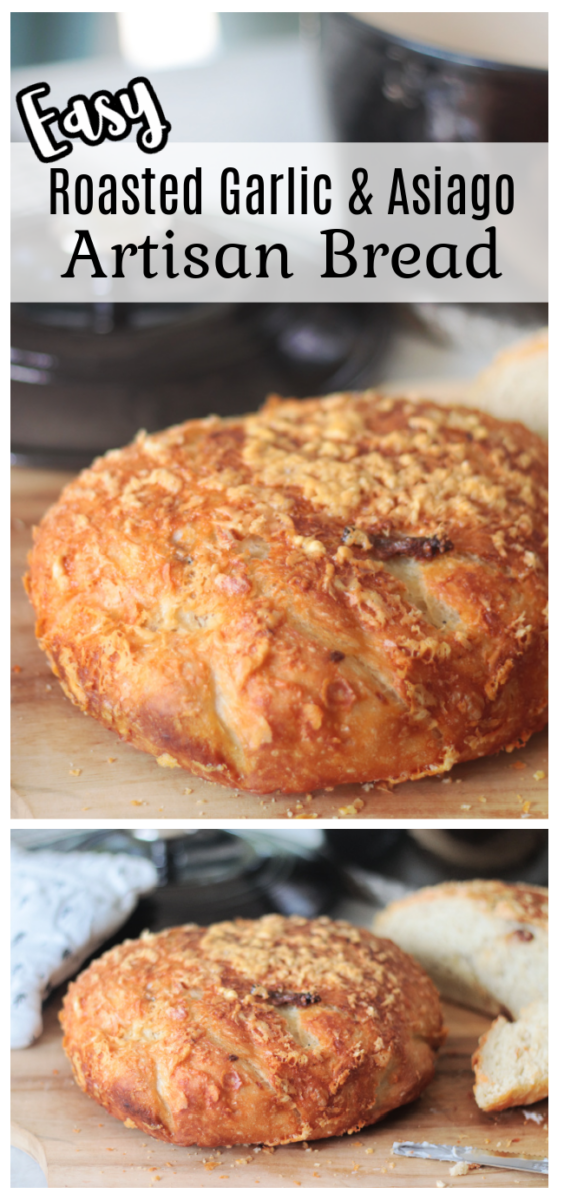
Our roasted garlic and asiago artisan bread is an easy no knead recipe! Crusty, chewy, and full of garlic and cheese flavor. It makes delicious sandwiches! This post contains affiliate links.
You might also like our no knead crusty bread, our homemade French bread or our quick garlic parmesan breadsticks!
Watch our step by step video!
If you love artisan bread you’ll love our no knead artisan bread. This loaf crackles when you press down on it. It’s golden brown and crusty on the outside, but chewy and soft on the inside. The best part is that it is SO DANG EASY to make. If you’ve ever struggled with homemade bread, you need to try this recipe. Our garlic and asiago loaf is loaded with roasted garlic cloves and baked with asiago cheese on top.
WHAT IS NO KNEAD BREAD?
This bread comes together in a large bowl, and is mixed by hand. You don’t need a stand mixer or any sort of attachment. I mix my dough with a Danish dough whisk, but a wooden spoon works great, too. That is where the dough prep ends. You mix and let it rise. You don’t need to knead it on a floured surface for 5 mintues!
No knead breads typically rise at least 4 hours. This recipe has a rise time of 2 hours, at room temperature on the counter, and 2-4 hours of time in the refrigerator. It’s so forgiving. If you don’t have time to bake your loaf, simply leave the dough in the refrigerator until the next day. According to the King Arthur bread website, the longer it sits in the refrigerator, the more tangy the bread will be (like sourdough). I’ve never left it in the refrigerator longer than 8 hours because I’m too impatient.
No Knead Roasted Garlic and Asiago Bread
Best Cheeses To Use
I love the flavor of asiago cheese, but you can use parmesan or a combination of both! Just make sure that it's freshly grated, not the kind already grated in a container.
How To Roast Garlic
There are a couple of ways to roast garlic. You can roast a whole head of garlic using this method or roast individual cloves. I buy peeled garlic cloves in a bag so I roast them individually. I'll grab a handful and roast them in a small ramekin with a bit of olive oil. Both ways work great!
Preheat the oven to 375 degrees. Add 6-8 peeled garlic cloves to a small ovens-safe ramekin. Pour 1 tablespoon of oil over the cloves. Cover the ramekin in foil and bake for 30-35 minutes, or until cloves are soft. Set them to the side to add to your bread dough!

How To Make No Knead ARtisan Bread
- Mix the ingredients.
- Let dough rise on the counter for 2 hours, then in the refrigerator for at least 2 hours.
- Shape dough into a ball shape.
- Let rise in bowl on counter for 1 hour or until dough is at room temperature again.
- Bake for 30 minutes in dutch oven with the lid on, and then an additional 20 minutes with the lid off.
Ingredients for Easy Artisan Bread
The ingredients for the dough are simple. Flour, salt, yeast, and warm water. That's it! FOUR INGREDIENTS. You'll also need olive oil, garlic cloves and fresh grated asiago or parmesan cheese.
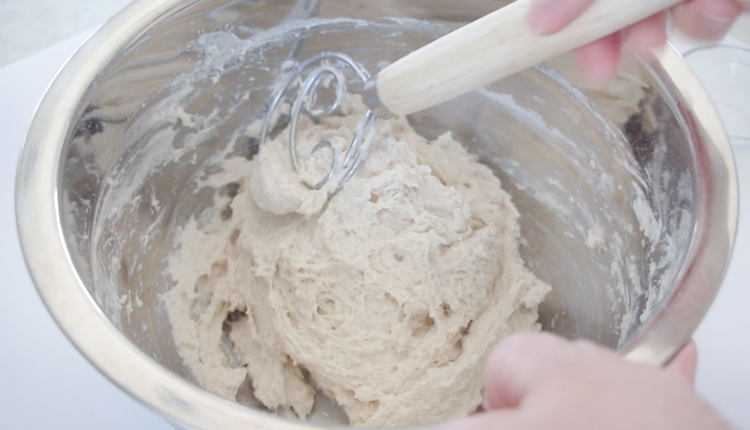
The dough will be sticky and rough looking. Not a smooth ball of dough like our Amish white bread. Just make sure everything is mixed well.
Cover the bowl with a damp cloth or plastic wrap and let it sit on the counter for 2 hours. Then move it to the refrigerator and let it rise for at least 2 hours. I typically leave mine in the refrigerator 3-6 hours.
The photo above is what the dough will look like after it comes out of the refrigerator. I usually sprinkle it with a little flour to make it easier to work with. It's still a bit sticky at this point.
Form the dough into a ball on a floured surface. Nothing fancy. Just a round shape.
Wash the bowl that the dough was in so that you can reuse it for the next step.
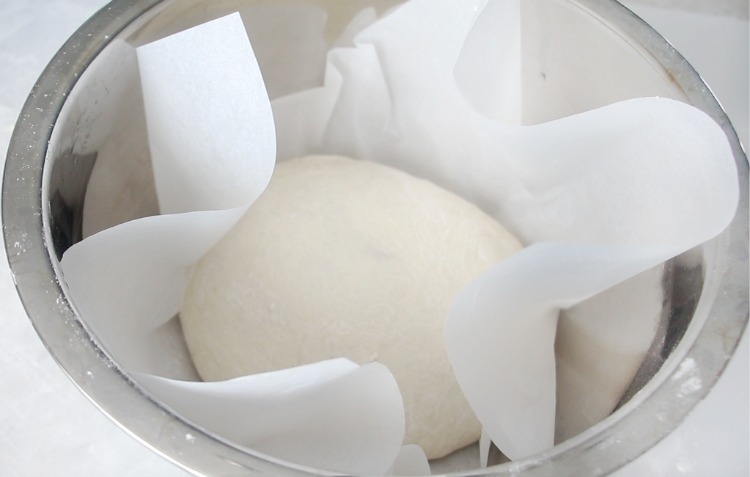
Place a piece of parchment paper into the bowl and place the dough on top.
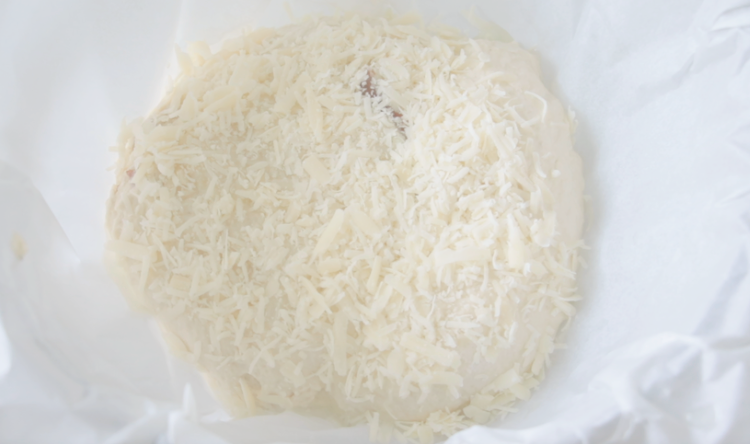
Brush dough in olive oil (olive oil helps the cheese stick) then sprinkle with ½ cup of fresh grated asiago cheese. You can also sprinkle with sea salt if you'd like. Cover with a damp cloth and let the dough rise for 1 hour.
Note: Parchment paper makes it easy to lift the dough out of the bowl and place into the pan when it's time to bake.
30 minutes into the rise, preheat your oven to 450 degrees and place a dutch oven pot inside with the lid on. You want your pot nice and hot when you put your bread inside.
Don't have a Dutch oven? No worries. Here is how to make no knead bread on a pizza stone or baking sheet.
When dough is ready to bake, lift the parchment paper and place dough into HOT Dutch oven. Remember: you must preheat your Dutch oven for the bread to cook right.
Place a lid onto the Dutch oven and bake the bread for 30 minutes.
Note: Baking the bread with the lid on creates steam. This makes the loaf nice and chewy, similar to how boiling bagels for a few mintues before baking makes the inside chewy.
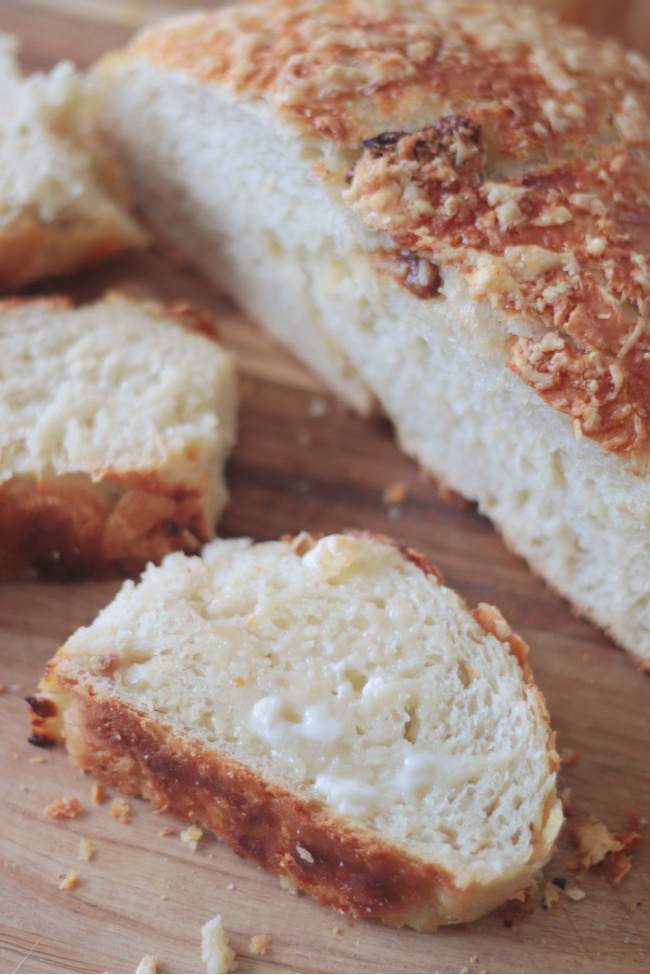
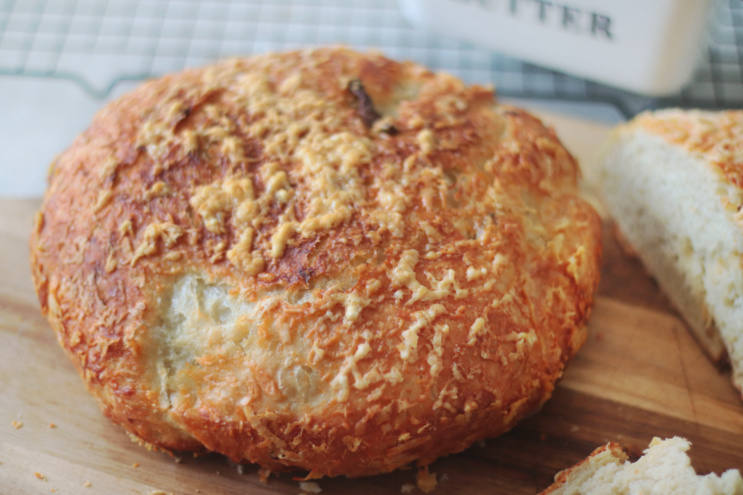
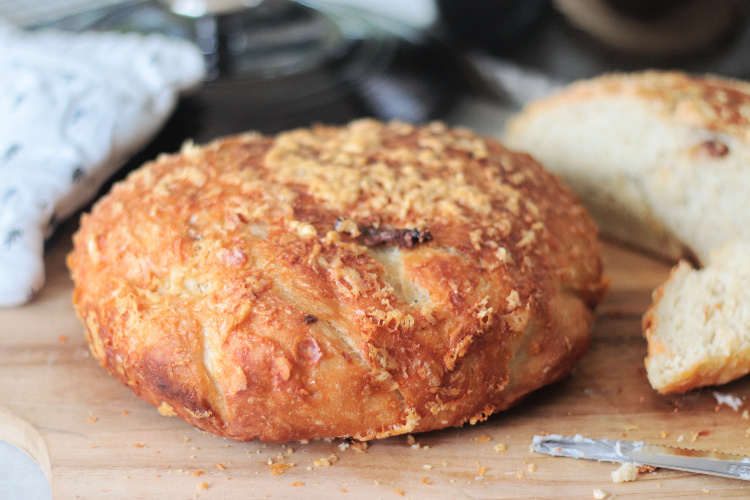
After the bread has baked for 30 minutes, remove the lid and continue to bake in oven for an additional 20 minutes or until loaf is GOLDEN brown.
Allow bread to cool on wire rack then slice.
Note: make sure the pot you use is oven-safe. Dutch ovens are made to be baked at high heat. If you choose a different type of pot, make sure both the pot and lid can handle the high oven heat.
Easy Roasted Garlic Asiago Artisan Bread Recipe
No Knead Crusty Bread
Equipment
- 6-7 qt. Dutch oven
Ingredients
- 3 ¼ cups flour all purpose or bread
- 2 ¼ teaspoon yeast dry active or instant
- 1 ½ teaspoon salt
- 1 ½ cup warm water
- 8 garlic cloves peeled
- 1 Tbsp. olive oil
- ½ cup fresh grated asiago cheese or parmesan
- olive oil for brushing
- sea salt
Instructions
Roasting the Garlic
- Preheat the oven to 375 degrees. Add 6-8 peeled garlic cloves to a small oven-safe ramekin. Pour 1 tablespoon of oil over the cloves. Cover the ramekin in foil and bake for 30-35 minutes, or until cloves are soft.
Making the Dough
- Mix flour, salt, yeast, warm water and roasted garlic cloves together using a Danish dough hook or wooden spoon. The dough will be sticky.
- Cover bowl with plastic wrap or damp towel and let rise on counter for 2 hours.
- Place bowl in refrigerator and let rest another 2 hours.
- Sprinkle dough with a small amount of flour (to make it easier to work with) and form into ball on floured surface.
- Wash bowl and place a piece of parchment paper inside bowl.
- Place dough on top of parchment paper. Brush dough with olive oil and sprinkle liberally with grated asiago cheese. Sprinkle with sea salt (optional).
- Cover with damp cloth, and let rise until dough is room temperature (about an hour).
- Preheat oven to 450 degrees. Place Dutch oven pot inside oven while it preheats.
- Use the parchment paper to lift dough out of bowl and place into pot.
- Place lid on Dutch oven. Bake bread for 30 minutes.
- Remove lid. Bake bread an additional 15-20 minutes.
- Remove bread, peel off parchment paper and allow bread to cool on wire rack.


Karen Furlow says
Question. Can you work the Asiago into the dough rather than topping it?
Brandy says
You can! I like how it gets toasty on top. 🙂
Carol says
Hi, do you mash the roasted garlic before adding them to the other ingredients , the video stops before it reaches that point .
Thanks Carol
Brandy says
No, I just add the roasted garlic whole. 🙂
Kammy says
Delicious!!!
Brandy says
I’m so glad you enjoyed it!
r wan says
I'm making this now. First all of the ads have really gotten in the way of being able to follow recipe. Second you mention if you don;t have dutch oven, but you didn't follow through
with what your supposed to do otherwise. Very disappointed
Brandy says
Hi! The post says “Don’t have a Dutch oven? No worries. Here is how to make no knead bread on a pizza stone or baking sheet.” If you click the link it will take you to a recipe that shows how to make this type of bread without a Dutch oven. The process is the same. You can print out the recipe at the end of the post, ad-free.
Joanne says
This is so easy to make and it turned out perfect!
Brandy says
I’m so glad!!