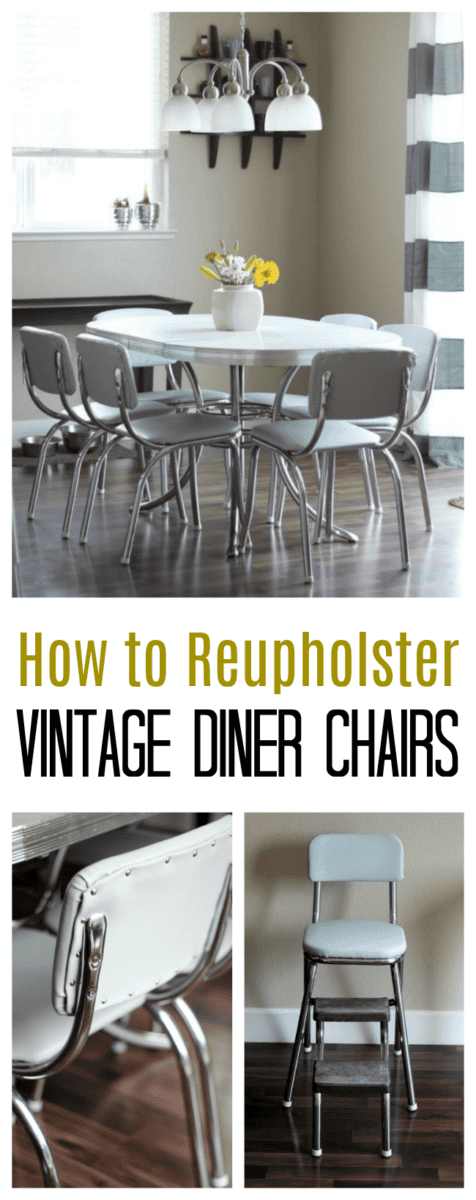
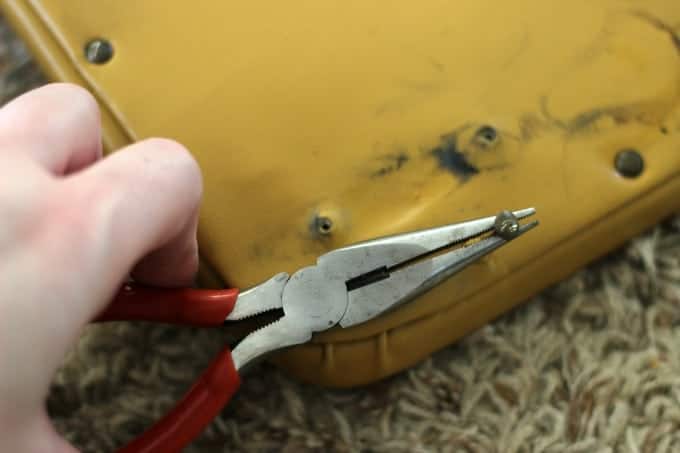
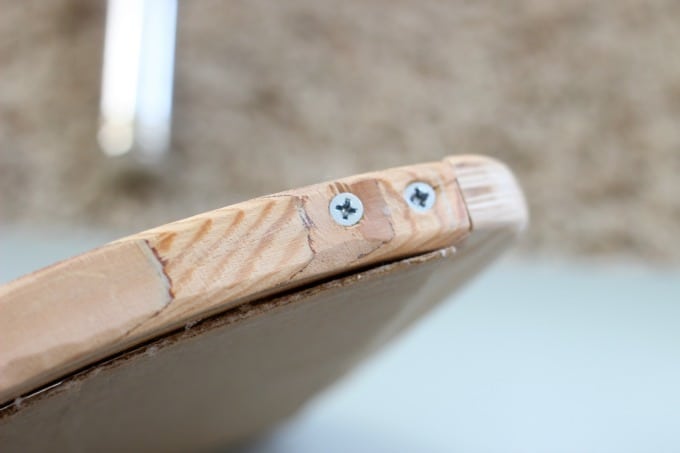
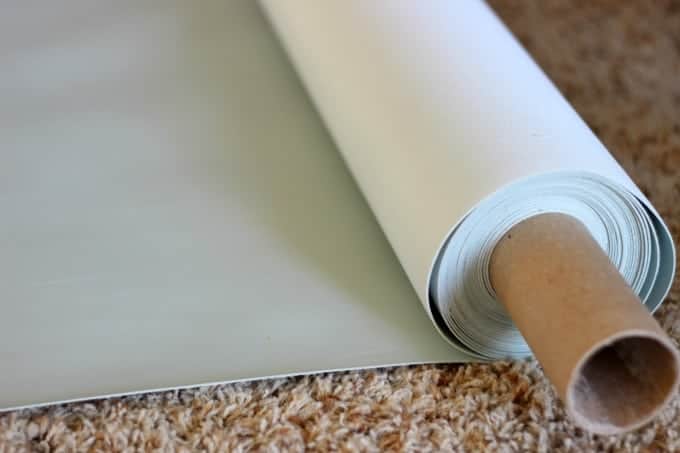
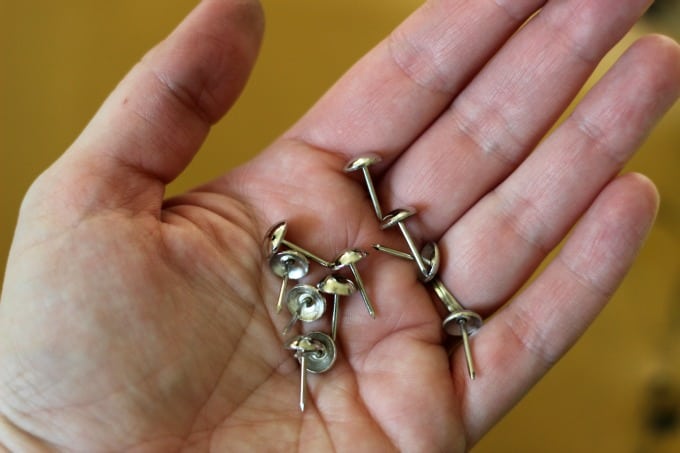
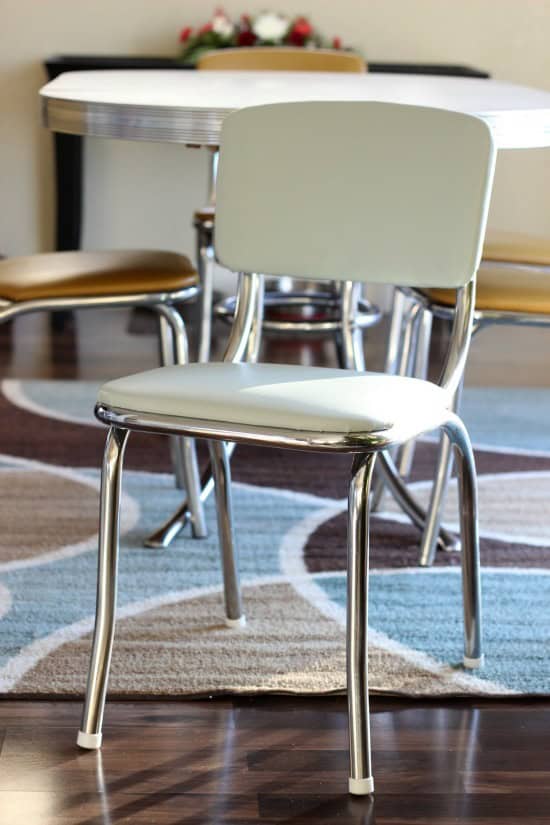
How to reupholster vintage diner chairs, step by step! A labor of love and a simple way to preserve this 67-year-old family heirloom. Scroll to the end of the post for a fun update!
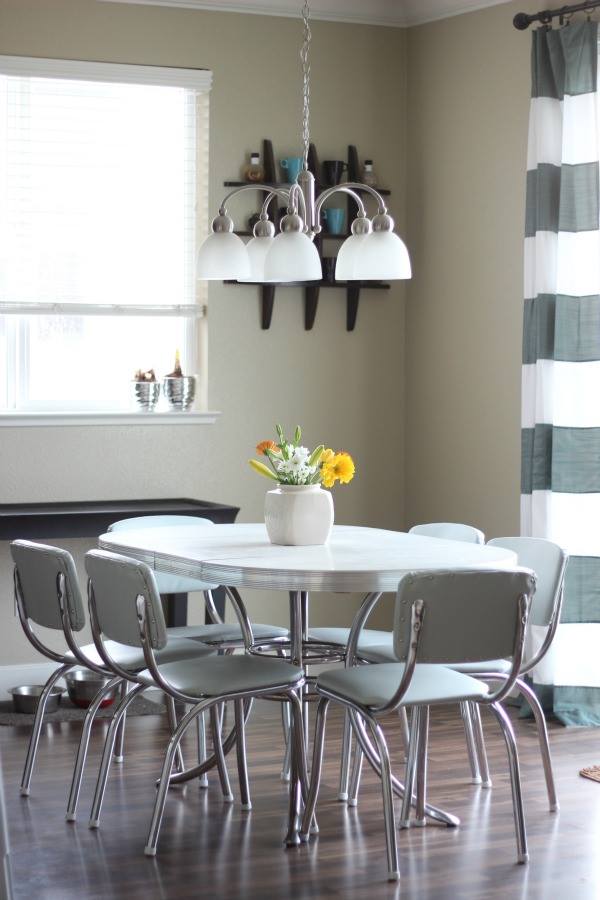

My grandma also cut out her sewing patterns on this table, paid bills, and wrote letters. She wrote many many letters and was a big fan of "snail mail". There are so many memories associated with this set, not just from me, but from all of the family members on that side of the family!
How to Reupholster 50s Vintage Diner Chairs Step by Step

2019 UPDATE!
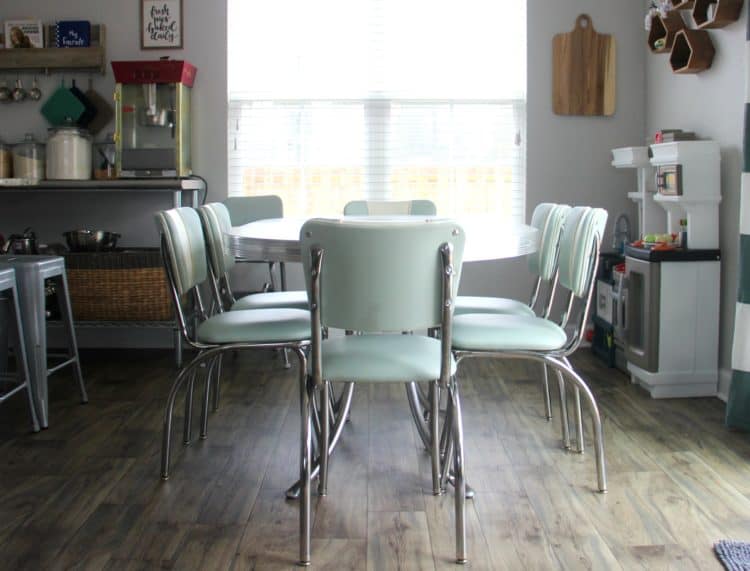
It's been a few years since I reupholstered my retro diner chairs and they are still in GREAT shape! We couldn't love them more. Two chairs had legs that were starting to bend in. My husband, who can fix anything, wasn't sure what to do and didn't want to make them worse. After all, they are 70 years old. It was stressing me out to have the kids sit on them so he suggested that I order replicas and store the originals until the kids are older. We bring them out as extra seating for guests and use some in our home office.
Friends, this was my Christmas gift and I couldn’t be happier with the results. I shopped around and decided to go with Heffron’s. Their site is just so fun to browse. So many options for 1950s retro furniture, diner booths, and chairs.
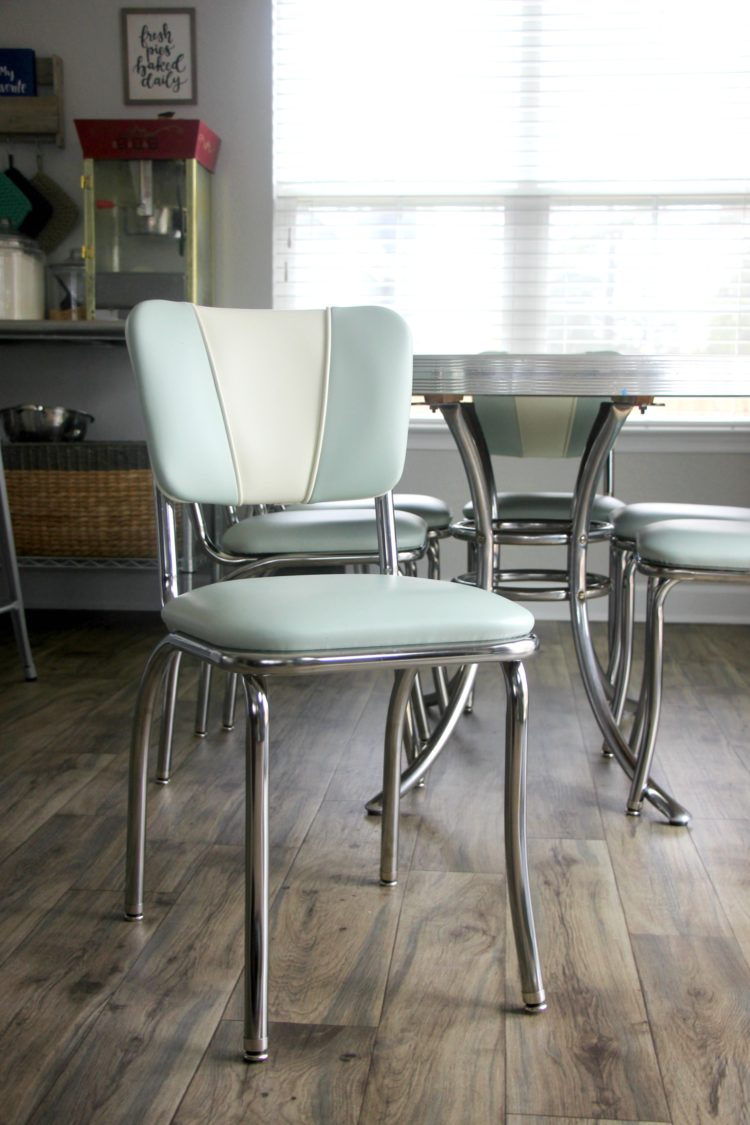
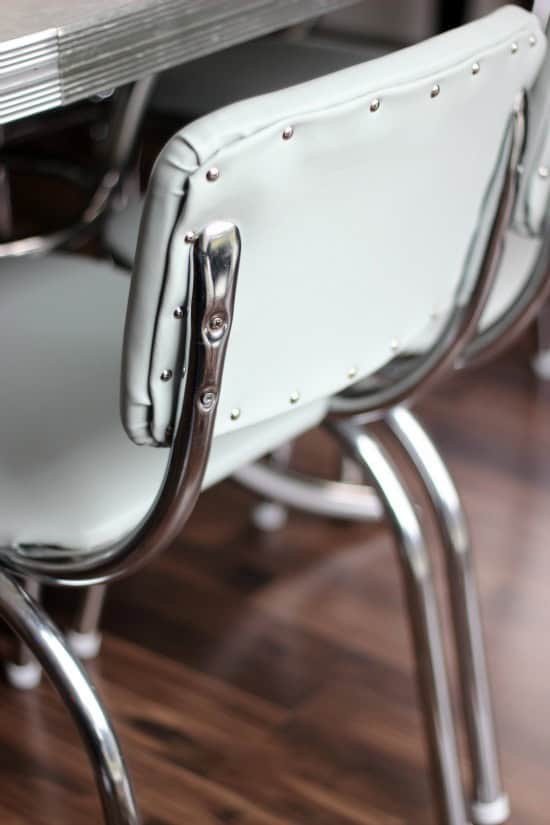
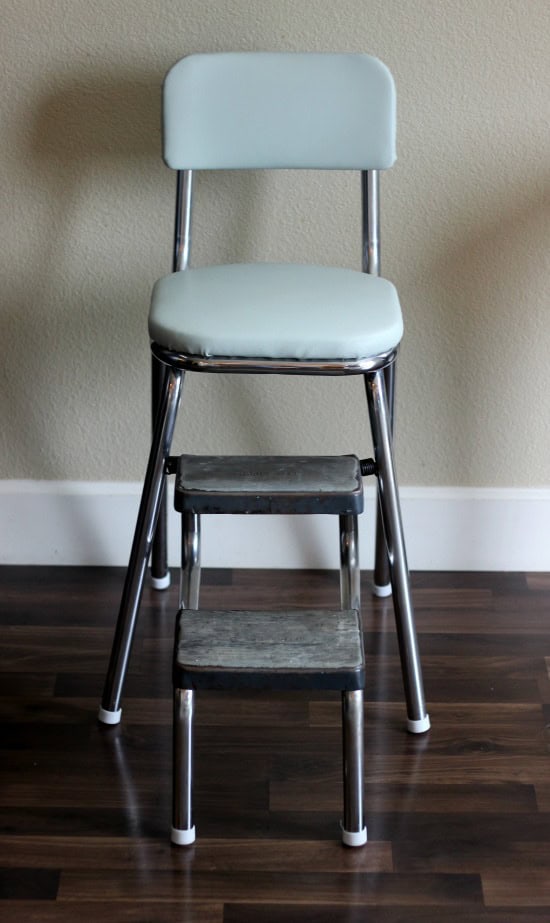
They did a fantastic job and designed 6 new heavy duty chairs for our dining set that will last a lifetime and shipped them right to my door. The color is exactly the same as the ones above, with the addition of a two-toned seat back and contrasting piping. You can't even tell that they aren't vintage chairs because these are made exactly how the first set was made and they work perfectly with Grandma's table. Restaurant quality gorgeous design. Our booster chair/step stool is the only seating that isn't being stored right now. That thing will never break, it's so sturdy! This is not sponsored. I was just so happy with the entire process and they had so many different styles!
You might also like...
How to reupholster a Swivel Rocker
How to Reupholster a Storage Ottoman
DIY Storage Cube Fabric Liners


acraftymix says
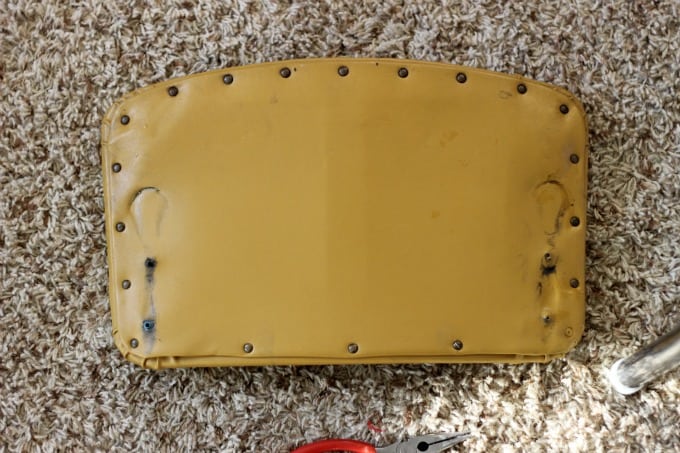
They look fabulous Brandy, great job. Hope your wrist and arm are feeling better. That sure was a lot of takes and nails you removed.
Pili Gomez says
This is a true labor of love but really worth the effort. I bet your grandparents would be very happy to see them shining again. I am planning to feature this at the party tomorrow.
Enjoy the rest of the week!
Paula says
You did such a good job with this and it looks fantastic in your home. I know your grandparents would be thrilled to know that this set is still being used and enjoyed.
Angie ~ ambientwares says
These turned out beautiful and look absolutely perfect in your home and that space! Fantastic job!
Leanna says
These are absolutely stunning antique chairs. My grand parents had a set as well and I can remember them talking about how they were made from real metal and could be welded etc. This is a lovely family heirloom. Congratulations on the restoration.
Brandy says
Thank you so much! They are truly treasured!
MEM says
The set came out beautifully! Its just my style too. Did you replace the padding too? I didn't see that part.
Brandy says
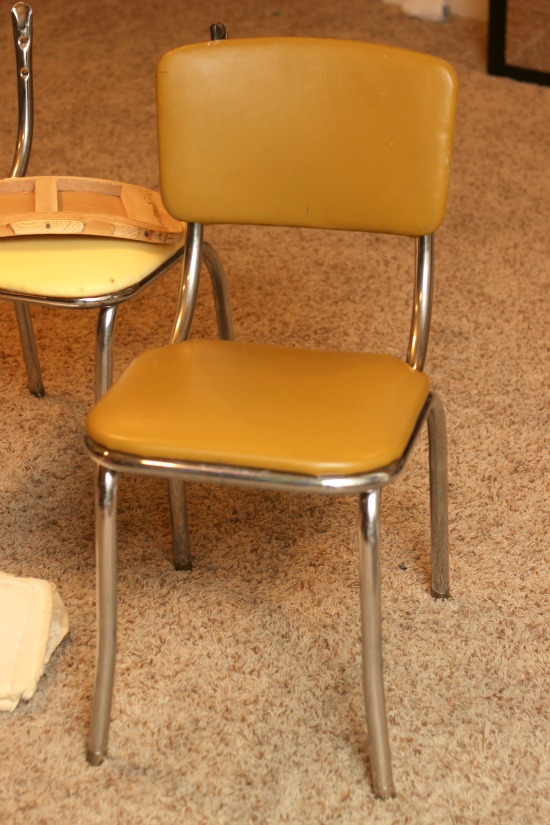
The padding was actually in great shape so I reused it 🙂 And thanks!!
Mary-The Boondocks Blog says
These came out looking spectacular. I am very impressed with your handiwork. The whole set looks great.
Theresa says
I love how your chairs turned out. Stunning set. Definitely a labor of love. I'm sure you'll enjoy the set & memories for a long time. Thanks for joining us at the Inspiration Spotlight party. Pinned & shared.
Fabiola Garcia says
Wao!, what a great transformation you did to that already beautiful dining set. Love the legs. I have the same condition in my right hand, and pulling all those nails or staples kills me. I will only do 2 chairs in a day. I bought a bracer at the pharmacy and after applying a cream to my hand, I will put my bracer to sleep, is the best to relief the pain. Hope you get better relief for your hand pain.
Brandy says
Thank you! My arm and hand recovered soon after, but seriously, I thought I'd have permanent damage with how painful it was!
diy180 says
What a cool table and chairs. Reminds me of the set my mom had growing up. It's looks great and love the color. Thank you for sharing at Dishing it and Digging it link party.
JESS44903 says
These look great!
I would love for you to share this with my Facebook Group for recipes, crafts, tips, and tricks: https://www.facebook.com/groups/pluckyrecipescraftstips/
Thanks for joining Cooking and Crafting with J & J!
homeonthecornerblog says
We had a similar set at my uncle's lake cabin. Boy, I wish I had gotten it when they sold the cabin. Yours looks great!
Kreativk Net says
A wonderful transformation! I love the new colour and wow, these are really precious, they have been through so many family get togethers! Thank you for sharing at Sweet Inspiration, wishing you a lovely weekend!
Carol says
When I was growing up ions ago, our next door neighbor had a similar set. Love your redo!
Brandy says
Thank you!!
Rijkhoff p says
Ik ben na jaren 50 geboren ik van deze stijl gaan houden en de inspiratie kom van de film Happy Days zin's dien wijk ik van deze tijdloze Design niet meer af er zijn Nederland zaken die in de 50th doen alleen de dinner meubels zijn we wat beperkt in Amerika Canada lopen wel achter dat vind ik wel jammer jaren 50 fan
the cape on the corner says
wow, those look gorgeous! when we bought our house, there were 4 red barstools in the basement, exactly as i had intended to buy actually, but we did have to really clean up the chrome. i love that you used the grey for the fabric. gorgeous!
b