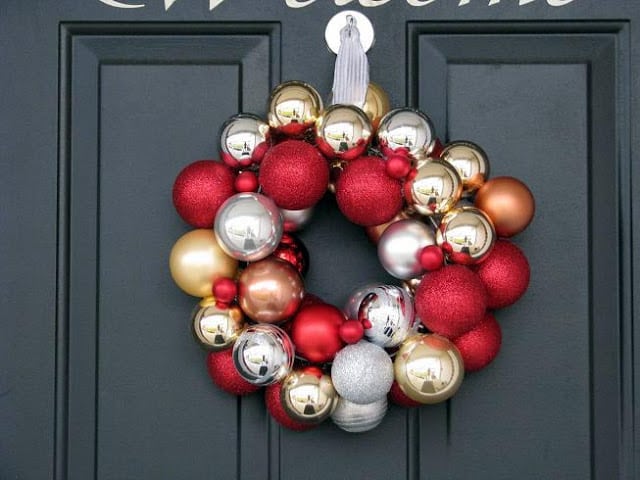
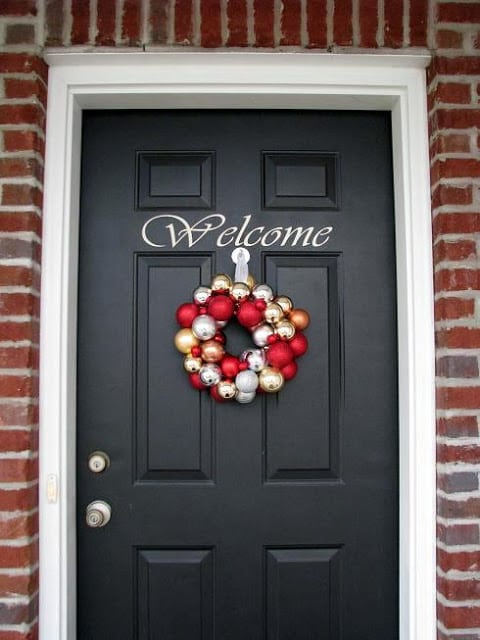
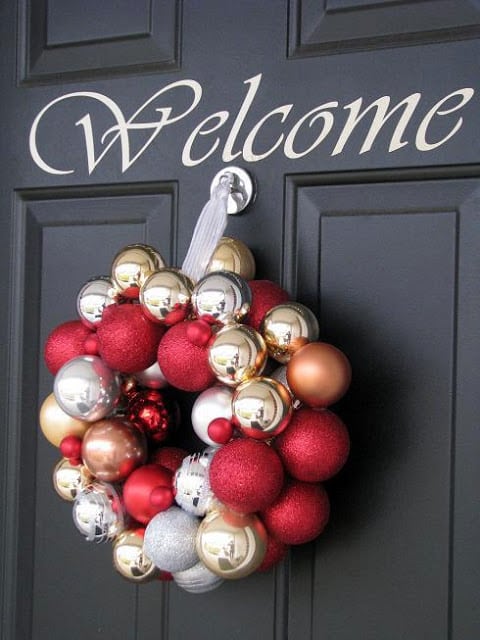
Make a gorgeous Christmas ornament wreath out of a coat hanger and a container of inexpensive ornaments! Quick, easy, and makes a huge statement! This post contains an affiliate link.
If you like this Christmas ornament wreath you'll love our easy boxwood wreath tutorial and our winter berry wreath tutorial!
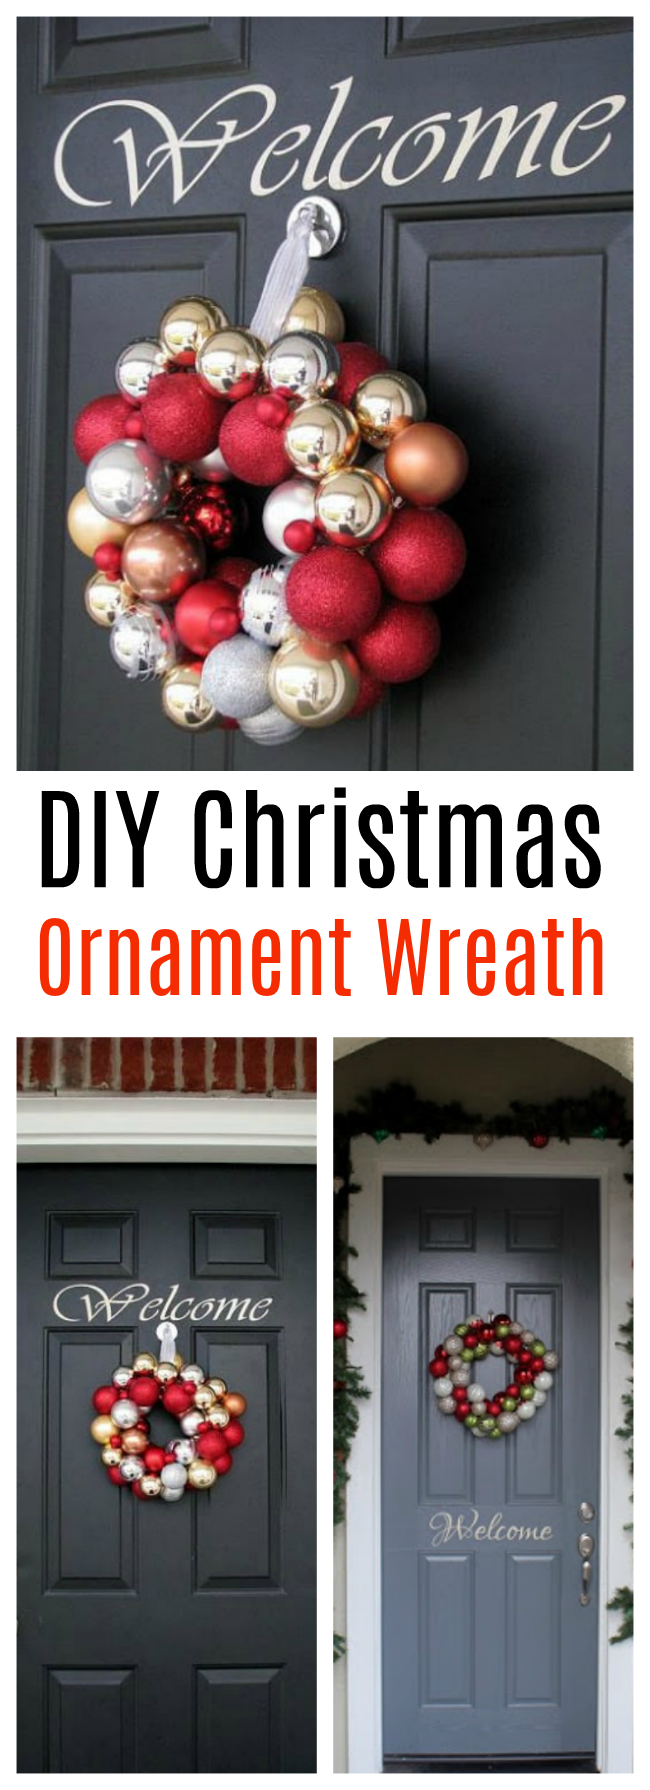
My favorite kind of projects are ones that can be made with items that I already have on hand. Wreaths are pricey to purchase, and can be pricey to make as well. So the fact that I was able to put this ornament wreath together without making a trip to the store was so satisfying! I've made a couple of ornament wreaths over the years and they are always so stunning on our front door.
Items You'll Need To Make An Ornament Wreath
I used a wire hanger and snipped off the hook with wire cutters. Then I bent it into a circular shape and started strung the ornaments onto the wire.
Tips and Tricks for Making An Ornament Wreath
- String ornaments on the coat hanger randomly. Rotate the ornaments as you go so that they are not all facing the same direction (ex: some should be facing down, up, and in the center).
- Use more ornaments, hot glued, to fill in areas that need a bit more bulk.
- Avoid hot gluing ornaments that are glittery as they do not stick as well. You can string glittery ornaments on the coat hanger just fine.
- Use a variety or ornaments in a variety of sizes. Example: String 2 large ornaments and one medium to add a mixture. Hot glue small ones to fill in the gaps.
A few readers have asked me about my wreath hook. My door is metal so this hook comes in super handy and is less noticeable than an over-the-door wreath hook. You can purchase one here.

DIY Christmas Ornament Wreath
Make a gorgeous Christmas ornament wreath out of a coat hanger and a container of inexpensive ornaments! Quick, easy, and makes a huge statement!
Pin Recipe
Yield: 1 wreath
Cost: Under $10
Equipment
- hot glue gun, optional
Materials
- coat hanger
- Christmas ornaments
- ribbon
Instructions
- Bend coat hanger into a circular shape.
- Begin stringing ornaments onto coat hanger. Twist ornaments tightly around as you go so that they are not all facing the same direction.
- Fill in gaps by hot gluing smaller ornaments in the gaps.
- Twist coat hanger to close off wreath.
- Tie a large ribbon around wreath for hanging.
Notes
Tips and Tricks for Making An Ornament Wreath:
String ornaments on the coat hanger randomly.
Use more ornaments, hot glued, to fill in areas that need a bit more bulk.
Avoid hot gluing ornaments that are glittery as they do not stick as well. You can string glittery ornaments on the coat hanger just fine.
Use a variety or ornaments in a variety of sizes. Example: String 2 large ornaments and one medium to add a mixture. Hot glue small ones to fill in the gaps.
Here are 45 more wreath ideas from House Beautiful.
This post is a refresh of a post originally shared in 2010.


Sally says
Really really cute! Looks like a lot of work went into it.
Annie says
So cute...
Jamie says
This is so pretty and sounds really easy!! Great job! Stopping by from Tip Junkie.
Debbie Corbari says
Ok...the pic of your wreath drew me in...and then I saw the pretty Welcome sign on your door...and THEN I read that you used a MAGNETIC wreath hanger?!?! Oh my word I'm so glad I stopped by here! LOVE.THAT.WREATH! LOVE IT! I bet it was FUN to make!!
Beth (www.livinglifeintentionally.blogspot.com) says
This is BEAUTFUL!! It turned out great!!! Thanks for linking up to tGIF! See you Friday =)
Beth
Lindsi B says
What a gorgeous wreath! This is something I could make with my son too! He'd love it! Would you please share this with our readers for Fun Stuff Fridays? http://www.toysinthedryer.com/2011/12/fun-stuff-fridays-2.html
Sally says
I love how it turned out! I've wanted to make one of these, but I'm not sure I have the patience! Yours looks great!! I'm your newest follower from the tip junkie party. If you get a chance, I'd love you to stop by my blog & maybe follow along too.
Sally
loveofhomes.blogspot.com
Janice@GypsyFarmGirl says
Love your wreath! I'm kicking myself for selling a box full of vintage ornaments in a garage sale last year...what was I thinking!
Sally says
It is so pretty. I love those colors against your dark door, it really makes the wreath pop!
UKMUMINUSA says
Your wreath is beautiful, I also made a ball wreath at the weekend (i posted it on my blog), it is amazing how they all look so different. The red really makes yours pop. They are so easy to make I think I will have to make another one, thsi time with brighter colours.
Marilyn says
THIS IS F A B.. Very pretty and festive for the season ;)).. I would LOVE if you could please share this via my Special Christmas Soiree party pweeease.. (TY so much).. http://theartsygirlconnection.blogspot.com/2011/11/my-favorite-christmas-recipea-special.html Wishing you an amazing start to your week.. : ))
Chrissy says
I love the red!! It really pops on your door!! Beautiful!
Jerri says
I love your wreath! It's really cute!
Hope you can stop by on Thursday for my Holly Bloggy Christmas Recipe party!
KasiaJ says
Super cute! I love the colors you chose; they look great against your door. Lovely.