These easy hand stamped rings are fun to customize and are made out of aluminum, so they are easy to stamp! Fun to make with teens! This post contains affiliate links.
You might also like our stamped constellation necklaces, leather mystery bracelets, or wired headband tutorial!

Watch our step by step video!
I've been the camp craft coordinator for my church for the past 5 years, and one craft that is requested year after year is metal stamping. Teens love making their own jewelry and accessories, and metal stamping is easy to do. We've made constellation-stamped necklaces, bracelets, dog tag necklaces, and keychains. This year, we are adding rings!
Easy Stamped Rings
There are so many ins and outs to stamping on metal. I'm not an expert, but I do know how to do it easily with a large group. I typically teach 20 girls at a time, 100 in total.
- I don't worry about using jigs when making them with a group. The girls don't seem to have the patience for that anyway, but if I were making these for myself or as a gift, I'd probably use one.
- I supply masking tape that they can use to hold their project in place or create a straight line to follow.
- I always provide the girls with aluminum squares to practice on to keep mistakes to a minimum. These work great for testing out stamps.
- Aluminum stamping blanks are inexpensive, so I make sure to have plenty of extras on hand.
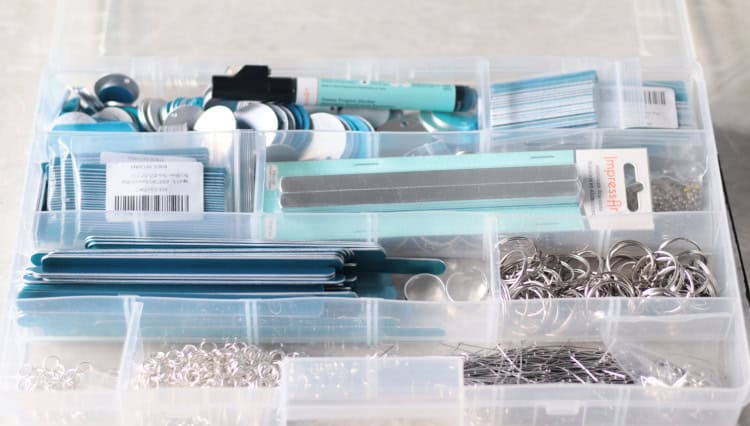
Whatever is left over goes back into my box for the next year! We have quite a collection of stamping blanks for charms, necklaces, keychains, bracelets, and rings!
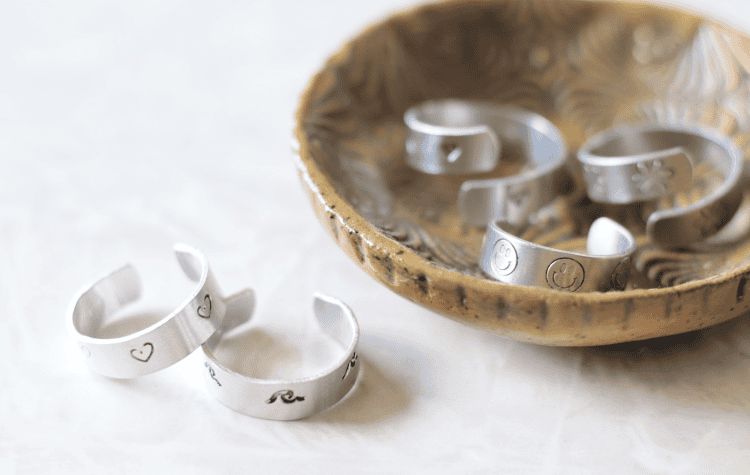
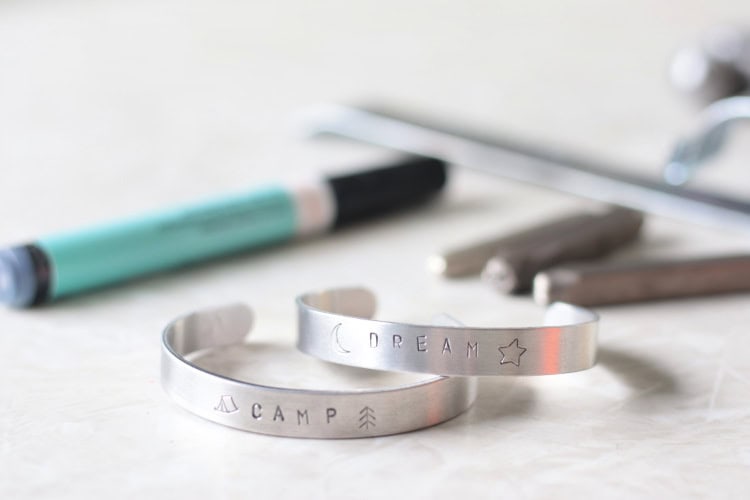
I had a lot of fun making these example rings for my group. They took minutes to make and turned out super cute!
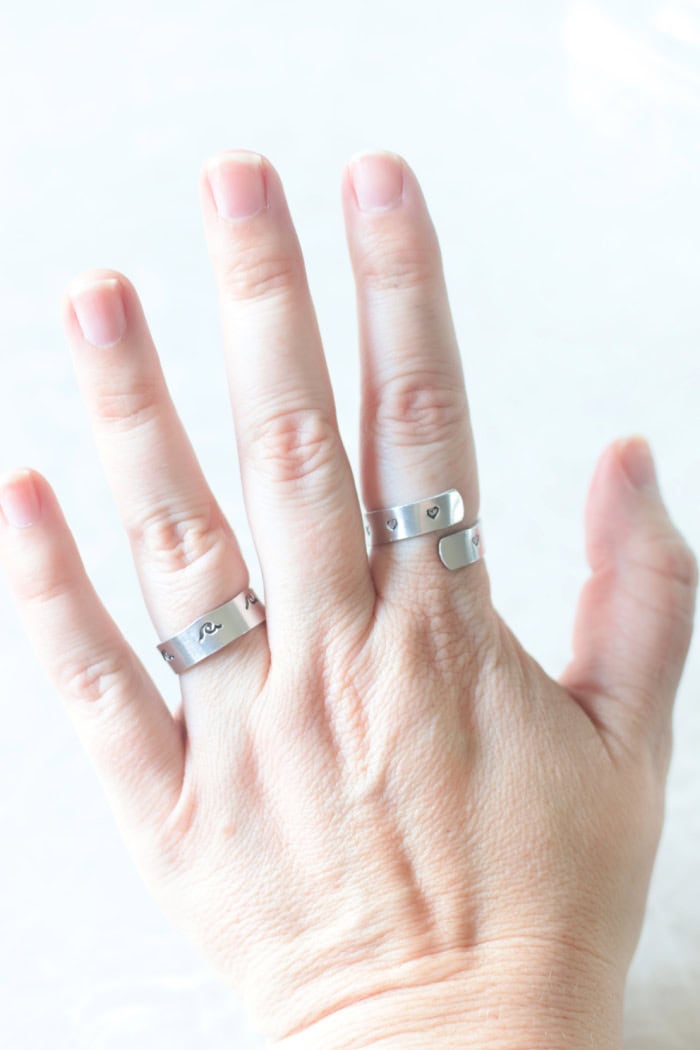
I'm wearing a 2 ¼" ring blank, which can be tightened or stretched to fit all of my fingers, and a 3" spiral ring blank.
Easy Hand Stamped Rings SuppLies
(Supplies are all linked below to Amazon and Michael's)
Ring Blanks (aluminum is easiest to stamp on)
- 2" Blanks (ring size 4-6)
- 2 ¼" Blanks (ring size 7-9)
- 3" Blanks (ring size 8-10 or spiral rings)
*When I make stamped crafts with the girls at YW camp, I use mini polyethylene cutting boards from Ikea and 8-oz hammers from Harbor Freight. A great, affordable way to teach this class to a crowd. I typically teach 15-20 girls at a time, 100 in total. Purchasing 15 bench blocks and hammer kits isn't cost-effective for a group setting, but if you are making these at home, I highly suggest using one, as the surface is ideal for stamping.
How To Make Stamped Rings
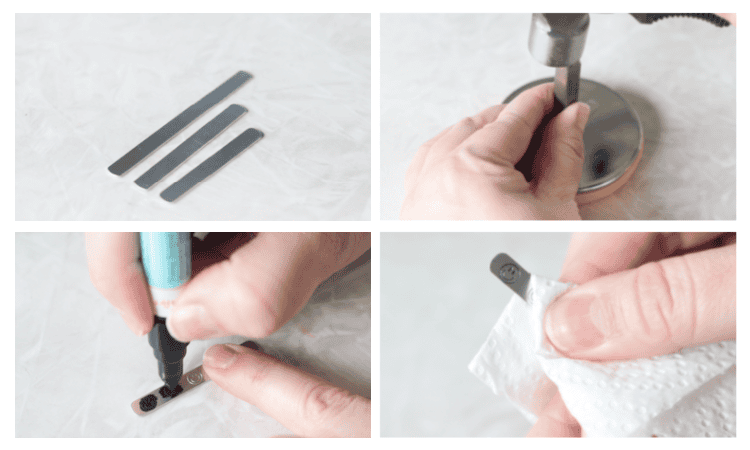
Step 1: Select the size of ring that you'd like to make. I use 2" and 2 ¼" inch ring blanks for regular rings and cuff rings, and the 3" ring blanks for spiral rings.
Step 2: Tape the ring to the stamping block using masking tape to hold in place (optional).
Step 3: Hit the metal stamp 1-2 times (preferably 1) to stamp the design into the ring.
Step 4: Color over the stamped designs using an enamel pen. Let it stand 30 seconds.
Step 5: Wipe the ink off using a paper towel.
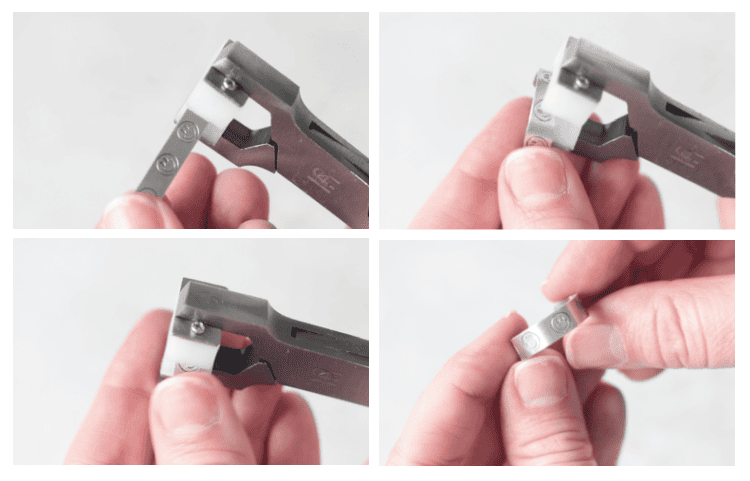
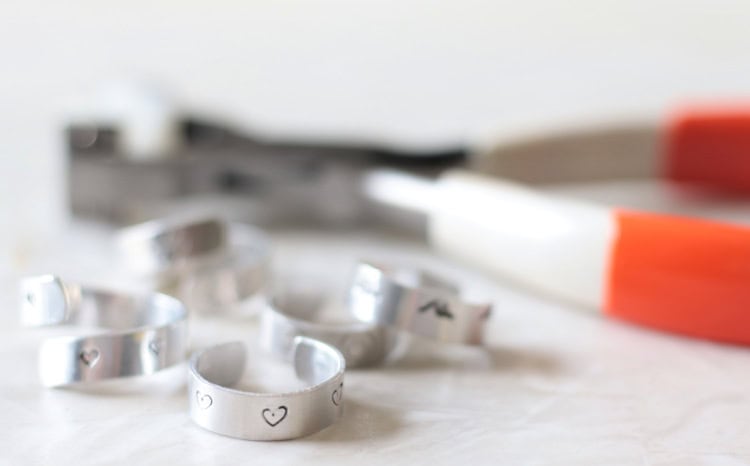
Step 6: Bend the rings.
To make a regular ring: Bend the ring using the ring-bending tool (ring-bending pliers). You can start in the middle or on one end; it doesn't matter. As you crimp, the ring will take shape. To make it smaller, squeeze the ends together a bit. To make it bigger, pull the ends a bit.
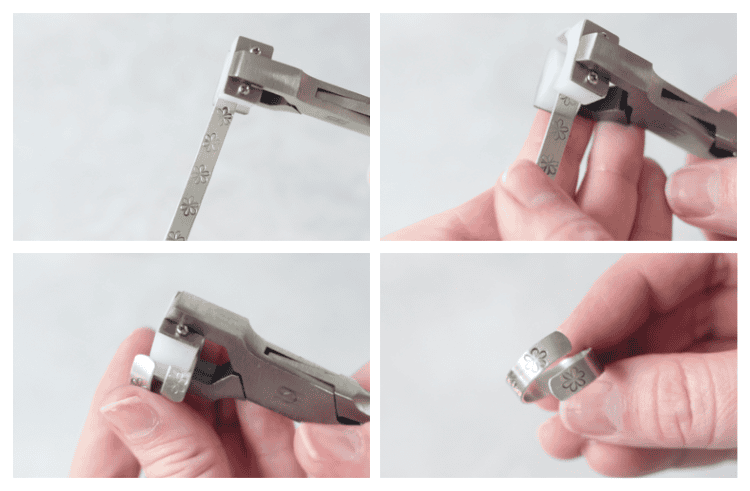
To make a spiral ring: Start bending the ring as normal. When you get towards the end, instead of allowing the metal to overlap, pull it down so that it goes underneath the starting point.
The rings are very forgiving, so if you don't know your exact size, you can generally make it work with the 2 ¼" ring blank (the medium one). You can resize the rings by gently pressing or pulling the ends together or apart.

Leave a Reply