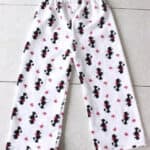
How to sew pajamas without a pattern! This method is ideal for making pajama pants for kids. Simply use an existing pair of pajama pants as a guide.
You might also like my favorite 1-hour nightgown pattern, soft-soled baby shoes pattern, or homemade dinosaur hoodie.

I like sewing pajama pants like this for my kids because it eliminates the guesswork. Printed PDF sewing patterns and the finished measurements have been hit-and-miss for me, but these pajama pants work! I’ve been making pajama pants and pants for Halloween costumes using this method for years. It's one of the most popular tutorials on the blog because it's so simple!
Why I Like This Tutorial
- Simple to follow. Not only do I provide step-by-step photos and instructions, but I also provide a video for you to follow!
- Quick project. This is a very quick sewing project. You can easily make a pair of pants in 30-60 minutes.
- Inexpensive. You don't need to purchase a pattern; just use a pair of pajama pants that you already have as a guide. It's ok if the existing pair is a little too small. You can adjust the hem to be longer and add width if needed.
What Others Are Saying
This was so fun! I’ve sewed NOTHING before and this came out perfectly and took such a short amount of time!---Sarah
It all worked brilliantly! The instructions and photos are so clear, and easy to follow. I'm really pleased with the result! Many thanks!---Kate
I just wanted to tell you thank you for explaining the steps on how to sew the crotch.. it just came out much better from you than any tutorial I've seen, you explained it pretty well.---Amanda
Jump to:
Tips and Tricks
- Use this method for children. If you look at store-bought toddler-big kid pajama pants you’ll notice that they look exactly like the ones that I am showing you how to make today. They are cut on the fold, without outer side seams, and are made out of 2 pieces of fabric. The front of the pants looks identical to the back.
- Don't use this method for adults. If you look at a teen-adult pair of pajama pants, you’ll notice they are made using 4 pieces of fabric and have side seams, as well as inner seams. The back is a bit baggier than the front, allowing for curves, hips, and more movement. For this reason I’d recommend using a pdf pajama pants pattern for the right size and best fit for curvier shapes. That being said, many exprienced sewers have used my method for adults, adding extra room in the waist and hips with great results. For beginners, I'd suggest using a pattern.
If you are looking to make basic elastic waistband pajama pants for toddlers, all the way up to big kids, without pattern pieces to cut out or pockets to sew let’s get started!
Supplies
- Existing pair of pajama or lounge pants
- Fabric: Cotton and flannel work well.
- Scissors
- Pins
- ¾" Elastic
- Sewing machine or serger
- Thread
- Measuring tape
How To Make Pajama Pants Without a Pattern
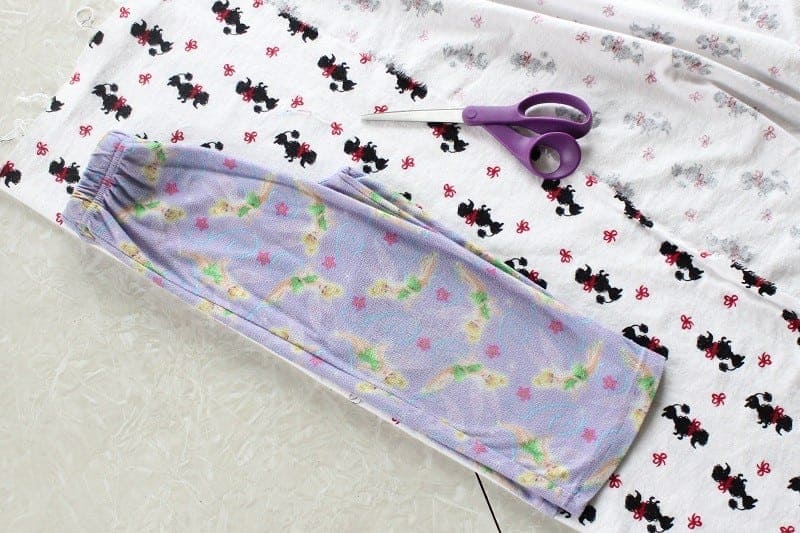
Step 1: Fold existing pajama pants in half. If necessary, iron to ensure you have the right shape. Lay the fold of the pants on the fold of the fabric. Pull the crotch area out a bit so that it is pointy.
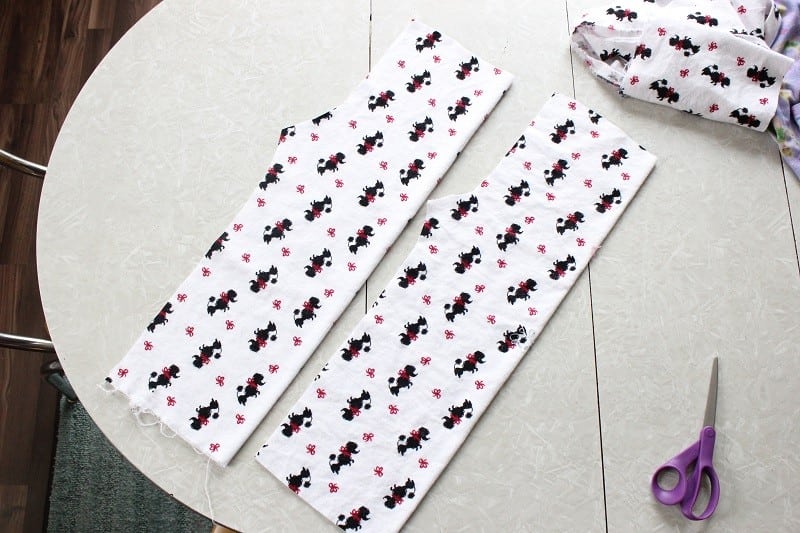
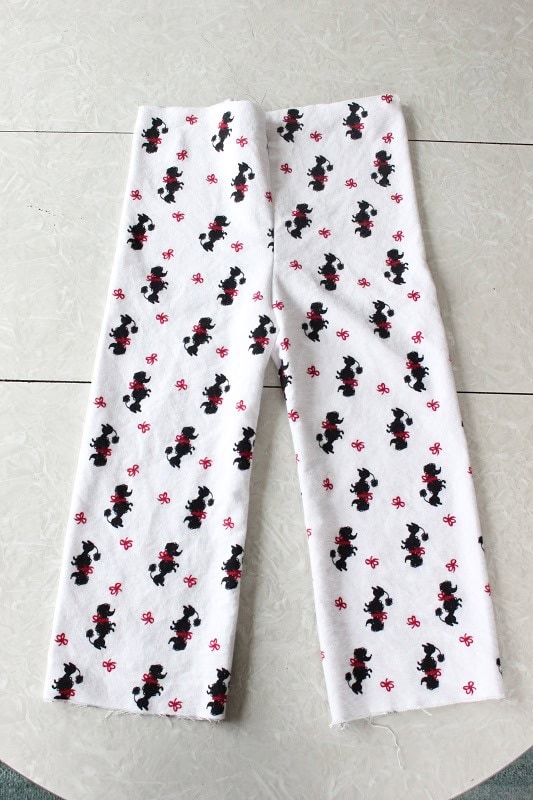
Step 2: Cut 2 pieces (one for each leg) on the fold, using your old pair as a guide (you can trace the cutting line onto the fabric before cutting if you'd like).
Cutting Guide
- Leave at least ½" for seam allowances on the sides.
- Add 3" on the top for the elastic casing.
- Add 1" for the bottom hem (can make it larger or smaller if you want).
- Be generous when cutting around the crotch area (where the back comes to a point) so that there is plenty of room to bend over and move around without stressing the seam. I usually go at least an inch away instead of ½" for the seam allowance in the crotch area.
Note: Since you are using an existing pair of pajamas, the elastic waist is already scrunched. You can also add an inch or so to the cutting area if you'd like for a bit of extra room. If the existing pajama pants are shorter than you'd like, add length when cutting out the pieces. If they are too narrow, add a larger seam allowance when cutting out the pants.
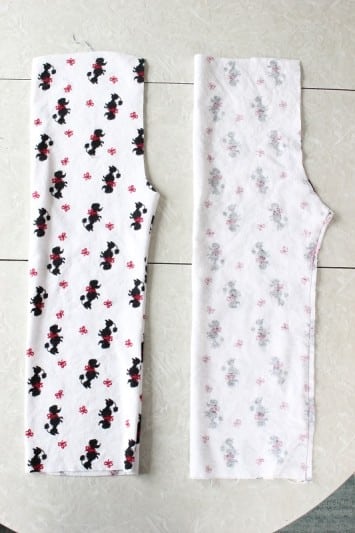
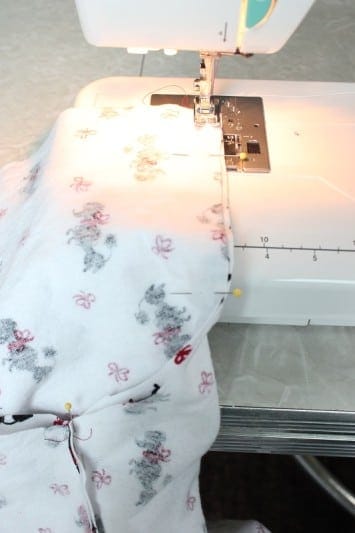
Step 3: Fold them inside out and sew (straight or zig-zag stitch) along outer leg length edge (from the bottom, to where the crotch begins to curve). Trim close to seams.
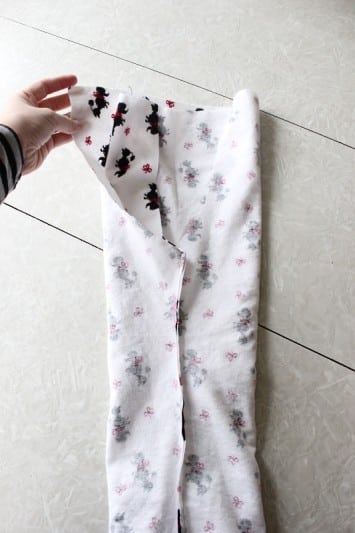
Step 4: Turn one pant leg right side out and stuff it inside the other pant leg. Right sides of the fabric will be facing each other. Make sure that the long seam that you just sewed on each leg matches the other.
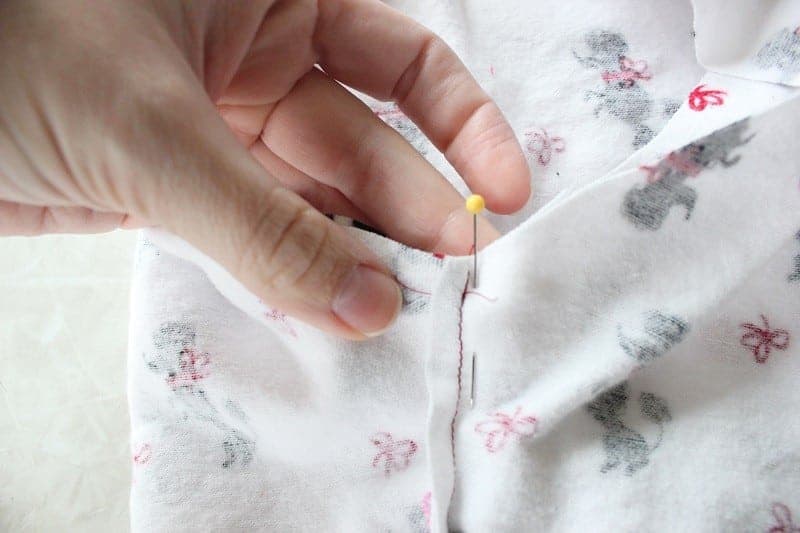
Step 5: Pin in the center to keep it in place.
Step 6: Sew the crotch seam of the pajama pants using a ⅜" seam allowance. Begin at the waist, sew along, and end at the top again. Sew once more close to the seam line to reinforce, since this area will get a lot of wear.
Step 7: Turn pajama pants right side out.
Step 8: The length of the elastic should be the same size as your child's waist + 1".
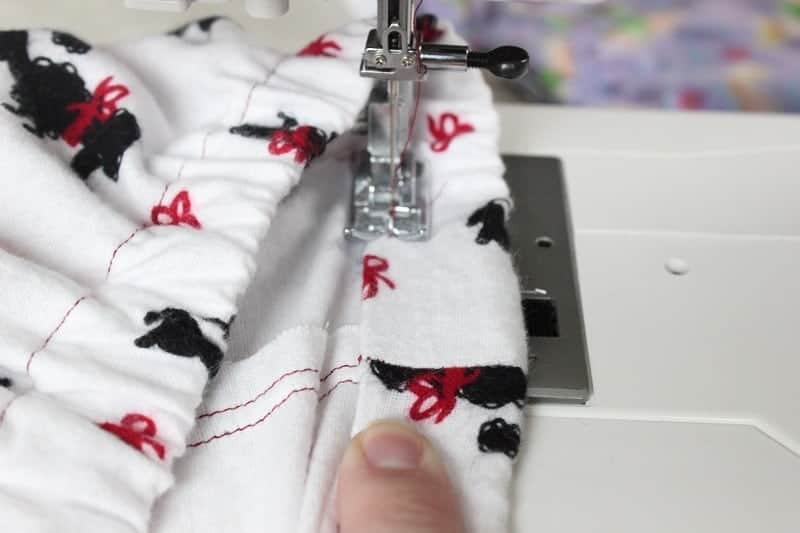
Fold down the waist ¼" inch and press it.
Fold it another 1 ¼ inch and sew the casing all the way around with a ¼" seam, also leaving a 2" gap to insert the elastic into later.
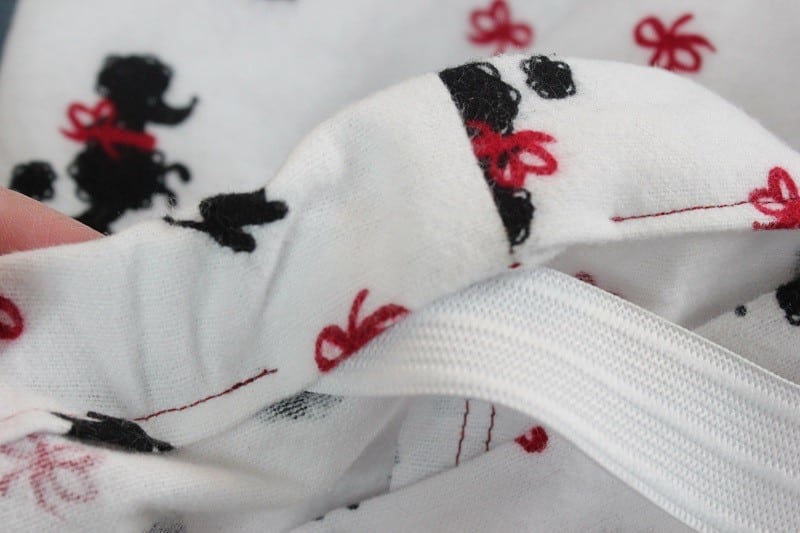
Step 9: Insert your elastic through the waistband using a safety pin to help guide it. Feed the elastic all the way through and out the other side of the opening.
Step 10: Sew the ends of the elastic together. Stretch the waist, pulling the elastic back into the opening.
Sew the gap in the waist closed.

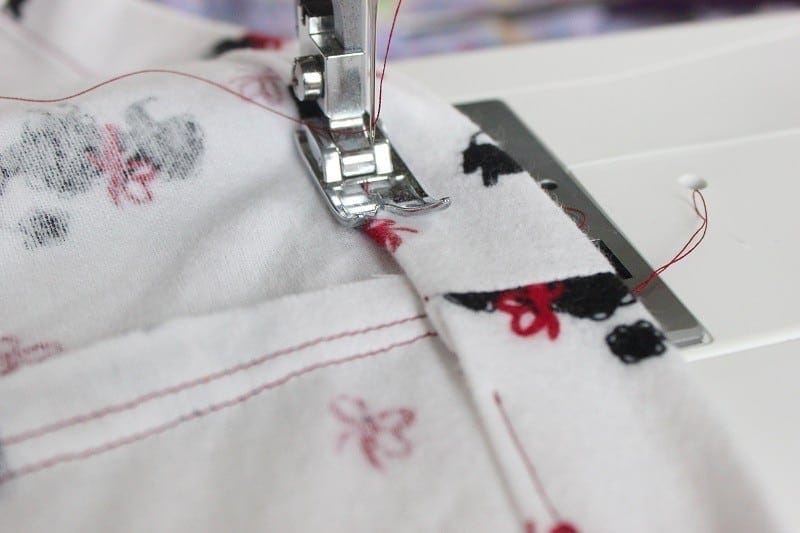
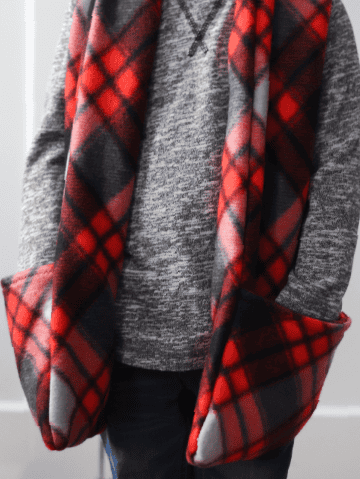
Step 11: Fold the bottom hem up and press, then fold it up one more time and press. (This one is about ½"). Sew around on both legs. Flannel is so easy to work with. You don't need pins since it pretty much just sticks together.
Homemade Pajama Pants FAQs
Lightweight fabrics like cotton and flannel are easy to work with and work well for homemade pajama pants. Knit is also a good choice, but it isn't as easy to sew as cotton.
You do not need a pattern to make children's pajama pants, but you do need an existing pair of pajama pants to use as a cutting guide.
You can use this method for making adult pajama pants, but you will need to add a larger seam allowance in the hips and waist. This is not a standard measurement, as everyone's shape is different. You will need to adjust to your own measurements.
More Clothes To Sew


MADE THIS CRAFT AND LOVED IT? 💛 Please leave a STAR rating and COMMENT below! Post it to Facebook or Pinterest to easily share with friends!
Easy Pajama Pants Without a Pattern
Equipment
- pins
- measuring tape
- sewing machine
Materials
- Existing pair of pants
- Flannel or cotton fabric
- ¾" wide elastic cut to waist measurement
Instructions
- Use a pair of pajama pants that you already have and fold them in half. Iron if necessary to make sure you have the right shape.
- Lay the fold of the pants on the fold of the fabric.Pull the crotch area out a bit so that it is pointy.
- Cut 2 pieces (one for each leg) on the fold, using your old pair as a guide (you can trace the cutting line onto the fabric before cutting if you'd like).Note: Follow the CUTTING GUIDE in the notes section.
- Fold them inside out and sew (straight or zig-zag stitch) along outer leg length edge (from the bottom, to where the crotch begins to curve). Trim close to seams.
- Turn one pant leg right side out and stuff it inside the other pant leg. Right sides of the fabric will be facing each other. Make sure that the long seam that you just sewed on each leg matches the other.
- Pin in the center to keep it in place.
- Sew the crotch seam of the pajama pants using a ⅜" seam allowance. Begin at the waist, sew along, and end at the top again. Sew once more close to the seam line to reinforce, since this area will get a lot of wear.
- Turn pajama pants right side out.
- The length of the elastic should be the same size as your child's waist + 1".Fold down the waist ¼" inch and press it.Fold it another 1 ¼ inch and sew the casing all the way around with a ¼" seam, also leaving a 2" gap to insert the elastic into later.
- Insert your elastic through the waistband using a safety pin to help guide it. Feed the elastic all the way through and out the other side of the opening.
- Sew the ends of the elastic together. Stretch the waist, pulling the elastic back into the opening.Sew the gap in the waist closed.
- Fold the bottom hem up and press, then fold it up one more time and press. (This one is about ½"). Sew around on both legs. Flannel is so easy to work with. You don't need pins since it pretty much just sticks together.
Video
Notes
- Leave at least ½" for seam allowances on the sides.
- Add 3" on the top for the elastic casing.
- Add 1" for the bottom hem (can make it larger or smaller if you want).
- Be generous when cutting around the crotch area (where the back comes to a point) so that there is plenty of room to bend over and move around without stressing the seam. I usually go at least an inch away instead of ½" for the seam allowance in the crotch area.


DD says
I love how easy this is. Clear directions and pictures. I can't wait to try this! Ty!
Melanie says
I used your instructions to make pj pants for/with my 9 year old daughter. Very clear and easy to follow and the pants turned out great!!! Thank you for the post!
Brandy says
Melanie, this made my day! I'm so glad you found the tutorial helpful!
Fee says
Hey there, could you not just use an adult pj pants to cut around to give the extra allowances you might need for an adult. Lovely simple method. Simple is always the best! Thank you. Fee
Brandy says
You can try! Most adult pajamas that I have are made with 4 pieces instead of two (with seams on both sides of the pant leg). This method only uses two pattern pieces so it’s different. Let me know if you have success!
Fee says
Hey Brandy it did work quite well using adult pants as a template. I should have made a bigger allowance for my hips though as its a squeeze getting them over but comfortable once they are on. Thank you. Fee
Brandy says
Good to know! Thank you for updating me. Now I know what to tell others if they have the same question!
Becki says
Hi! This is question. Do you think this method would work well for the average 12-13 year old? Thank you!
Brandy says
Hi Becki! I’ve only ever made them for my younger children, but it might work if he/she doesn’t have hips! My 12 year old is a bean pole and I’m sure this method would still work for her.
Marlene Jonew says
I'm 74, looking to make pajama pants for myself. I have used this method in the past but could not recall the steps for putting them together. Thanks to you I will be doing this. I will adjust my pattern according to my size. It's not hard. Thanks. I'm using two old fitted sheets. Torn at the fitted area. Will make use of that fabric.
Thank you for this. Makes my life a little easier.
Brandy says
Hi Marlene! Thanks! I hope this works out for you!