Our Pop Tart haunted gingerbread houses are so fun for kids to make. Wait, Pop Tarts? YES. You'll never go back to graham cracker houses after you try our method! This post contains affiliate links.
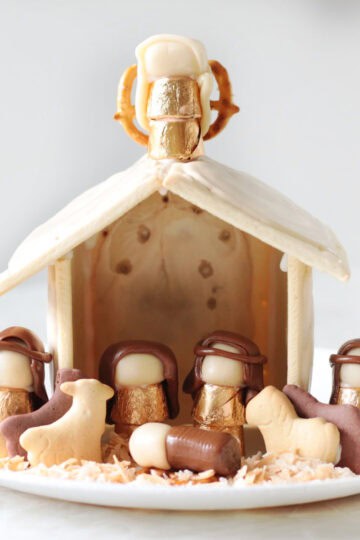
Check out our pop tart nativity scene or pop tart gingerbread house!
Looking for more fun projects this Halloween season? How about our vampire donuts or mummy rice krispies treats?
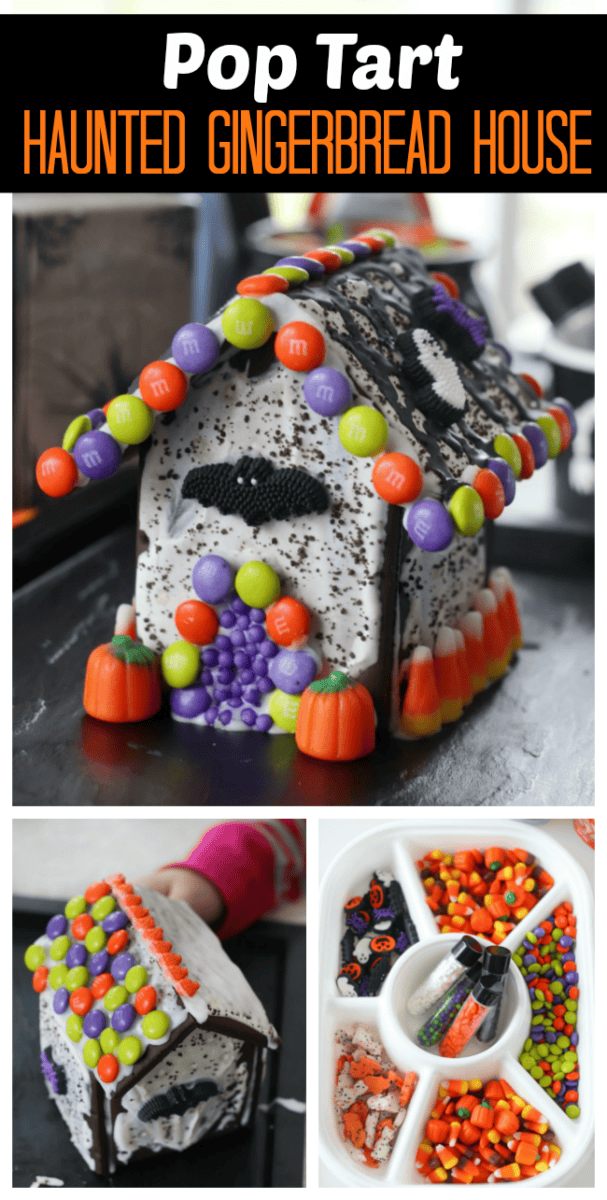
Watch our step by step video!
This post is 11 years old. Can you believe that? The little kiddos who first made these houses with me are now in high school! I went to the store to buy chocolate graham crackers to make houses again this year, with my little ones who weren't around when we first shared the post, and couldn't find any. I went to another store only to find the shelf empty, and another! NO CHOCOLATE GRAHAM CRACKERS. What gives? Is this another strange supply shortage that we are having right now?
My husband was with me at the last store and said that I should just use Pop Tarts. I wasn't sure if he was serious, but he was. I didn't think they'd work, but I bought two boxes anyway, and a box of regular graham crackers as a backup and headed home. I guess I could have made gingerbread from scratch, but I really wasn't up for making and chilling the dough or cutting out templates. I needed a faster way.
Guys, I hate being wrong. He was totally right. Pop Tarts make the best gingerbread houses! We're totally revisiting this for Christmas.
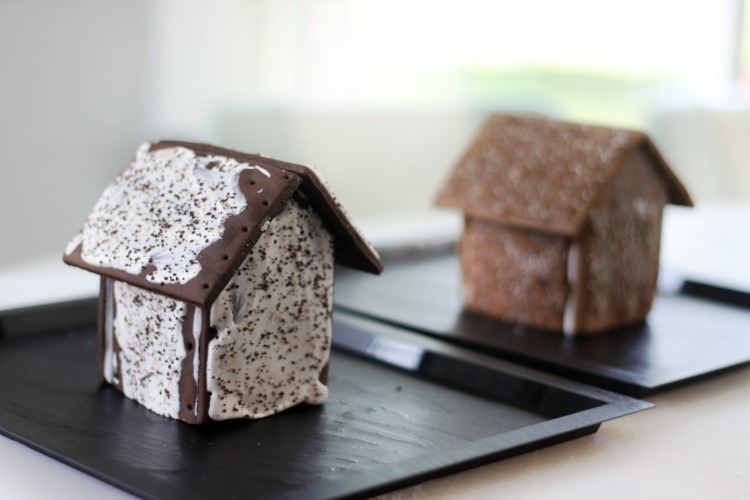
Pop Tarts Make Better Gingerbread Houses Than Graham Crackers
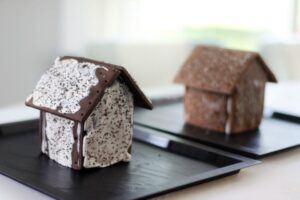
(Cookies and Cream Pop Tart House and a Chocolate Fudge Pop Tart House)
Why are Pop Tarts better?
- They are bigger than graham crackers so you get a bigger house.
- They are easier to cut than graham crackers to get the shape you want.
- They come in so many colors and flavors.
- They are sturdier than graham crackers and look more like a boxed gingerbread house kit.
- They are frosted so it gives them a fun texture and decorative look.
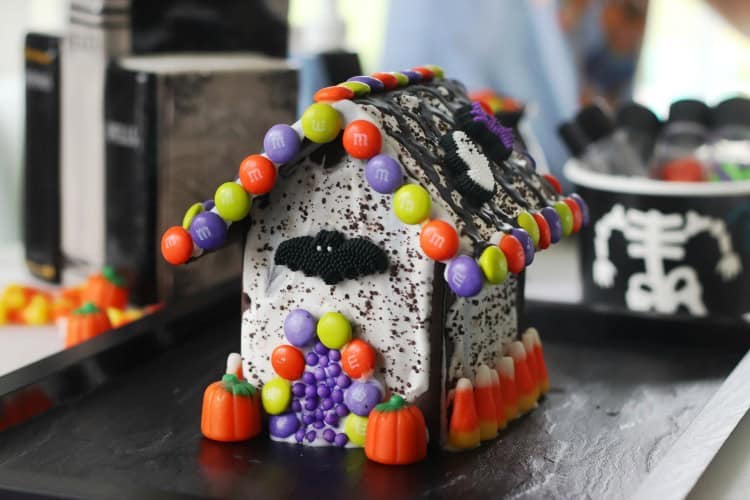
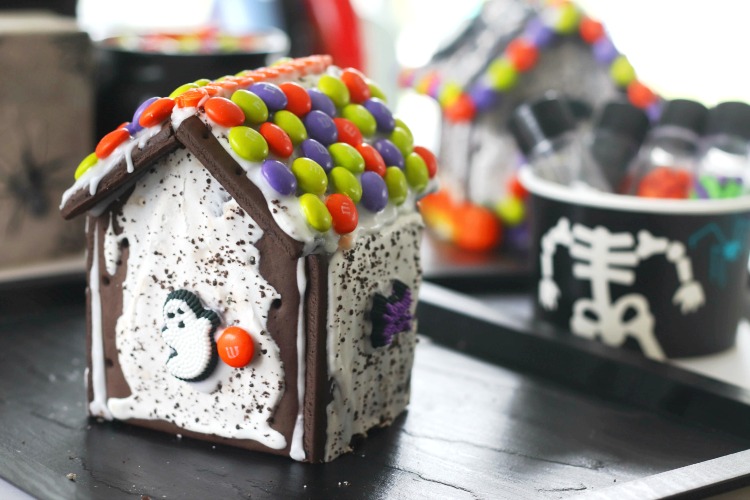
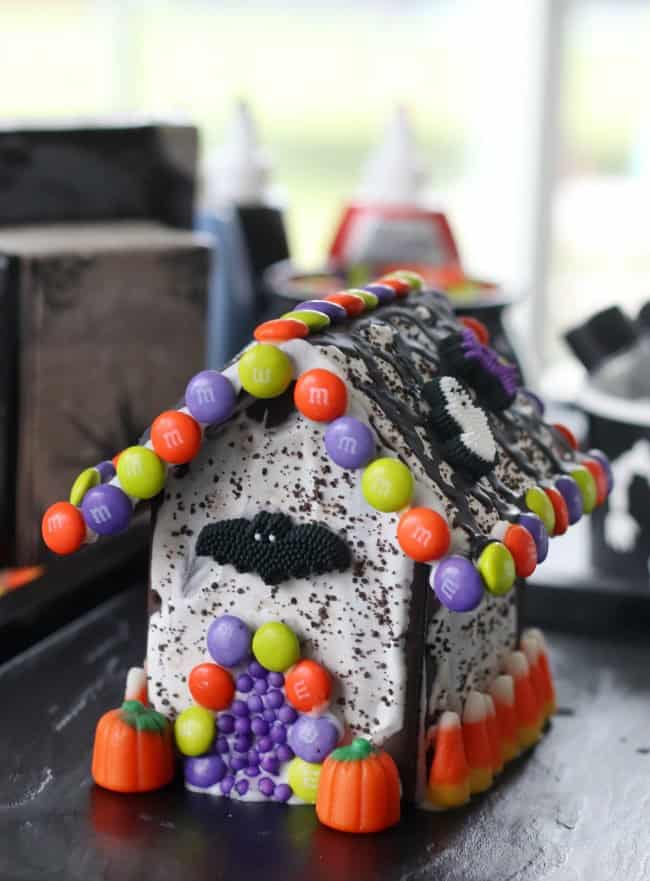
Pop Tart Haunted Gingerbread House
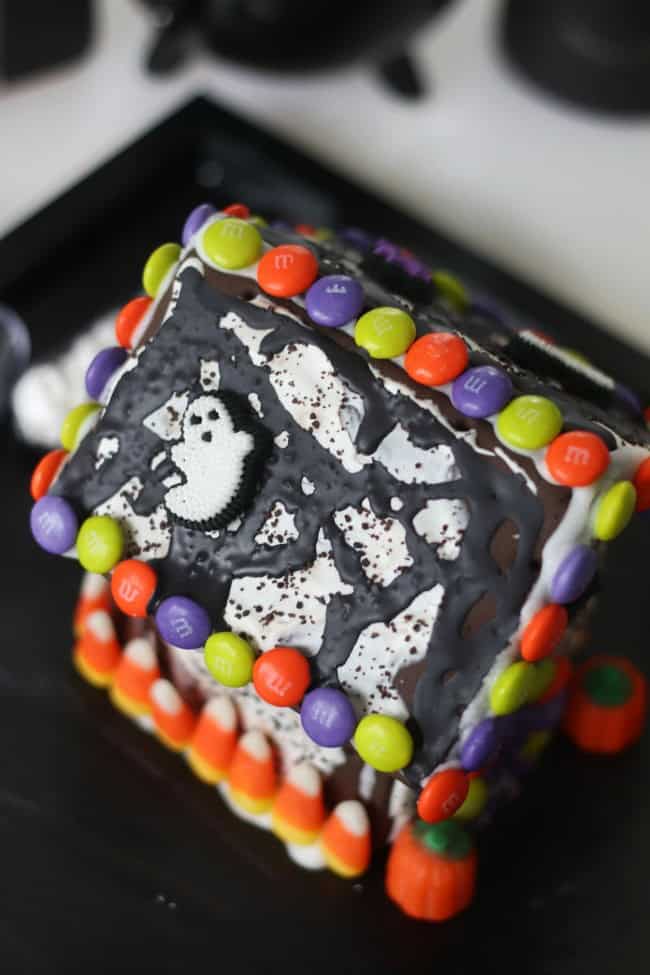
(I love how the black icing looks on the roof!)
We set up the table with everything we’d need. I assembled a little haunted mansion for each of the kids and let them dry for about 30 minutes before we began decorating them. For a sturdier house, assemble them the day before you plan on decorating them to allow the pop tarts to harden a bit.
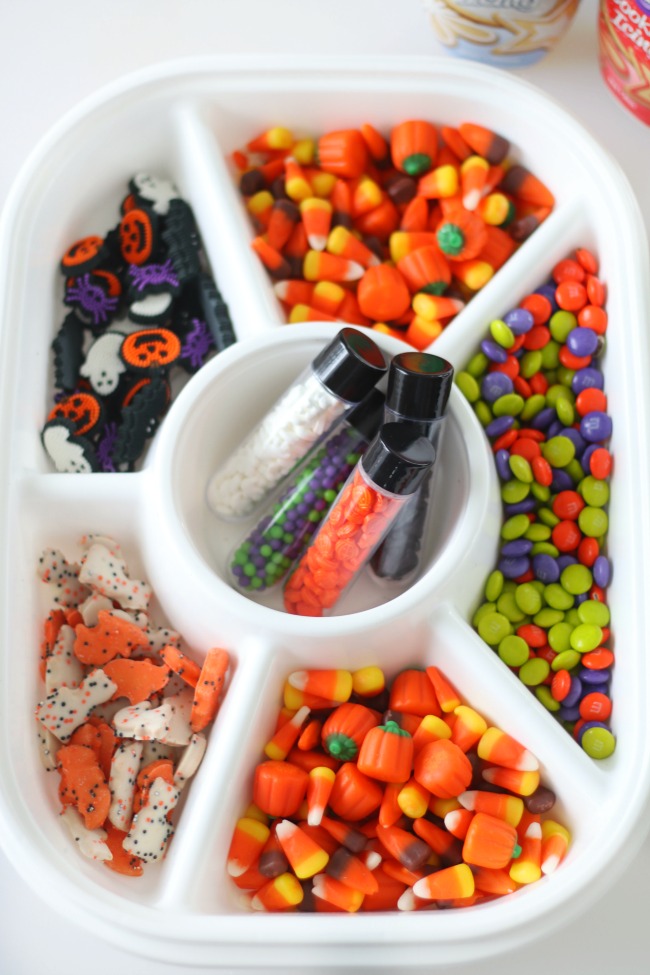
Target had Halloween themed Circus Animal Cookies this year. They were so tiny and perfect! I also picked up frosting characters, candy corn, sprinkles, and Halloween M&Ms. We used those same M&Ms for our deep dish Halloween cookies.
And can we talk about that divided tray that I used for our favorite candies? It comes with a lid and I use it ALL THE TIME for so many things! It's a great snack platter when friends come over. I fill it with crackers and fruit.
Tips for Making Icing
A basic powdered sugar and water mix is perfect for assembling gingerbread houses. I like using ½ cup of powdered sugar and about 2 ½ teaspoons of water for each house. The icing should be the thickness of craft glue (tacky glue). You can add a bit of powdered meringue to the icing which helps it dry faster and eliminates cracks in the icing, but I usually don't (just because I don't normally have it on hand). Want chocolate royal icing? Use cocoa powder and powdered sugar to make an icing that matches the chocolate pop tarts.
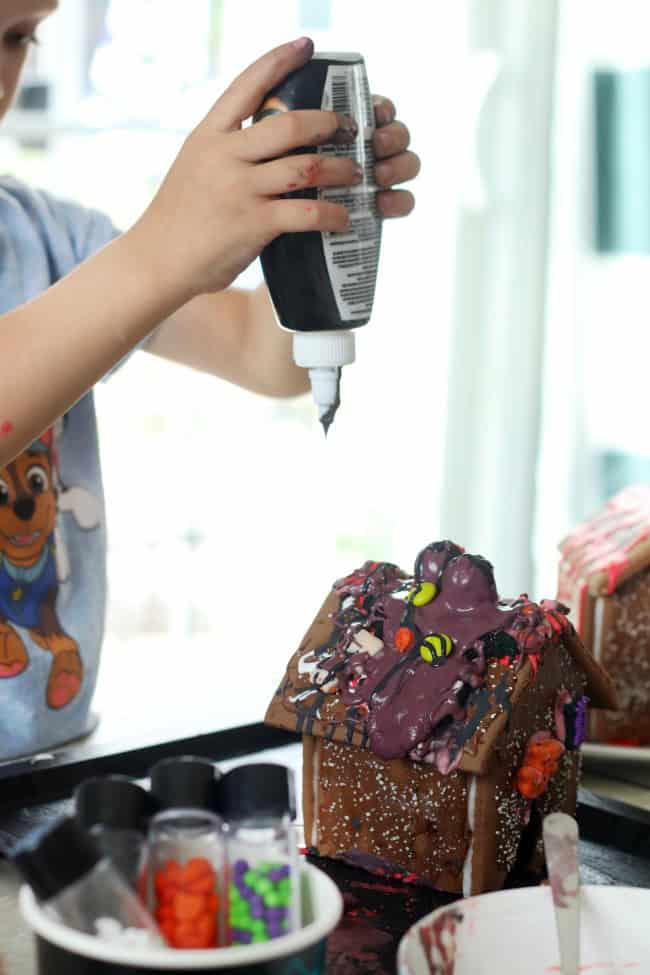
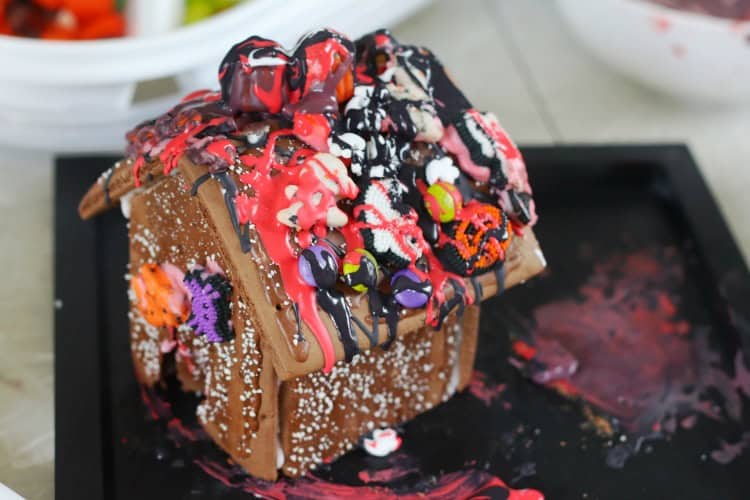
This recipe creates enough icing to assemble the house and add a few decorations....unless you are 3 years old and want to use ALL THE ICING. (See photos below.) I had a few tubes of cookie icing that I let him use to add "slime" and other goo to his house.
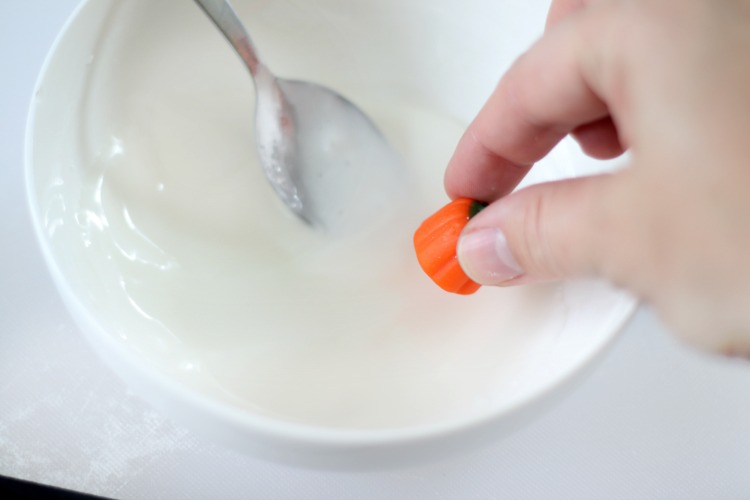
Spoon the icing into a piping bag (or ziploc bag and cut off the tip using a pair of scissors). You can also add some to a bowl and dip candy into it before adding it to the house.
Tips for Cutting Pop Tarts
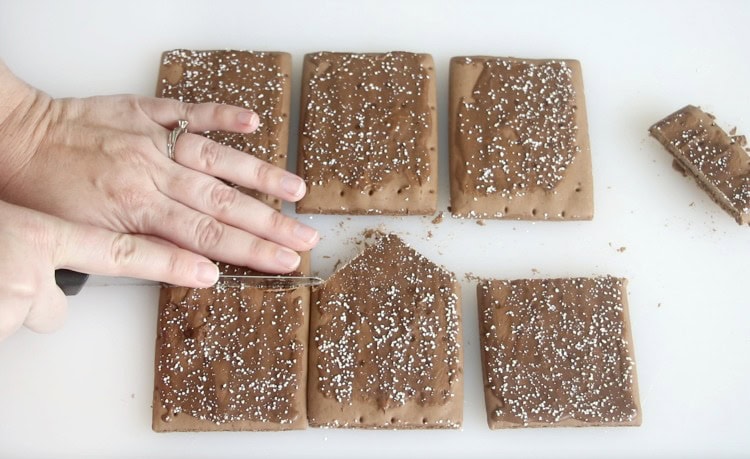
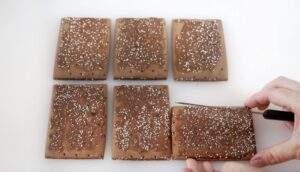
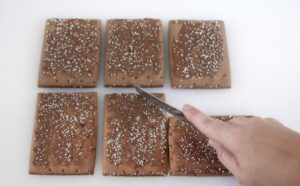
Cutting Pop Tarts is easier than cutting graham crackers. They don't crumble as easily but will break if you aren't careful. Simply use a serrated sharp knife, and saw through the Pop Tart instead of cutting or putting pressure straight down on the knife.
Tips for Decorating The Haunted Houses
The nice part about using Pop Tarts is that they have a layer of icing on them which makes the house look decorated already! All you have to do is add a few embellishments. To add heavier candies like M&Ms, add a bead of icing onto your house. Wait 2 minutes, then add press the candies into the icing. Waiting those extra 2 minutes will allow the icing to harden (just a little) and become tacky. The candy will hold onto the house much better this way.
Once the houses are dry they are nice and sturdy, but you may need to adjust the candies here and there until that happens.
We used bottles of cookie icing to add spider webs, slime, and other details to the houses. Cookie icing is runnier, and will not work for assembling your houses. It's just decorative.
These were so much fun to make and I don't see myself ever going back to gingerbread dough or graham crackers
How To Make a Pop Tart Haunted House
Pop Tart Haunted Gingerbread House
Equipment
- serrated knife
- Plastic baggie
Materials
- 6 pop tarts
- ½ cup powdered sugar
- 2-3 teaspoons water
- Halloween candy (pumpkins, ghosts, dots, M&Ms, etc.)
Instructions
- Place 6 pop tarts on the cutting board.
Roof
- You will be making cuts on 4 out of 6 of the pop tarts. The 2 that aren't cut are the roof pieces. You can set those 2 pop tarts to the side if you'd like.
Front and Back Walls
- Take 1 pop tart and place it on its side, right next to another pop tart.
- Cut on a diagonal from the corner of the pop tart that it on its side, to the center of the middle pop tart. Repeat on the other side.
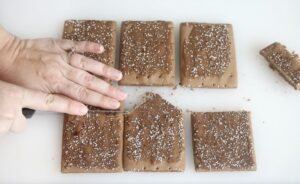
- You should now have a pop tart that looks like a house. Repeat this step so that you have 2 house shaped pop tarts.
Side Walls
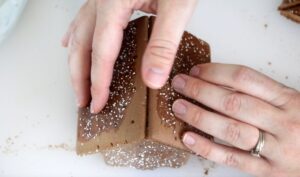
- Remember that pop tart that you turned on its side? Go ahead and stand it up again. Place it next to one of the house-shaped pop tarts, lining up the corners, and cut horizontally across (as shown in photo). Repeat.
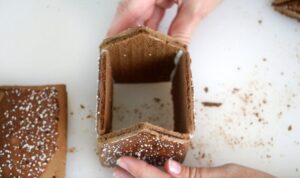
- You should now have two roof pieces (un-cut), 2 house shaped pieces, and 2 wall peces.Combine powdered sugar and water to make a royal icing glue. Add water ½ teaspoon at a time until desired consistency is achieved (2 ½ teaspoons works well for me). Spoon icing into a ziploc bag and cut the tip off. Glue the 4 walls together with icing and hold in place for a minute or so.
- Add the roof pieces and hold in place for another minute or so.
- Let houses stand at least 30 minutes before decorating. If making these with kids, assemble them the day before to allow pop tarts to harden (makes them sturdier) before decorating.
- Dip decorations into icing or pipe icing onto houses to decorate.
Video
Notes
- Icing should be the consistency of craft glue. You can tint it different colors using food coloring if you'd like.
- When cutting pop tarts, use a serrated knife and gently saw. Don't press down hard with the knife.
- To add heavier candies to the houses, like M&Ms, add a line of icing to the house and let the icing stand for a couple of minutes before placing candy on it. This will allow the icing to dry a little and become tacky.



Jeanne Insalaco says
These are so cute… great idea using pop tarts. Any idea of how long they last before they get moldy??
Brandy says
We had ours up for over a month and they never got soft or moldy.
MADELINE l NEWTON says
these are so cute and look so much easier ...thank you ...
stefanie says
Genius! Thanks for stepping it out. I'm going to try this.
Deanna says
When we made "gingerbread" houses in teh preK class I got milk cartons from teh cafeteria, washed and dried them, stapled shut and glue gunned graham crackers to them (trimming into triangles for the peaked roof). Then gluf gunned them to a paper plate.
Each kiddo wrote their name on teh paper plate and went to town decorating it.
The paper plate made it easy to transport home.