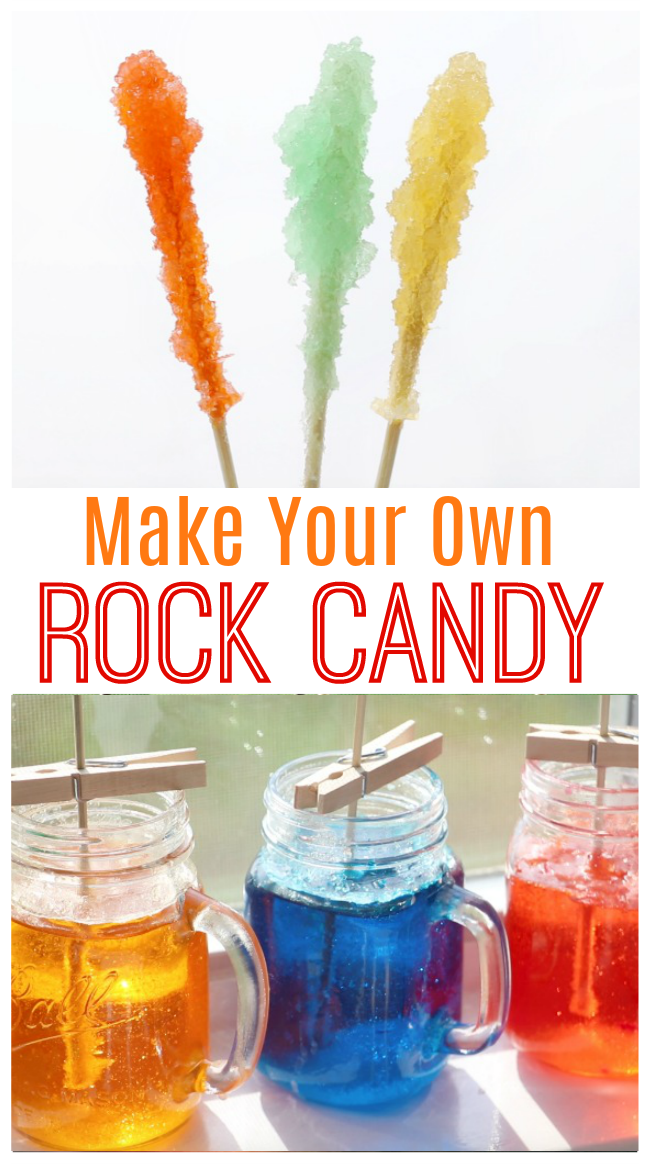
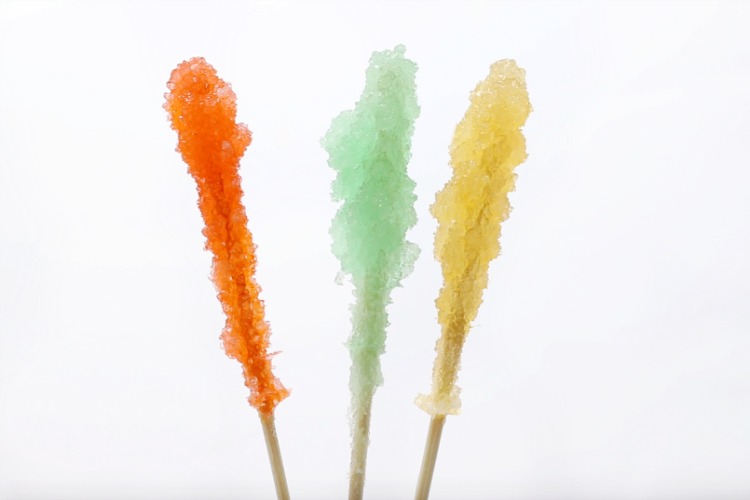
Make homemade rock candy with these tips and tricks and answers to frequently asked questions. A fun science experiment and treat for kids! Rock candy takes 5-7 days to grow, but the process is fun to watch!
Looking for more science experiments for kids? Check out our collection of easy science experiments using household ingredients!
Watch our step by step video!
Homemade Rock Candy is easy to make, it just takes patience.
There are so many variations using string, sticks, etc. It's a beautiful science project and sweet treat all in one. It does take time, and the end results can vary. There's a science to it and that's all part of the fun! Just know this... YOU NEED A WHOLE LOT OF SUGAR. A LOT. You can start with a 1:2 water/sugar ratio, but we've had better luck just shy of a 1:3 water sugar ratio. So if you have 4 cups of water, you'll need between about 10 cups of sugar to make the perfect sugar syrup.
Scroll to the bottom for some frequently asked questions for making rock candy.
How to Make Rock Candy on a Stick
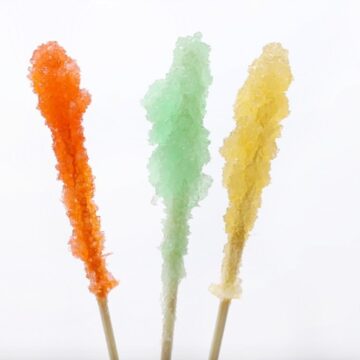
Homemade Rock Candy Recipe
Equipment
- funnel
- glass jars
- clothespins
- large pot
Ingredients
- Granulated sugar lots of sugar
- Water
- Food Coloring concentrated for brighter colors
- Wooden Candy Sticks or Bamboo Skewers
- flavoring optional, Lorann is my favorite brand
Instructions
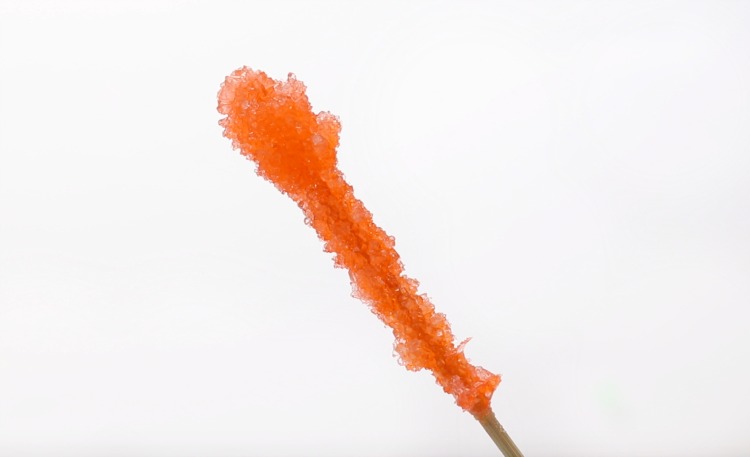
- Trim down your skewers to a reasonable size to fit in whatever jars or cups that you will be using. You'll also want to get rid of the point. Dip them in water, then roll in sugar.
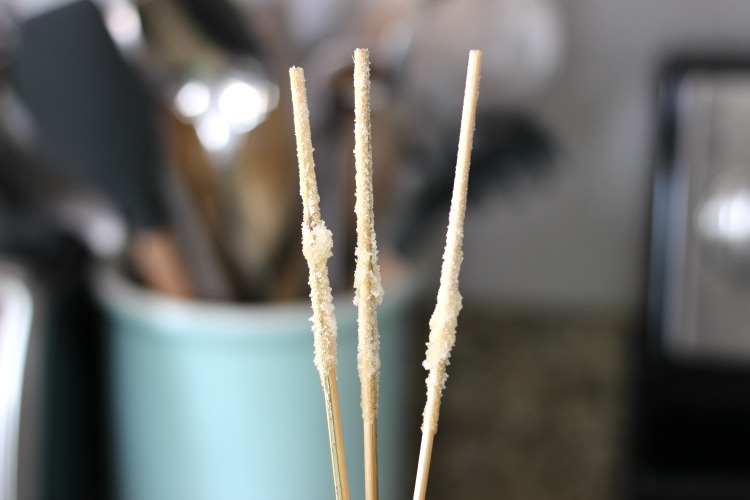
- Let the sticks dry completely and set aside. This will give the sugar a base (something to stick to when it starts to crystallize).
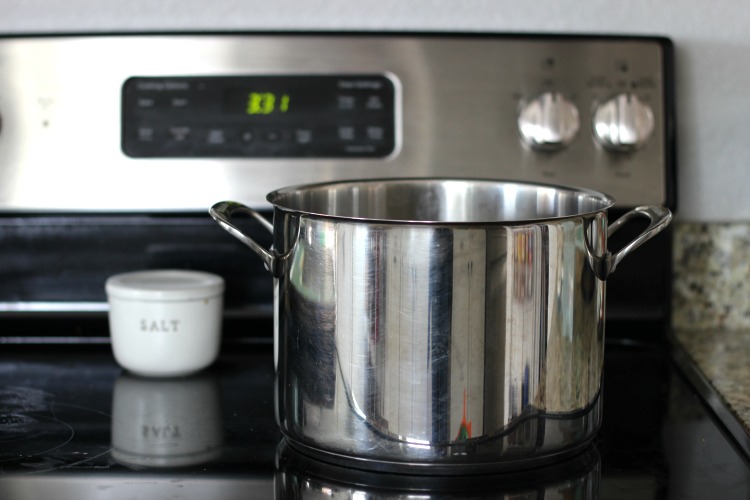
- Heat water on medium-high heat in. a saucepan or large pot (depending on how much syrup you want to make) When it starts to simmer/boil begin adding sugar until you reach a 1:2 to just shy of a 1:3 water-sugar ratio. The mixture will take longer to dissolve the more sugar you add (totally normal). Keep stirring with a wooden spoon until completely dissolved. Remove from heat. CAUTION: it is very HOT!
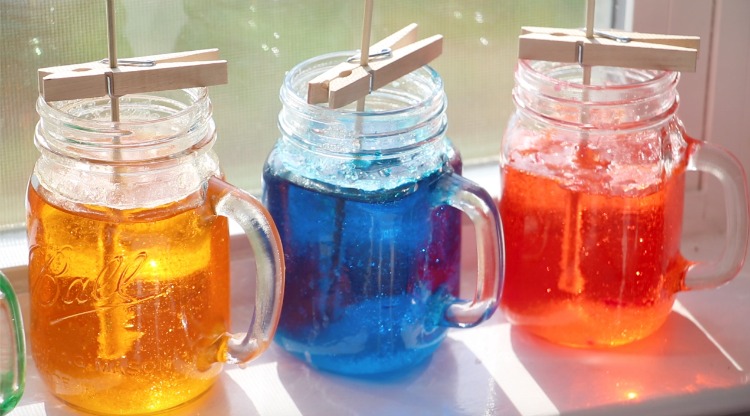
- Ladle the syrup into your jars using a funnel to catch spills. Add food coloring and flavorings to each jar, if you’d like wouldn't grape, cherry, orange or lemon flavoring be delicious?).
- Allow the liquid in the mason jars to cool down a bit. Warm or room temperature. Attach a clothespin to each skewer (the ones you dipped in sugar and let dry) and place in the jar.
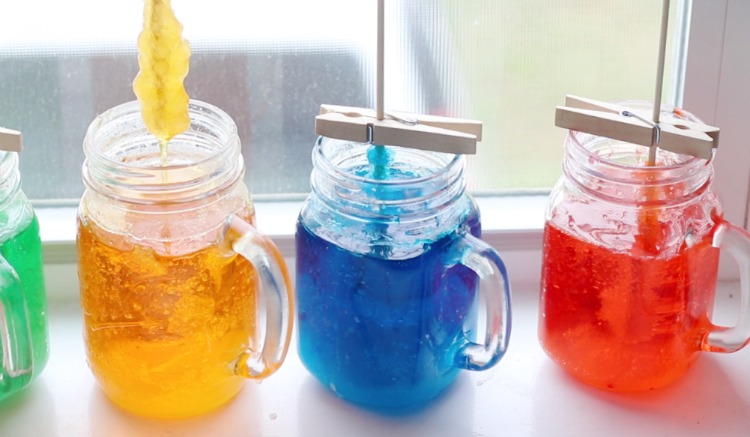
- Place your jars in a safe location and watch the crystals grow!
Notes
- You can create as much or as little syrup as you'd like as long as you keep the same sugar/water ratio. You are making a nice, sticky, sugary syrup.
- If after 24 hours you don't see any crystal growth, pour each jar of syrup back into the pan (separately) and add more sugar. ¼ c. or so and heat once more until it is a syrup consistency. Roll the sticky skewers in sugar and add once more to the jar after the syrup has cooled down to be warm (not hot) or room temperature.
- Make sure the skewer isn't touching the bottom or sides of jar/glass. They need room to grow. One skewer per jar works best for regular sized jars.
Nutrition
Frequently Asked Questions:
Can you make more than one stick of rock candy in each jar?
How do you drain the rock candy?
How long will rock candy last?
The shelf life for rock candy, if kept in a dry location, is 1 year.
Can I use a disposable foam cup for making rock candy?
Why didn't my rock candy grow crystals?
If crystals don't grow it is almost always due to lack of sugar.
If after 24 hours you don't see any crystal growth, pour the syrup back into the pan and add more sugar. ¼ c. or so and heat once more until it is a hot syrup consistency. Only pour and heat one jar at a time if you used different colors of syrup. Roll the sticky skewers in sugar and add once more to the jar after the syrup has cooled down.
Can you re-use rock candy syrup to make more crystals?
Should You Cover Your Rock Candy Jars?
Here's are a few more tips for making homemade rock candy:
- Make sure your glass/jars are clear and CLEAN.
- Make sure your water/ sugar ratio is AT LEAST 1:2- just shy of a 1:3. You want a thick, saturated sugar syrup mixture.
- Place in a WARM, SUNNY location if you’d like to grow crystals quicker. They will be smaller crystals. If you want larger crystals, place it in a place away from direct sunlight. Our crystals are small because we grow ours on a windowsill. We like seeing the light shine through the glass and watching the crystals grow.
Eryn says
After going back and rereading through the process and materials, I wonder if we shouldn't have used the sticks we did. It looks like you guys used wood instead of the candy sticks (like the type you would use for cake pops). I wonder if that makes any difference. Maybe if we don't see any growth after three days we will start over using kabob skewers in hopes it will work better.
Eryn says
Just curious but....my daughter and I are using this as her science project and after one day the glasses looked a little odd. We did three glasses and the surface all have the crystals on top but none on the actual candy sticks. Is that normal? Are we doing this right? We made sure to saturate and roll them in sugar but the sugar base has come off in the water. Please help!
Brandy says
Ours did that too! I don't think we noticed crystals until growing until day 3 or so. By day 7 we almost had to chip the top layer a bit to pull the sticks out. We've made this and had it fail too. If by day 3 (4 at the latest) you don't see any growth, go ahead and heat the syrup up and try again. The fact that your syrup is hardening a bit is a good sign that you used enough sugar. I know you can make it with string too instead of wooden skewers. I'm not sure about the lollipop sticks. Good luck! 🙂
Julie W says
We put our skewers through unbleached coffee filters to keep the dust and pet hair out of our jars but allow for evaporation. It seemed to work well. Also, when we made this during a high humidity period it was a complete failure (but still fun.)
Lindsay McClanahan Jackson says
We used to do this when I was a kid, but instead of skewers we used string.
Brandy says
My son is making some for cubscouts right now with string! Works the same! 🙂
alyssa says
smart idea and im sure it tastes good imma do it in class for an expirement!!!!!!!!!!!!! XP
alyssa says
😛
DxRj says
If you are having problems making the rock candy, here is a tip that might help.
Unlike the article says, warm, humid areas do not help the crystals form at all! Heat evaporates the water, yes, driving the sugar to crash out of the solution (LeChatelier's principle). This cannot happen in humid environments. The sugar solution in a warm environment won't always come out stuck to the stick like you want it to though. In order to make the sugar crash out into the nice cubic pattern stuck to the stick, you want to get the stick in the syrup solution while it is still warm/hot, then immediately store in a cool, dry place. A warm place will cause the sugar to not want to join the crystalline structure on the stick and might not even cause any sugar to come out of solution (warm liquids can hold more solute).
Background: Master's degree in Organic Chemistry, where crashing compounds out of solutions is common practice.
mamajamie says
We tried several years ago to make rock candy without success. We'll give it a try with your recipe.
mamajamie says
We tried several years ago to make rock candy without success. We'll give it a try with your recipe.
Kierst says
oh my goodness. It's like you were reading my mind! I came to your blog today, specifically looking for this exact post! I'm totally weirded out.
Brandy says
That's funny! Stacy and I do things like this all the time. It must be the Whitaker genes 🙂
ba78370e-ebee-11e2-87d5-000bcdcb471e says
adult candy
Wilma Flintstone says
How would you go about adding flavor please?
Brandy says
Wilma,
I would just add a few drops of flavoring to each jar/glass before putting in your stick.
jamix3fiasco says
Just a thought, it seems like the darker colors did better. Maybe attracted more sunlight. Yellow and pink seem to be smallest and are also the most translucent.
Brandy says
That is interesting and did seem to be the case with ours!
Escort says
Hey!! Thanks for sharing with us…it was really nice…London Czech escort Erica provides escort services in Knightsbridge. Click Here
Robert Braun says
This comment has been removed by the author.
Robert Braun says
This comment has been removed by the author.
Robert Braun says
I love this activity. I have 3 daughters and we made this one of the nights events during a 12 girl sleep over. I used the smaller mason jars and labeled each jar with the girls names. I did a test 2 weeks before and found that you really need to have a very good sugar base started on each stick to get the best results. We used the solid food coloring and hard candy flavoring. To help with keeping the bugs away I used some of those outdoor pop up nets you use for outdoor dinners over your plates. The girls loved that they got to see a progress report every evening on their Instagrams. Day seven they were all over after school to collect their rock candy. Thank you
Robert Braun says
3 drops of flavoring is perfect for each jar.
Brandy says
Wonderful! Thank you so much for sharing your experience with making rock candy! And THANK YOU for giving us the right ratio for flavorings. I've had several readers ask about flavoring the candy, but I've only made it with straight sugar for my kids.
Robert Braun says
Your welcome. 🙂