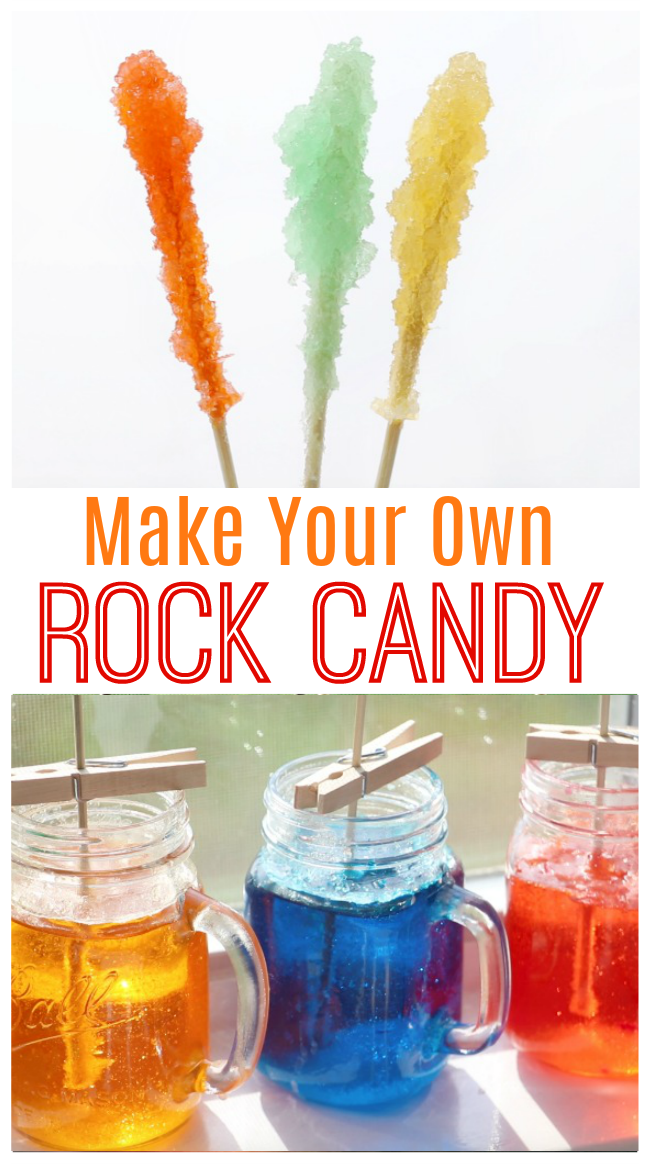
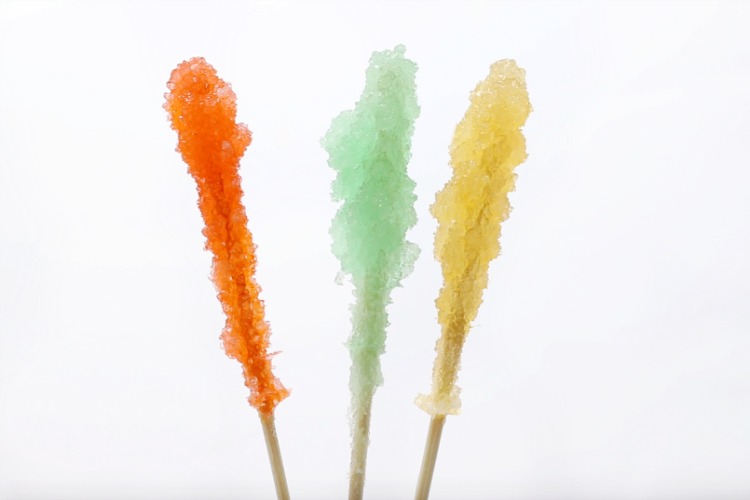
Make homemade rock candy with these tips and tricks and answers to frequently asked questions. A fun science experiment and treat for kids! Rock candy takes 5-7 days to grow, but the process is fun to watch!
Looking for more science experiments for kids? Check out our collection of easy science experiments using household ingredients!
Watch our step by step video!
Homemade Rock Candy is easy to make, it just takes patience.
There are so many variations using string, sticks, etc. It's a beautiful science project and sweet treat all in one. It does take time, and the end results can vary. There's a science to it and that's all part of the fun! Just know this... YOU NEED A WHOLE LOT OF SUGAR. A LOT. You can start with a 1:2 water/sugar ratio, but we've had better luck just shy of a 1:3 water sugar ratio. So if you have 4 cups of water, you'll need between about 10 cups of sugar to make the perfect sugar syrup.
Scroll to the bottom for some frequently asked questions for making rock candy.
How to Make Rock Candy on a Stick
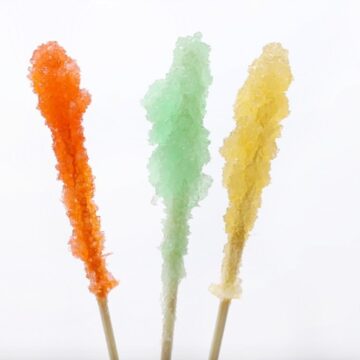
Homemade Rock Candy Recipe
Equipment
- funnel
- glass jars
- clothespins
- large pot
Ingredients
- Granulated sugar lots of sugar
- Water
- Food Coloring concentrated for brighter colors
- Wooden Candy Sticks or Bamboo Skewers
- flavoring optional, Lorann is my favorite brand
Instructions
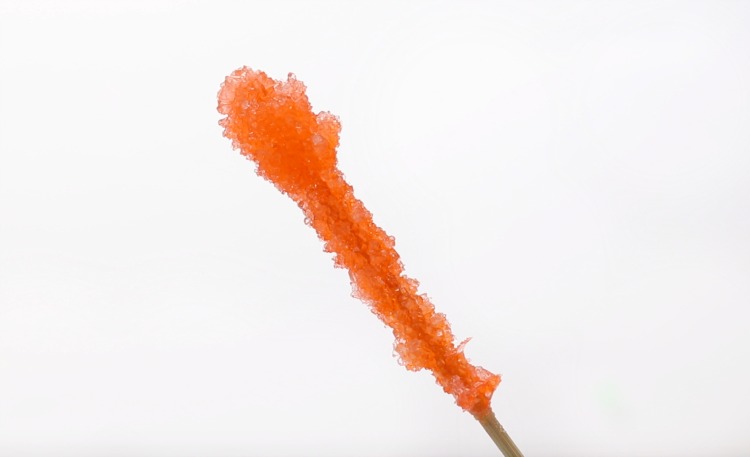
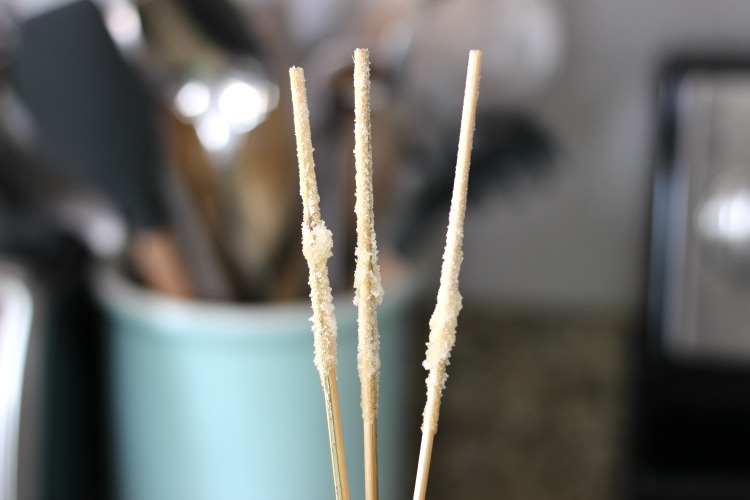
- Trim down your skewers to a reasonable size to fit in whatever jars or cups that you will be using. You'll also want to get rid of the point. Dip them in water, then roll in sugar.

- Let the sticks dry completely and set aside. This will give the sugar a base (something to stick to when it starts to crystallize).
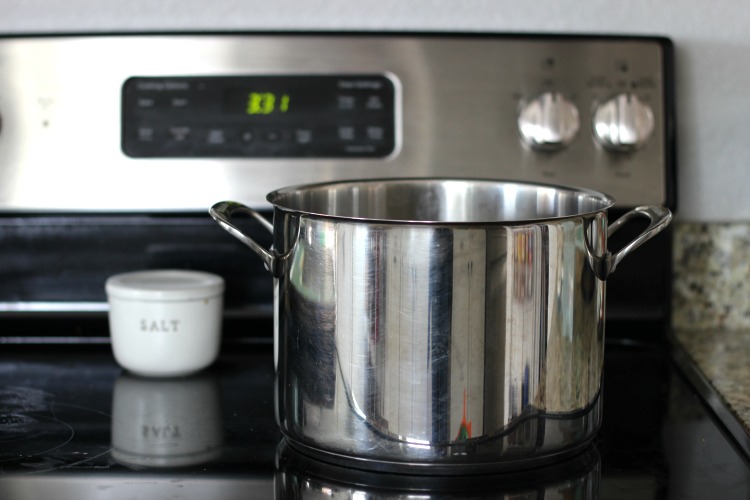
- Heat water on medium-high heat in. a saucepan or large pot (depending on how much syrup you want to make) When it starts to simmer/boil begin adding sugar until you reach a 1:2 to just shy of a 1:3 water-sugar ratio. The mixture will take longer to dissolve the more sugar you add (totally normal). Keep stirring with a wooden spoon until completely dissolved. Remove from heat. CAUTION: it is very HOT!
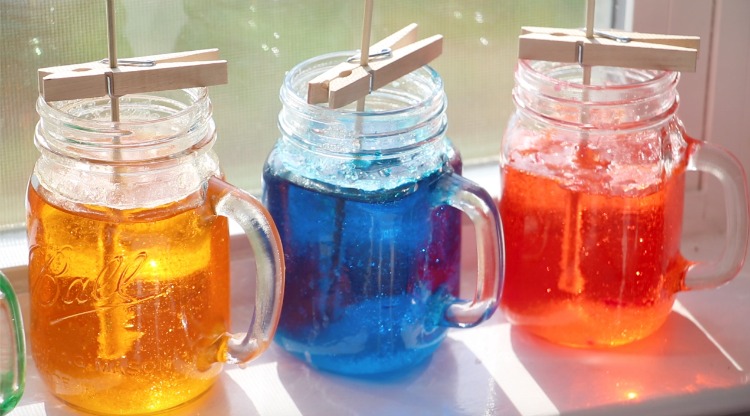
- Ladle the syrup into your jars using a funnel to catch spills. Add food coloring and flavorings to each jar, if you’d like wouldn't grape, cherry, orange or lemon flavoring be delicious?).
- Allow the liquid in the mason jars to cool down a bit. Warm or room temperature. Attach a clothespin to each skewer (the ones you dipped in sugar and let dry) and place in the jar.

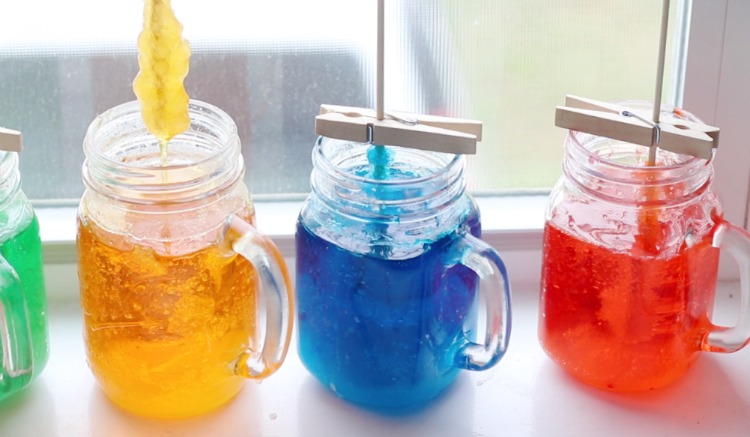
- Place your jars in a safe location and watch the crystals grow!
Notes
- You can create as much or as little syrup as you'd like as long as you keep the same sugar/water ratio. You are making a nice, sticky, sugary syrup.
- If after 24 hours you don't see any crystal growth, pour each jar of syrup back into the pan (separately) and add more sugar. ¼ c. or so and heat once more until it is a syrup consistency. Roll the sticky skewers in sugar and add once more to the jar after the syrup has cooled down to be warm (not hot) or room temperature.
- Make sure the skewer isn't touching the bottom or sides of jar/glass. They need room to grow. One skewer per jar works best for regular sized jars.
Nutrition
Frequently Asked Questions:
Can you make more than one stick of rock candy in each jar?
How do you drain the rock candy?
How long will rock candy last?
The shelf life for rock candy, if kept in a dry location, is 1 year.
Can I use a disposable foam cup for making rock candy?
Why didn't my rock candy grow crystals?
If crystals don't grow it is almost always due to lack of sugar.
If after 24 hours you don't see any crystal growth, pour the syrup back into the pan and add more sugar. ¼ c. or so and heat once more until it is a hot syrup consistency. Only pour and heat one jar at a time if you used different colors of syrup. Roll the sticky skewers in sugar and add once more to the jar after the syrup has cooled down.
Can you re-use rock candy syrup to make more crystals?
Should You Cover Your Rock Candy Jars?
Here's are a few more tips for making homemade rock candy:
- Make sure your glass/jars are clear and CLEAN.
- Make sure your water/ sugar ratio is AT LEAST 1:2- just shy of a 1:3. You want a thick, saturated sugar syrup mixture.
- Place in a WARM, SUNNY location if you’d like to grow crystals quicker. They will be smaller crystals. If you want larger crystals, place it in a place away from direct sunlight. Our crystals are small because we grow ours on a windowsill. We like seeing the light shine through the glass and watching the crystals grow.
somu sekhar says
i love candies http://www.tollywoodpolitics.com
Bug's Mom says
What an awesome experiment/recipe to try with my kids! I'm curious... Has anyone tried flavoring their syrup with any sort of extracts? I would love to try it, just not sure how much to use. I guess that's why it's an "experiment"! 🙂
Brandy says
So many people have mentioned flavoring it, but haven't reported back to say if they've tried it or not! I don't see why it wouldn't work! Maybe try different amounts in each glass! Have a great week!
kprevite says
We used food flavoring that we bought from getsuckereddotcom and it tastes amazing! Our personal favorite was Blue Raspberry 😀
Brandy says
Great tip, thanks!!
PK Nugent says
What if I used way too much sugar and after a day it looks almost solid?
Brandy says
Hmm...I'm not sure. If after another day or two you don't see any growth, you might try pouring it back in a pan, add a bit if of water to dilute it and reheat it to make the syrup again. I'd just hate to see it go to waste! I would still wait at least a day though.
Orah says
I made these, they seem to have turned out fine- except for the fact they are completely stuck to the bottom on the jars! I atacked a couple with a knife and ate a small peice. Is there any way to get the lumps out without melting the whole lot?
Brandy says
Oh no! The sticks may have been a bit too close to the bottom of the jar, but it sounds like they grew a decent size for you! I'm not sure how to break them out without breaking the candy. Ours didn't hit the bottom. Crystals grew along the bottom, but they weren't attached to the wooden stick. I'm so sorry!
Orah says
It's not too terrible, two candies came out perfectly, another one fell apart and the last 2 are stuck. I'll try holding them over steaming water and hoping they come out all right. The broken pieces I managed to chip out are so pretty and sparkly, I love looking at them in the light before eating them haha
Olgun sohbet Odaları says
This comment has been removed by a blog administrator.
Br St says
Wow! A classic boiled sweets recipe!They look fabulous, good job!
Brandy says
Hi Aryn! I honestly have no clue since I have only made it in the summmer/early fall. Sorry I couldn't be of much help :/
snacks and pickles online says
Totally Awesome
Aryn says
I have a question! I would like to make these for my daughter's winter wonderland birthday party, but I'm worried it might be too cold now. We have only north-facing windows in our apartment with no direct sunlight. Would there be enough light that way, or would it be too cold for the crystals to grow in our window sill? We're in MN and temps have been between 20-40 most days.
Julie Baugh says
Brilliant idea - hoping to give this one a go this holiday.
Unknown says
I wonder how well it would work to use koolaid powder as flavoring& coloring
Our Pinteresting Family says
Love this! I remember doing this when I was a child. 🙂 Megan
Our Pinteresting Family says
Love this! I remember doing this when I was a child. 🙂 Megan
andrea says
Hello there, thanks for the post. Our family is doing this for our summer bucket list!
Just an observation: folks don't hold yourself to any particular timeline. We didn't start to see crystals forming until about day 7. Here we are at day 14 and we pulled one out and it is similar to the smaller one pictured. We have decided to wait another week to see what more we can get.
I knew we had something within the first three days though, because crystals started forming in the top water line and at the bottom of the glass. If you don't have these crystals within the first 4-5 days, you probably need more sugar.
I covered the tops loosely with cupcake liners. I just slipped them over the top through a small hole in the bottom. I too was worried about critters. It also stopped prying eyes from trying to touch.
The LemonDrop Tree says
I'm selling the ball end sticks that are used to make rock candy. They are SO HARD TO FIND!!!! Anyone needs them can contact me at [email protected]