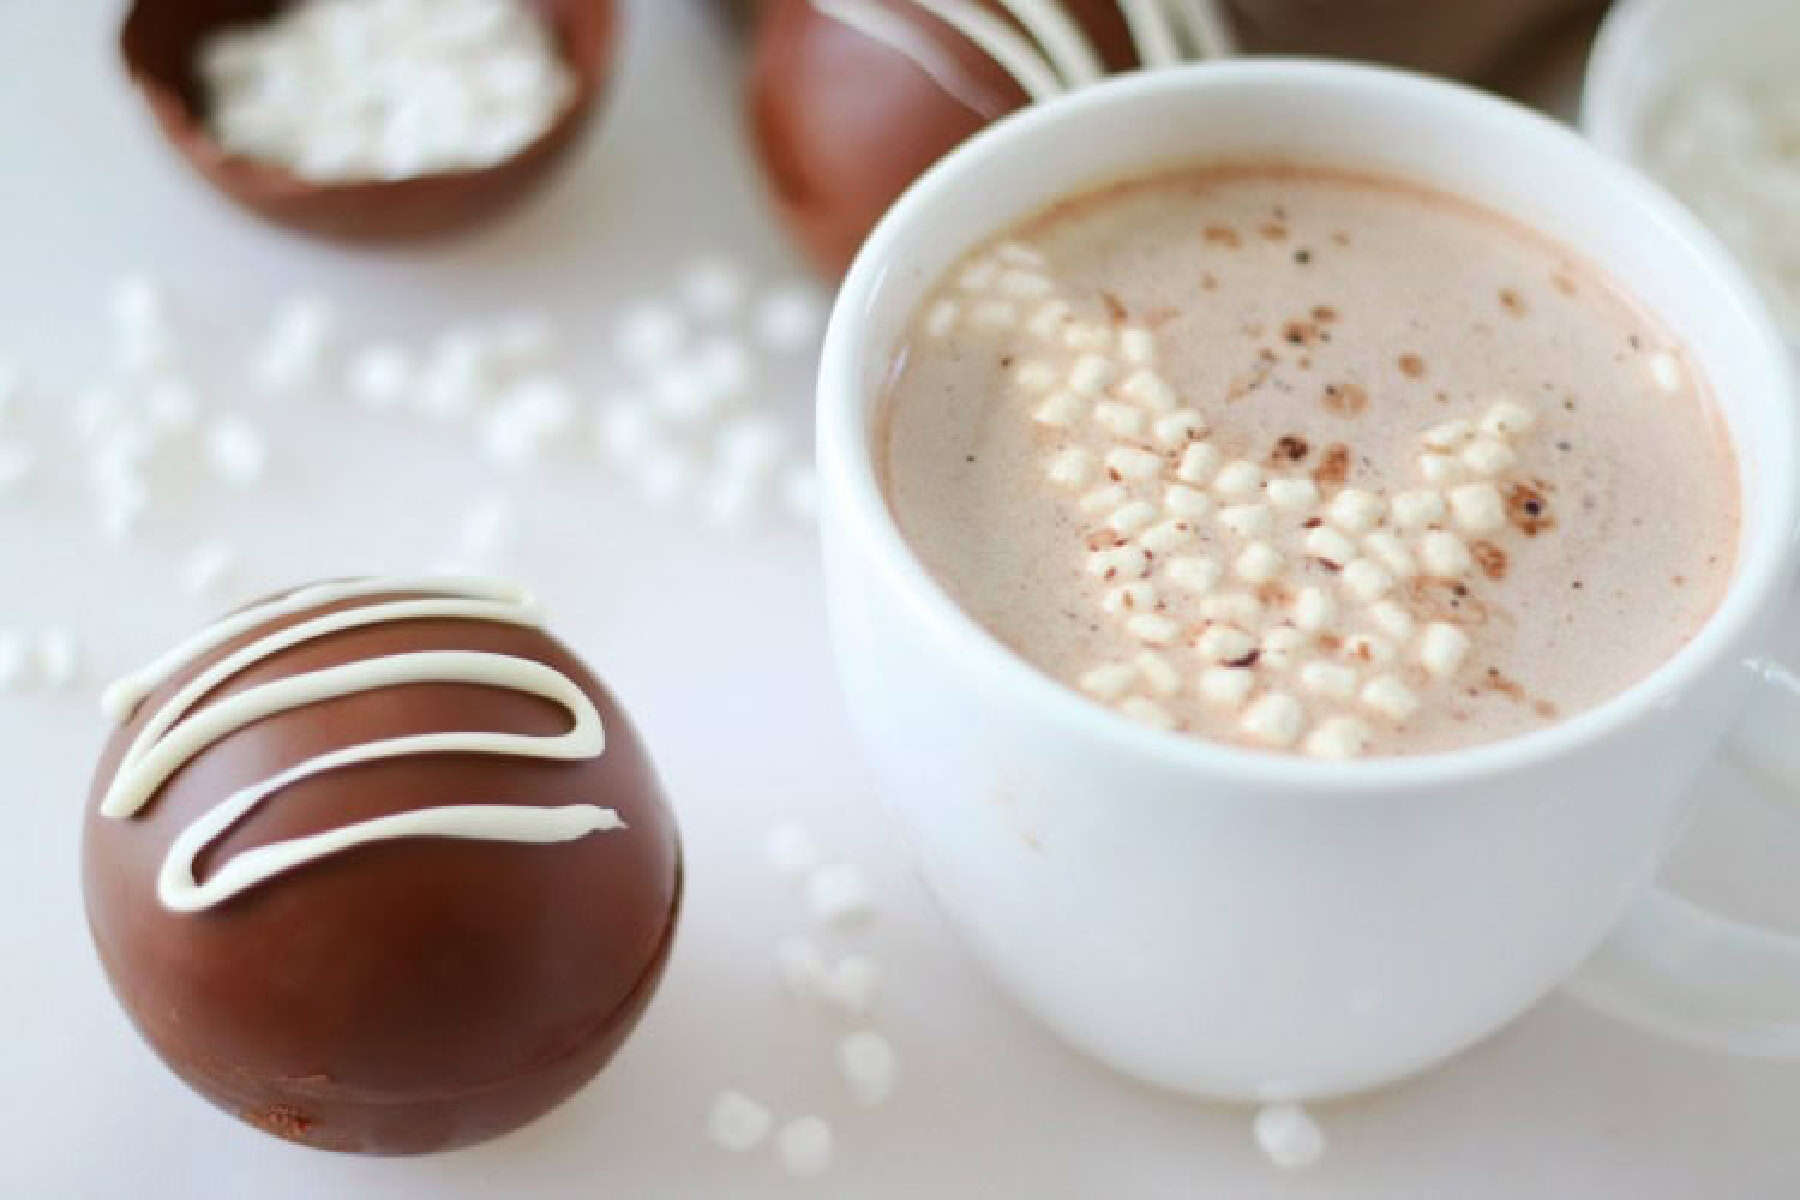
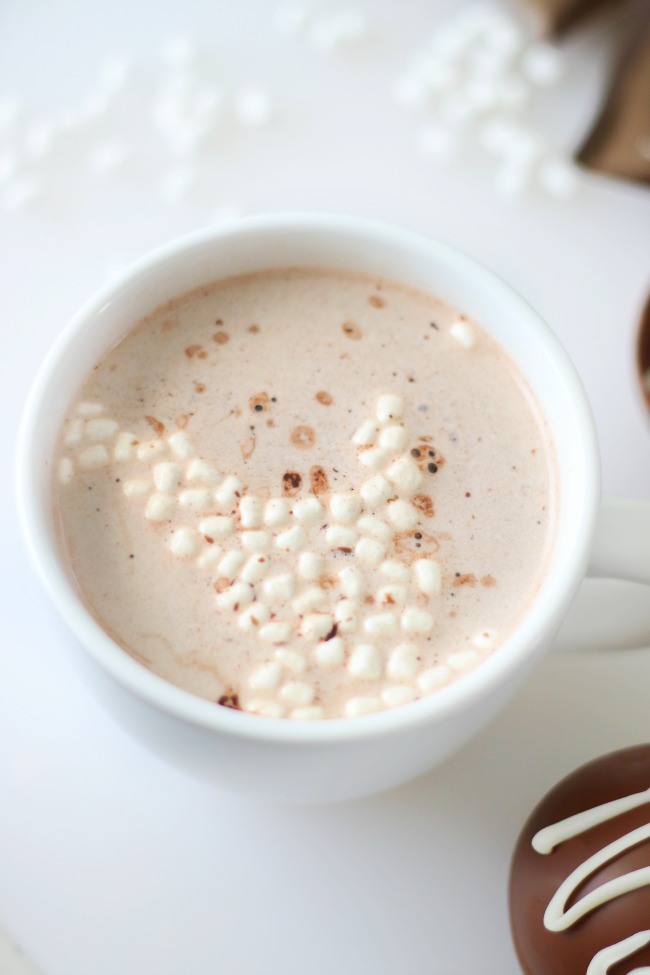
Hot chocolate bombs are a fun treat to make and even more fun to stir and watch disappear in a cup of hot milk! The most decadent cup of hot chocolate you'll ever drink!
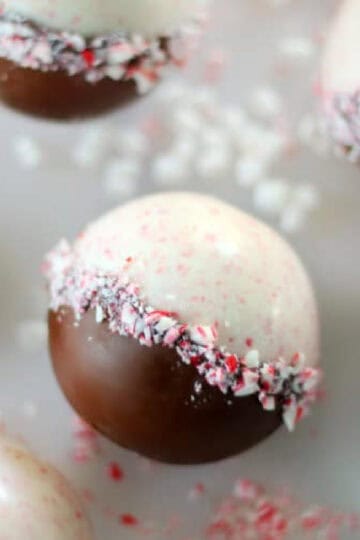
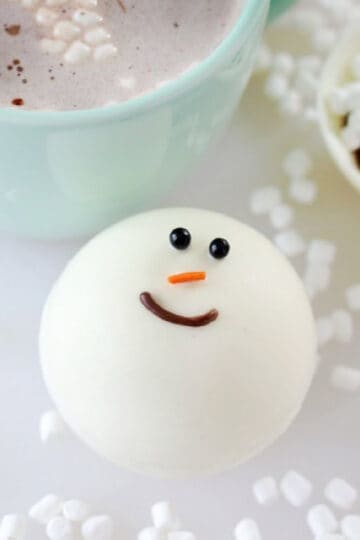
If you like these, you'll love our SNOWMAN hot chocolate bombs and our peppermint bark hot chocolate bombs!
I recently saw an ad from a local company for hot cocoa bombs. They linked a video, and I immediately went to Amazon and bought a silicone chocolate mold. It HAD TO BE DONE. My kids agreed. The video of the hot milk being poured over the hot cocoa bomb was so mesmerizing! It was also an excuse to buy a big bag of freeze-dried mini marshmallows. We'll talk about that in a minute.
Why I Like This Recipe
- Rich and chocolatey. Hot cocoa is delicious on it's own, but the chocolate shell from the hot cocoa bombs takes it up a notch by delivering a boost of chocolate flavor to each cup!
- Fun to melt. Hot cocoa bombs are just plain fun. Fun to make and fun to melt. Simply pour hot milk over each bomb and it will melt and pop open. Kids especially love hot chocolate bombs!
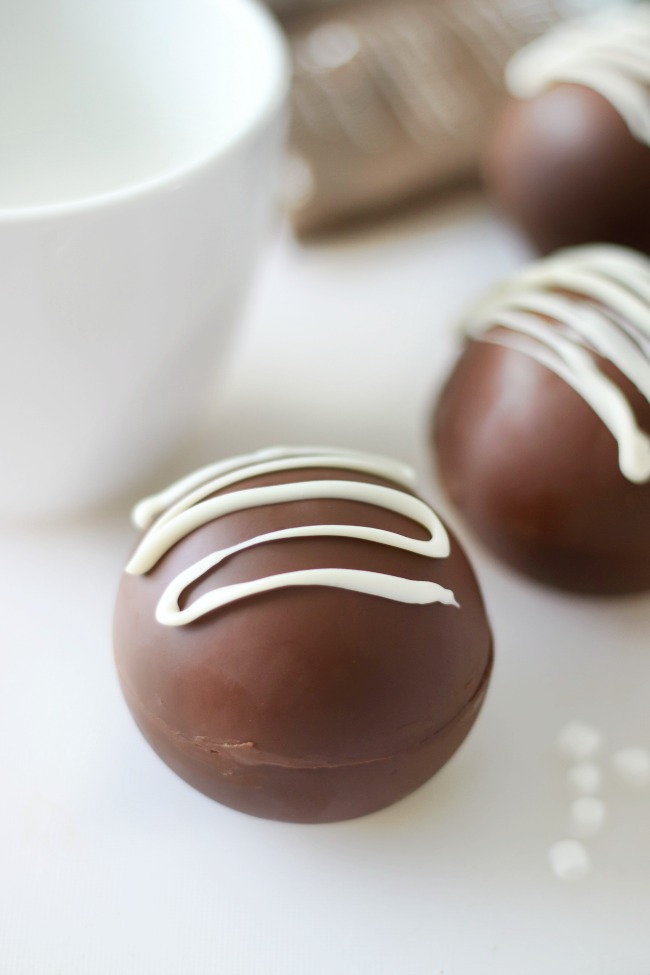
- Perfect size: Our chocolate bombs are about 2.5" in diameter and work great in a wide mug. Mine are from Target.
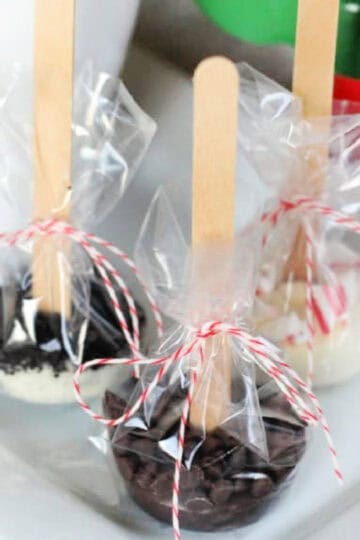
- Easy gift idea. I've gifted hot chocolate bombs many times. They store beautifully in a cup wrapped in cellophane. You can also package a few up in a bag and gift with a half gallon of milk and two mugs!
What Others Are Saying
Tried this recipe and it came out perfectly!!! Thank you for making this so easy to understand!!---Debbie
My daughter and I made these last night. They are our trial ones before making for friends and family. We are following your tips today as a lot of what you said completely made sense as to why we had some holes, fingerprints, etc. We appreciate your very specific and helpful instructions!---Crystal
Jump to:
Tips and Tricks
- Melt a little extra chocolate and make a few extra chocolate cups your first time making these. That way, if you have a couple that don't turn out, you'll have extras to replace them with. Consider your first time a practice run. That's what we did. We had no expectations, and actually ended up with 4 out of 6 bombs that turned out great! The others were delicious (we didn't let them go to waste), but they had holes in the seams because we handled them when they weren't quite set up all the way and it caused them to be misshaped.
- DO NOT overheat the chocolate chips. Chocolate can be melted in a double boiler or in the microwave.
- The key to success is making sure the chocolate has time to really set up in the refrigerator. If the chocolate is soft (AT ALL) it will stretch and break.
- Use any extra melted chocolate to fill in weak spots. Before taking the chocolate cups out of the mold, examine them carefully to see if there are any thin areas that could use a little more chocolate. Add more chocolate, refrigerate a bit longer, and continue on your way.
- How to prevent melting when touching the hot cocoa bombs: Like any other chocolate project, if you handle the chocolate too much, the heat from your hands will cause it to soften. If you find this to be the case while you are smoothing out edges and seams in the chocolate molds, just place the molds back in the refrigerator for 5 minutes or so.
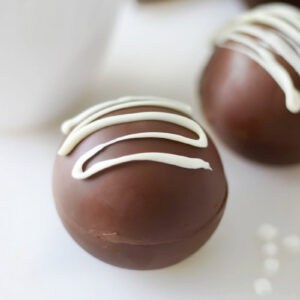
- You can use a hot spoon or knife to smooth out the center seam. If your seam doesn't match up perfectly, you can dip your finger in some of the extra melted chocolate and carefully run it along the seam. You can also pipe some chocolate over the seam (like we did for these ones) and allow it to set up. This will also seal the edges.
- Work quickly to avoid fingerprints on the chocolate balls. You can also combat this by wearing candy-making gloves. I haven't used the gloves, but I heard they work great.
Ingredients & Supplies
- Hot Chocolate Bomb Mold: This is the best one that I've found. It works perfectly!
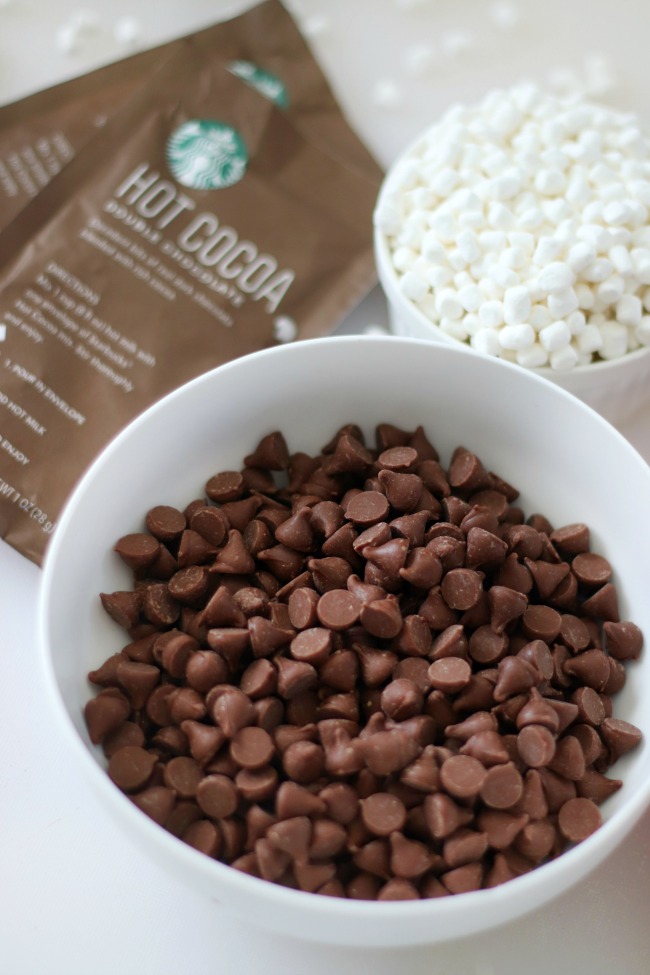
- Chocolate Chips: I used chocolate chips. Other types of chocolate that would work well are melting wafers (I like Ghirardelli), almond bark, or chopped chocolate bars (milk or dark chocolate).
- White Chocolate Chips: If you'd like to add a drizzle over each chocolate bomb you can melt a small amount of white chocolate chips.
- Hot Cocoa Mix: My favorite hot chocolate has always been from Starbucks. If you enjoy the creamy cup available at your local Starbucks location, you'll love this one! I make it with Starbucks hot chocolate powder mix. Rich flavor, creamy, and super chocolatey---even when made with skim milk.
- Mini Marshmallows: I've been wanting to add these freeze-dried mini marshmallows to our hot cocoa bar that we set up every holiday season, and this was a great time to order a bag. You can definitely use regular mini marshmallows (and we have), but these are just fun and really pop out of the hot chocolate bomb when the milk is poured over. They are basically tiny Lucky Charm marshmallows.
See the recipe card for full information on ingredients and quantities.
How To Make Hot Chocolate Bombs
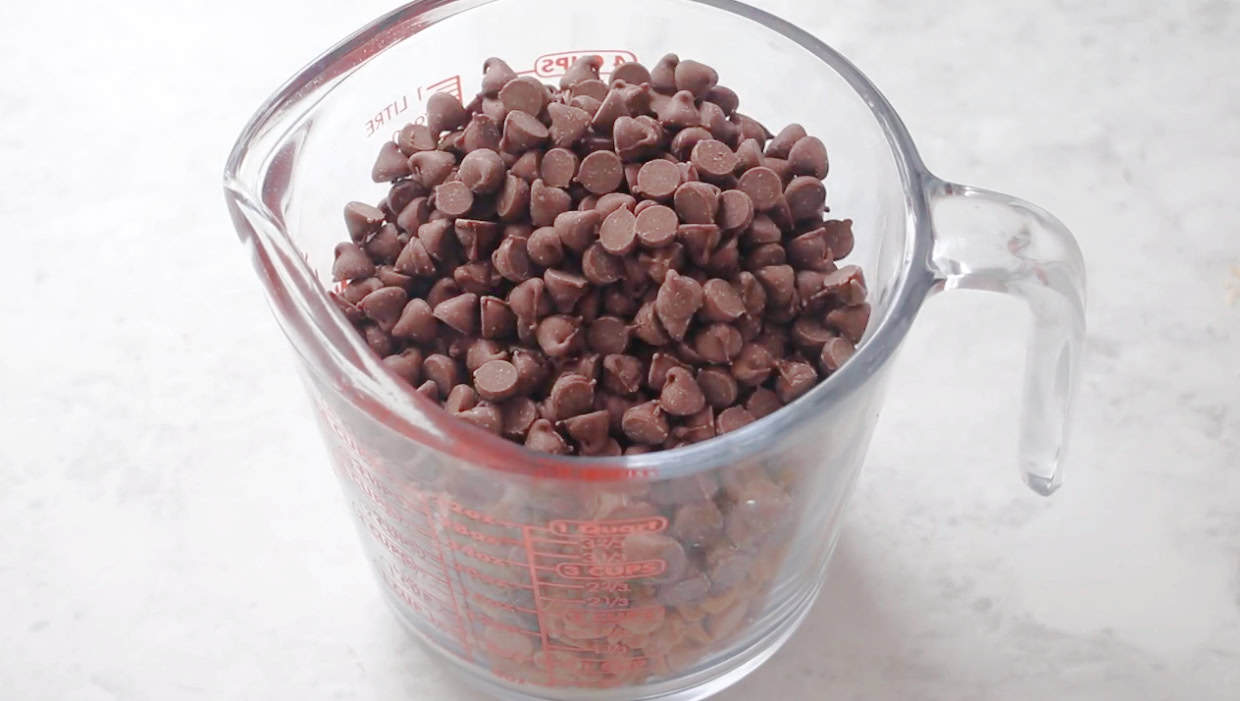
Step 1: Melt chocolate chips in microwave safe bowl for 30 seconds. Stir. Continue to microwave in 15-second intervals until chocolate chips are melted and smooth.DO NOT overheat the chocolate.
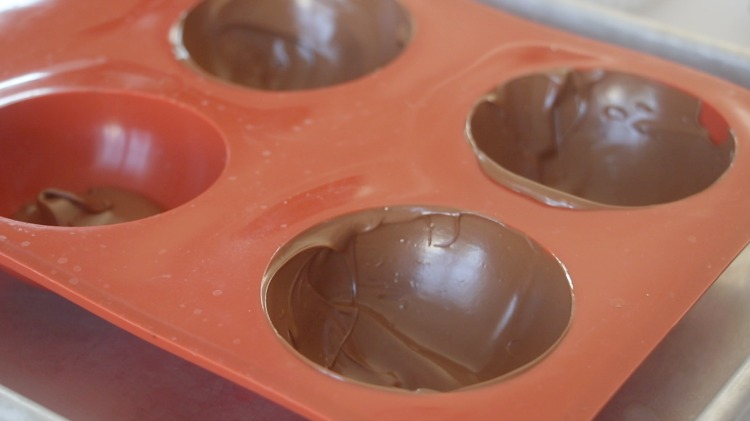
Step 2: Add a spoonful of chocolate into 6 chocolate mold cavities. Smooth chocolate up the sides of each mold with a spoon. Add more chocolate as necessary to coat the inside of each mold.Let the chocolate sit for a few minutes. Check to see if there are any areas that need to be covered again, then smooth out the sides with a spoon. This will help ensure that the sides and center of the mold are evenly coated with chocolate.There will be a little extra chocolate leftover in the bowl. Save this to patch any weak areas or seal the middle seam after the chocolate hardens.
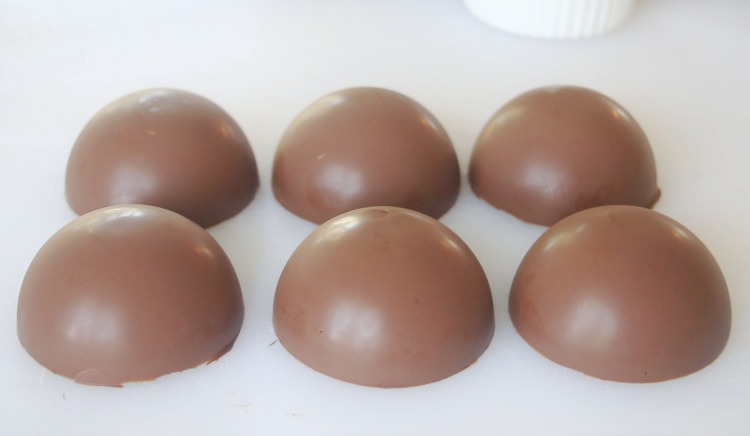
Step 3: Refrigerate the chocolate for at least 30 minutes or until completely set. Gently remove from the mold.
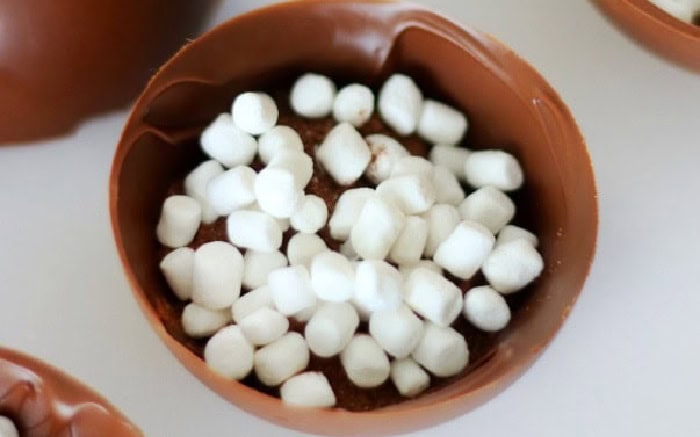
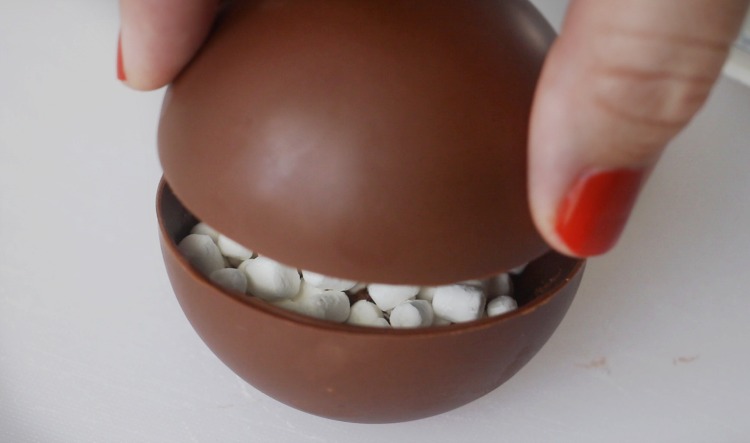
Step 4: Fill 3 halve-spheres with 1 tablespoon of cocoa mix and 1 tablespoon of mini marshmallows.
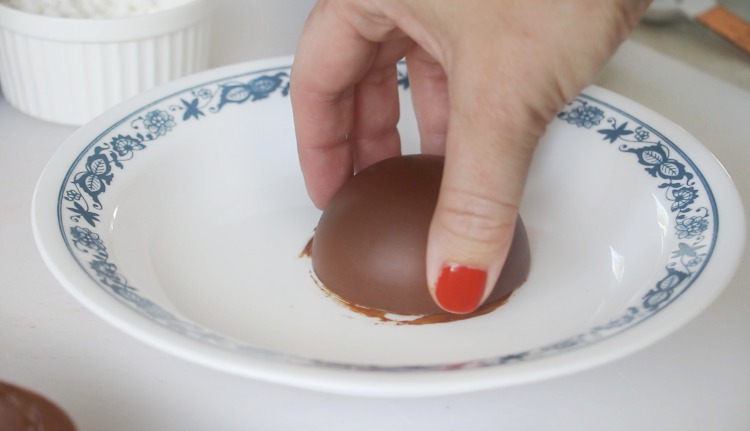
Step 5: You will need a hot bowl or plate. Press one of the empty chocolate cups against the warm plate to slightly melt the rim.
Step 6: Place the empty chocolate cup over one of the filled ones. Work quickly and try not to handle the chocolate too much. The warmth of your hands will leave fingerprints and can soften the chocolate. If you notice this happening just pop the chocolates back into the refrigerator for a few minutes.
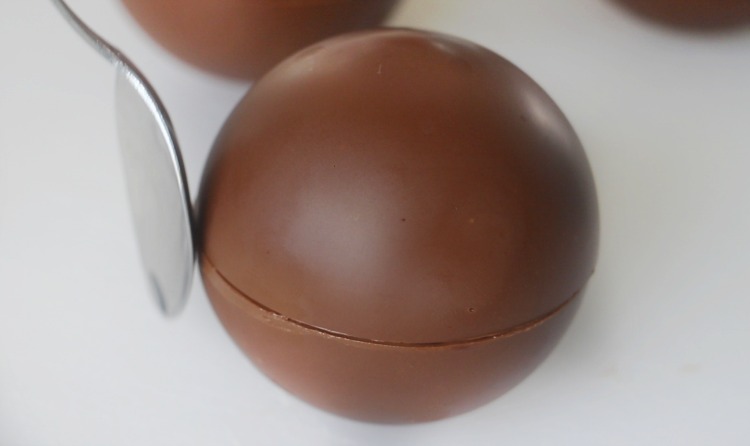
Step 7: Run a hot spoon along the seam where the two chocolate cups meet to slightly melt the chocolate and seal the seam. If you have any gaps, you can also pipe some melted chocolate over the seam, and it will also seal it nicely and tightly.
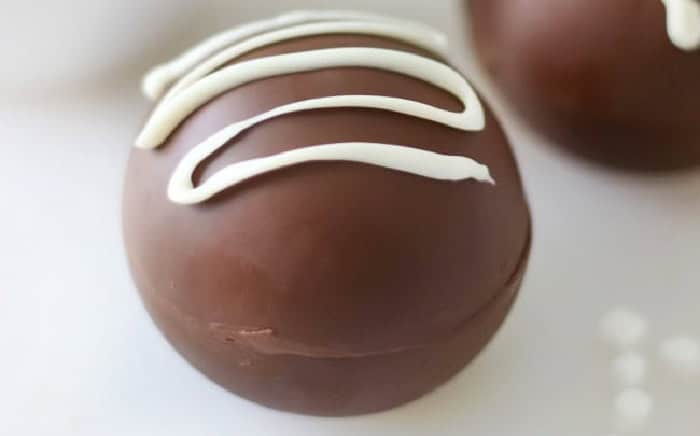
Step 8: Melt white chocolate chips and place in a plastic baggie. Cut the corner and drizzle over hot chocolate bombs (optional). If you'd like to add any decorations (like sprinkles), you can do that at this time while the white chocolate is still melted. Refrigerate chocolate bombs for 30 minutes.
This will create six chocolate cups, which, when fitted together, will form three hot chocolate bombs. The mold comes with two trays, allowing you to make six hot chocolate bombs at a time. This recipe will show you how to make 3, but you can easily double the recipe. You can also buy this set that makes multiple sizes of hot chocolate bombs.
Hot Chocolate Bomb FAQs
A hot chocolate bomb is made with melted chocolate chips, hot cocoa powder, and mini marshmallows. When added to a cup of hot milk the bomb breaks open, releasing the hot cocoa mix and mini marshmallows. After a quick stir you'll have a decadent cup of cocoa! I’ve seen them made with all different kinds of chocolates and different methods for making the chocolate spheres in the silicone mold. We made a few batches to see what we liked best. Here’s what worked for us!
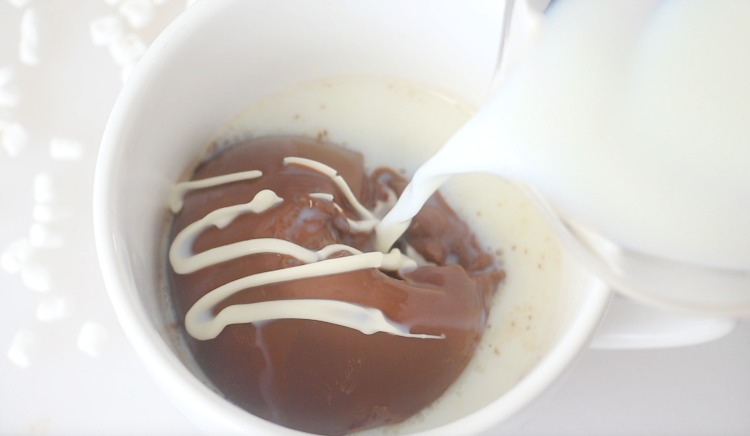
When you place one in a cup and pour hot milk over it, it melts and mini marshmallows magically appear! I've found that 1 ½ cups of milk is the perfect amount.
Hot chocolate bombs can be stored in an airtight container or individually packaged for up to two weeks at room temperature. They should ideally be stored in a cool, dry place, away from windows or heat sources.
They can be stored in the freezer or refrigerator short-term, but be careful, as the fridge can introduce moisture to the hot chocolate mix, and the freezer may cause condensation and moisture to form as the chocolate thaws to room temperature again.
Mini Marshmallows
Crushed Candy Canes
Andes Mint Pieces (baking bits)
White chocolate chips
Peanut butter chips
Sprinkles inside or on the outside of the hot cocoa bombs
Melted candy melts to drizzle over finished cocoa bombs
I used chocolate chips. Other types of chocolate that would work well are melting wafers (I like Ghirardelli), almond bark, or chopped chocolate bars (milk or dark chocolate).
1 cup or 1 ½ cups of milk (any kind of milk). Obviously, 1 cup is a little richer. I like using 1 ½ cups of skim milk.
More Chocolate Bomb Recipes To Make
MADE THIS RECIPE AND LOVED IT? 💛 Please leave a STAR rating and COMMENT below! Post it to Facebook or Pinterest to easily share with friends!
Hot Chocolate Bombs
Ingredients
- 1 cup milk chocolate chips
- 3 Tbsp. hot chocolate mix
- 3 Tbsp. mini marshmallows
- chocolate mold
- ¼ cup white chocolate chips optional
Instructions
- Melt chocolate chips in microwave safe bowl for 30 seconds. Stir. Continue to microwave in 15-second intervals until chocolate chips are melted and smooth. DO NOT overheat the chocolate.
- Add a spoonful of chocolate into 6 chocolate mold cavities. Smooth chocolate up the sides of each mold with a spoon. Add more chocolate as necessary to coat the inside of each mold.Let the chocolate sit for a few minutes. Check to see if there are any areas that need to be covered again, then smooth out the sides with a spoon. This will help ensure that the sides and center of the mold are evenly coated with chocolate.There will be a little extra chocolate leftover in the bowl. Save this to patch any weak areas or seal the middle seam after the chocolate hardens.
- Refrigerate chocolate for at least 30 minutes or until completely set.Gently remove from the mold.
- Fill 3 halve-spheres with 1 tablespoon of cocoa mix and 1 tablespoon of mini marshmallows.
- You will need a hot bowl or plate. Press one of the empty chocolate cups against the warm plate to slightly melt the rim.
- Place the empty chocolate cup over one of the filled ones. Work quickly and try not to handle the chocolate too much. The warmth of your hands will leave fingerprints and can soften the chocolate. If you notice this happening just pop the chocolates back into the refrigerator for a few minutes.
- Run a hot spoon along the seam where the two chocolate cups meet to slightly melt the chocolate and seal the seam. If you have any gaps you can also pipe some melted chocolate over the seam and it will also seal it nice and tight.
- Melt white chocolate chips and place in a plastic baggie. Cut the corner and drizzle over hot chocolate bombs (optional). If you'd like to add any decorations (like sprinkles), you can do that at this time while the white chocolate is still melted. Refrigerate chocolate bombs for 30 minutes.
- To make a cup of hot chocolate, place one hot chocolate bomb in a mug. Pour 1 ½ cups of hot milk over bomb. Stir. For an even richer cup of hot chocolate, add a splash of heavy cream.
Notes
Nutrition
Tara Love says
What do you use if the choc is too thick I have a wilton choc melting pot and sometimes the choc is just too thick?
Brandy says
Hi Tara, I microwave my chocolate chips in the microwave for 30 seconds, stir, then another 20-30 seconds, always stirring until melted and smooth. I've had good luck with chocolate chips and the Ghirardelli melting wafers. I haven't tried using a Wilton chocolate pot for these.
mitra says
what chocolate do you use for the mold?
Brandy says
I use chocolate chips, but you can use a variety of different kinds of chocolate or melting wafers.
Kim says
Hi
I want to make boozy bombs. Can I add liquor?
Brandy says
Hi Kim! I’m honestly not sure!
Dolly says
Hi, what size mold did you use? And you used a 16 oz cup to serve?
Brandy says
Hi Dolly! I used a 2.5" mold and 16 oz. mugs!
Jan H Keith says
What and where can I get the mold. I would love to try them. Thanks you.
Brandy says
Hi! I ordered these ones from Amazon. https://amzn.to/30RHY9t they worked great!
Christianna Kralisz says
I can't wait to try this!!! Do you prefer another brand of mini marshmallow? The brand you used, our not for sale on amazon at this time. so sad! Chat soon!!!
Brandy says
Hi Christianna! You can use regular mini marshmallows if you’d like. I’ve also seen tiny freeze dried ones in the ice cream sundae topping section at the grocery store, next to the hot fudge, etc.
Cheryl Raby says
I fine the tiny dried marshmallow at our local farmer’s market . Any store that carries bulk items should have them.
Jen says
Do you spray the silicon molds with a non stick spray prior to putting the chocolate in?
Brandy says
Hi Jen! You do not need to spray the molds. The chocolate pops right out after it had set up.
Shauna Sneek says
Could you store chocolate bombs in the fridge or freezer until you were ready to use them or give them as gifts ?
Brandy says
Hi Shauna. You can store them in the refrigerator or freezer short term. I'd be worried that the refrigerator might make the hot chocolate mix moist over time.
Sara says
not sure if this is asked yet, but did you tinker around to figure out a good amount of hot milk when using the bombs so that its a good flavour and consistency? I plan to play around with it myself, but any tips are appreciated. 🙂
Brandy says
Hi Sara! 1 1/2 cups works great. 1 cup is delicious too, very rich with chocolate flavor.
Robyn Hill says
I struggle getting things out of silicone molds. Do you have tips (or even better a video) on how to get the shells out?
Brandy says
Hi Robyn! I’ve had issues in the past sometimes as well, but these popped right out without any problems as long as they were evenly coated with chocolate . With my first batch, I had a couple that had thin areas, but the second batch turned out perfect!
Barb says
Hi. What cocoa mix did you use?
Brandy says
Hi Barb! I used the Starbucks hot chocolate mix (bought at Target).
Tony says
Thanks!
Pearl Melchor says
Hi Brandy, which molds did you use?
Brandy says
Hi Pearl! I used these ones: https://amzn.to/30RHY9t
These ones seem to be in stock more frequently though and come in a multi pack: https://amzn.to/3nCjpHu
Jacki Brannon says
What size molds did you use?
Brandy says
2.5”
Tracy says
Hi Brandy!
I made this and I’m hoping you could help. The molds came out great, but putting them together was harder than I thought. I had so many fingerprints on it! I’m not even sure how I could avoid it. I tried to put the other molds back in the fridge, but the moment I touch it—fingerprints! Is there anything else I can do to try and keep it clean?
Brandy says
That part is definitely a struggle! I have the same problem when I make English toffee and go to break it into pieces. Wearing a pair of food service gloves helps and it takes a little longer for the warmth of my fingers to melt the chocolate. For the chocolate bombs, I just work as fast as I can and avoid touching them as much as possible. If they are really cold it helps. Then I drizzle white chocolate on the top to cover my fingerprints, haha!
Tracy says
I will try and keep them in the fridge longer to see if it helps, and also with gloves! And YES for the drizzle cover up haha!
Megan says
Buy cotton gloves. 🙂 They're cheap on Amazon. You can search for candy or chocolate gloves and it will come up with a bunch of white cotton gloves. I use them a lot when I make molded chocolates.
Brandy says
Didn't even know chocolate gloves existed! Thank you for the tip!!
Jan Armstrong says
I may be wrong, but I think my idea is a cheaper way to go for the filling. At $10.99 a bag for freeze-dried marshmallows on Amazon, "OUCH!!!" Starbucks chocolate, "OUCH!!!" again. My idea: why not buy a box of individual packs of hot chocolate mix with the mini marshmallows and just open a pack and pour it in the chocolate shell. A box of hot chocolate packs, store brand, is only a couple of dollars. Just think of the money you would save and the more bombs you could make. Is this not a good idea or what???!!!
Brandy says
Girl, genius! Seriously though. That’s such a great hack! The bag of marshmallows from Amazon is pretty huge and goes a long way, but the packets would work out the same!
Kelley says
I had a similar issue, but figured out that the chocolate was too thin. This lead to it warming up too quick. When I made it a little thicker no finger prints!
Catherine says
Thanks for this fun recipe. My first batch is a mess. I’m confident they’ll get better with practice making them for my 7 grandchildren. Lightly rolling the wet seams in crushed candy canes was a nice way to make them look better.
Appreciate you finding time to blog this considering you’re wrangling 5 kids!
Grandma Catherine
Brandy says
What a fun grandma! They get easier with practice for sure!
Terra says
How long can they be stored for? and where is the best place for storage for long lasting?
Brandy says
Terra, I would store them for up to two weeks in an airtight container or packaged in cellophane bags. I wouldn’t leave them on a counter that gets sunlight or near the stove. In a pantry or cupboard would work best. You just don’t want the chocolate to warm up and soften.