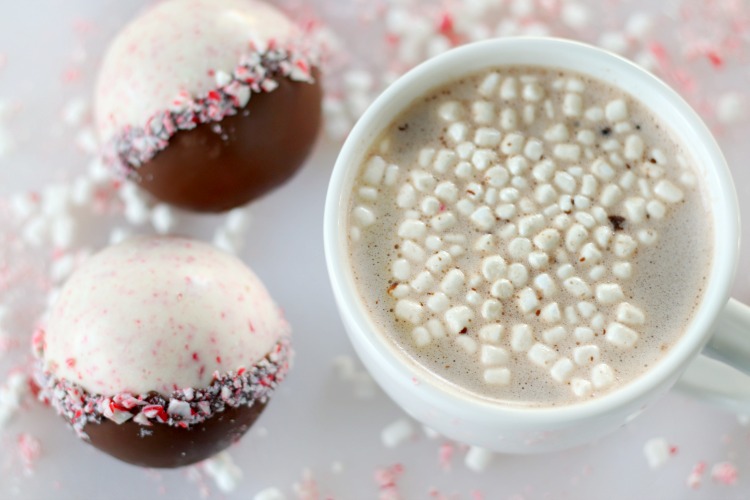
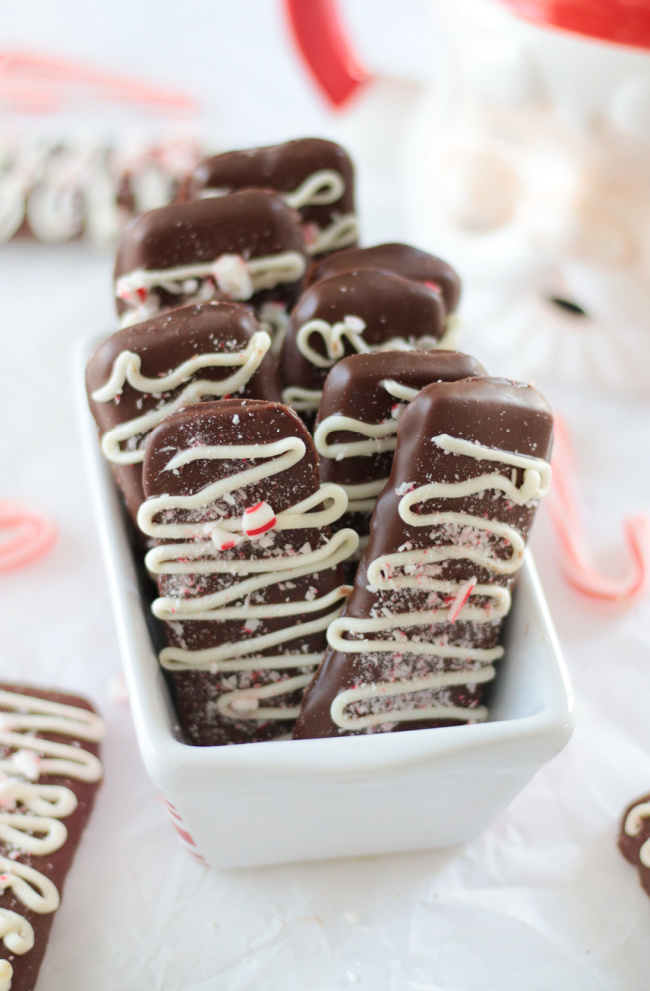
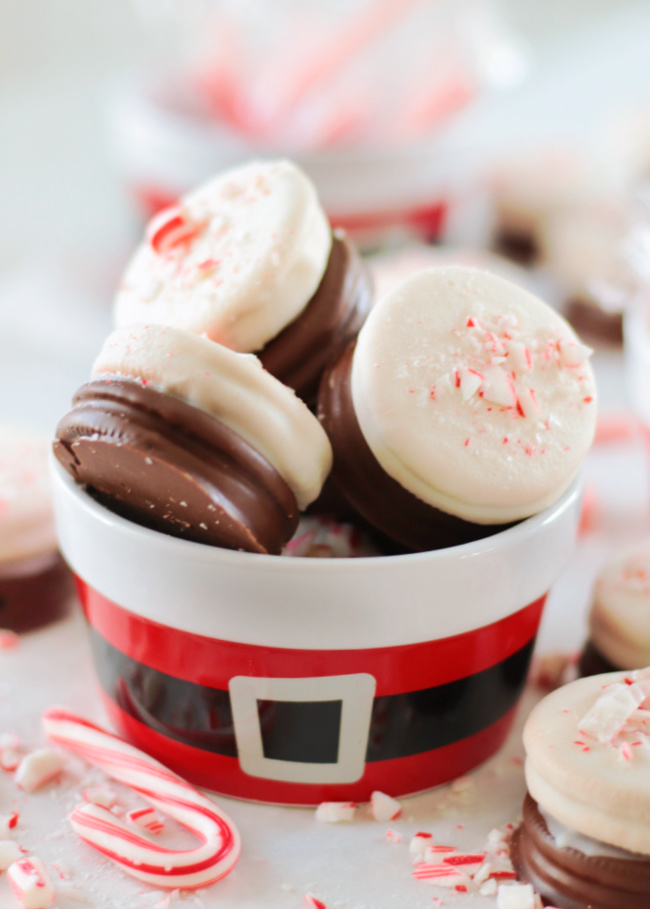
Chocolate on the bottom, topped with white chocolate and crushed peppermint candy. These peppermint hot chocolate bombs look like peppermint bark!
If you like hot chocolate bombs, try our original milk chocolate hot chocolate bombs and our snowman hot chocolate bombs!
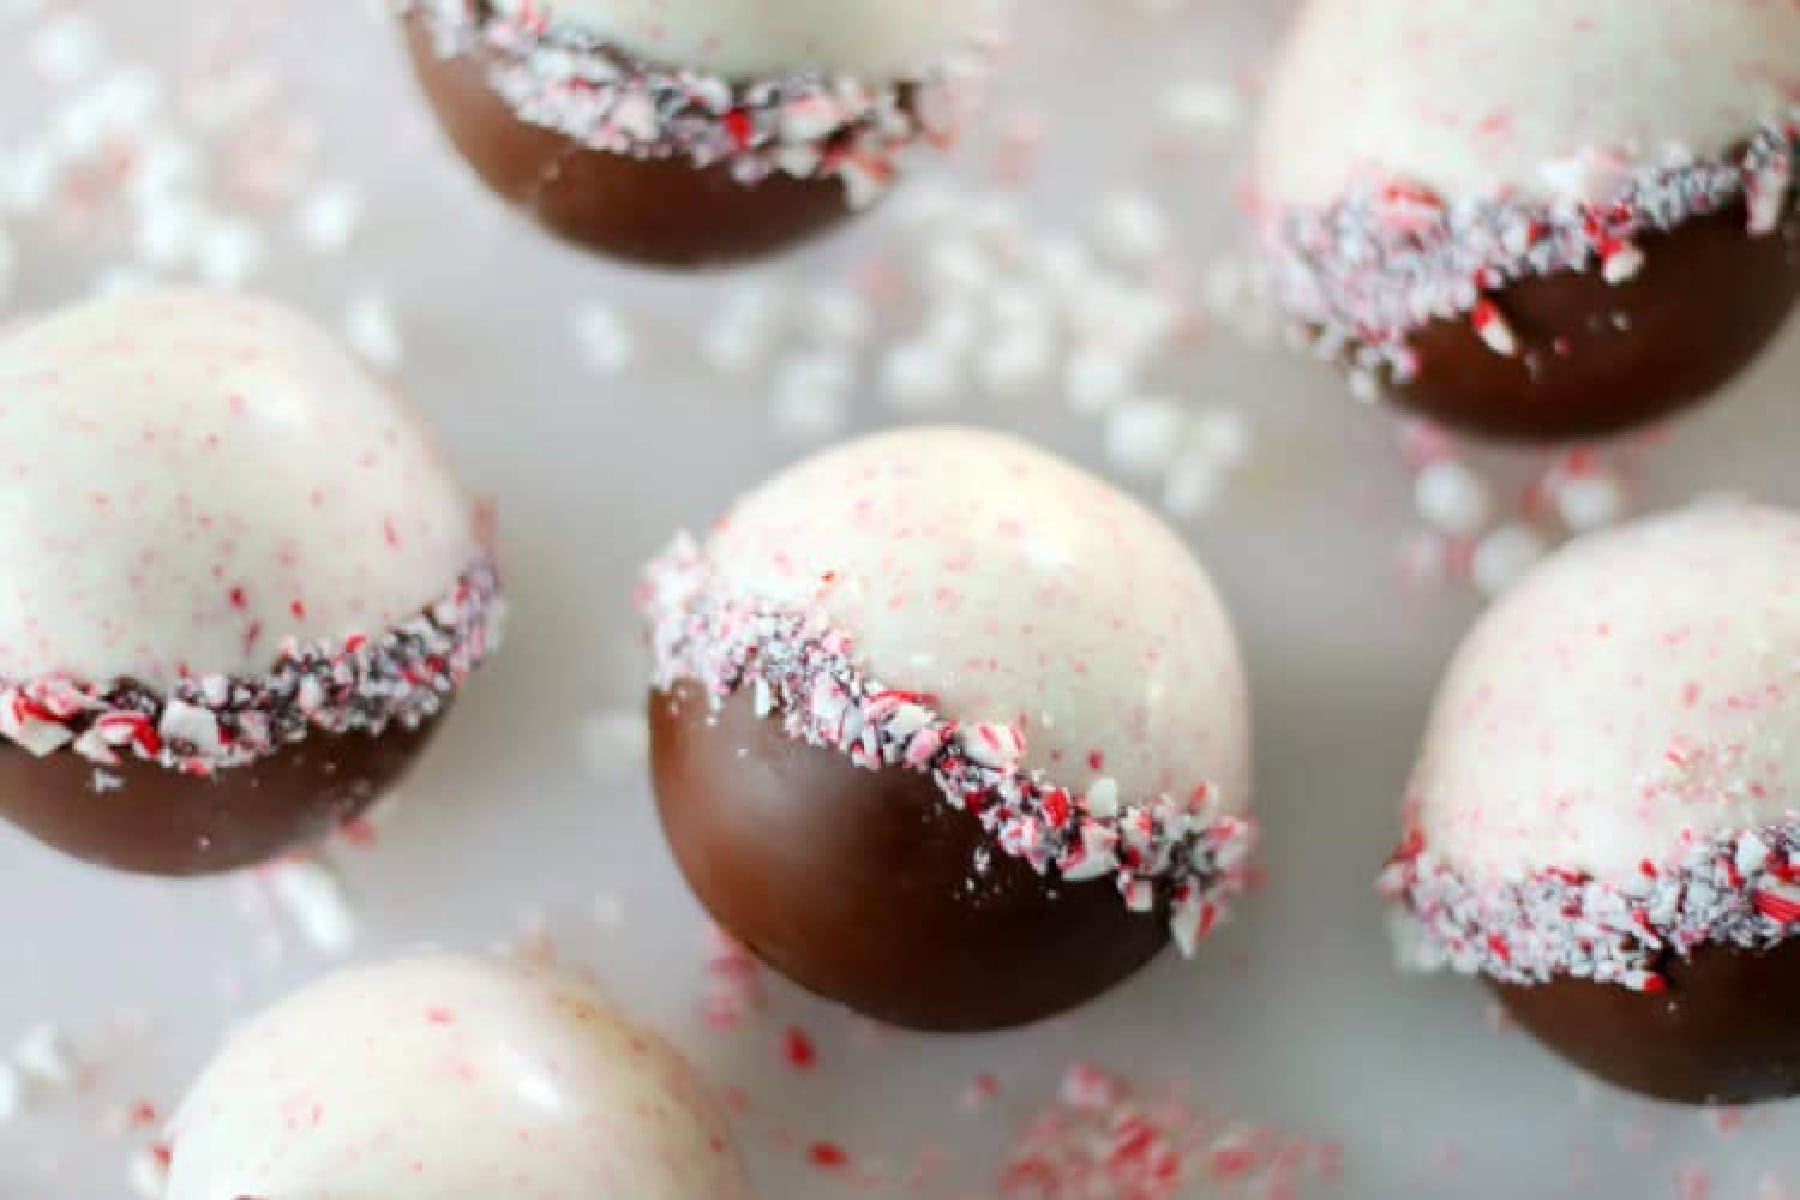
These peppermint bark hot chocolate bombs are so pretty and festive for the holidays. Ruby gave some to her horseback riding teachers, and they loved them! So creamy and smooth. They make the BEST cup of hot chocolate. Don't worry about looking at the calories, it's December and calories don't count, right?
Why I Like This Recipe
- Easiest cocoa bombs to make. Out of all of the hot chocolate bomb recipes that we've shared, these peppermint bark ones are THE EASIEST TO MAKE! If your seams don't match up perfectly, don't worry about it! We covered them with melted chocolate and crushed candy for decoration, which totally takes them to the next level.
- Fun to melt. Hot cocoa bombs are just plain fun. Fun to make and fun to melt. Simply pour hot milk over each bomb and it will melt and pop open. Kids especially love hot chocolate bombs!
- Perfect size: Our chocolate bombs are about 2.5" in diameter and work great in a wide mug. Mine are from Target.
- Easy gift idea. I've gifted hot chocolate bombs many times. They store beautifully in a cup wrapped in cellophane. You can also package a few up in a bag and gift with a half gallon of milk and two mugs!
What Others Are Saying
These came out beautiful and on our first try! Super yummy too! Thanks!---Patti
Added peppermint hot chocolate mix to ours, and they were so yummy and rich!---Traci on Pinterest
Jump to:
Tips and Tricks
- Melt a little extra chocolate and make a few extra chocolate cups your first time making these. This way, if you have a couple that don’t turn out, you’ll have extras to replace them with. Consider your first time a practice run. That’s what we did our first time. We had no expectations, and actually ended up with 4 out of 6 bombs that turned out great! The others were delicious (we didn’t let them go to waste), but they had holes in the seams because we handled them when they weren’t quite set up all the way, and it caused them to be misshapen.
- DO NOT overheat the chocolate chips. Chocolate can be melted in a double boiler or in the microwave.
- The key to success is making sure the chocolate has time to really set up in the refrigerator. If the chocolate is soft (AT ALL) it will stretch and break.
- Use any extra melted chocolate to fill in weak spots. Before removing the chocolate cups from the mold, inspect them to see if any thin areas could benefit from a little more chocolate. Add more chocolate, refrigerate a bit longer, and continue on your way.
- Work quickly to avoid fingerprints on the chocolate bombs. You can also combat this by wearing candy-making gloves. I haven’t used the gloves, but I heard they work great.
- Tip for more peppermint flavor. The candy cane-infused white chocolate is super delicious---I mean, it's peppermint bark, so you know it is going to be tasty. Make an extra one just to eat plain; the peppermint flavor really shines through! That being said, once it has been mixed with milk, it doesn't have a ton of mint flavor. To boost the peppermint flavor, use peppermint cocoa inside the cocoa bomb and add a few drops of peppermint flavoring oil to the melted chocolate.
Ingredients
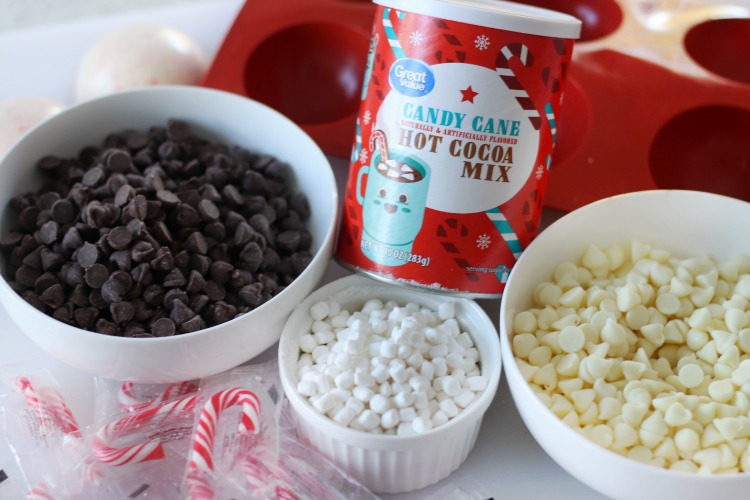
- Chocolate Chips: I used chocolate chips. Other types of chocolate that would work well are melting wafers (I like Ghirardelli), almond bark, or chopped chocolate bars (milk or dark chocolate).
- White chocolate chips
- Peppermint candy: Crushed candy canes or Starlight mints work well.
- Mini Marshmallows: I've been wanting to add these freeze-dried mini marshmallows to our hot cocoa bar that we set up every holiday season, and this was a great time to order a bag. You can definitely use regular mini marshmallows (and we have), but these are just fun and really pop out of the hot chocolate bomb when the milk is poured over. They are basically tiny Lucky Charm marshmallows.
- Peppermint hot chocolate mix
- Hot Chocolate Bomb Mold: This is the best one that I've found. It works perfectly! The mold we used makes 2.5" bombs. You can also buy this set that makes multiple sizes of hot chocolate bombs.
See the recipe card for full information on ingredients and quantities.
How To Make Peppermint Hot Cocoa Bombs
Step 1: Crush candy canes with a rolling pin. Set aside.
Melt chocolate chips in a microwave-safe bowl for 30 seconds. Stir. Continue to microwave in 15-second intervals until the chocolate chips are melted and smooth.
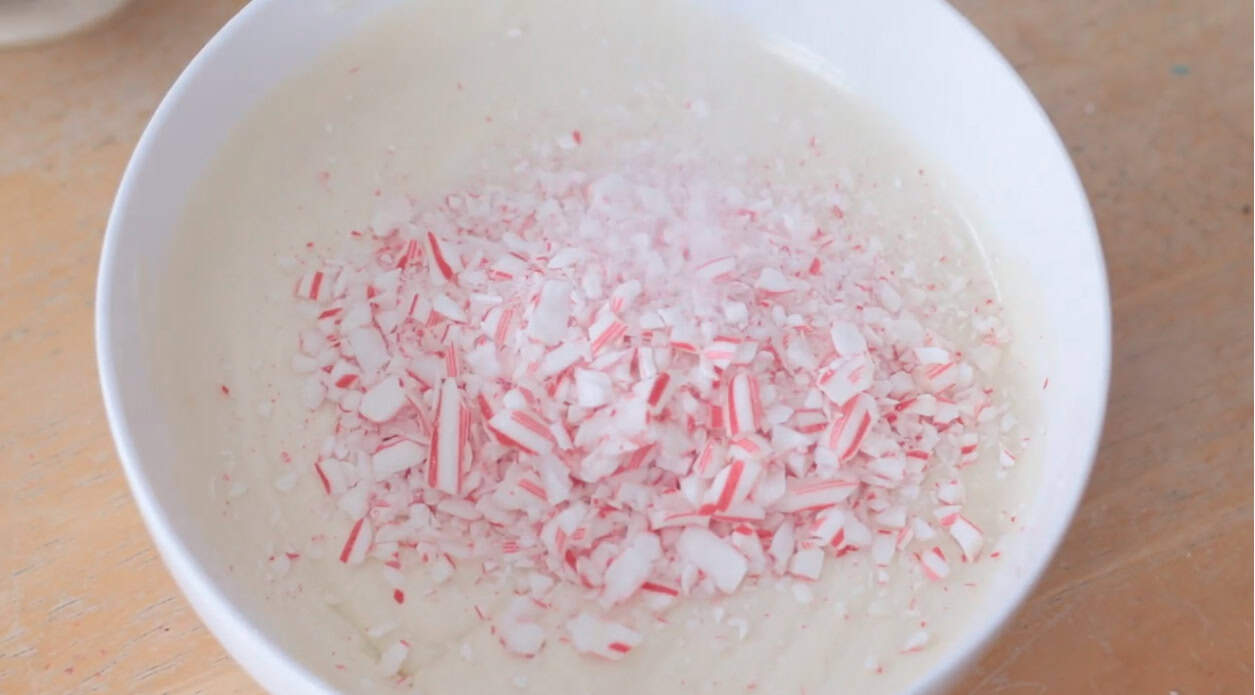
Repeat for white chocolate chips. DO NOT overheat the chocolate. Stir ⅓ cup crushed candy canes into melted white chocolate
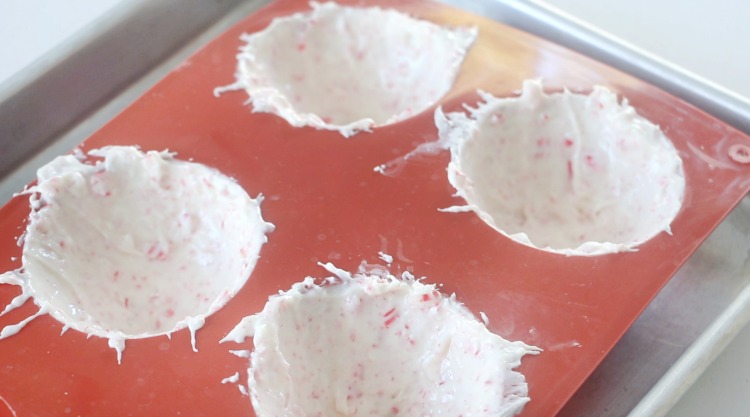
Step 2: Add a spoonful of the melted white chocolate and candy canes into 6 chocolate mold cavities. Smooth chocolate up the sides of each with a wooden spoon. The crushed candy canes will make the mixture lumpy. Don't worry, it will be smooth on the other side. Just do your best. Spoon some of the mixture up and over the edge. We will trim this off later.
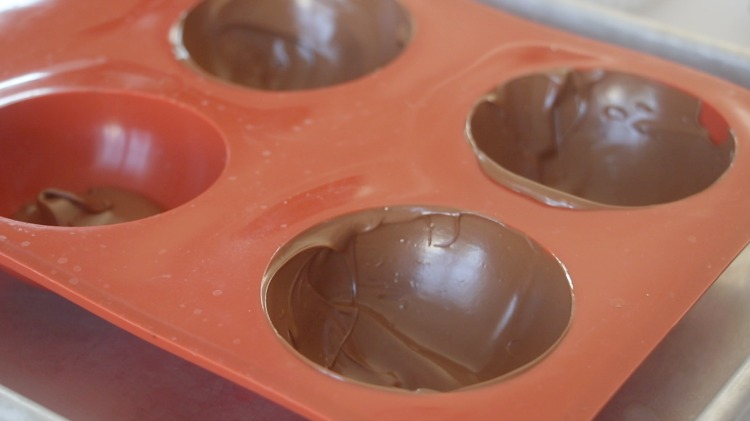
Step 3: Add a spoonful of chocolate into 6 chocolate mold cavities. Smooth chocolate up the sides of each mold with a spoon. Add more chocolate as necessary to coat the inside of each mold.
Let the chocolate sit for a few minutes. Check to see if there are any areas that need to be covered again, then smooth out the sides with a spoon. There will be a little extra chocolate leftover in the bowl. Save this to patch any weak areas or seal the middle seam after the chocolate hardens.
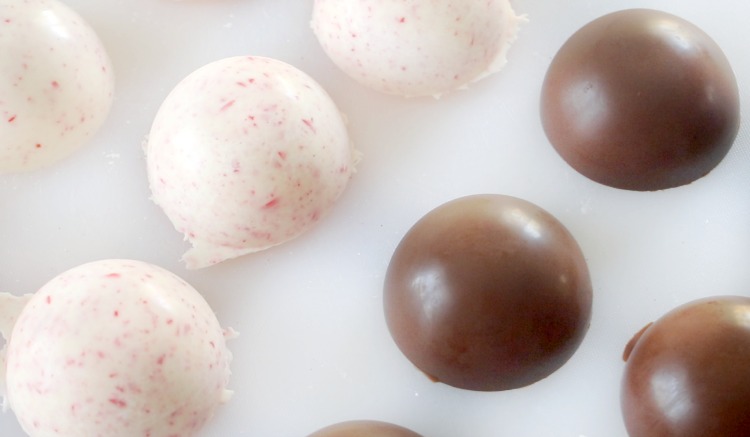
Step 4: Refrigerate chocolate molds until completely set. Gently remove from the mold.
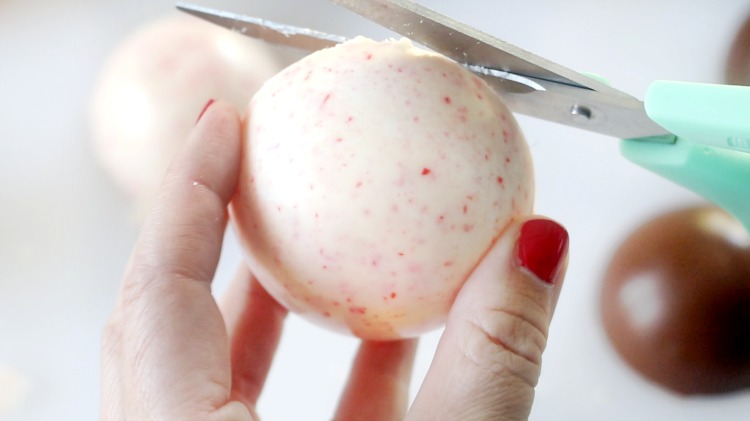
Step 5: Trim the white chocolate edges with a pair of scissors.
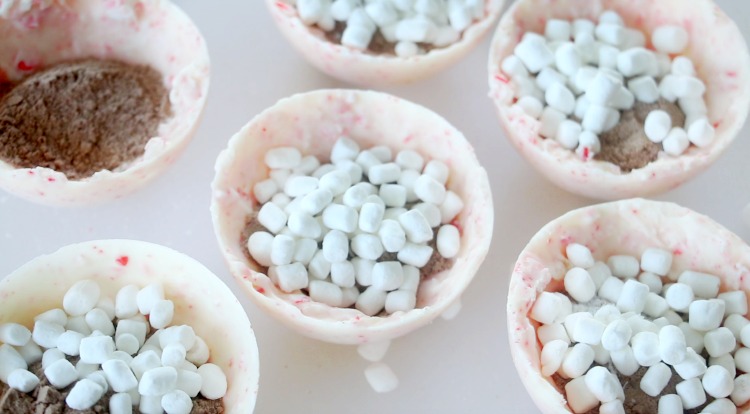
Step 6: Fill the white chocolate halves with 1 tablespoon of peppermint cocoa mix and 1 tablespoon of mini marshmallows.
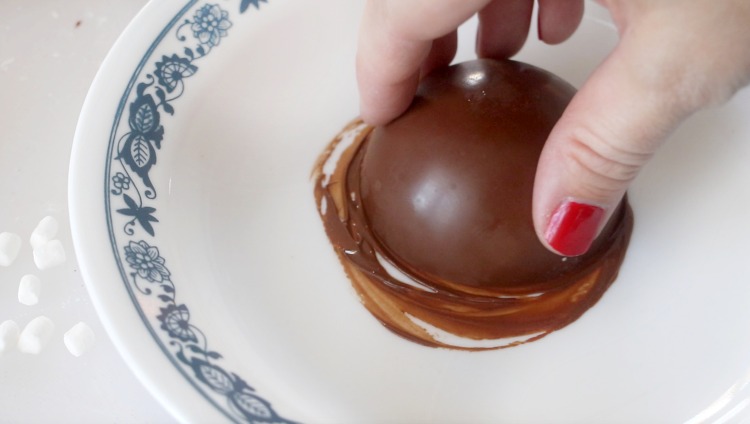
Step 7: You will need a hot bowl or plate. Press one of the empty chocolate cups against the hot plate to slightly melt the rim.
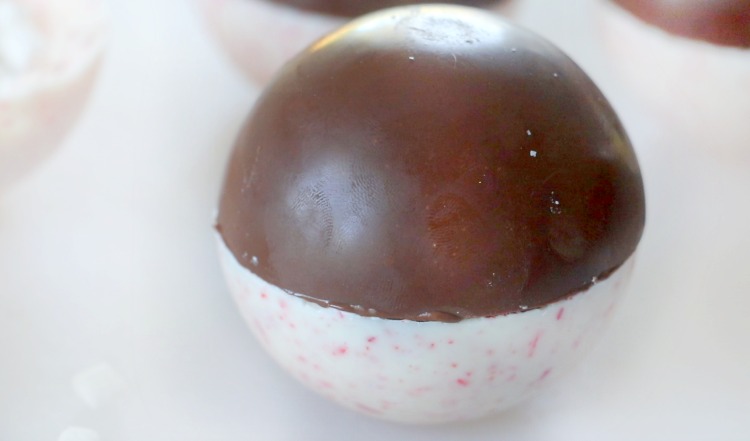
Step 8: Place the empty chocolate cup over one of the filled ones. Work quickly and try not to handle the chocolate too much. The warmth of your hands will leave fingerprints and can soften the chocolate. If you notice this happening just pop the chocolates back into the refrigerator for a few minutes.
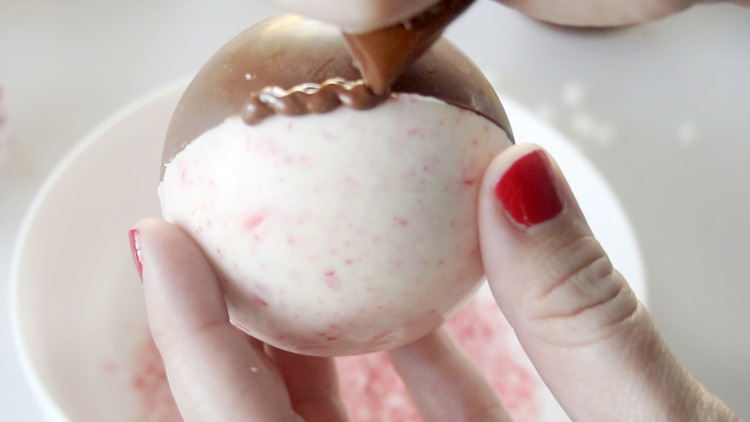
Step 9: Melt the extra ¼ cup of chocolate chips and place them in a plastic baggie. Cut the corner and drizzle over the seam.
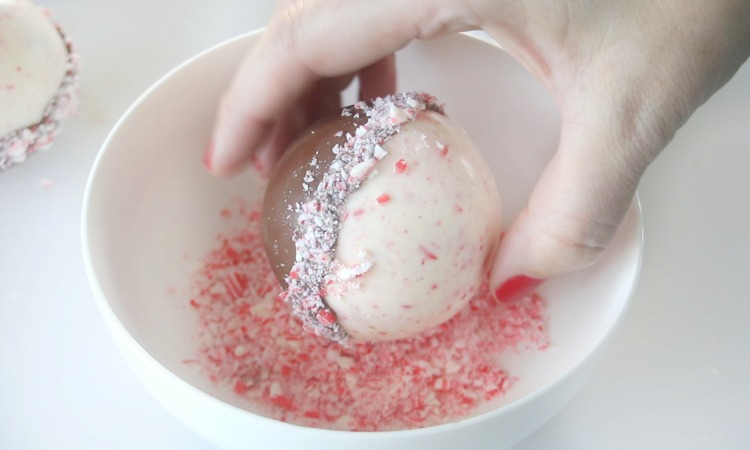
Step 10: Roll each bomb in the remaining crushed peppermint candy. Let it sit until the seam has hardened.
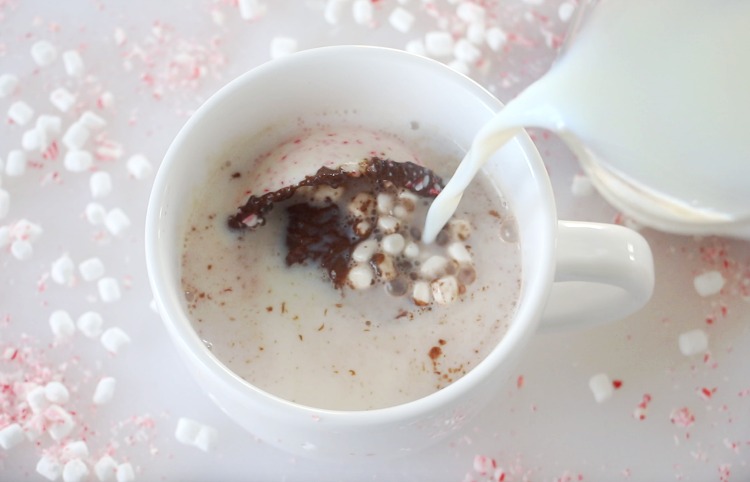
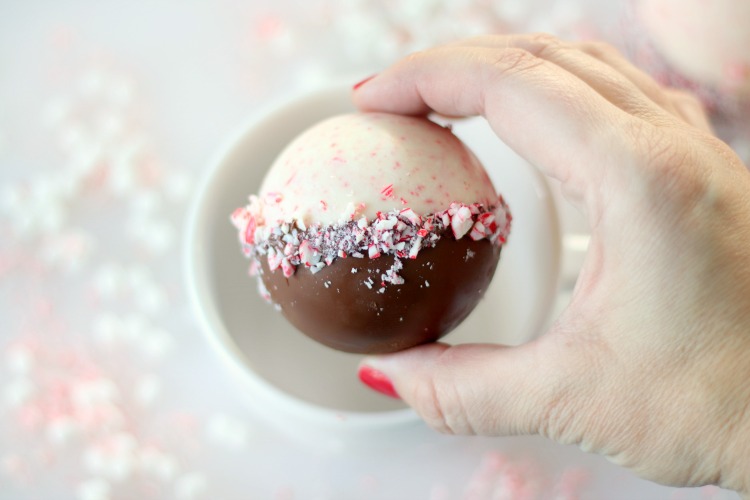
To make a cup of hot chocolate, place one hot chocolate bomb in a mug. Pour 1 ½ cups of hot milk over the bomb. Stir.
This recipe will create 12 chocolate cups, which, when assembled, will form 6 hot chocolate bombs.
Peppermint Cocoa Bomb FAQs
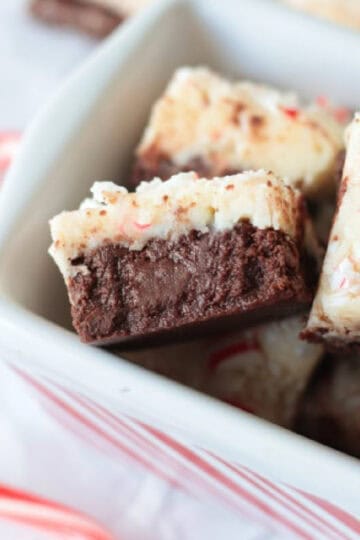
Peppermint bark is usually made by spreading melted chocolate on a piece of waxed paper. Once it has had a chance to set up you spread it with white chocolate and liberally sprinkle it with crushed peppermint candy. You can also mix the peppermint candy right into the white chocolate. Our peppermint bark hot chocolate bombs combines hot chocolate and peppermint bark. The best of both worlds!
Did you know that you can flavor melted chocolate? It's true! If you want an explosion of mint flavor, consider adding a TINY amount of peppermint flavoring oil (not the same as essential oil) to your melted chocolate. We did this when we made hot chocolate sticks, about 8 drops for every cup of melted chocolate---works like a charm!
When you place a chocolate bomb in a cup and pour hot milk over it, it melts, and mini marshmallows magically appear! I’ve found that 1 ½ cups of milk is the perfect amount.
Hot chocolate bombs can be stored in an airtight container, or individually packaged for up to two weeks at room temperature. They would ideally be stored away in a cool, dry place, away from a window or heat source. This is how I store mine.
They can be stored in the freezer or refrigerator short-term, but be careful as the refrigerator can introduce moisture to the hot chocolate mix, and the freezer may cause condensation and moisture to form as the chocolate thaws to room temperature again, especially with the crushed candy on the outside.
More Peppermint Recipes To Make
MADE THIS RECIPE AND LOVED IT? 💛 Please leave a STAR rating and COMMENT below! Post it to Facebook or Pinterest to easily share with friends!

Peppermint Hot Chocolate Bombs
Ingredients
- 1 cup milk chocolate chips
- 1 ¼ cups white chocolate chips
- 18-20 crushed mini candy canes (about ⅔ cup)
- 6 Tbsp. hot chocolate mix
- 6 Tbsp. mini marshmallows
- chocolate mold
- ¼ cup chocolate chips to drizzle around seam
Instructions
- Crush candy canes with a rolling pin. Set aside.
- Melt chocolate chips in microwave-safe bowl for 30 seconds. Stir. Continue to microwave in 15-second intervals until chocolate chips are melted and smooth. Repeat for white chocolate chips.DO NOT overheat the chocolate.
White Chocolate
- Stir ⅓ cup crushed candy canes into melted white chocolate.
- Add a spoonful of the melted white chocolate and candy canes into 6 chocolate mold cavities. Smooth chocolate up the sides of each with a wooden spoon. The crushed candy canes will make the mixture lumpy. Don't worry, it will be smooth on the other side. Just do your best. Spoon some of the mixture up and over the edge. We will trim this off later.
Milk Chocolate Half
- Add a spoonful of chocolate into 6 chocolate mold cavities. Smooth chocolate up the sides of each mold with a spoon. Add more chocolate as necessary to coat the inside of each mold.THIS PART IS DIFFERENT THAN THE WHITE CHOCOLATE HALF: Let the chocolate sit for a few minutes. Check to see if there are any areas that need to be covered again, then smooth out the sides with a spoon. This will help ensure that the sides and center of the mold are evenly coated with chocolate. (White chocolate hardens faster and is thicker than milk chocolate so this step isn't necessary with the white chocolate. It doesn't seem to pool in the center of the mold as much).There will be a little extra chocolate leftover in the bowl. Save this to patch any weak areas or seal the middle seam after the chocolate hardens.
- Refrigerate chocolate molds until completely set.Gently remove from the mold.
- Trim the white chocolate edges with a pair of scissors.
- Fill the white chocolate halves with 1 tablespoon of peppermint cocoa mix and 1 tablespoon of mini marshmallows.
- You will need a hot bowl or plate. Press one of the empty chocolate cups against the hot plate to slightly melt the rim.
- Place the empty chocolate cup over one of the filled ones. Work quickly and try not to handle the chocolate too much. The warmth of your hands will leave fingerprints and can soften the chocolate. If you notice this happening just pop the chocolates back into the refrigerator for a few minutes.
- Melt the extra ¼ cup of chocolate chips and place in a plastic baggie. Cut the corner and drizzle over the seam.
- Roll each bomb in remaining crushed peppermint candy. Let sit until seam has hardened.
- To make a cup of hot chocolate, place one hot chocolate bomb in a mug. Pour 1 ½ cups of hot milk over bomb. Stir.


barb pettersen says
You should never handle chocolates bare handed. Always wear latex/latex free gloves, or any form of cheap disposable gloves.
Kathy says
Do the silicone pans need spray grease before putting in the chocolate?
Brandy says
Nope! 🙂
Kathy says
Thanks, I can hardly wait to try them. My pans r only 2” but I’m assuming that will still work.
Brandy says
Yep, those will still work!
Patti C says
These came out beautiful and on our first try! Super yummy too! Thanks!
Brandy says
So glad to hear!