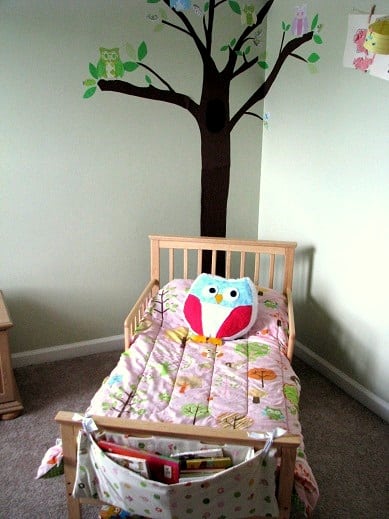
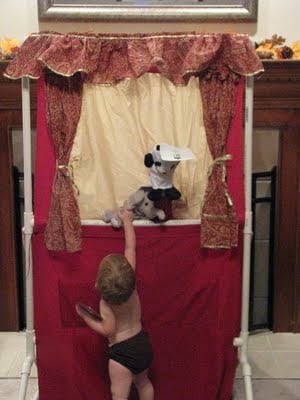
While browsing Toys R Us & Babies R Us last weekend, we came across a cute Tinkerbell canopy bed that Kaylee just loved. She already had a nice toddler bed, so we didn't give it much though, or at least I didn't. Daddy had other plans...
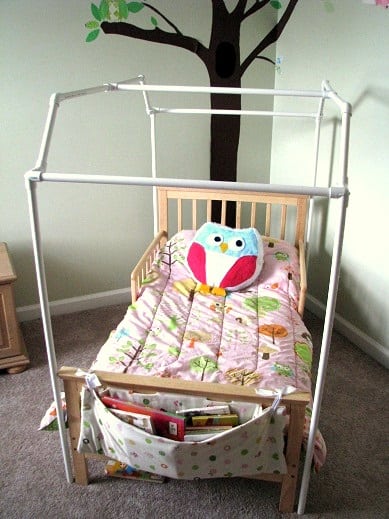
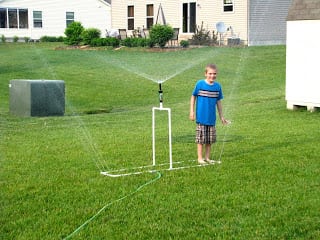
Derrick thought that it would be pretty simple to make her a canopy for her existing bed from a PVC frame. He is the king at PVC pipe creations...
(Just to name a few 🙂
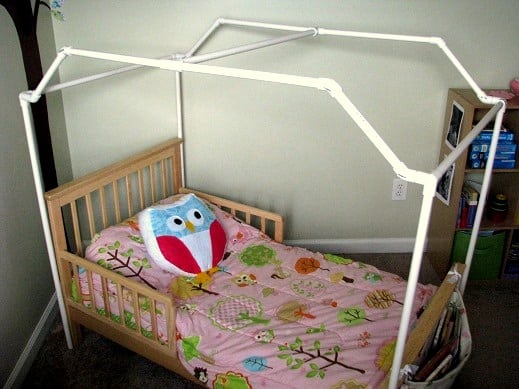
And he was right. He was able to put this frame together in a matter of minutes and Kaylee was thrilled! She loved having just the frame, never mind having any sort of canopy attached. Kids are easy to please. I took her to the fabric store and she chose a couple of fabrics for the project. A pink kitty fabric and turquoise tulle.
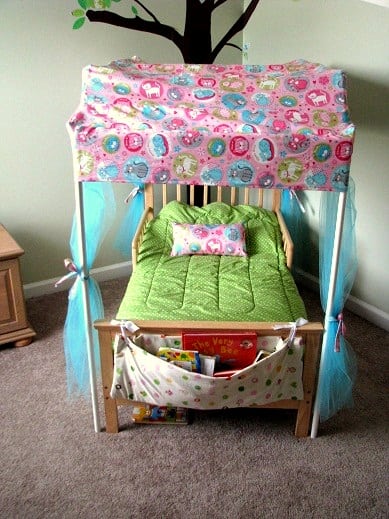
After a couple of hours of stressing (I'd never done something like this before and did not have a pattern) and sewing, here is the finished product!
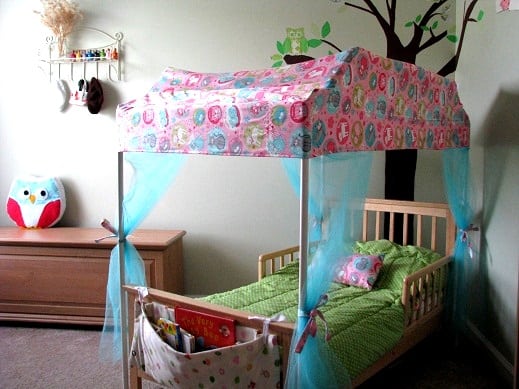
It fits perfectly, thanks to a few minor adjustments and an extra seam through the center to tighten it up a bit in the end. I've already had some requests for a tutorial. If I had any idea what I was doing(when I was doing it), I might have written down some dimensions and instructions, but it was a first time project for me that would probably turn out differently if I did it again. Basically...
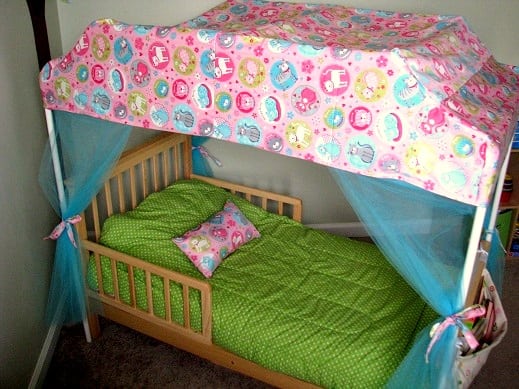
You can see that both side panels are kind of a triangle shape. I followed the outline of the frame that Derrick made and added an ½" all the way around for seam allowances. I used a ⅜" seam and that gave it a little room for error. I used newspaper to make pattern pieces (taped it to the pipes) and then cut out the fabric shape. The top is one long piece that is the width of the pipes and stops where you see the crease on the front. That is a seperate piece so that it would fit the angle. It is also the width of the pipes, but only 4" or so in length. Then there is another piece directly on the front attached to the small 4" one. I made it long enough so that it was flush in length with the side panels. So the sides are each 1 panel and the top is 1 large panel + 2 smaller ones on the front and another 2 smaller ones (the same size as the front) on the back. This probably doesn't make any sense. Just use your frame as a guide. I'm not sure what it would have looked like if I just did one piece for the top and didn't use seperate pieces for the angles, it might have been fine. I'm not an expert so I just did what I thought would work. Then I hemmed it all the way around and sewed the little curtains to the hem. Total fabric for the project 3 ½ yards pink + 4 yards tulle.
***
I used extra fabric to make ties for the faux curtains and a throw pillow. This is the reverse side of her owl comforter in the first photos. It matched the new canopy perfectly!
***
I used extra fabric to make ties for the faux curtains and a throw pillow. This is the reverse side of her owl comforter in the first photos. It matched the new canopy perfectly!
She loves her kitty bed (although she calls it a Tink bed after seeing the Tinkerbell one at the store) and sleeps, not only in comfort, but in style!
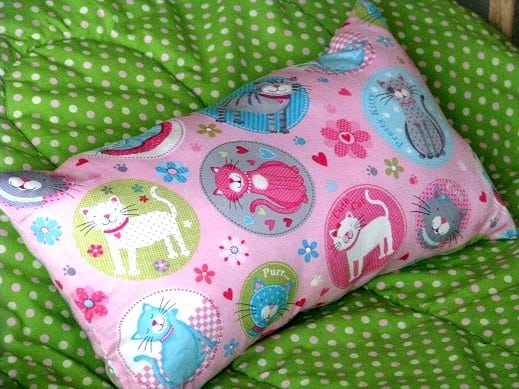
Here is a close-up on the fabric. It was found at Joann's in the juvenile apparel selection at 60% off last week. I picked up several prints since it is so bright and cheerful, and nice and sturdy! So much better than calico.

Summer says
Thanks for linking up to Market Yourself Monday! I'll be featuring this on Saturday on my blog.
http://sumossweetstuff.blogspot.com
Thanks!
Sumo:)
Miranda @ Life in the Motherhood says
So cute!!! I wish I had a girl so I could do this. I'm totally pinning this...just incase we ever have a girl!!!
KRyStal says
This is so awesome! I admire your work I would really love to make this for my little girl hopefully I can follow by these pics 🙂
Danielle says
absolutely gorgeous. I am amazed at everything you guys have done with PVC pipes. So inspiring. I would love for you to link this up to my feature friday link party. This bed is just too cool.
http://www.blissfulanddomestic.blogspot.com
Amy@Sassy Scarlett says
Adorable idea! You guys did an awesome job, I'm very impressed!!
Michelle@Somedaycrafts says
This is fabulous. Any kid would love to have this in their room! I am featuring this at somedaycrafts.blogspot.com
Rachel says
Wow so adorable! I'm so impressed! I love the whole room (the tree on the wall, the owl pillow, the book caddy at the foot of the bed). I am definitely bookmarking this for when my daughter is out of her crib 🙂
Jennifer says
What a great idea!! That came out so good, I bet your daughter is thrilled! Thank you so much for linking up this week at Saturday Social!
xoxo
Jenn @ Social Salutations
April says
You are amazing! I am intimidated by learning how to thread my machine...
Em says
It's adorable! What a dream for a little girl!!
Carrie says
Darling! Gotta love how cheap and easy PVC is!
Desiree @ The 36th Avenue says
One word for you: STICKER!
Awesome idea!
Suzy www.savedbysuzy.blogspot.com says
What a great idea. I bet your daughter loves it! Thanks for linking up.
Nicole@Thrifty Decorating says
That is amazing! Thanks so much for linking to Thrifty Thursday! I'd love to feature this next week! 🙂
Brandy says
Hi Sarah, yes it is the same concept as the ones I made the boys! Just used a sturdy cotton vs. fleece like I used with the other ones. It's nice to have a place to store their favorite bedtime stories!