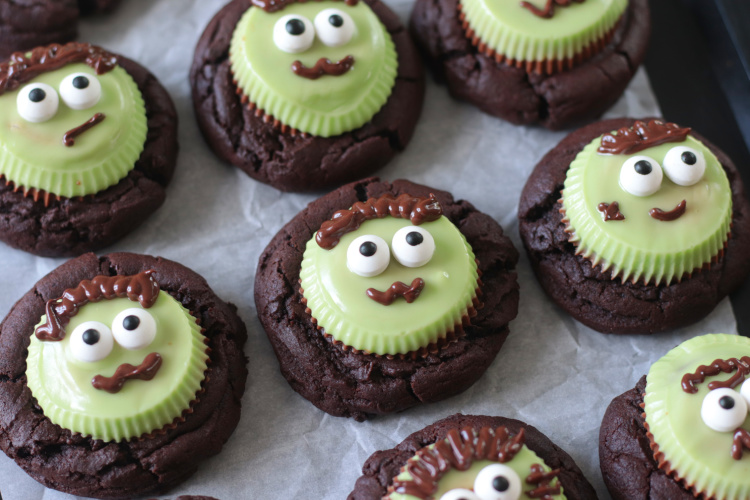
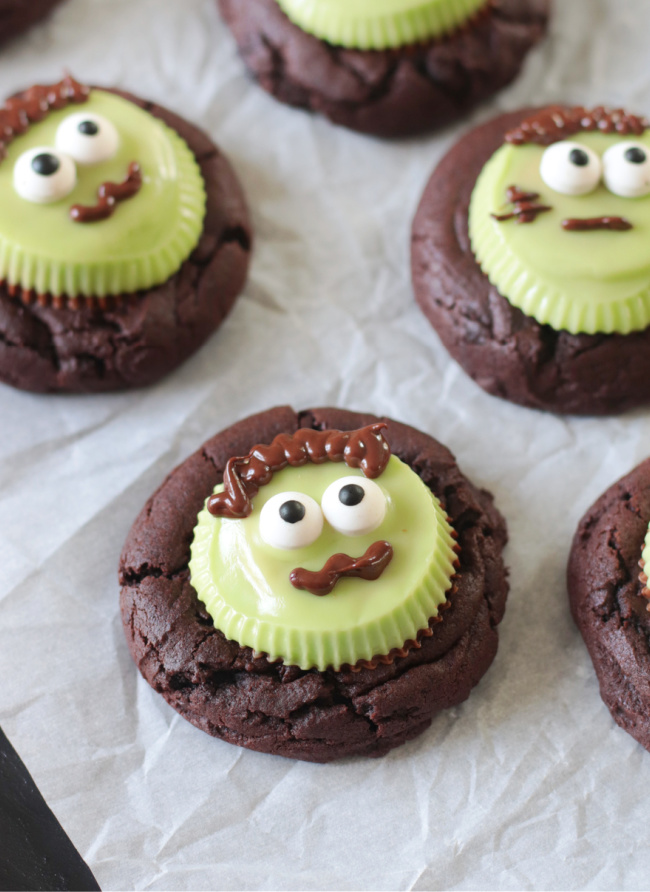
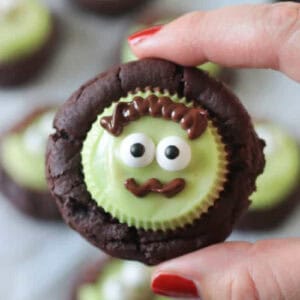
These easy Frankenstein cookies are just plain fun! A rich, chocolatey cookie topped with a Halloween peanut butter cup and decorated to look like Frankenstein!
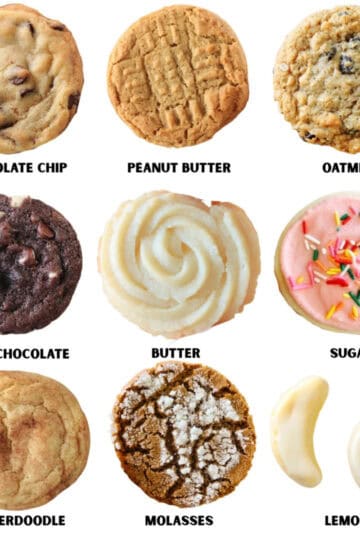
You might also like our Halloween brownie pops, our Halloween Rice Krispies Treat pops, or our deep dish Halloween cookies!
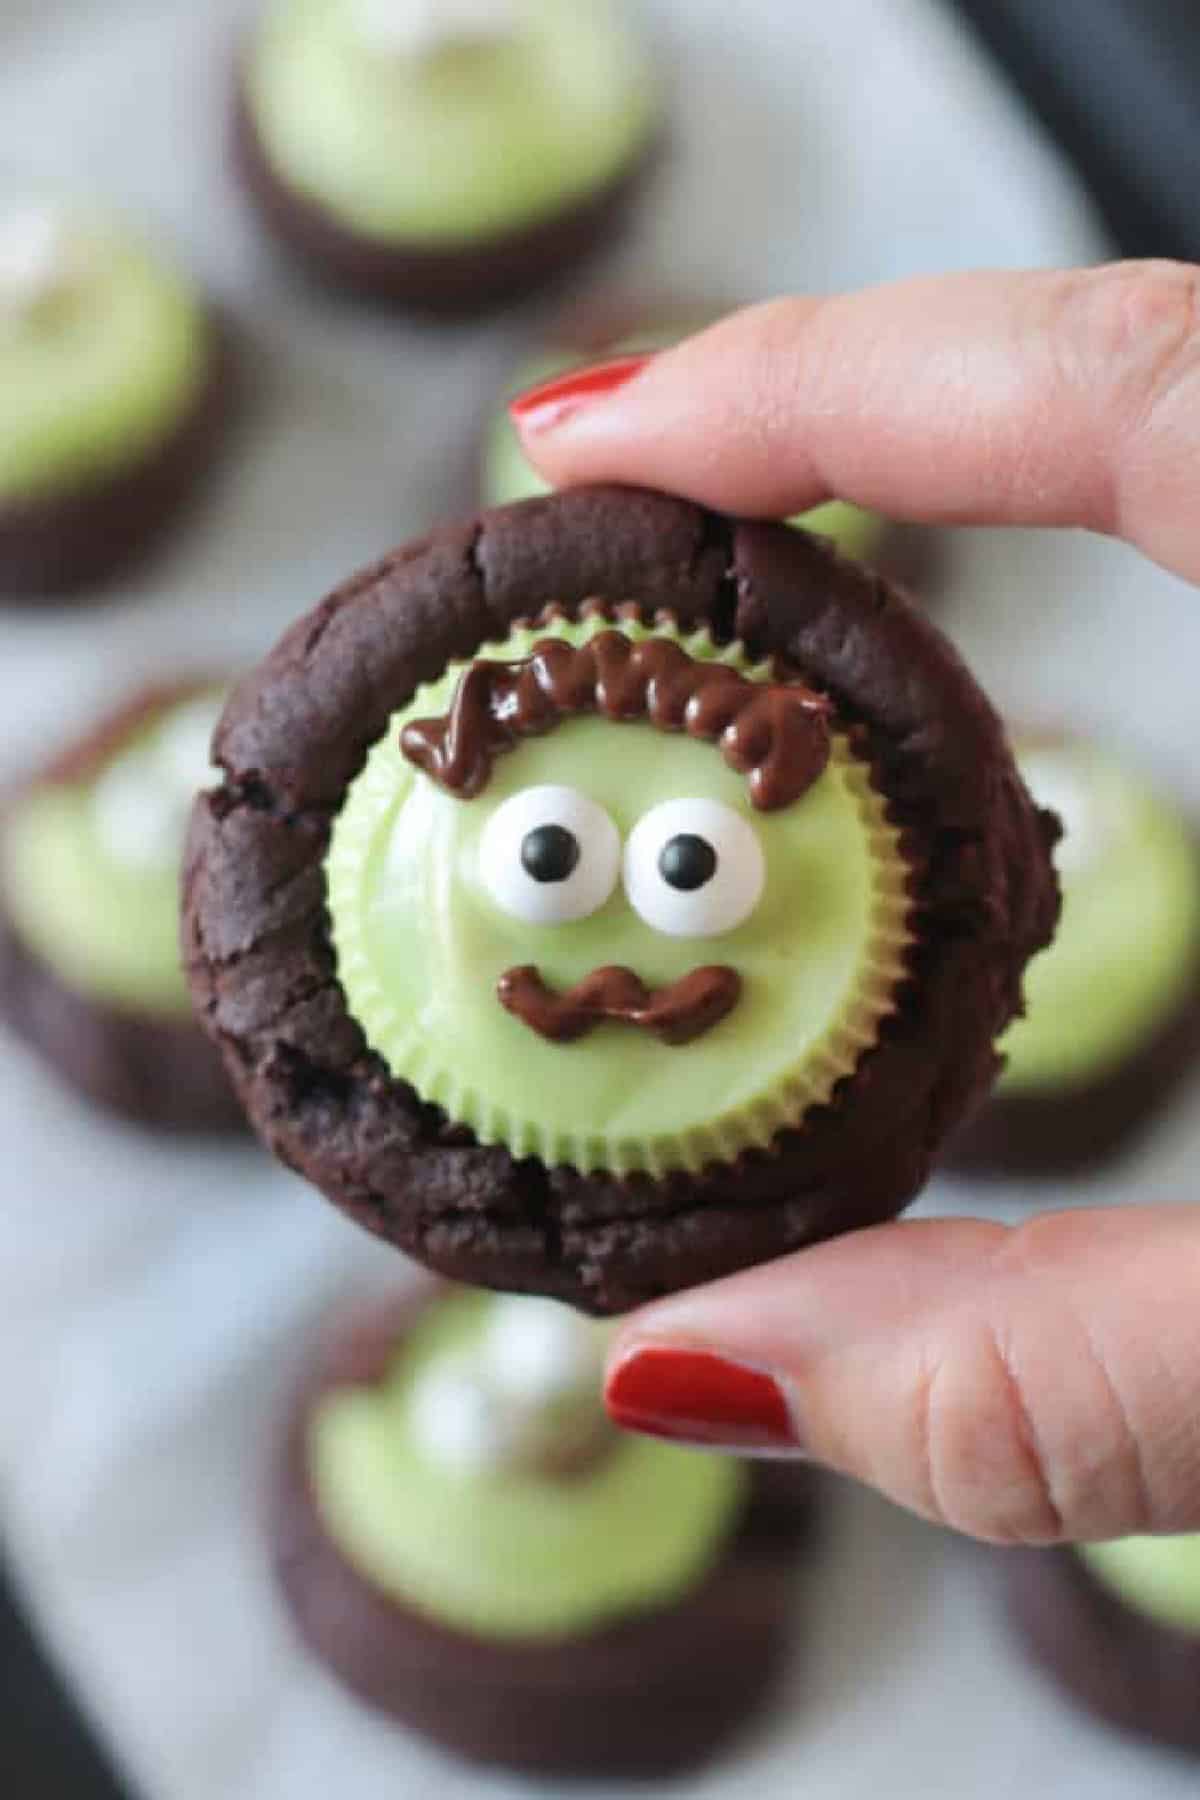
Frankenstein cookies are easy to make! Bring a platter of these spooky cookies to your next gathering; they won't disappoint. You can create Frankenstein faces with green candy melts or Halloween Reese's peanut butter cups.
Why I Like This Recipe
- Delicious cookie base. You can make Frankenstein cookies using any cookie recipe that you'd like, but my chocolate cookie dough is the perfect base. Rich and loaded with chocolate flavor. I also use it for making German chocolate cookies, Rocky Road cookies and Texas sheet cake cookies.
- Two ways to create Frankenstein faces. You might not be able to find green Halloween peanut butter cups, no worries! I included instructions for an alternative method using green candy melts.
- Easy to customize. I used melted chocolate chips and candy eyeballs for Frankenstein's hair and details, but you can use sprinkles, gel, chocolate frosting, or whatever you'd like!
Jump to:
Tips and Tricks
- Best baking cocoa. I prefer using a 50/50 blend of Hershey's Special Dark Baking Cocoa and regular baking cocoa for a rich chocolate flavor that isn't overpowering.
- Do not transfer cookies to a cooking rack. Leave the cookies on the baking sheet instead of moving them to a cooling rack, as you'll be placing the tray in the refrigerator in a bit.
- Storage tips. Keep cookies in a single layer until they are set all the way through. Store leftover cookies in an airtight container or cover the tray with plastic wrap.
Ingredients
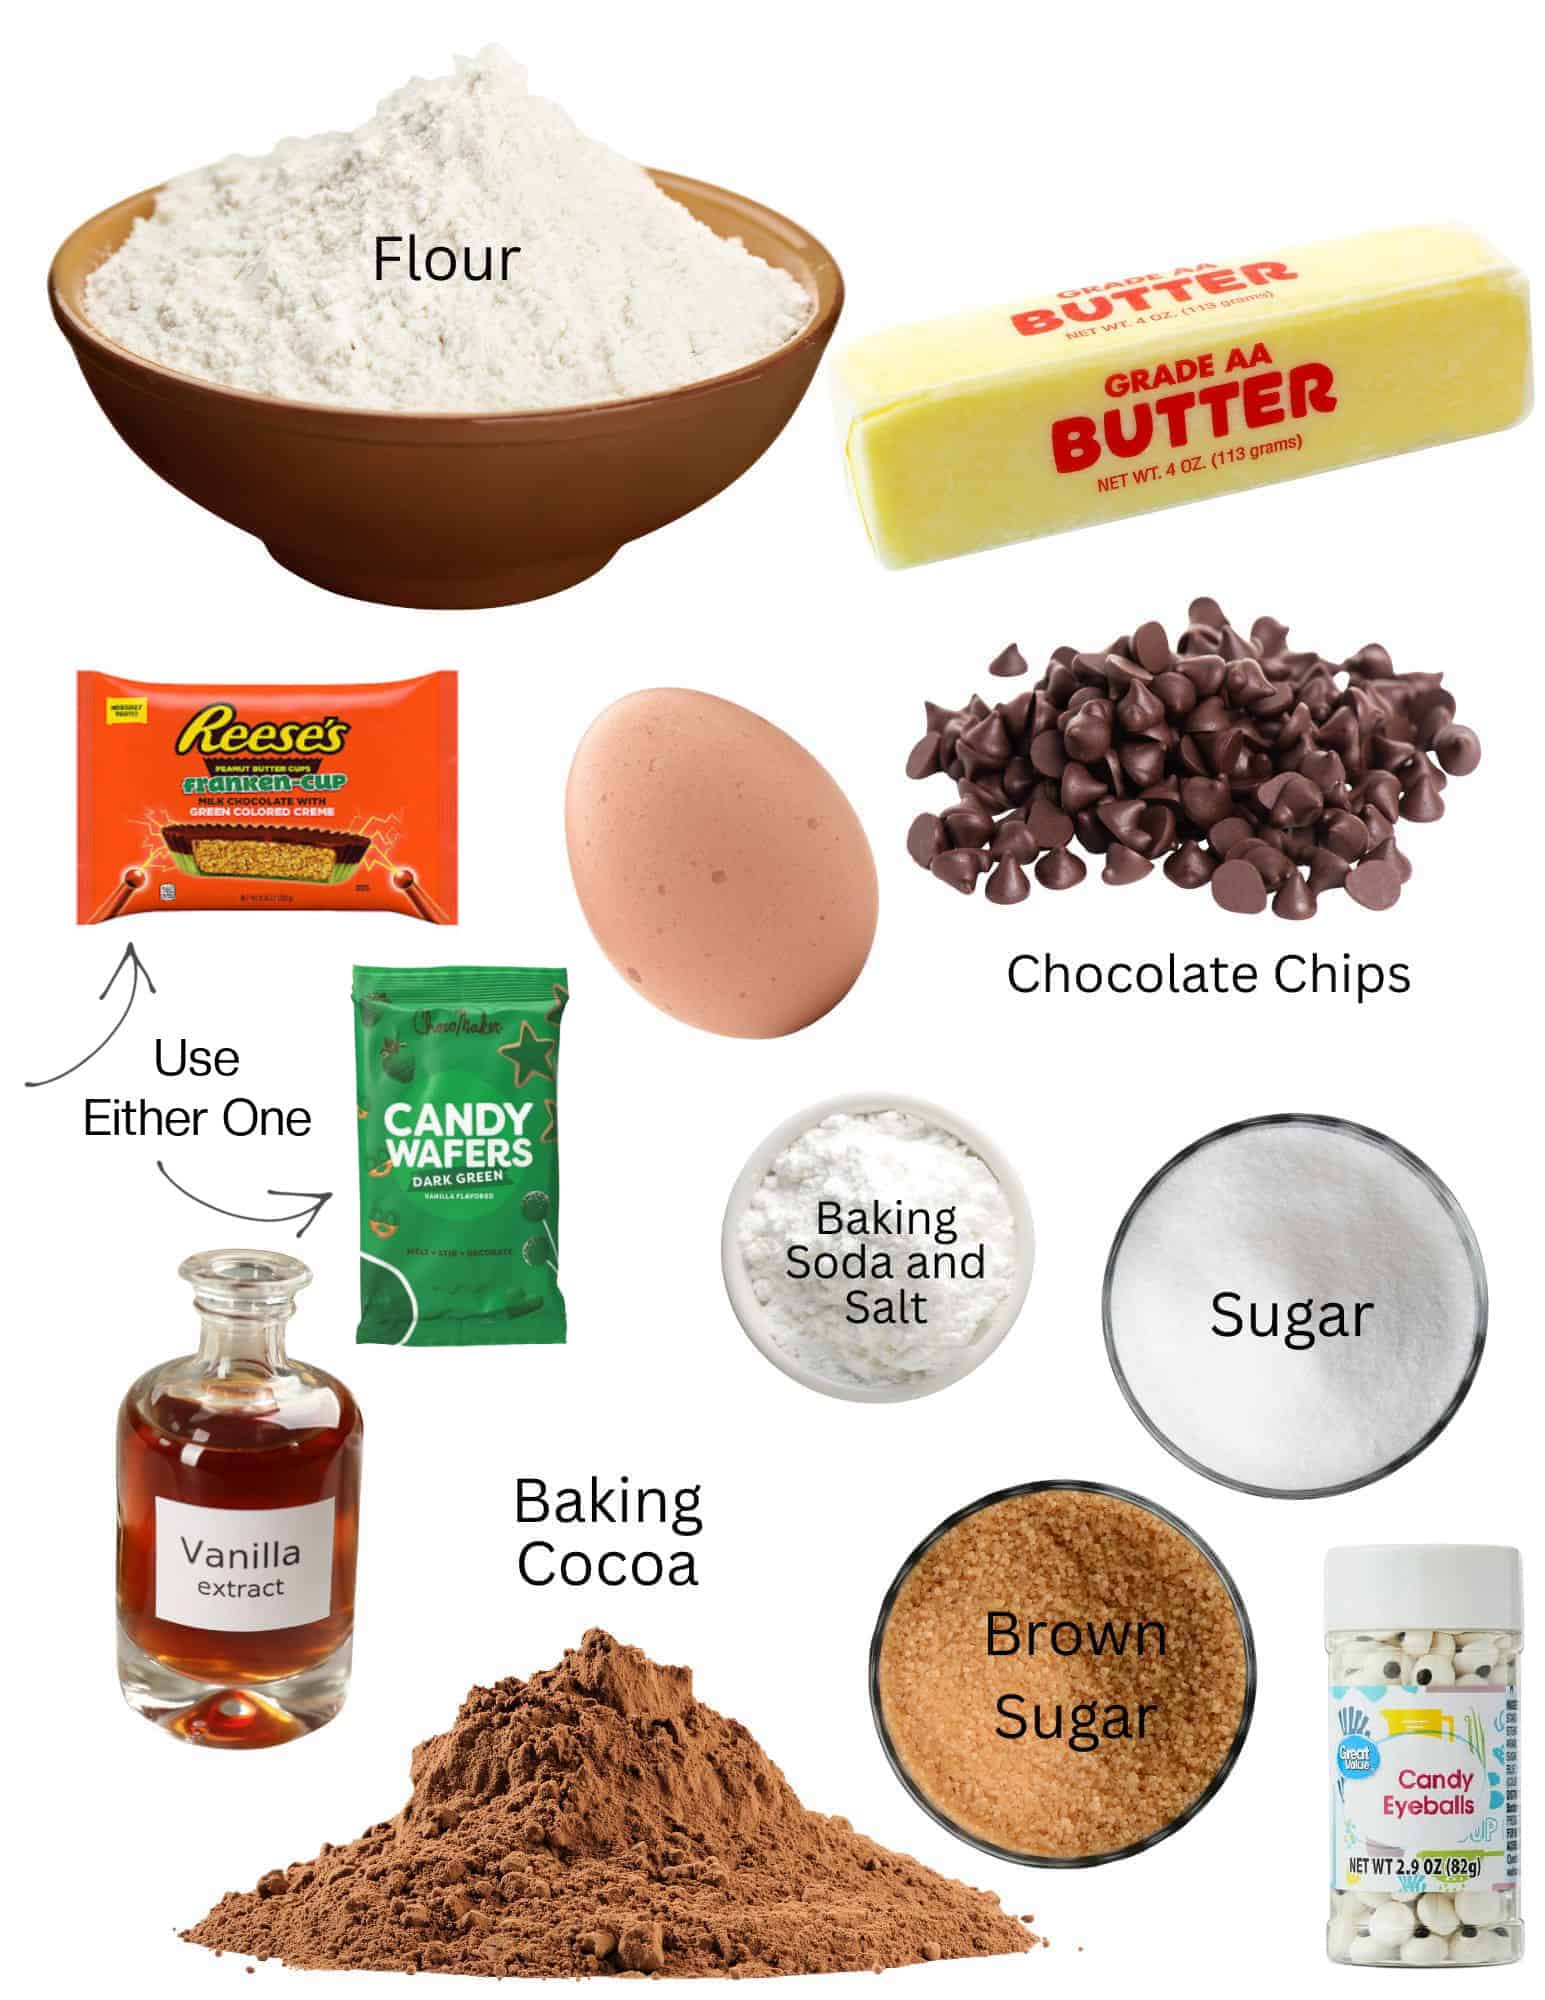
- Butter: Melted butter mixes with the sugar and cocoa to create the perfect base for the cookie dough. I always bake with salted butter.
- Cocoa powder: I use a 50/50 mix of regular baking cocoa and Hershey's Special Dark baking cocoa, but you can use whatever you'd like)
- White and brown sugar: A combination of both gives the cookies great flavor and texture.
- Eggs
- Vanilla extract
- Salt and baking soda: For flavor and leavening.
- All purpose flour
- Reese's Franken-cups or green candy melts
- Candy eyes
- Chocolate chips: Melted chocolate chips are used for creating the eyebrows and mouth.
See the recipe card for full information on ingredients and quantities.
How To Make Easy Frankenstein Cookies
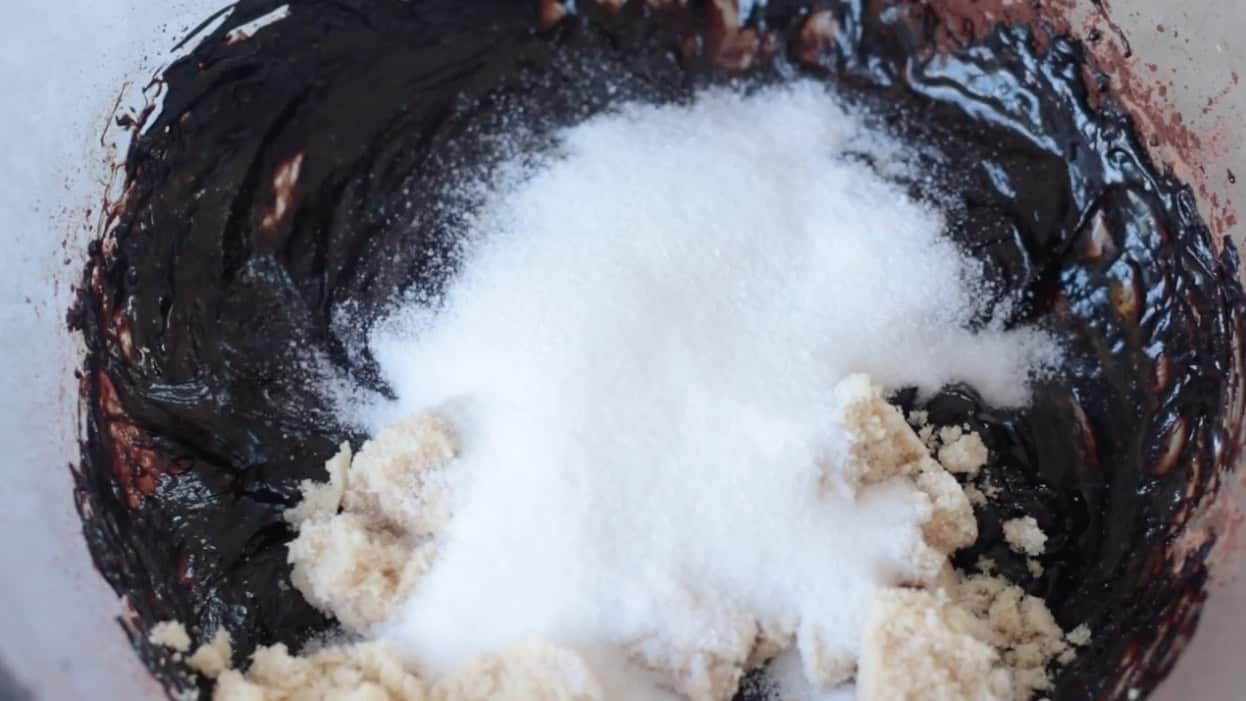
Step 1: Combine melted butter and cocoa powder in a large bowl and mix using a hand mixer or stand mixer. Add sugars and mix until smooth. Add eggs and vanilla.
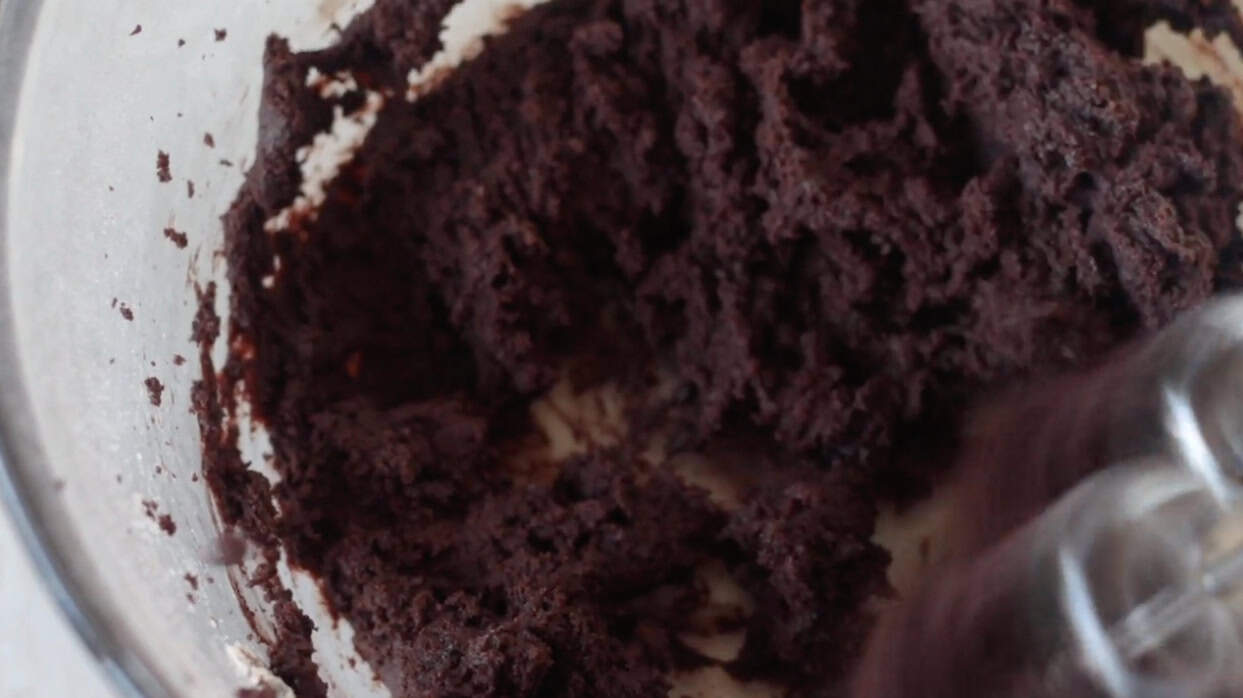
Step 2: Add dry ingredients to the wet ingredients.
Cover the bowl and allow the dough to chill in the refrigerator for about 60-90 minutes.
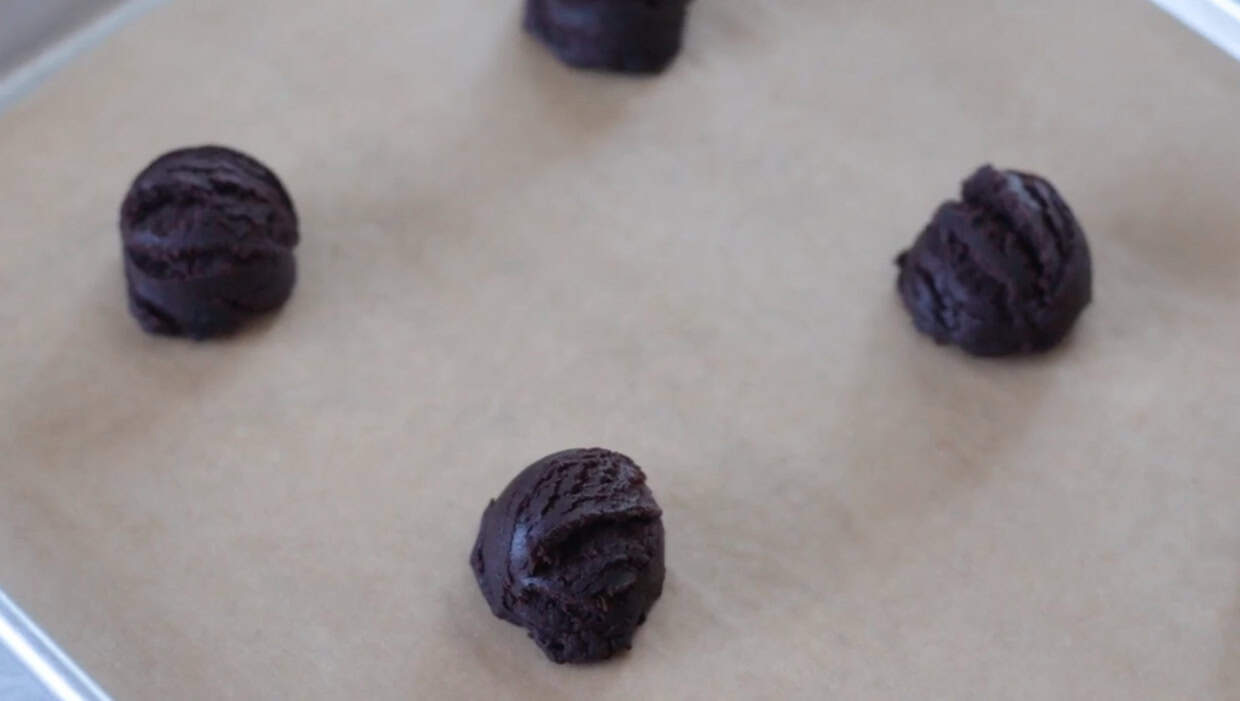
Step 3: Use a medium cookie scoop (2 Tbsp. size) to drop cookies on a parchment paper-lined baking sheet.
Bake at 350 degrees for 9 minutes (DO NOT OVERBAKE!)
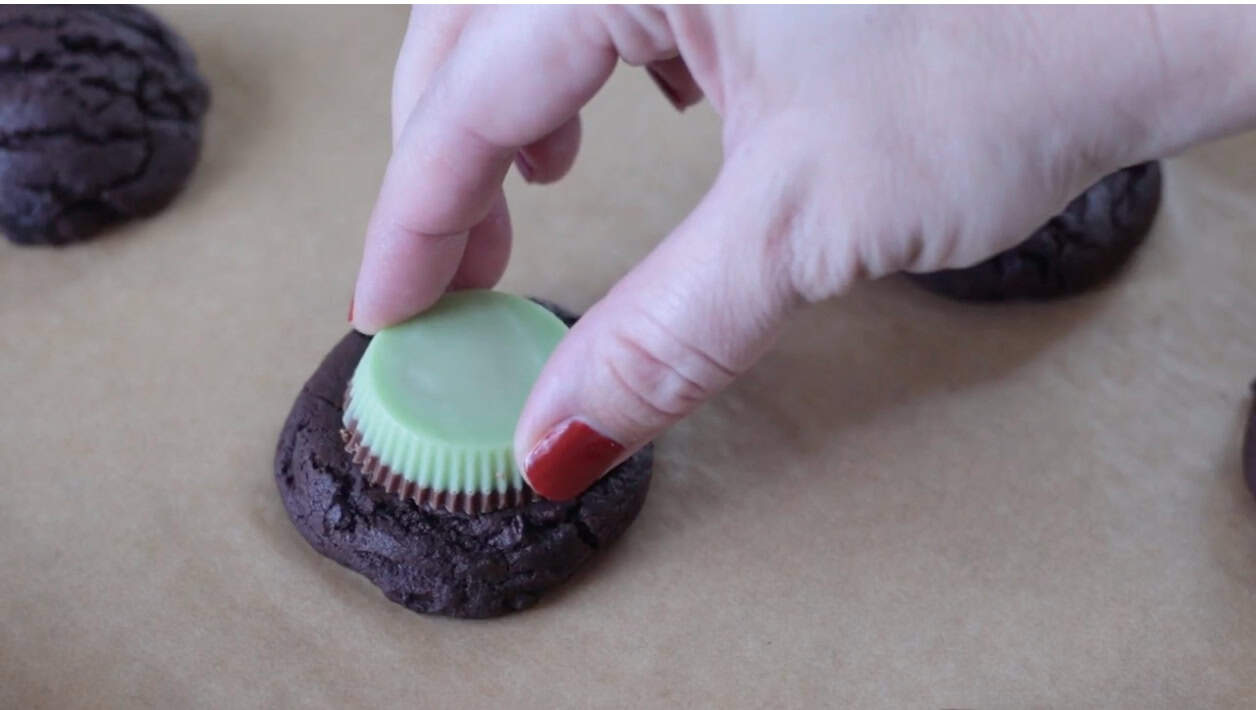
Step 4: Place a peanut butter cup onto each cookie as soon as it comes out of the oven. Let the cookies stand for 5 minutes (or until the peanut butter cups start to look glossy).
Note: If using green candy melts, let cookies cool completely, then melt green candy melts and spoon a small amount over each cookie, creating a circle.
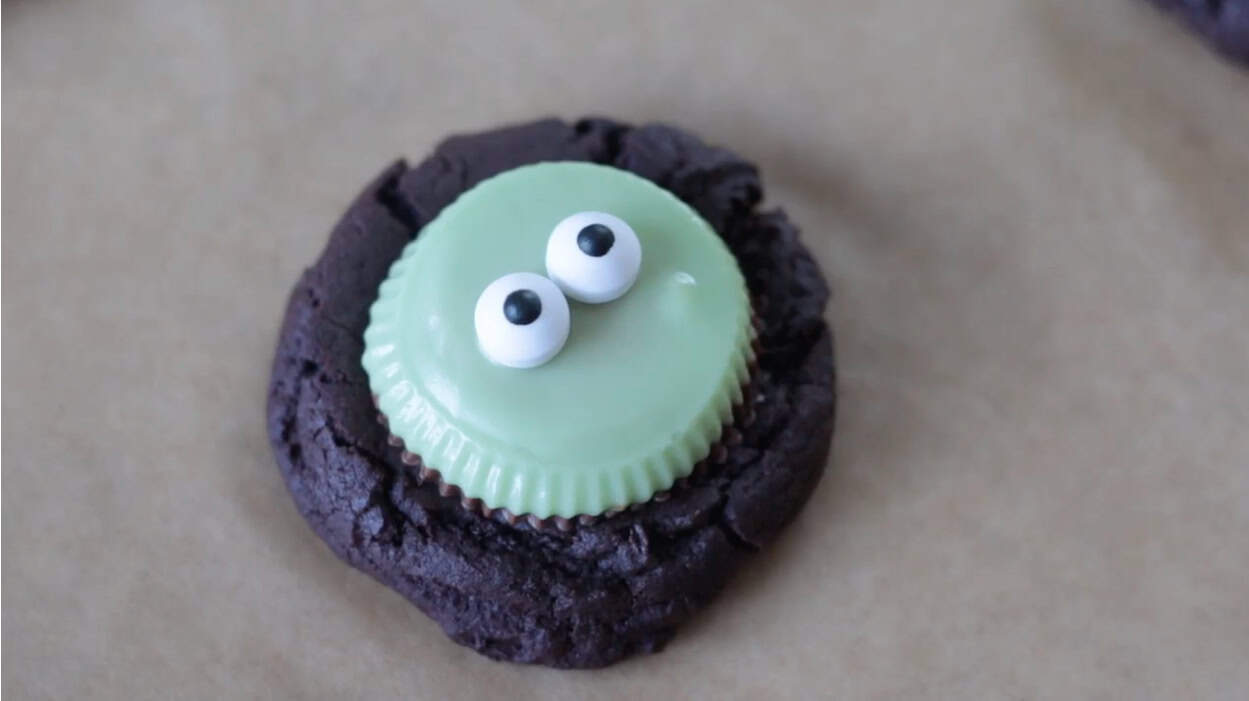
Step 5: Add candy eyes. Since the peanut butter cups are glossy and soft, the eyes will stick right to them. Refrigerate the tray of cookies for 15 minutes. This will prevent the peanut butter cups from melting too much and allow the candy melts to harden if you used those.
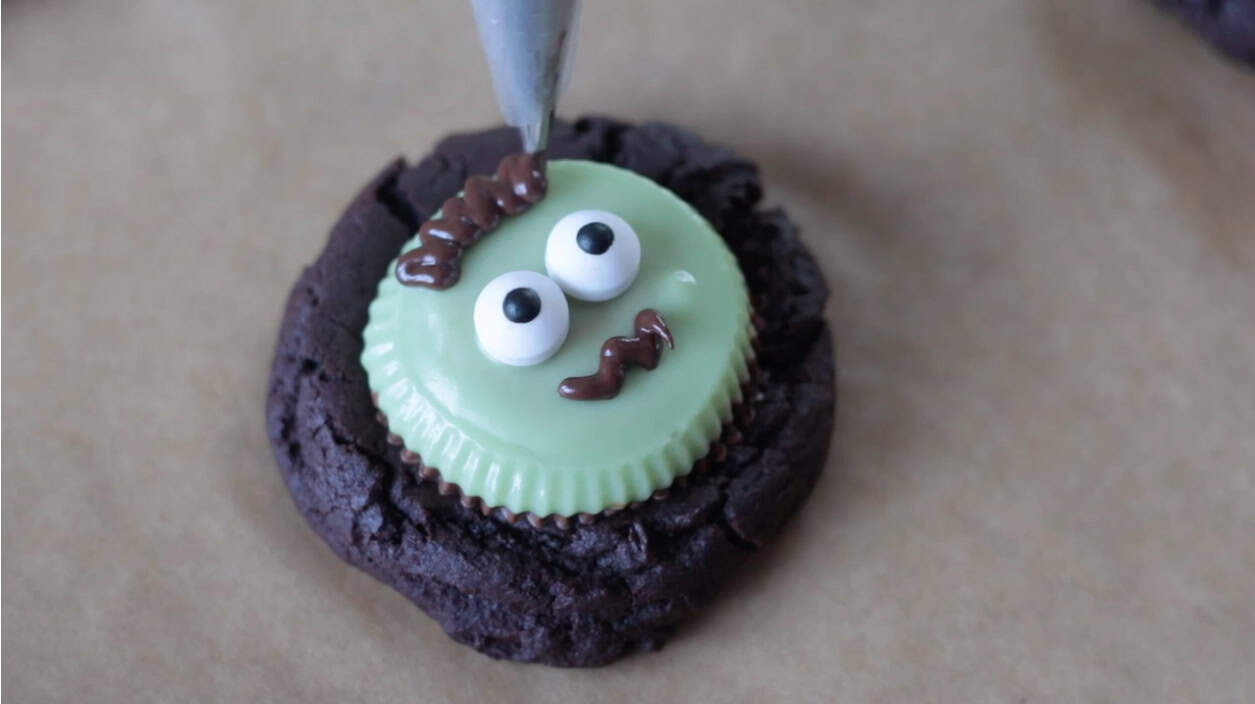
Step 6: Melt chocolate chips in a microwave-safe bowl. Spoon chocolate into a frosting bag or sandwich bag. Use a frosting tip or cut the tip off of the bag (making a TINY hole) and pipe the chocolate onto the cookies to add hair and a mouth. I didn't add any bolts to my Frankenstein cookies, but you can add one on each side if you'd like, using the melted chocolate.
Keep cookies in a single layer until they set up all the way. Store leftover cookies in an airtight container or cover the tray with plastic wrap.
Frankenstein Cookies FAQs
Green Reese's peanut butter cups (Halloween edition) work great for Frankenstein faces, but they are not always available every year. No worries! I included instructions for an alternative method using green candy melts.
You do not need to chill the dough for an extended period of time (4+ hours). However, the dough is sticky and wet and needs to chill for 30 minutes. Leave the unscooped cookie dough in the refrigerator while the other cookies bake. Pull the bowl out of the refrigerator when ready to bake up another batch of cookies, so the cookie dough doesn’t warm up again.
I prefer to bake on light-colored baking sheets. If you use dark metal sheets you’ll need to watch closely to make sure that the cookies don’t brown too quickly.
More Halloween Recipes To Make


MADE THIS RECIPE AND LOVED IT? 💛 Please leave a STAR rating and COMMENT below! Post it to Facebook or Pinterest to easily share with friends!
Reese's Frankenstein Cookies
Ingredients
COOKIES
- ½ cup melted butter (1 stick)
- ¼ cup cocoa powder
- ½ cup brown sugar
- ¼ cup white sugar
- 1 large egg
- ½ teaspoon vanilla extract
- ¼ teaspoon salt
- ½ teaspoon baking soda
- 1 ¼ cups flour
- 14 Reese's Franken-cups or green candy melts
- candy eyes
- ⅓ cup chocolate chips melted
Instructions
Cookies
- Melt 1 stick of butter (½ cup) in the microwave. Combine melted butter and cocoa powder in a large mixing bowl. Stir until smooth.
- Mix brown sugar and white sugar with the butter/cocoa mixture.
- Add eggs and vanilla.
- Mix in salt, baking soda, and flour.
- Chill dough for 60 minutes.Preheat the oven to 350 degrees.
- Scoop dough onto parchment paper lined cookie sheets using a medium cookie scoop (2 Tbsp. size).
- Bake cookies for 9 minutes.
- While cookies bake, unwrap peanut butter cups and set them to the side.Leave cookies on the baking sheet instead of moving them to a cooling rack.
- Place a peanut butter cup onto each cookie as soon as it comes out of the oven. Let the cookies stand for 5 minutes (or until the peanut butter cups start to look glossy). See the notes section if using green candy melts instead of peanut butter cups.
- Add candy eyes. Since the peanut butter cups are glossy and soft the eyes will stick right to them.
- Refrigerate the tray of cookies for 15 minutes (this will prevent the peanut butter cups from melting too much).
- Melt chocolate chips in a microwave-safe bowl. Spoon chocolate into a frosting bag or sandwich bag. Use a frosting tip or cut the tip off of the bag (making a TINY hole) and pipe the chocolate onto the cookies to add hair and a mouth.

Brandy says
These chocolate peanut butter cup cookies are so yummy! I love that if you can't find green peanut butter cups that you can use green candy melts instead.