Gluesticks Blog

menu icon
go to homepage
  • Summer
  • DIY
  • Recipes
  • About Me
  • Subscribe
    • Facebook
    • Instagram
    • Pinterest
  • subscribe
    search icon
    Homepage link
    • Summer
    • DIY
    • Recipes
    • About Me
    • Subscribe
    • Facebook
    • Instagram
    • Pinterest
  • ×
    Home » Craft Tutorials » Kids Crafts

    Sesame Street Characters {Using Polymer Clay}

    Modified: Jun 8, 2025 · Published: Aug 26, 2013 by Brandy · This post may contain affiliate links.

    Sesame Street polymer characters

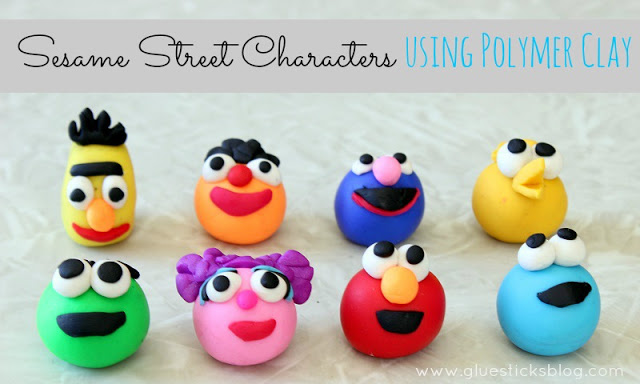
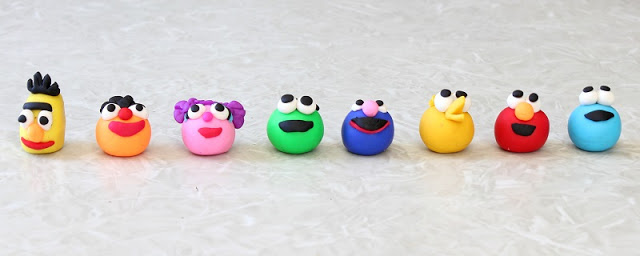
    Most folks stopped playing with play-doh sometime during their childhood. I guess I am not most people because I had way too much fun making these polymer characters with Ruby! We started out with the plan of making Elmo and Cookie Monster, but once I got started I had to make all of our favorites. And here they are!
    Sesame Street polymer characters
    They just make me laugh everytime I see them. Such goofy, fun characters that remind me of being a kid. Except for Abby. I don't think she was around back them.

    colorful blocks of polymer clay
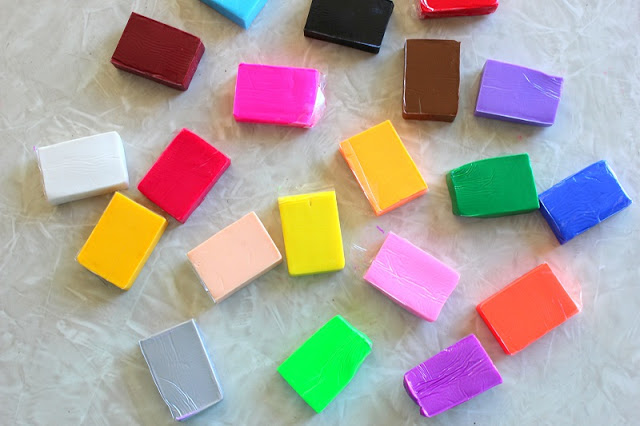
    We love polymer clay because it is easy to work with and you can save your creations by baking them. It comes in so many fun and vibrant colors. You can even get glow in the dark and sparkle varieties. Aaron has a nice collection of FIMO. We didn't want to dive into his stash so I picked these up from Wholeport. You can find polymer clay at your local craft store as well.
    Ruby is at the age where she no longer puts odd objects inside her mouth so I felt safe letting her help me. If you have young children just be aware that this is not edible like salt dough and you need to wash their hands thoroughly after using it.
    red clay
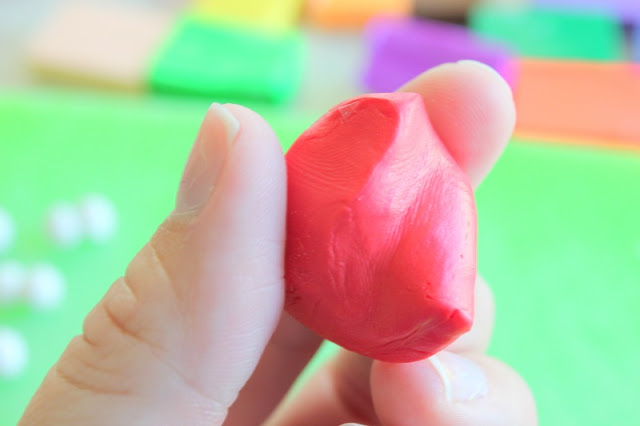
    We started out by breaking off even portions of clay and rolling them into a ball for the heads of the characters.
    white balls of polymer clay for eyes
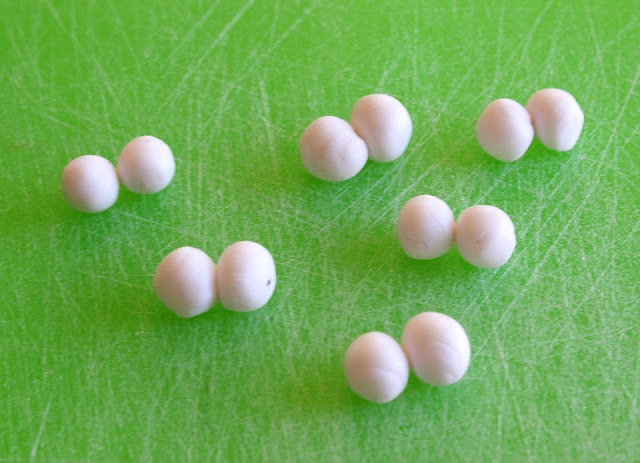
    Then we made eyes. Lots of them.
    yellow head of polymer clay
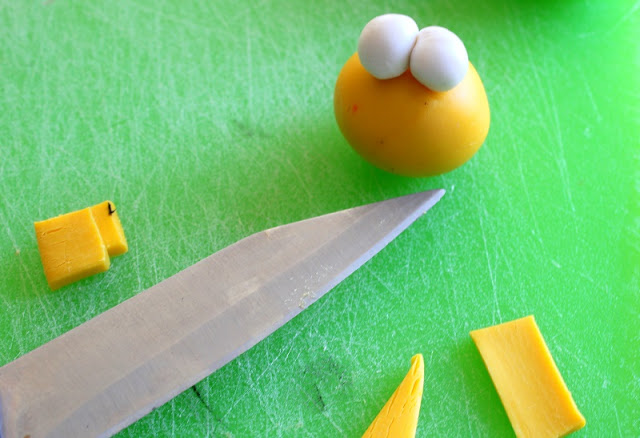
    You can use a paring knife or other kitchen tools to form and cut the clay. In the photo above I was cutting out Big Bird's beak.
    Oscar the grouch clay character
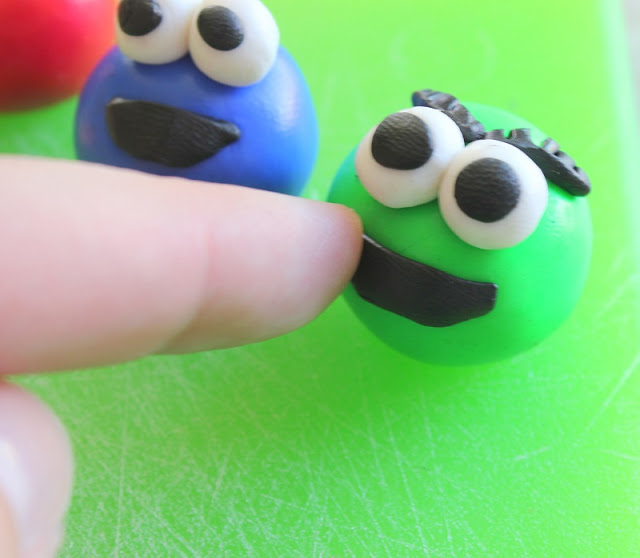
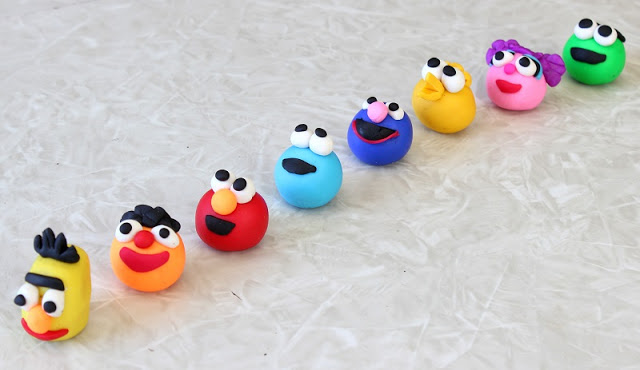
    Polymer clay sticks really well to itself. Just press and it's on there (once it's baked). Since I kept all of the shapes the same (except for Bert) it was easy to make them look uniform.
    Sesame Street polymer characters on pan
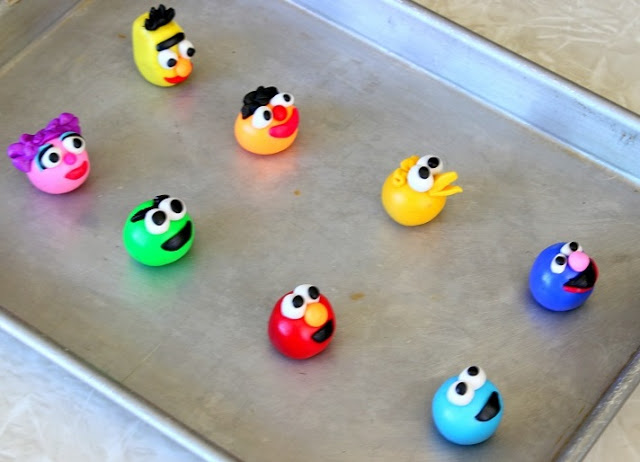
    Here they are. All ready to go into the oven. 265 degrees for 30-40  minutes. Allow to cool on the pan before removing.
    Sesame Street polymer characters
    These guys are nice and sturdy. Ruby has been rolling them around, carring them all over the house and sharing them with her siblings. She can drop them on the carpet or short distances and they won't break. They don't crumble and they are completely solid. That is the beauty of polymer clay.
    Cookie Monster polymer clay
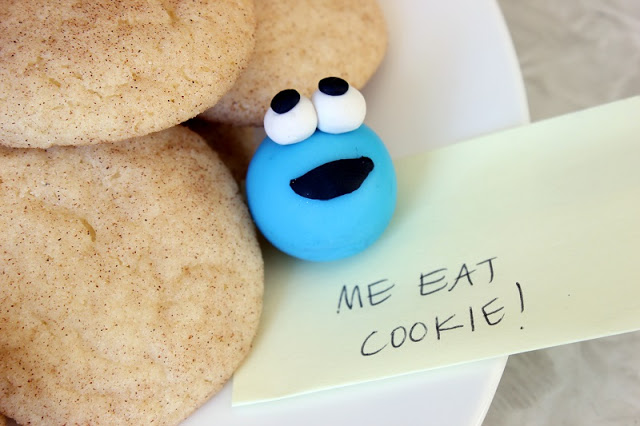
    This little guy was waiting for the kids when they got home from school. They thought it was pretty funny.
    hands holding Cookie Monster and Elmo character
    Which character is your favorite?
    small polymer characters
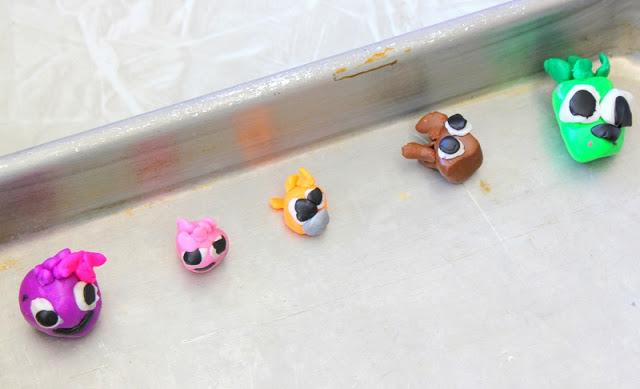
    Oh, and here are some "Puffles" (Club Penguin) that Kaylee made when she got home from school. She didn't want to be left out of the fun!
    This post contains sponsored product (polymer clay).
    Share
    Pin

    More Kids Crafts

    • Arms with stacks of bandana bracelets on them.
      Easy DIY Bandana Bracelets
    • White candles decorated with wax candle pens.
      How to Decorate Candles with Wax Candle Pens
    • Pop Tart nativity scene on white plate.
      Pop Tart Nativity Scene
    • DIY Jewelry Box for Kids to Organize Rings and Earrings!

    About Brandy

    Welcome! I'm Brandy, mother to 5 darling kiddos and a cute black lab named Toby. My husband is in the Coast Guard so we've lived all over the place, turning each house into a home. I love baking, sewing, making cute things with my kids, and sharing what I've learned with all of you!

    Comments

    1. [email protected] says

      August 28, 2013 at 6:38 am

      Thank you so much for sharing. Very Respectfully. Good job Kaylie. looks like you had fun.

      Reply
    2. TiffanyM says

      August 28, 2013 at 4:31 am

      super super cute!

      Reply
    3. Jaime JJ says

      August 26, 2013 at 2:07 pm

      these are just AWESOME!

      Reply
    4. Jaime JJ says

      August 26, 2013 at 2:07 pm

      these are just AWESOME!

      Reply

    Leave a Reply Cancel reply

    Your email address will not be published. Required fields are marked *

    Recipe Rating


    This site uses Akismet to reduce spam. Learn how your comment data is processed.

    Welcome!

    I'm Brandy! I love to create and share my ideas through easy-to-follow recipes and tutorials.

    More about me

    As an Amazon Associate, I make a small commission on qualifying purchases.

    sew with me kids sewing book
    My Book

    Summer Posts

    • Cherry pie on prep mat.
      Best Cherry Pie Recipe
    • Bandanna Picnic Blanket Tutorial
    • diy tiki torch planter on black plant stand
      DIY Tiki Torch Planter (Table or Stand) + Video
    • slab pie on white plate
      Peach Slab Pie
    • toddler playing with dinosaur garden
      Dinosaur Garden For Kids (Fairy Garden) (Video)
    • water bottle sewing tutorial
      Color Block Fabric Water Bottle Holder Tutorial
    • strawberry pie with whipped cream on top.
      Fresh Strawberry Pie Recipe (Video)
    • slice of ice cream cake on spatula
      Oreo Ice Cream Sandwich Cake
    See more Summer →

    Latest Posts

    • Two bandana tote bags.
      DIY Bandana Tote Bag Tutorial (Easy Sewing Project)
    • 3 walnut brownies stacked.
      Katharine Hepburn's Brownie Recipe
    • Stack of colorful bandana hair bows.
      How To Make Easy Bandana Hair Bows (No-Sew)
    • Slice of Chessmen banana pudding on a metal spatula.
      Chessmen Cookie Banana Pudding (Easy No Bake Recipe)
    • Chocolate cake coated in ganache and mini chocolate chips.
      Best Chocolate Pudding Bundt Cake
    • Corned beef, cabbage, carrots, potatoes and roll in serving dish.
      Corned Beef and Cabbage (Stovetop, Slow Cooker or Instant Pot)

    Footer

    ↑ Back to Top

    About

    • Privacy Policy
    • Accessibility Policy

    Newsletter

    • Sign Up! for emails and updates

    Contact

    • Contact

    As an Amazon Associate, I earn from qualifying purchases.

    Copyright © 2025 Gluesticks Blog