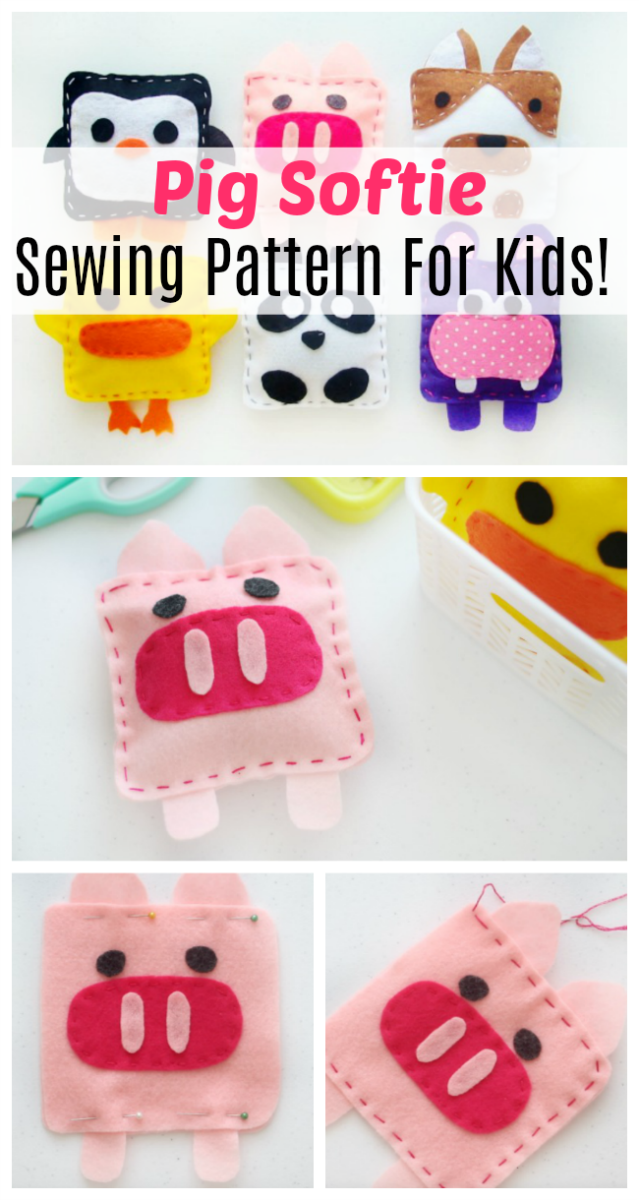
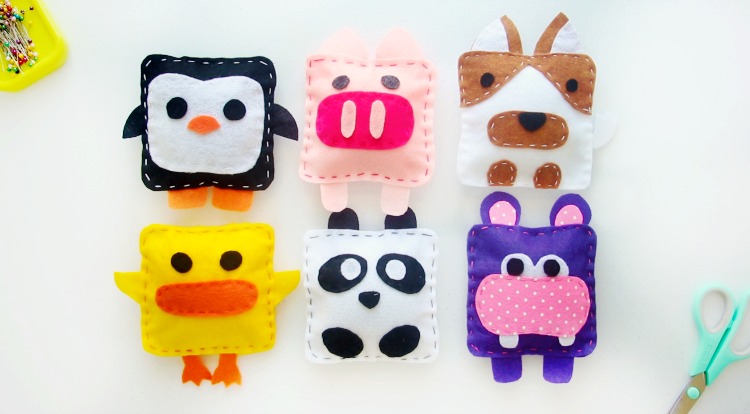
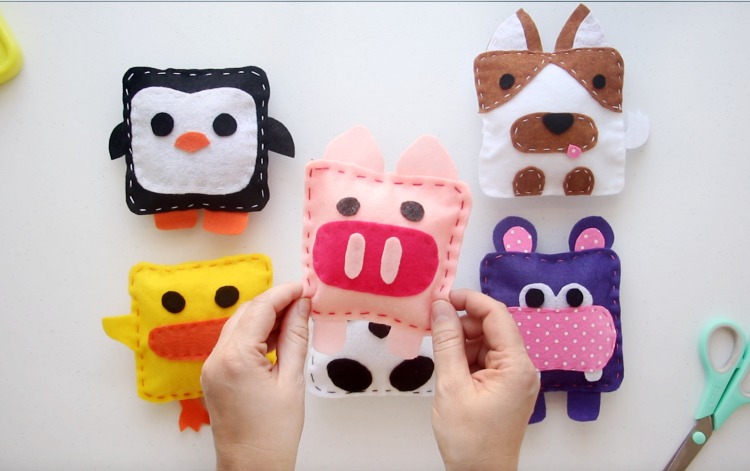
Make your own pig softie! A simple sewing project for kids using scrap felt and a needle and thread! Such a sweet and simple way to make your own stuffed animal! This is part 3 of a 6-part sewing series for kids. Today we're making a pig. In part 1 we made a hippo and in part 2 we made a Corgi puppy! In part 4 we'll make a panda so be sure to come back to make one with us!
Looking for more sewing projects for kids? Check out our Corgi puppy softie or 10-minute wired headband!
Watch our step by step video!
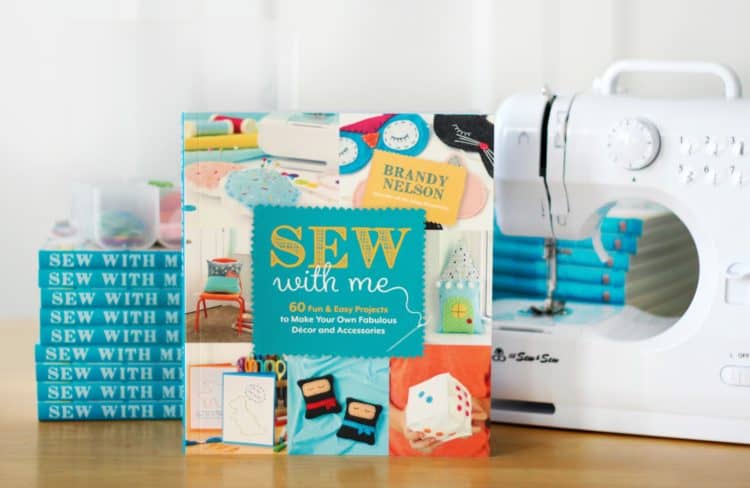
For 60 more sewing projects for kids check out my sewing book, SEW WITH ME!
Easy Softie Sewing Patterns for Kids
Items you'll need to have on hand for our Felt Softies:
- felt scraps
- thread (we used embroidery floss)
- needle
- scissors
- pins
- hot glue or fabric glue*
- paper to print template for pattern pieces
Tips for Sewing Softies
- It's not a great time to be heading to the store to pick up supplies with the government encouraging us to stay at home. That's ok! Just work with what you have. If you don't have any stuffing to fill your softie, you can use a sock or even a plastic grocery bag (it'll sound crinkly!).
- I had a lot of felt scraps left over from previous projects, but not everyone has a stash like mine and that's totally okay! If you don't have felt, you can use other fabric scraps. I like using felt or fleece because these types of fabric don't fray. If you use cotton, the edges will fray, but it will still be a cute softie! These heart plushies are made out of cotton. We cut the fabric out using pinking shears (decorative sewing scissors) which helps the edges not fray.
- You can sew your entire softie or glue your entire softie. It's up to you. We will be using a combination of sewing and gluing in our step by step photo instructions and video. You still get the cute stitched look, but don't have to sew every tiny detail on by hand.
- Get creative! Use different colors of felt, add buttons if you'd like---have fun!
*Hot glue dries fast, but fabric glue is easier for kids to work with. If using fabric glue, allow time for drying.
Pig Softie Sewing Pattern for Kids
How To Make A Pig Softie
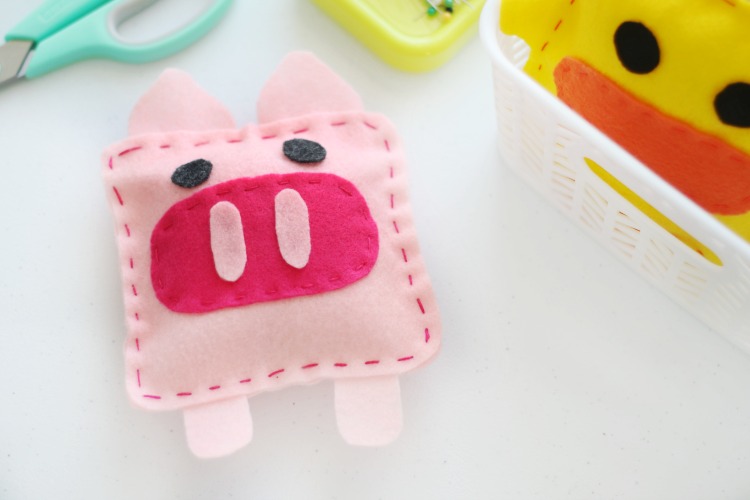
Pig Softie Sewing Pattern For Kids
Equipment
- pins
- scissors
Materials
- printable pig softie template
- felt scraps
- stuffing (polyester fiber fill)
- hot glue or fabric glue
Instructions
- Cut out pig softie templates. Pin each template to the felt and cut out the necessary pieces.
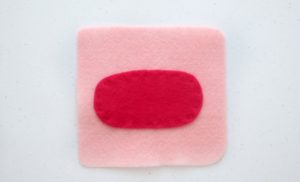
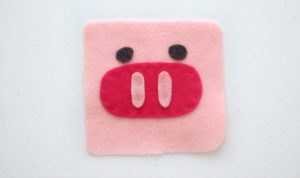
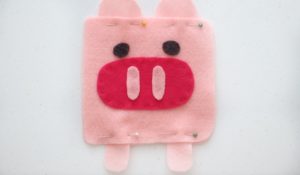
- Place the snout piece onto one of the squares of felt. Pin into place.Thread a needle with a long piece of thread. If using embroidery floss, seperate the strand of floss into two sections (each section will have 3 strings of floss). Use one section for sewing.Tie a knot on the end. Stitch around the snout. Tie a knot on the back when you are finished and cut the thread.

- Glue the eyes and nostrils onto the snout using hot glue or fabric glue.

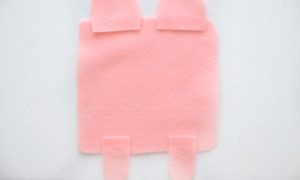
- Set the front of the softie to the side. Place the second square onto your work surface. Place ears and legs over the square.

- Place the front piece on top, sandwiching the ears and feet in between. Add a few pins to keep everything together.

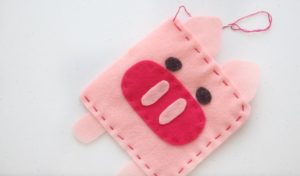
- Stitch around 3 sides, leaving one side open. Stuff pig with a small handfull of stuffing.

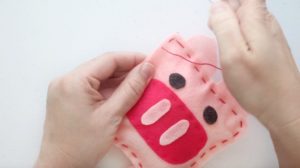
- Stitch the opening closed.

Video
Notes
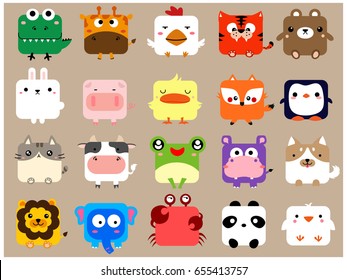
The designs for our animal softies were inspired by this clip art that I found on shutterstock.


Leave a Reply