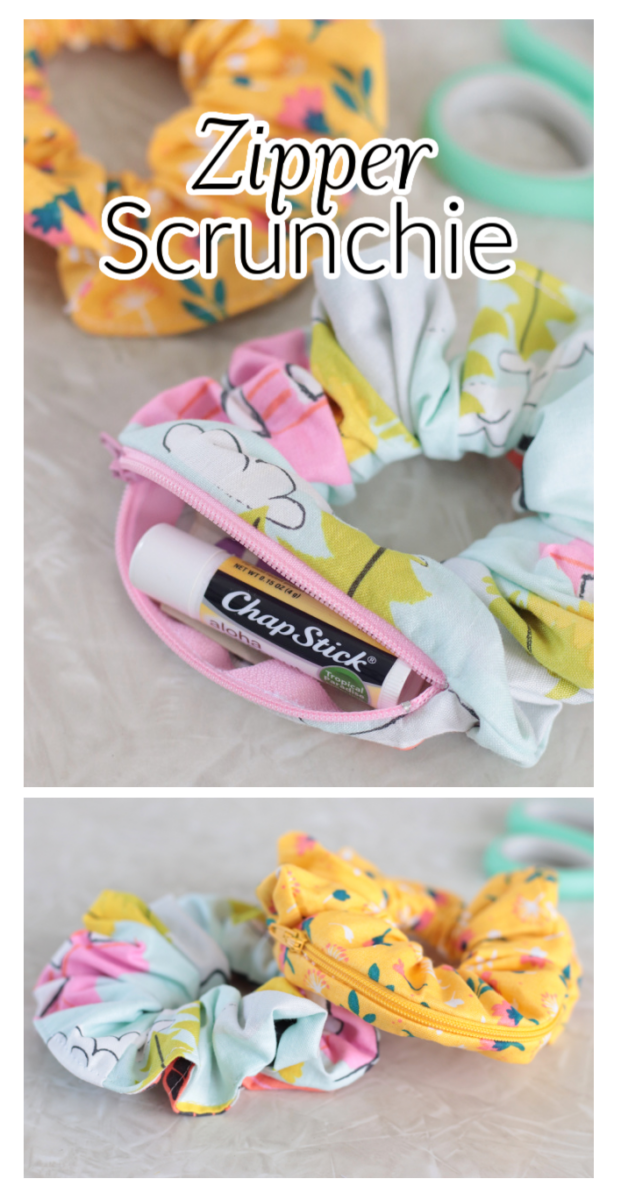
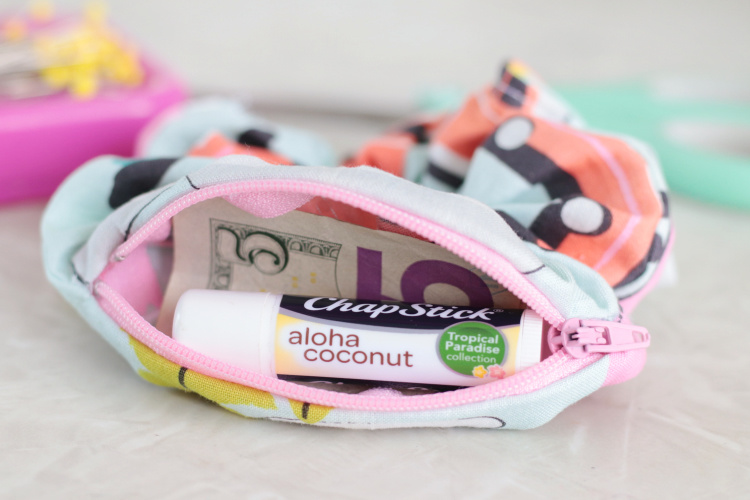
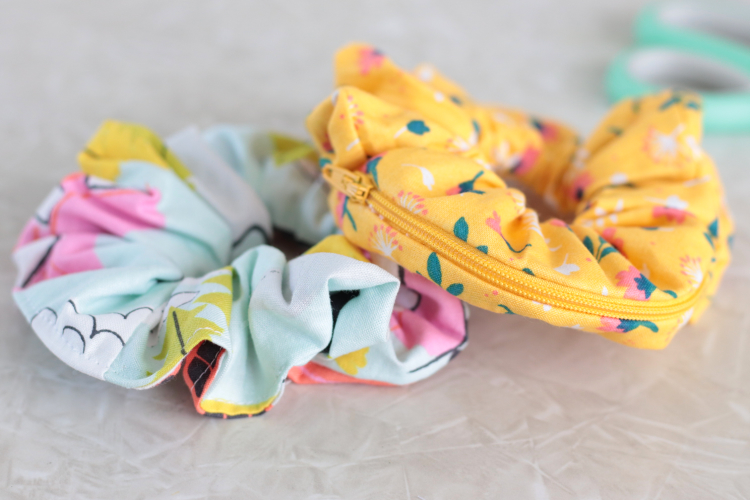
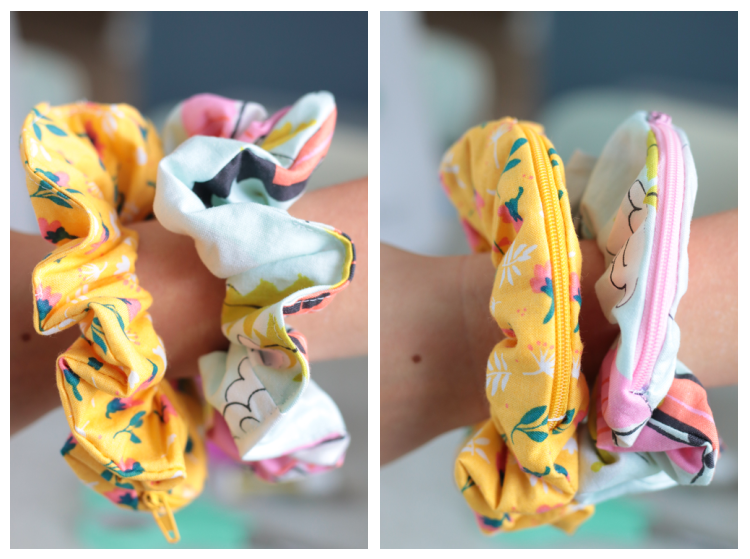
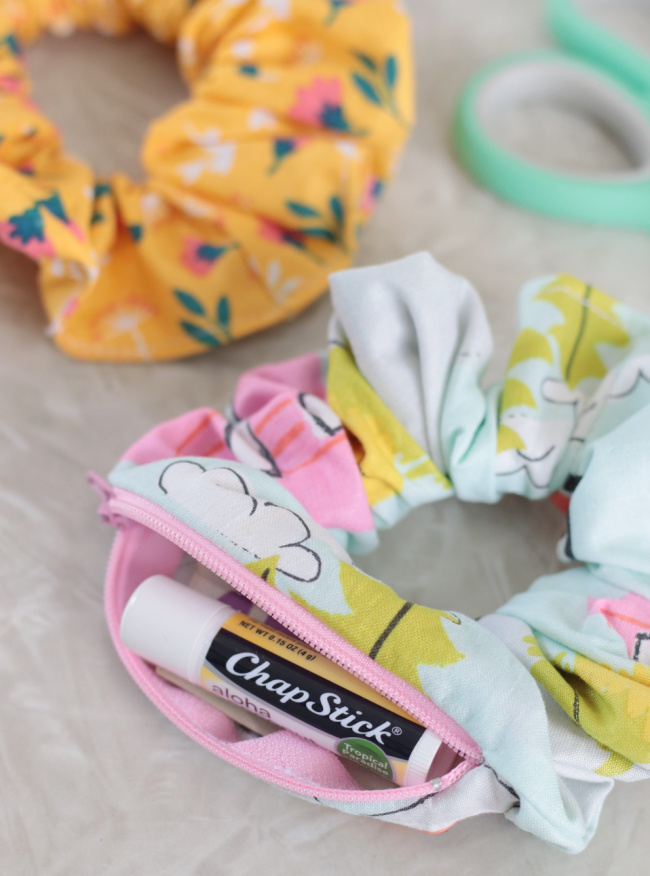
Make a stash scrunchie with a zipper! Adding a hidden zipper to a scrunchie turns it into a pocket to hold a key, chapstick, money, and more!
You might also like our 10-minute wired fabric headbands (so easy and CUTE!) or our Morse code beaded bracelets. Looking for another cute scrunchie to make? Try our bunny ear (tied) scrunchie!
Make Sure To Watch Our Step By Step Video Before Beginning!
Stash Scrunchie With Zipper
A scrunchie with a zipper pocket? When you think about it, a scrunchie is just an empty tube of fabric, cinched with a piece of elastic. Add a zipper and you have yourself a nice little pocket scrunchie!
What Does a Scrunchie With Zipper Hold?
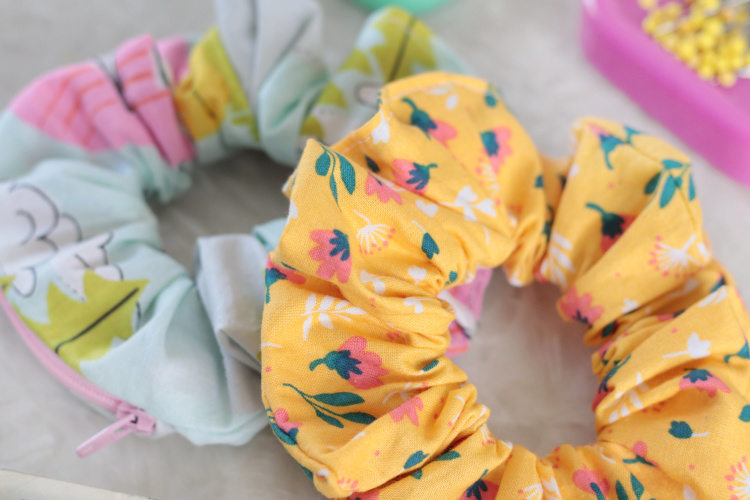
These fabric scrunchies are fun to make and a great scrap fabric project! They make great gifts too. Here are some items that would easily fit inside a scrunchie:
Lip gloss, keys, rubber bands, money, earrings, bobby pins, and more!
You might be wondering if you can still wear the scrunchie if it has something inside of it and the answer is YES. I tried one on that had a tube of chapstick inside and was still able to hold my hair in a ponytail.
Best Fabrics For Making Scrunchies
My favorite fabric to use for scrunchies is cotton. I always have scraps of quilting fabric around so that's my go-to, but knit, corduroy, lightweight denim, or muslin would work too. I used my basic scrunchie tutorial to create this updated version. These ones are bigger and just plain fun!
DIY Scrunchie Supplies
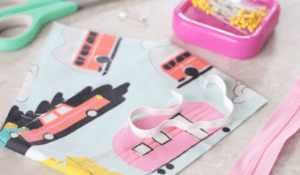
Fabric: I listed my favorite fabric choices above. You'll need a 28" x 4.5" rectangle of fabric to make a zipper scrunchie.
Zipper: These are the zippers that I always order. I buy them in bulk and they are perfect for so many projects. It's easy to shorten a zipper so I prefer to have them too long vs. too short. You can use a metal zipper, but you'd have to shorten it by hand vs. using your sewing machine.
Elastic: ¼" elastic or ⅛" elastic is perfect for making scrunchies. You'll need a 9" piece.

More Easy Sewing Gift Ideas
Colorblock Cosmetic Bag Tutorial
Double-Sided Tissue Pouch (Holds chapstick, tissues, and hand sanitizer!)
How To Make a Scrunchie With Zipper

Jumbo Scrunchie With Zipper
Equipment
- scissors
- sewing pins
- safety pins
- measuring tape
- iron/ironing board
- sewing machine
Materials
- 1 zipper nylon zippers are easier to work with than metal
- 1 9" piece of ¼" elastic
- 1 28" x 4.5" rectangle of fabric
- coordinating thread
Instructions
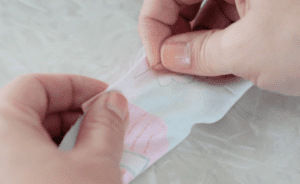
- Watch my step-by-step video (it displays under the first photo in the post) before beginning this sewing project.Seam allowances: ⅜"Gather supplies.

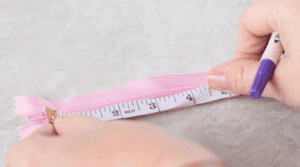
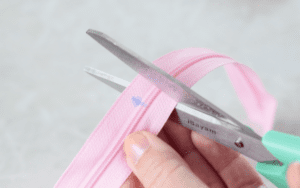
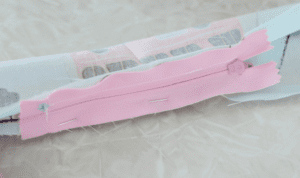
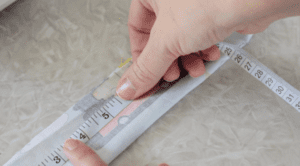
- You probably won't already have a 4 or 5" zipper on hand and that's ok. You can shorten another zipper by measuring 4.5" and marking it with a pin or a sewing pen.

- Trim ½-3/4" away from the mark.

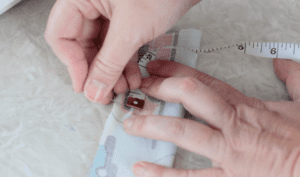
- Sew over the marking a few times. This will create a new zipper "stop".

- Fold the fabric in half and press. Open fabric. (We are just marking the center spot by ironing it).

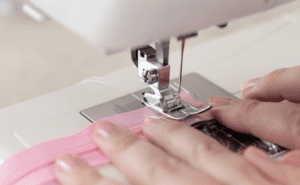
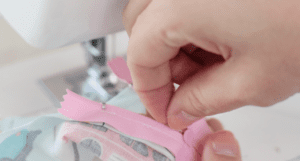
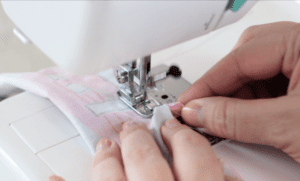
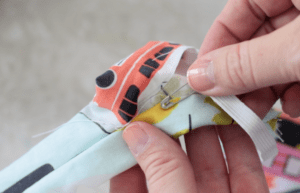
- Place the zipper FACE-DOWN on top of the fabric, centering it on the fold.Pin in place.

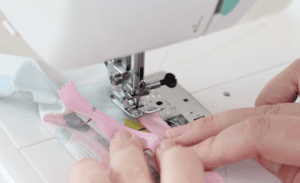
- Use a zipper foot (or a zig-zag foot) to stitch CLOSE to the center of the zipper.

- When your sewing foot touches the zipper pull, stop, make a knot, and cut the strings. Open the zipper, slightly. Then finish sewing the zipper to the end.You have now stitched ONE side of the zipper.

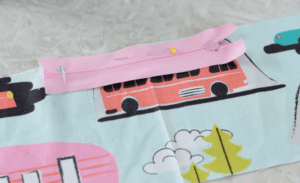
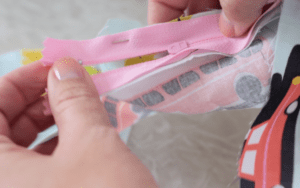
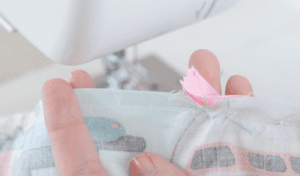
- Fold the scrunchie fabric in half to pin it to the other side of the zipper.

- It should look like this. One side of the zipper it stitched and the other side is pinned.

- Open the zipper, slightly so that you can begin to sew without the zipper pull being in the way.
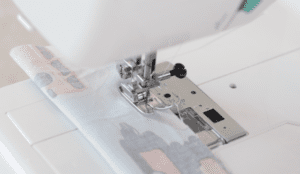
- Stitch close to the center of the zipper.
- Stop and close the zipper pull as you approach it. Continue stitching until you reach the end.

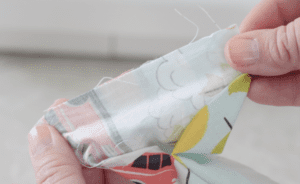
- Fold the fabric in half.Mark 3" from each end of the scrunchie fabric.

- Mark it with a pin on each side.

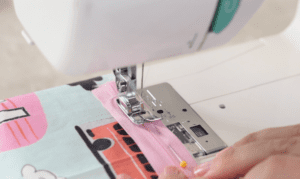
- Stitch the side seam, starting at the pin and stitching down to the zipper.
- As you approach the zipper, pull the excess zipper ends to the side so that you can stitch CLOSE to the end of each side of the zipper.

- Your side seam should look like this.Repeat on the other end, starting at the pin (3" away from the end of the fabric) and finishing at the other end of the zipper.TURN SCRUNCHIE RIGHT-SIDE-OUT.

- Bring the ends of the scrunchie together, lining up the top of the fabric with the right sides facing and the inside of the fabric facing you.Pin in place.Stitch across the top.
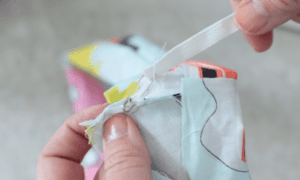
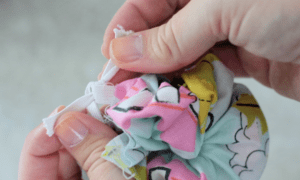
- Attach a safety pin to each side of the elastic.

- Attach one end of the elastic inside the opening of the scrunchie.Feed the other end of the elastic through the tube until it comes out the other side.Remove safety pins.

- Tie the ends of the elastic into a double knot.
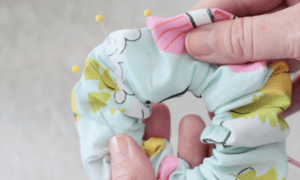
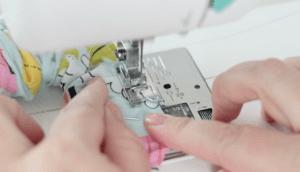
- Fold raw edges over, lining them up with the seam and pin into place.
- Top stitch the opening closed.


Leave a Reply