
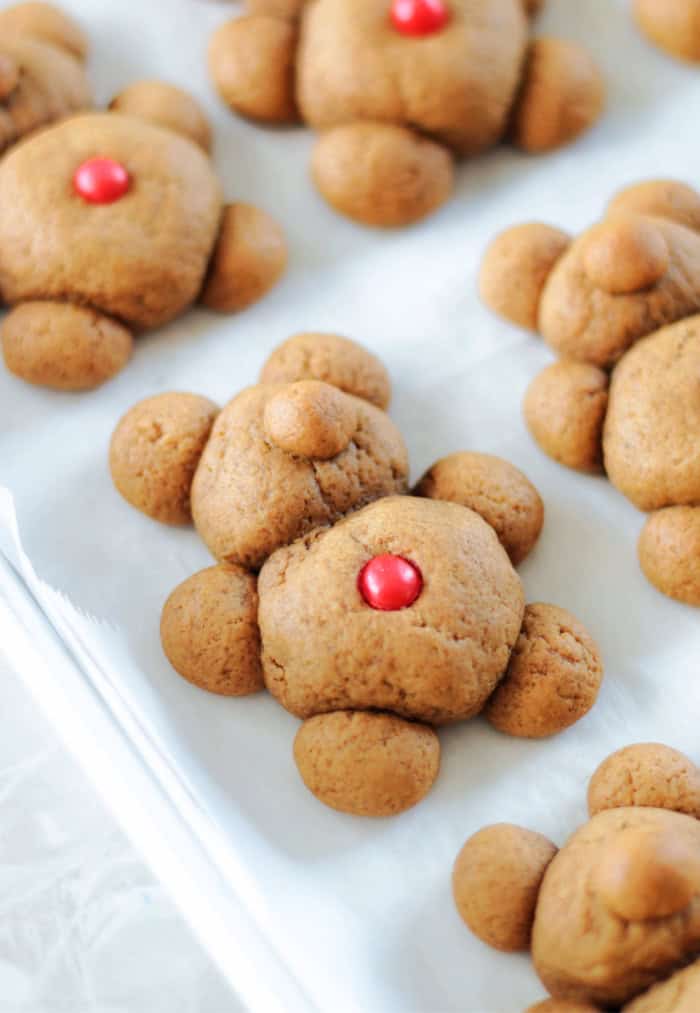
These adorable teddy bear gingerbread cookies are soft, chewy, and full of warm gingerbread spices. They're made without a cookie cutter by shaping the dough into little bears, making them a fun and easy Christmas baking project for kids and adults alike.
They're the cutest little addition to a Christmas cookie tray and are especially fun to make with kids!
If you're planning a holiday baking day, don't miss my 40 Christmas Cookie Recipes for more classic and festive cookies to add to your Christmas cookie trays.
Why You'll Love This Recipe
- No cookie cutter needed. These gingerbread bears are shaped entirely from small balls of dough, so you don't need a rolling pin or special cookie cutter.
- Fun for kids. Rolling the dough into different-sized balls and assembling the bears is an easy job for little hands.
- Soft and flavorful. Molasses, ginger, cinnamon, and cloves give these cookies plenty of classic gingerbread flavor while keeping them soft and chewy.
- Easy to decorate. A single red-hot candy makes the cutest little belly button. You can also use icing, sprinkles, or mini candies if you'd like to add more details.
- Perfect for Christmas. Their adorable shape makes them stand out on holiday cookie trays and makes them especially fun for Christmas baking with kids.
Jump to:
Tips and Tricks
- Chill the dough. This dough is slightly sticky, so chilling it for 25–30 minutes makes it easier to scoop and roll into balls. If necessary, lightly flour your hands while shaping the dough.
- Keep the second tray chilled. While one tray of teddy bears is baking, place the second tray in the refrigerator for about 10 minutes. This helps the bears hold their shape, especially around the tiny nose.
- Don't press the candy too far into the dough. Gently press the red-hot candy into the center of the body just enough for it to stick. Pressing too deeply can cause the candy to disappear into the cookie as it bakes.
- Let the cookies cool completely on the baking sheet. These cookies are very soft when they first come out of the oven. Letting them cool on the baking sheet gives them time to set without breaking apart.
- Use a light-colored baking sheet. Light aluminum baking sheets tend to bake cookies more evenly. Dark baking sheets can cause the bottoms of cookies to brown more quickly.
- Don't overbake. The cookies should be set but still soft when they come out of the oven. They will firm up as they cool.
What Are Teddy Bear Gingerbread Cookies?
Teddy bear gingerbread cookies are a fun twist on traditional gingerbread men. Instead of rolling gingerbread dough flat and cutting it into shapes, you form each bear from several small balls of dough.
Each bear is made from:
- A larger ball for the body
- Half of a ball for the head
- Small balls for the ears and feet
- Tiny balls for the noses
The pieces are gently pressed together on the baking sheet before baking. The result is a chubby little gingerbread bear with a cute round shape.
They're especially fun to make with kids because the shaping is more like playing with dough than traditional cookie decorating.
Ingredients
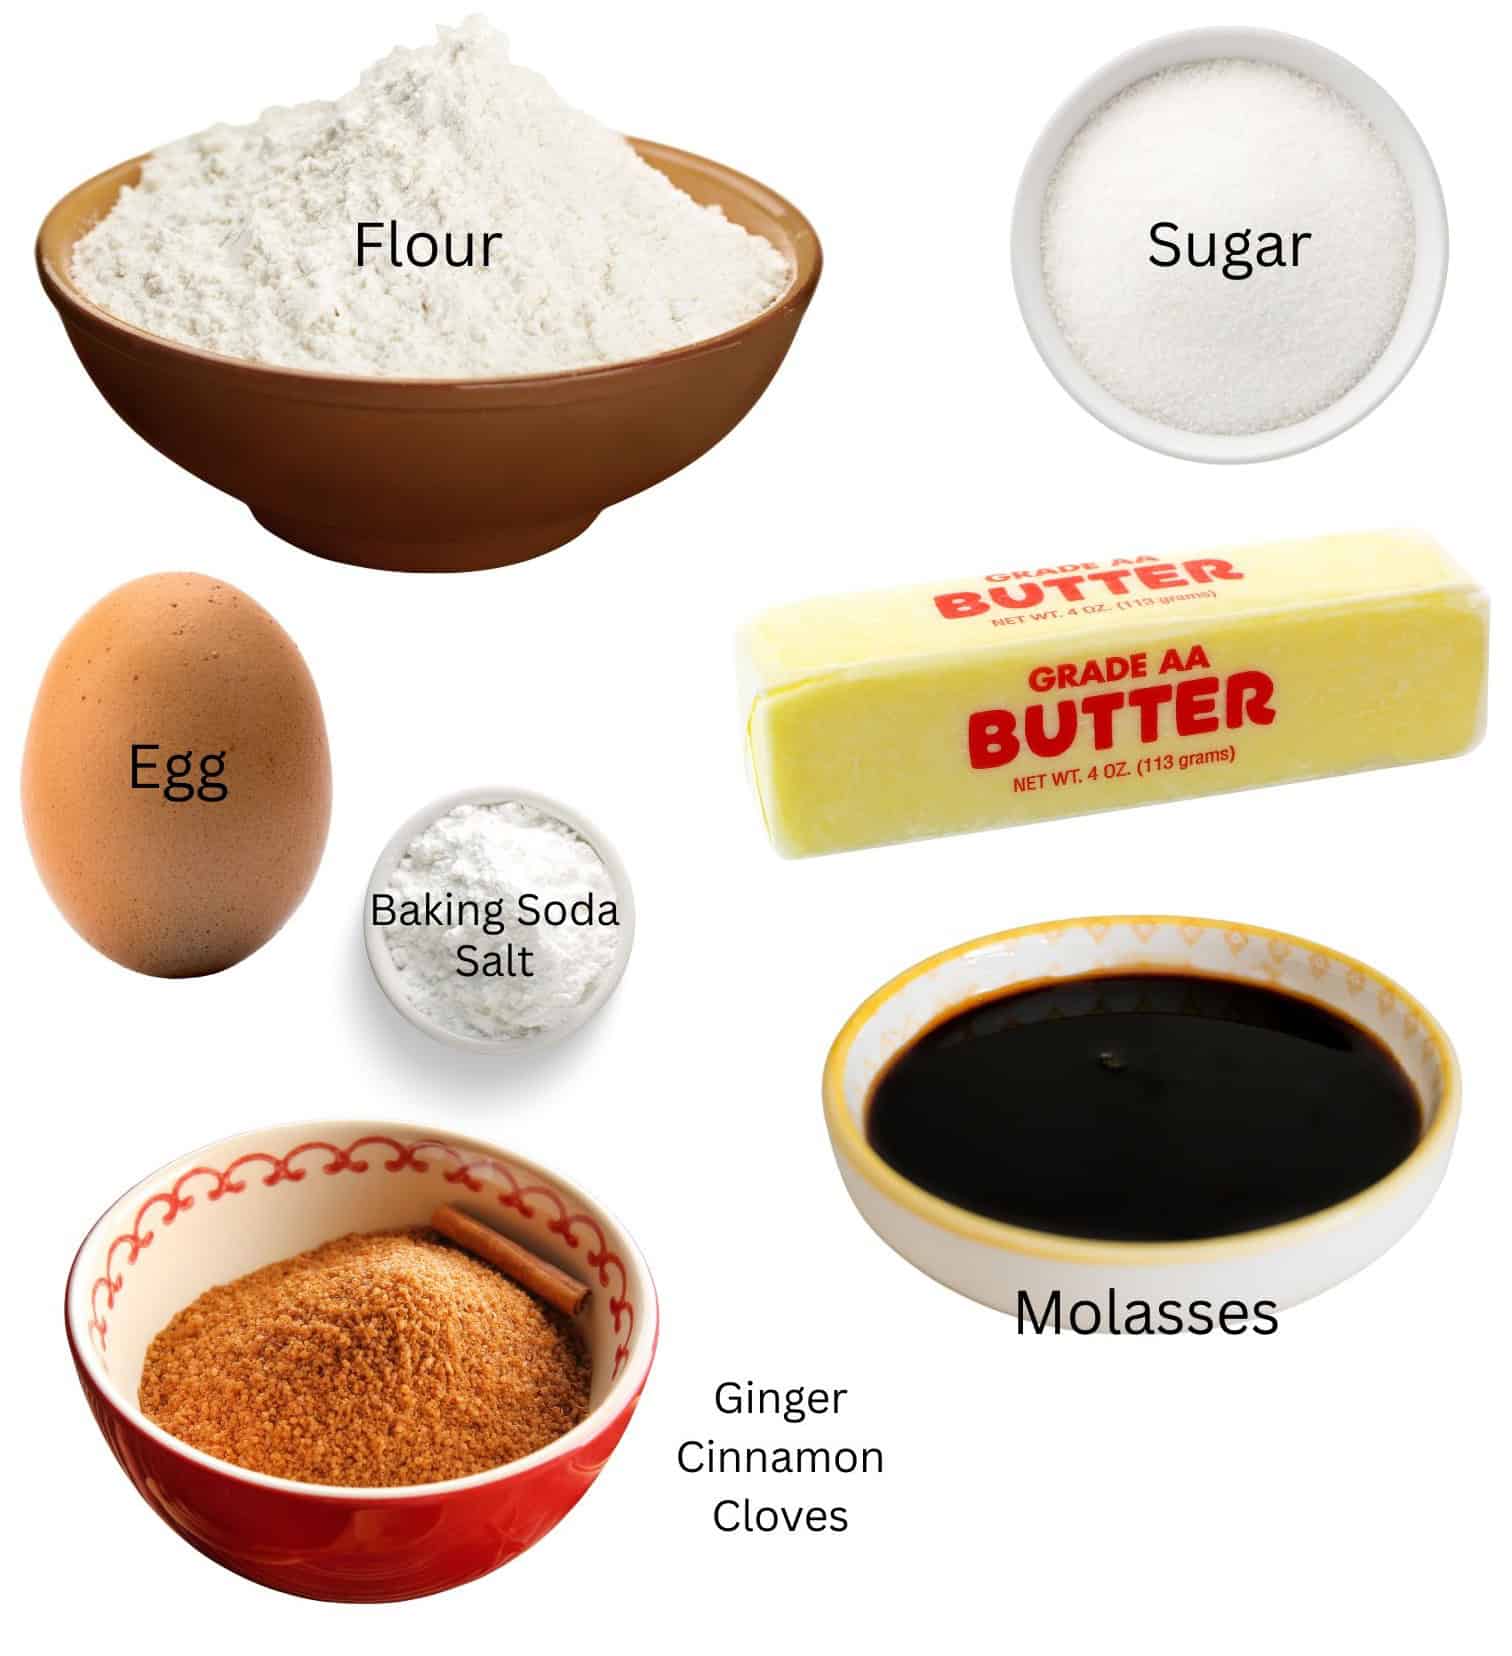
- Sugar: I typically use a combination of brown sugar and white sugar in my cookies, but for gingerbread cookies it's white sugar all the way.
- Molasses: regular molassses, nothing fancy.
- Butter: I always bake with salted butter, but you can use unsalted if you prefer. The original recipe calls for lard or shortening. I like butter for these, but you can use whatever you'd like. If using shortening, you may not need to freeze the cookies on baking sheets before baking.
- Water: you'll need hot water for this recipe. Hot tap water works fine, no need to use boiling water.
- Egg: for richness and texture.
- Baking Soda and Salt: for leavening and flavor.
- Ground Ginger, Ground Cinnamon and Ground Cloves: my favorite blend of spices for gingerbread cookies.
- Flour
- Candy or sprinkles: I use cinnamon candies for the belly button. You can use a mini M&M, frosting, or sprinkles.
See the recipe card for full information on ingredients and quantities.
How To Make Gingerbread Teddy Bears
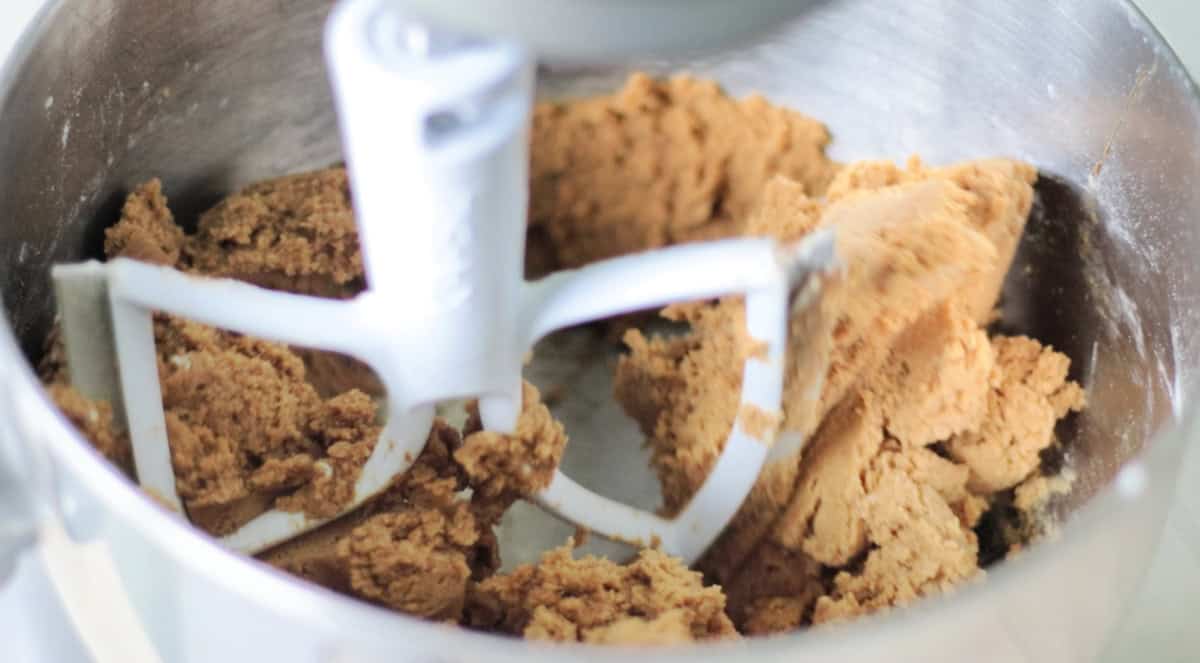
Step 1: Combine sugar, molasses, and softened butter. Mix until smooth. Add hot water and mix.
Step 2: Mix in the egg. Add dry ingredients and mix until dough forms. Cover the dough with plastic and chill for 30 minutes.
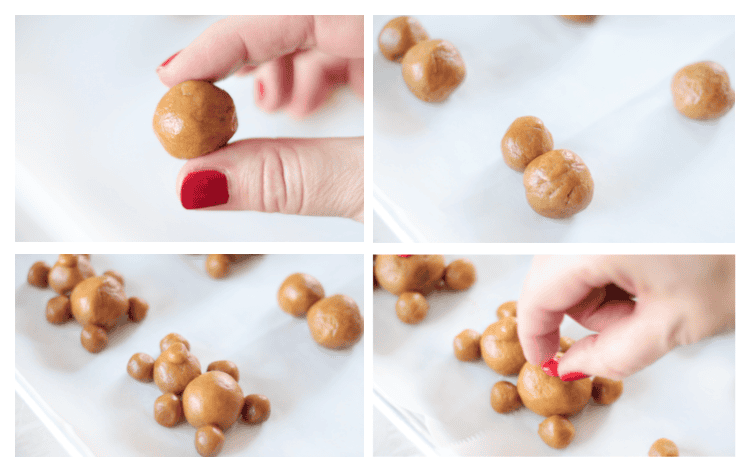
Step 3: Roll a tablespoon-sized scoop of dough into a ball. Use this for the teddy bear bodies.
Step 4: Roll a tablespoon-sized scoop of dough into a ball. Break in half and roll each piece into a ball. Use the smaller ball for the teddy bear heads.
Step 5: Roll a tablespoon-sized scoop of dough into a ball. Break into 8 small sections. Roll each section into balls. Use these small balls for the ears and feet.
Step 6: Roll a tablespoon-sized scoop of dough into a ball. Break into 16 tiny sections. Roll each section into balls. Use these tiny balls for the noses. Press down slightly on the nose so that it sticks in place.
Let's Review
1 ball = body. ½ ball = head. ⅛ ball = ears, feet. 1/16 ball = nose.
Step 7: GENTLY press a red hot candy into the center of the teddy bear's body before baking. You don't need to press down far, just enough so that it sticks. You can also add the red hot after the cookie comes out of the oven with a dab of icing.
Step 8: Chill cookies on a baking sheet for 10 minutes. While one batch is baking, place the second batch in the refrigerator so it's ready to go.
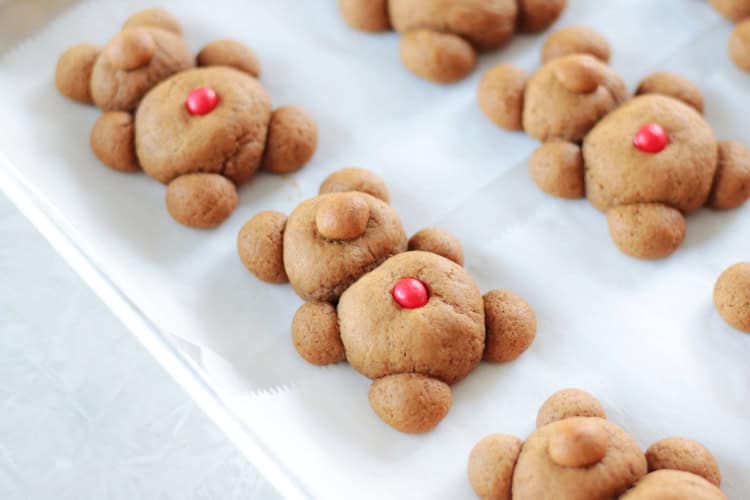
Step 9: Bake cookies at 350 degrees for 12 minutes. Let cookies cool completely on the baking sheet. Store cookies in an airtight container for up to 5 days.
Decorating Ideas
I keep these teddy bear gingerbread cookies simple with a single red-hot candy for the belly button, but you can decorate them however you'd like.
- Classic teddy bears. Leave them with their simple cinnamon candy belly buttons for an easy, old-fashioned look.
- Iced teddy bears. Use royal icing or a simple cookie icing to add eyes, mouths, ears, and clothing.
- Christmas teddy bears. Add red and green sprinkles or tiny candies for a festive holiday look.
- Chocolate teddy bears. Use mini chocolate chips for eyes and buttons.
- Let the kids decorate. Set out small candies and icing and let everyone create their own little gingerbread bear.
Teddy Bear Gingerbread FAQs
I bake on aluminum baking sheets. The light colored sheet (vs. dark metal sheets) bake more evenly. I like these ones (with almost 40K reviews) as well as the ones sold at Sam’s Club. The darker the cookie sheet, the faster the cookies will brown on the bottoms. It’s all personal preference, but light colored baking sheets have always given me great results.
I use regular molasses, which is a great all-around choice for baking. The brand I usually grab at the store is Grandma’s. You don’t want blackstrap molasses, which has a bitter flavor.
No. That's one of the best things about this recipe! The bears are made by shaping balls of gingerbread dough, so you don't need a cookie cutter at all.
The dough is slightly sticky, and chilling it for 25–30 minutes makes it much easier to scoop and shape. The additional 10-minute chill after shaping helps the bears hold their shape while baking.
Yes. The original recipe can be made with lard or shortening. I prefer butter, but shortening works as well.
Absolutely. The candies are just for decoration. You can use mini M&M's, sprinkles, small chocolate candies, or add a dot of icing after the cookies have cooled.
Make sure the dough is chilled before shaping and keep the second tray refrigerated while the first tray bakes. The 10-minute chill after shaping helps the cookies hold their details.
That's normal. Gingerbread cookies are very soft when they're hot. Let them cool completely on the baking sheet and they'll firm up while remaining soft and chewy.
Store completely cooled cookies in an airtight container at room temperature for up to 5 days.
Yes. Once completely cooled, place them in a freezer-safe container with parchment between the layers. Thaw at room temperature before serving.
Yes. These cookies are great for holiday baking because they stay soft for several days and can also be frozen for longer storage.
More Holiday Cookies To Make
Love gingerbread? I've rounded up all of my favorite gingerbread recipes, from classic gingerbread cookies to cookie bars, muffins, and more. See my collection of Gingerbread Recipes for even more recipes to bake this holiday season.


MADE THIS RECIPE AND LOVED IT? 💛 Please leave a STAR rating and COMMENT below! Post it to Facebook or Pinterest to easily share with friends!

Teddy Bear Gingerbread Cookies
Ingredients
- ¾ cup butter softened
- ½ cup molasses
- ½ cup sugar
- 2 Tbsp. hot water
- 1 large egg
- ½ teaspoon baking soda
- ¼ teaspoon salt
- 1 ½ teaspoons ground ginger
- 1 ½ teaspoon ground cinnamon
- ½ teaspoon ground cloves
- 3 ¼ cups all-purpose flour
- red hot candies
Instructions
- Preheat the oven to 350 degrees. Line 2 baking sheets with parchment paper.
- Combine sugar, molasses, and softened butter. Mix until smooth. Add hot water and mix.
- Mix in the egg. Add dry ingredients and mix until dough forms. Chill the dough for 25-30 minutes.
- Roll a tablespoon-sized scoop of dough into a ball. Use this for the teddy bear bodies. If the dough is still a little sticky, add a bit of flour to your hands.
- Roll a tablespoon sized scoop of dough into a ball. Break in half and roll each piece into a ball. Use the smaller balls for the teddy bear heads.
- Roll a tablespoon sized scoop of dough into a ball. Break into 8 small sections. Roll each section into balls. Use these small balls for the ears and feet.
- Roll a tablespoon sized scoop of dough into a ball. Break into 16 tiny sections. Roll each section into balls. Use these tiny balls for the noses.
- GENTLY press a red-hot candy into the center of the teddy bear's body before baking. You don't need to press down far, just enough so that it sticks.Chill cookies on baking sheets for 10 minutes. While one batch is baking, place the second batch in the refrigerator so that it's ready to go.
- Bake cookies at 350 degrees for 12 minutes. If the nose is slightly off-center, you can gently push it into place while the cookie is still hot.Let cookies cool completely on the baking sheet to set up.



Brandy says
Hi everyone! Brandy here, I hope you try these cookies. They are fun to make, and I like that the dough doesn't need to chill. Truly, it's a no-chill recipe, and the shapes turn out great. Enjoy!