Gluesticks Blog

  • About
    • About Me
    • Contact Me
    • Terms and Privacy Policy
  • Sewing
    • My Book
    • Kids Sewing Projects
    • All Sewing Projects
  • Crafts
    • Kids Crafts
    • Paper Crafts
    • Free Printables
    • All Crafts
  • Holidays
    • Christmas
    • Halloween
    • Patriotic Holidays
    • Easter
    • St. Patrick’s Day
    • Valentine’s Day
    • Gift Ideas
      • Teacher Gifts
      • All Gift Ideas
    • Parties
  • Home
    • Home Decor Projects
    • Cleaning & Organizing
    • Gardening
    • Motherhood
  • Recipes
    • Kids in the Kitchen
    • Appetizer Recipes
    • Bread Recipes
    • Dessert Recipes
      • Cake Recipes
      • Cookie Recipes
      • All Dessert
    • Main Dish Recipes
    • Slow Cooker
    • Sides & Salads
    • Holiday Recipes
    • All Recipes

September 28, 2023 By Brandy Leave a Comment

Home » Craft Tutorials » Kids Crafts

Easy Macrame Ghosts (+ Video)

Filed Under: Craft Tutorials, Halloween, Kids Crafts

Jump to Project

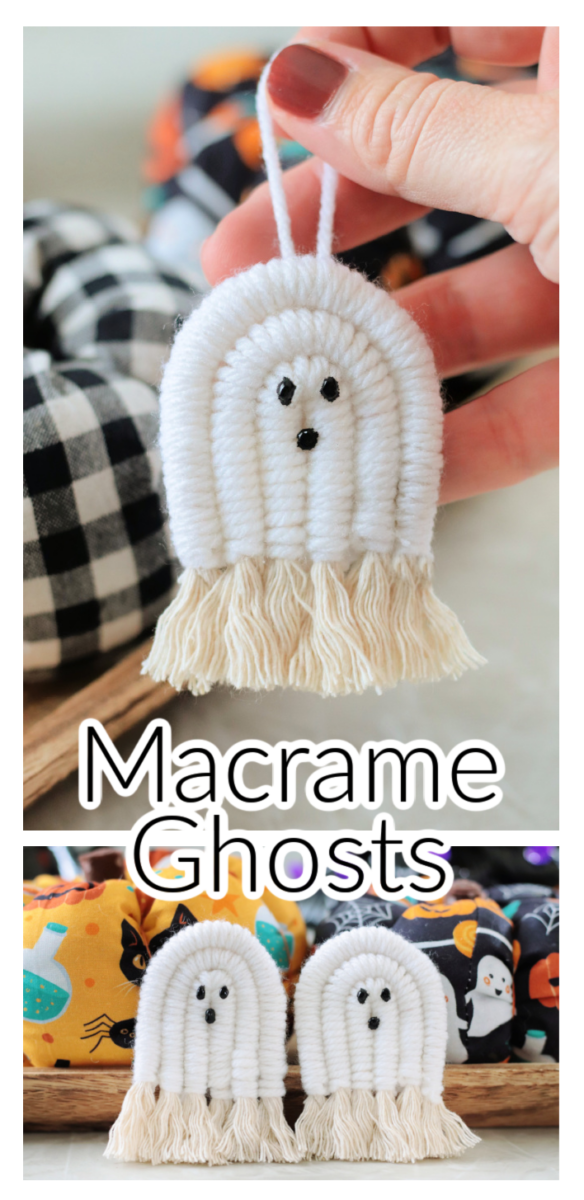
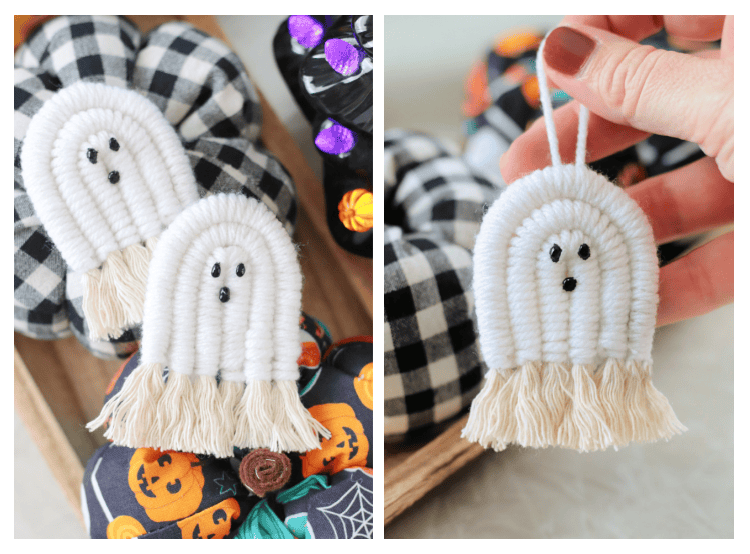
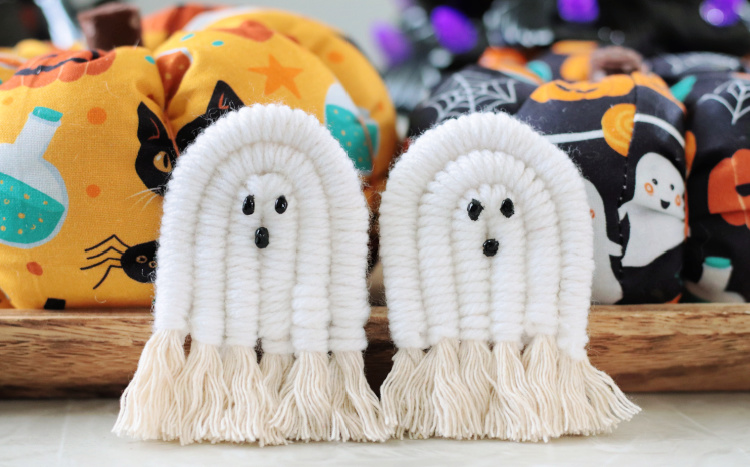
These easy macrame ghosts are made out of cording and yarn. Super easy to make and so fun for Halloween! You can make a tiny wall hanging or keychain!

You might also like our felt Halloween candy pouches, our Pop Tart haunted houses, or our EASY sock pumpkins!

macrame ghosts

Watch our step by step video!

I came up with a simple rainbow macrame craft a few years ago for a youth summer camp. The teenage girls loved making the rainbow keychains and they turned out so cute! I used that same technique to make a fun Halloween version—ghosts! These little ghosts are so easy to make. You can turn them into a keychain or simply add a yarn loop on the back for hanging.

macrame ghosts

My first grader claimed these ones and immediately put them into his backpack. He said he’s going to give one to his teacher and then deliver one to his former kindergarten teacher too. I hope they enjoy having these little ghosts in their classroom!

two macrame ghosts on a table

Macrame Yarn Ghosts

Macrame is a technique of knotting strands of rope, cording, or yarn together to create wall hangings and other textiles. These little ghosts aren’t a true macrame craft, but many rope and yarn crafts have been lumped in the same category lately. I used cotton cording wrapped in yarn to create these spooky characters. I’ll show you how to make a 2″ ghost, but you can adjust the length of the ropes to make a taller ghost.

scissors, black paint, yarn, felt, rope

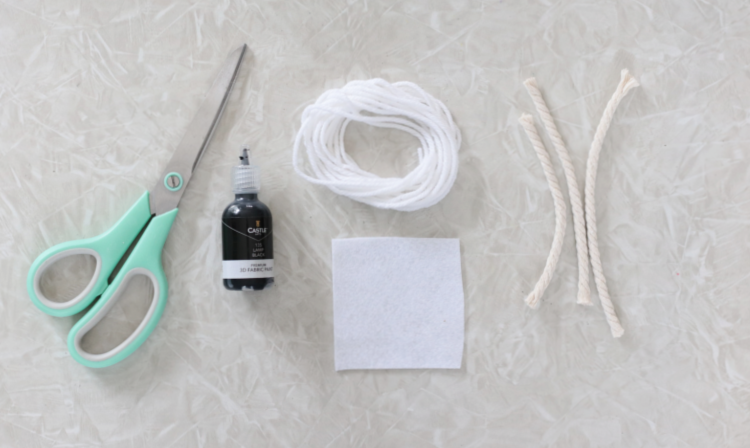
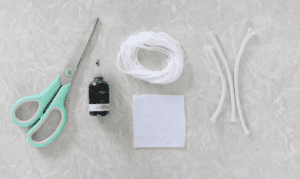
Macrame Ghost Supplies

  • white yarn: an all-purpose yarn works great.
  • cotton rope: 5mm wide, comes in a spool at Michael’s in the jewelry-making section.
  • masking tape: any 1″ wide tape will work.
  • scissors
  • felt: just a small scrap.
  • scissors
  • black fabric paint (for eyes and a mouth) You can also use black felt scraps for the eyes and mouth and hot glue them onto the ghost.

two macrame pumpkins next to fabric pumpkins

Easy Macrame Ghost Instructions

Make sure to watch my video for the best visual tutorial. It plays directly under the first image of the blog post.

hand holding white macrame ghost
Print
No ratings yet

Mini Macrame Ghost

These easy macrame ghosts are made out of cording and yarn. Super easy for kids or adults to make and so fun for Halloween!
Prep Time30 minutes mins
Total Time30 minutes mins
Yield: 1 keychain
Cost: $1

Equipment

  • scissors
  • hot glue gun
  • measuring tape

Materials

  • cotton rope 5mm wide
  • white yarn
  • masking tape
  • felt

Instructions

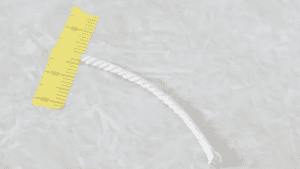
Cutting Guide & Yardage

  • Cut the cording/rope into the following lengths (1 of each): 6.5", 5.5" and 5"
    Cut a long piece of white yarn for each piece of rope. It's better to have too much vs. not enough so cut a strand around 45" long.
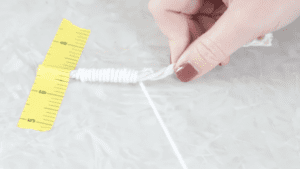
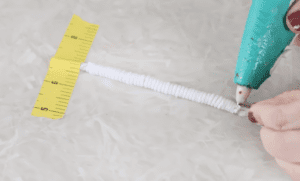
    scissors, black paint, yarn, felt, rope

Wrapping The Rope

  • Tape the longest piece of rope to the table using a piece of masking tape. Line the edge of the masking tape with the edge of the rope. This is important. You only want an inch of the rope covered by tape.
    cotton cording taped to table with masking tape
  • Wrap the yarn around the rope and tie a knot just below the masking tape. Do not cut off the excess yarn. Hold it against the rope as you wrap the rope in yarn (it will get wrapped as you go).
    Wrap the yarn TIGHTLY around the rope, making sure you can't see the rope through the rows of yarn as you go.
    hand wrapping yarn around cotton cording
  • Continue wrapping until you only have an inch of rope left. Tie knot at the end and trim off any excess.
    Cover the knot in a small dot of hot glue. This will reinforce the end and keep it from unraveling.
    hot glue dabbed onto the end of the rope
  • Repeat the steps above for the second and third pieces of rope.

Creating The Ghost Shape

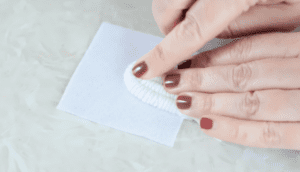
  • Fold the shortest rope in half and hot glue it to a scrap of felt. Make sure the frayed edges are not glued to the felt. They should hang down.
    rope folded in half and glued to a piece of felt
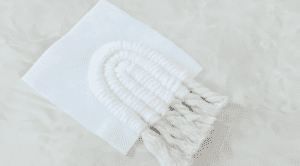
  • Glue the other two ropes to the felt, making sure to add the longest rope last.
    hand glueing the second piece of rope to felt
  • Use scissors to trim away any excess felt. Be careful to NOT cut the yarn!
    ghost glued to felt
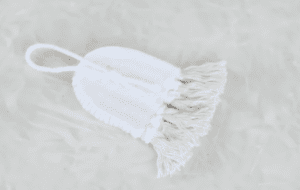
  • Unravel the unwrapped edges of the rope to create a fringe edge.
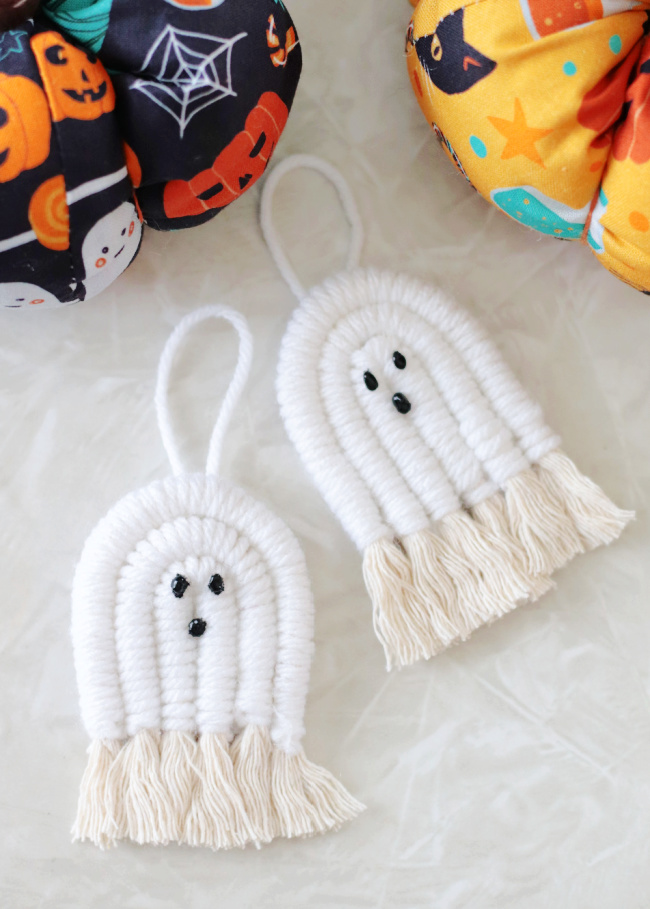
  • Glue a loop of yarn to the back to hang the ghost, if desired.
    yarn loop glued to the back of the ghost
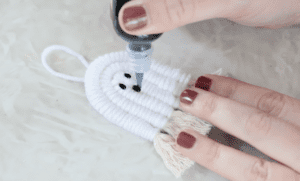
  • Add eyes and a mouth using the black craft paint (puffy paint). Let dry completely.
    black puffy paint eyes and mouth on ghost

Video

Notes

If you'd rather make a keychain, follow the directions in this post for adding a keychain and jump ring.


Print Friendly, PDF & Email

Related

Share
Pin

About Brandy

Welcome! I'm Brandy, mother to 5 darling kiddos and a cute black lab named Toby. My husband is in the Coast Guard so we've lived all over the place, turning each house into a home. I love baking, sewing, making cute things with my kids, and sharing what I've learned with all of you!

Disclaimer: I am a participant in the Amazon Services LLC Associates Program, an affiliate advertising program designed to provide a means for me to earn fees by linking to Amazon.com without any additional cost to you. As an Amazon Associate, I earn from qualifying purchases.

Previous Post: « Easiest TikTok Cinnamon Rolls (+ Video)
Next Post: Peanut Butter Ghosts (Copycat Reese’s) + Video »

Reader Interactions

Leave a Reply Cancel reply

Your email address will not be published. Required fields are marked *

Recipe Rating


This site uses Akismet to reduce spam. Learn how your comment data is processed.

Primary Sidebar

I'm Brandy! I love to create and share my ideas through easy-to-follow recipes and tutorials. MORE ABOUT ME

Follow Along

  • Facebook
  • Instagram
  • Pinterest

Disclaimer: I am a participant in the Amazon Services LLC Associates program. As an Amazon Associate, I earn from qualifying purchases, at no cost to my readers.

My Amazon Store

Get My Best Projects and Recipes!

My Sewing Book for Kids!

kids sewing book cover
  • Home
  • Website Accessibility
  • My Book
  • Privacy Policy

Copyright © 2025 Log in

Gluesticks blog logoLogo Header Menu
  • About
    • About Me
    • Contact Me
    • Terms and Privacy Policy
  • Sewing
    • My Book
    • Kids Sewing Projects
    • All Sewing Projects
  • Crafts
    • Kids Crafts
    • Paper Crafts
    • Free Printables
    • All Crafts
  • Holidays
    • Christmas
    • Halloween
    • Patriotic Holidays
    • Easter
    • St. Patrick’s Day
    • Valentine’s Day
    • Gift Ideas
      • Teacher Gifts
      • All Gift Ideas
    • Parties
  • Home
    • Home Decor Projects
    • Cleaning & Organizing
    • Gardening
    • Motherhood
  • Recipes
    • Kids in the Kitchen
    • Appetizer Recipes
    • Bread Recipes
    • Dessert Recipes
      • Cake Recipes
      • Cookie Recipes
      • All Dessert
    • Main Dish Recipes
    • Slow Cooker
    • Sides & Salads
    • Holiday Recipes
    • All Recipes

Rate This Recipe

Your vote:


A rating is required
A name is required
An email is required