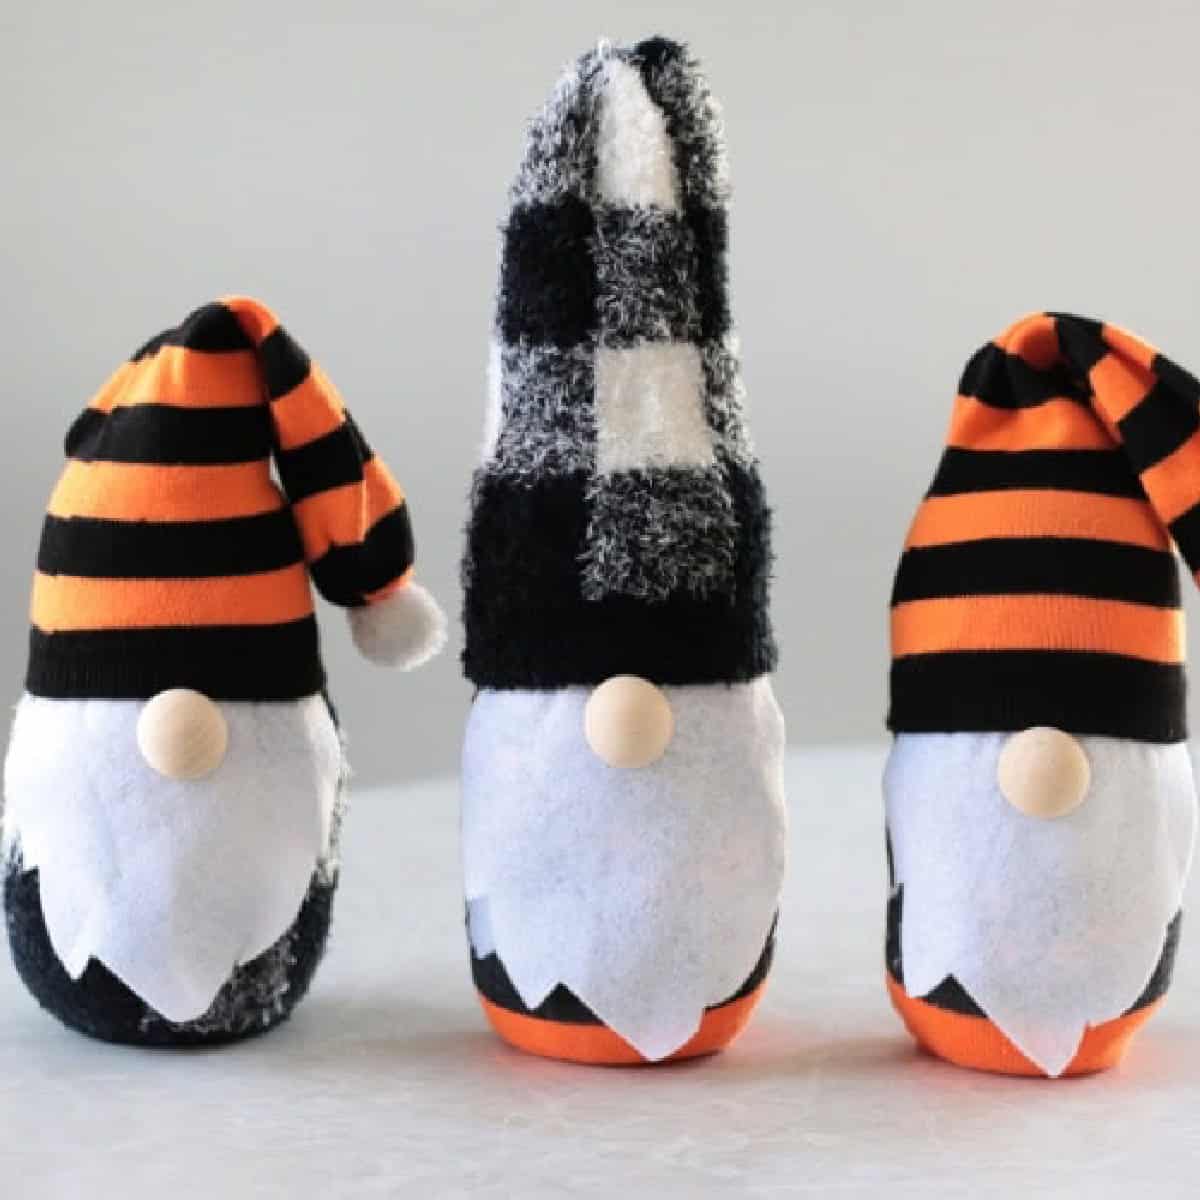
Our no-sew Halloween sock gnomes are so cute and easy! They take less than 10 minutes to make and can be made with many different sock prints!
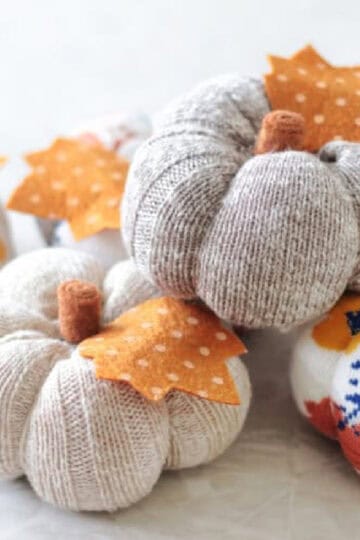
You might also like our 10-minute sock pumpkins, easy velvet pumpkins, or felt Halloween candy pouches!
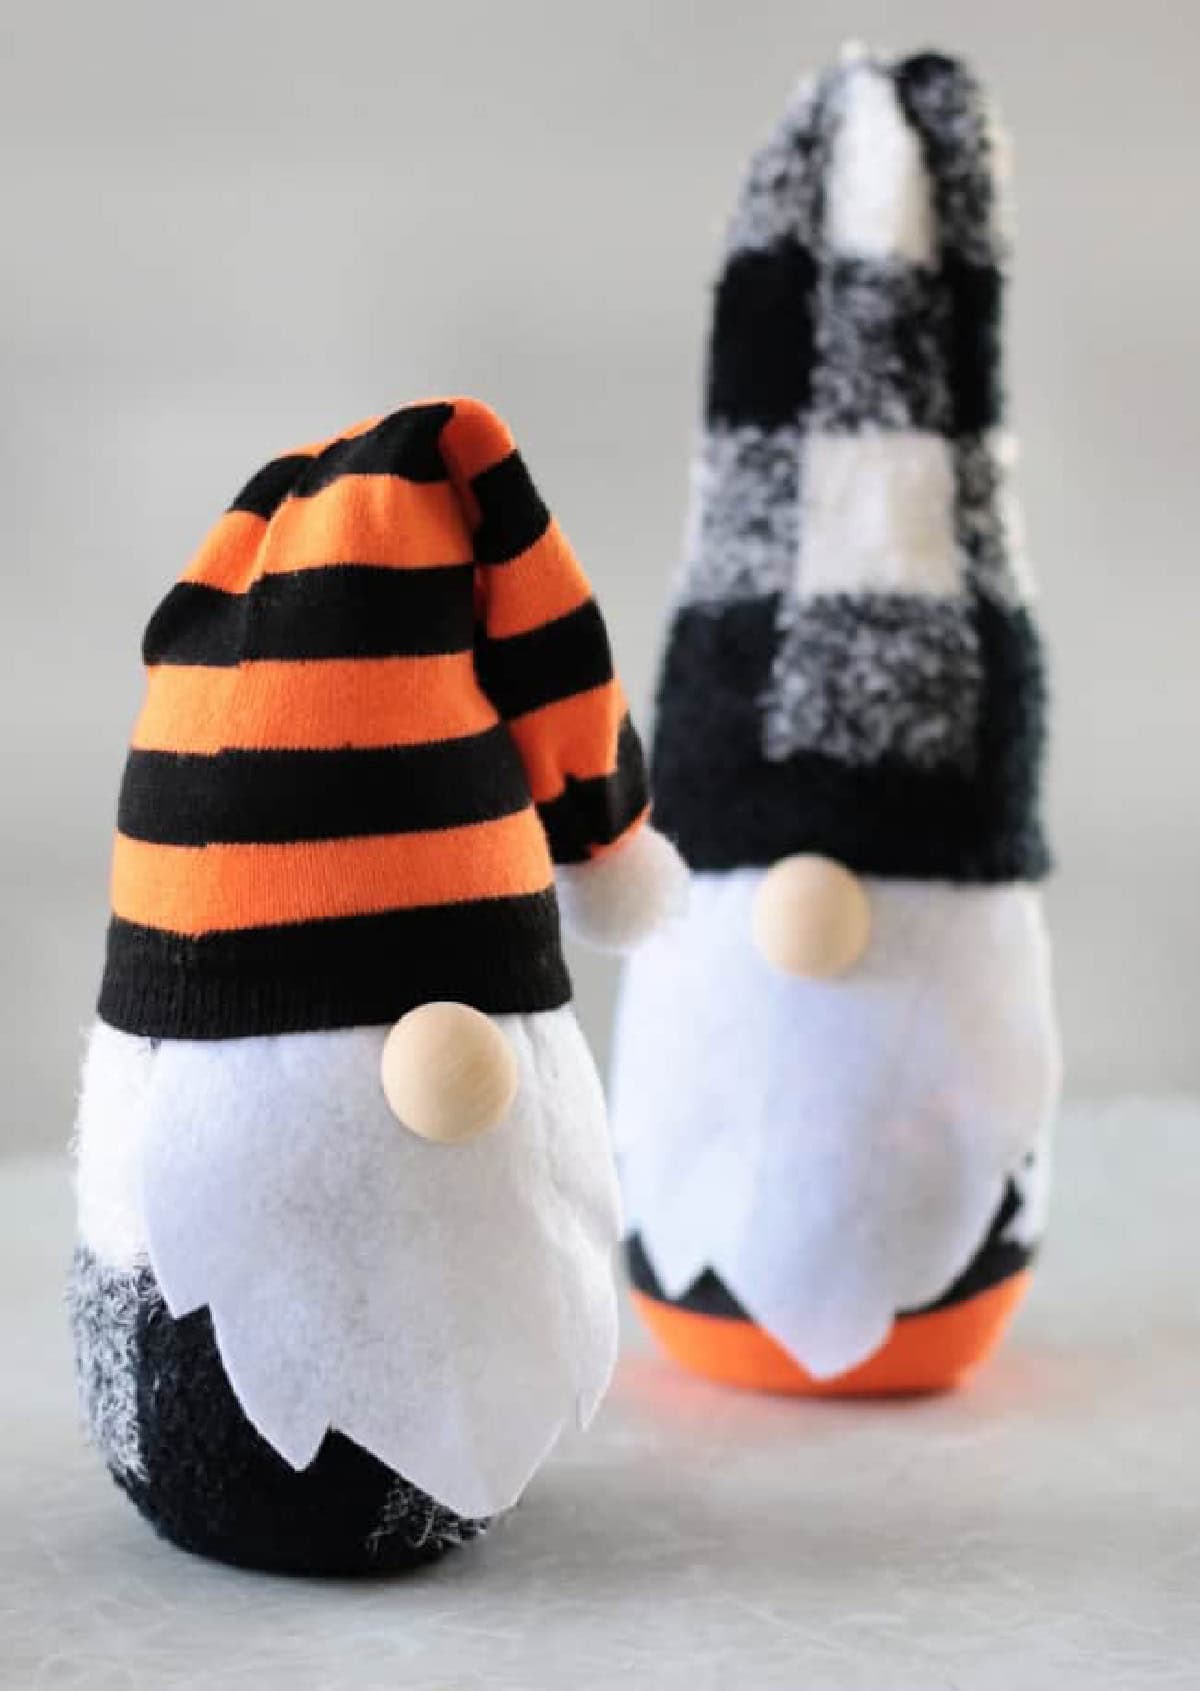
Looking for a quick and easy craft to brighten a shelf during October? These sock gnomes are just the thing.
Why I Like This Project
- Quick project. They take less than 10 minutes to make and are so fun.
- No-sew project. There's no sewing involved, minimal supplies, and they can be made from any adult crew sock!
- Printable template. I take all of the guesswork out of this project by providing a printable beard template to use for cutting out the felt beard.
Jump to:
Tips and Tricks
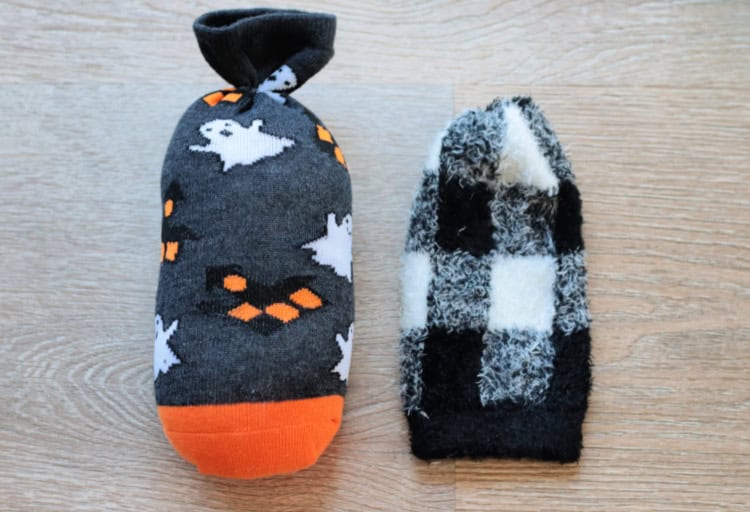
- Use mismatched socks. This is an excellent project for mismatched socks! I found my socks at Target. Walmart and Dollar Tree also sell inexpensive patterned socks during Halloween. You can use an ankle sock for the body, but definitely use a crew sock for the hat. The banded edge is perfect for the hat since it's a finished edge and squeezes onto the gnome's head just right. If you'd like a really long and droopy hat, you can use a knee-high sock.
- Save leftover socks for future gnomes. After making this project, you'll have two unmatched socks. Save them for a later date or make a couple of extra gnomes to give as gifts!
- Use felt for the gnome's beard. One thing that sets our little gnomes apart from others is that we don't use craft fur. Felt is something I always have on hand, and it costs $ 0.25 a sheet. You can easily get 4 beards from one sheet. Easier to find and cheaper than faux fur.
Supplies
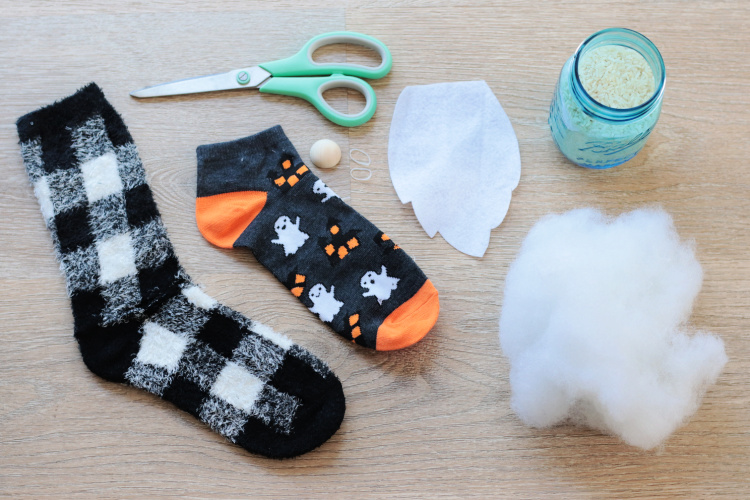
- One solid adult crew or ankle sock: for the body.
- One adult crew sock: for the hat.
- Rice: can also use dry beans. This will give the gnome a bit of weight, making it stand easily. Check out the jar method for filling the sock with rice. It's definitely easier than scooping rice into the sock with a spoon and even faster than using a funnel.
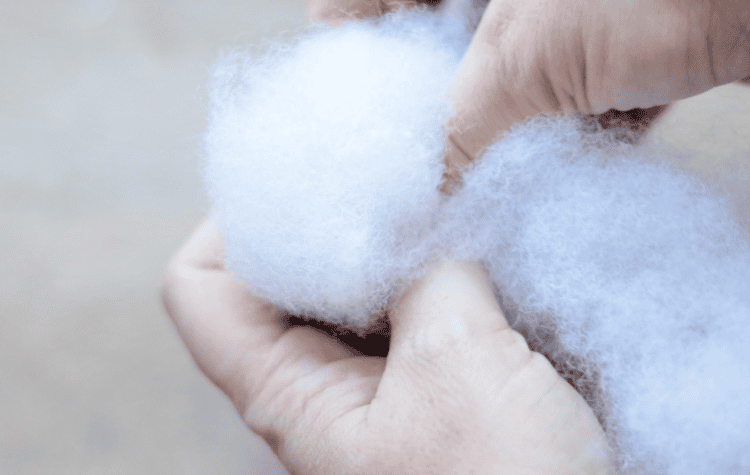
- Pillow stuffing (Polyfil): Just a bit to add on top of the rice. You can use all rice, but the more rice you use the heavier the gnome will be. I like using about ⅔ rice and ⅓ pillow stuffing for my gnomes. If you don't have pillow stuffing you can use scrap fabric or cotton balls. I save the stuffing from my old throw pillows for craft projects like this.
- Hair ties or rubber bands: These are used to tie off the socks. You can also tie off the ends with string, but I like using hair ties.
- Wood bead or half bead: You can use a wooden bead, half bead, or pom pom for the nose. I prefer using half beads. They don't have holes and they sit nice and flush. I ordered them from Amazon, but you can find wood beads at your local craft store like Hobby Lobby or Joann.
- Felt: One thing that makes our little gnomes different than others is the fact that we don't use craft fur. Felt is something that I always have on hand, it's $.25 a sheet and you can easily get 4 beards from one sheet. Easier to find and cheaper than faux fur.
- Printable beard pattern: feel free to print out our cutting template to use for the beard.
- Scissors
- Hot glue/hot glue gun
See the how-to card at the end of the post for full information on supplies and quantities.
How To Make Halloween Sock Gnomes
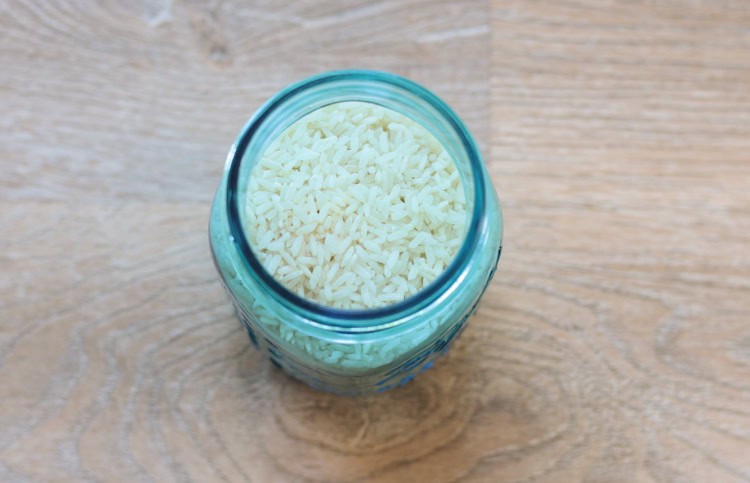
Step 1: Fill a jar or cup with rice.
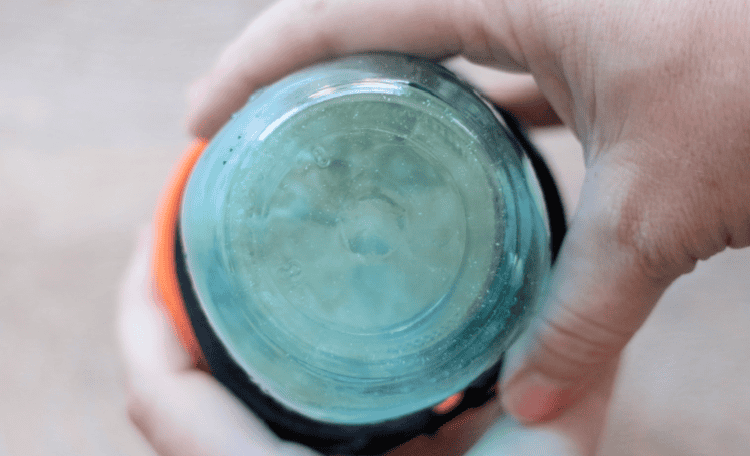
Step 2: Slide the body sock over the jar, and turn the jar over to allow the sock to fill with rice. Pull the jar out of the sock.
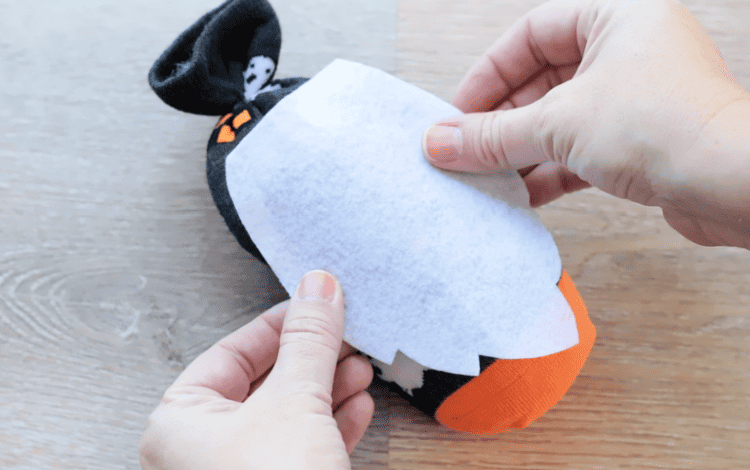
Step 3: Add a couple of handfuls of pillow stuffing on top of the rice. The sock should measure 6-7" from the bottom to the top of the pillow stuffing.
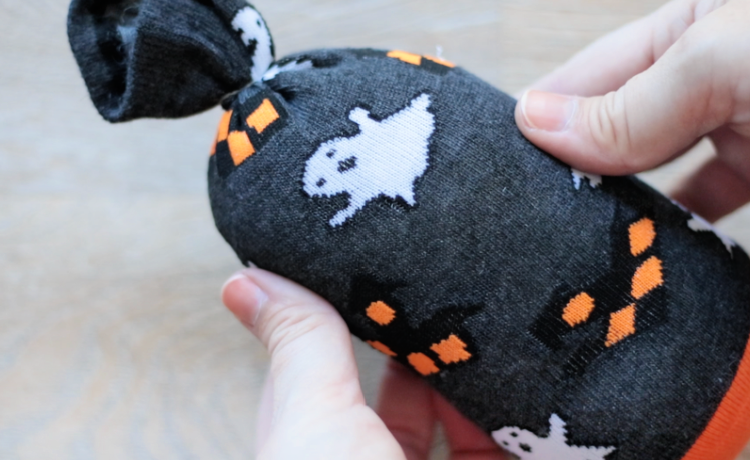
Step 4: Secure the opening with a hair tie.
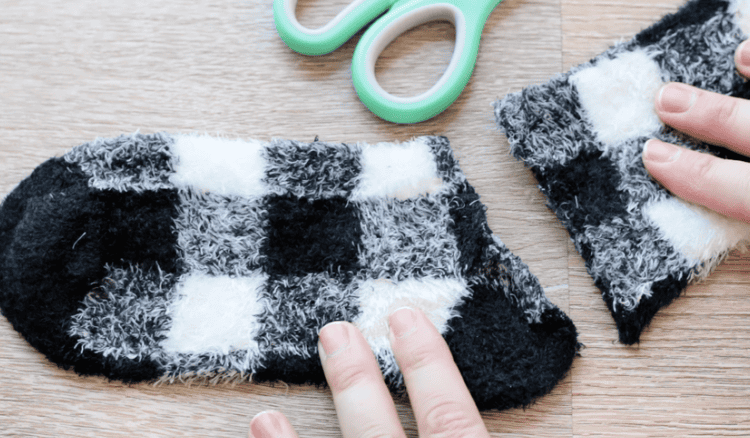
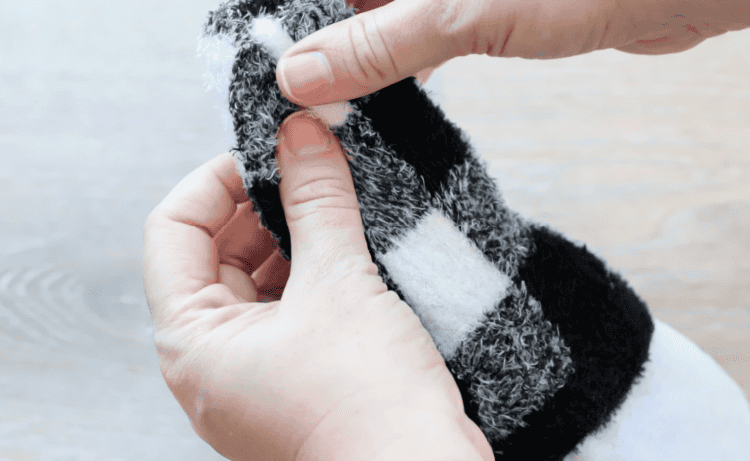
Step 5: Cut the hat sock as shown, cutting just before the ankle. Set the foot portion to the side (can use to make another gnome sometime). You'll be using the side with the finished edge band.
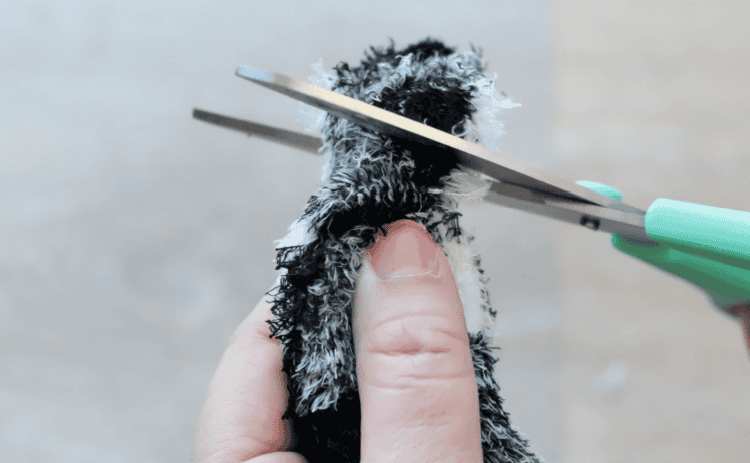
Step 6: Turn the piece with the edge band inside out. Gather the cut (unfinished) end and secure it with a hair tie. Trim of excess.
Step 7: Turn the sock right side out. You should now have a gnome body and a gnome hat.
Step 8: Cut out a felt beard using the cutting template. Glue beard onto the front of the gnome.
How To Make A Pointy Gnome Hat
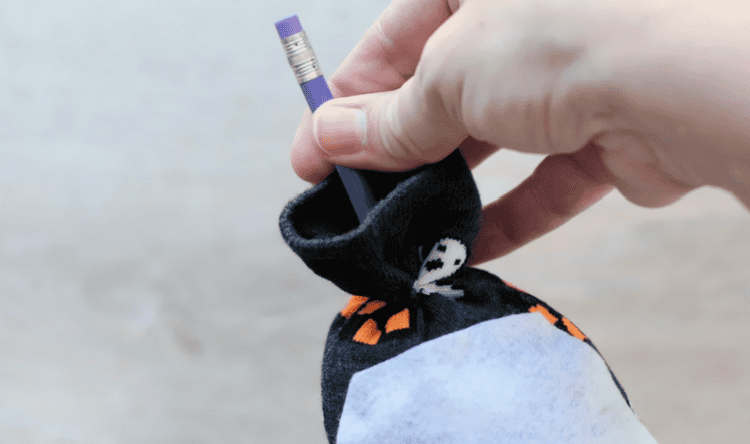
Step 1: If you'd like your hat to stand up nice and tall, insert a pencil into the opening of the body. It should stick out a few inches. You can add a bit of hot glue around it to keep it in place.
Step 2: Slide the hat over the pencil. Arrange the hat so that the top is pointed and touching the top of the pencil.
How To Make a Floppy Gnome Hat
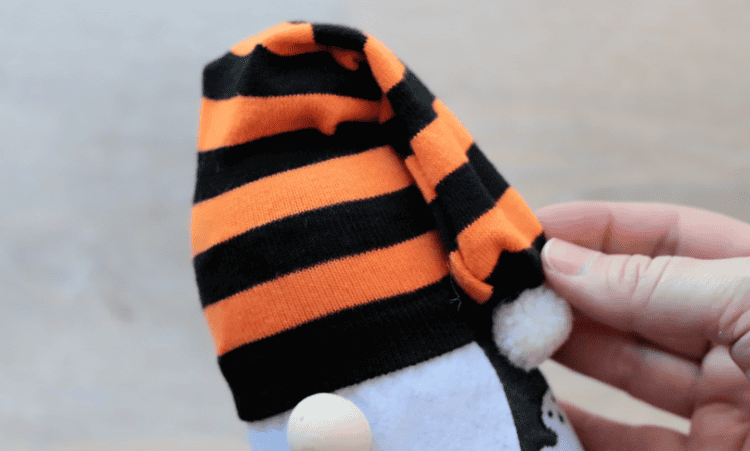
Step 1: For a floppy hat, simply slide the sock hat onto the gnome and hot glue it into place. You can hot glue a pom pom to the end of the hat if you'd like.
Note: floppy hats work best with regular socks (not fleece or bulky fuzzy socks).
How To Add The Finishing Touches
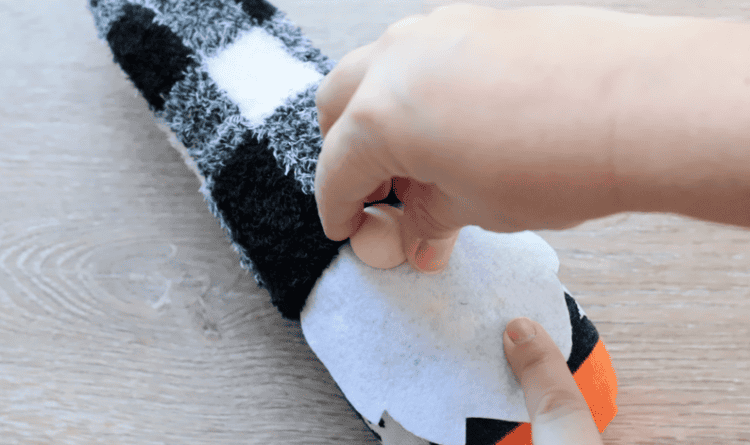
Step 10: Glue the nose onto the front of the gnome.
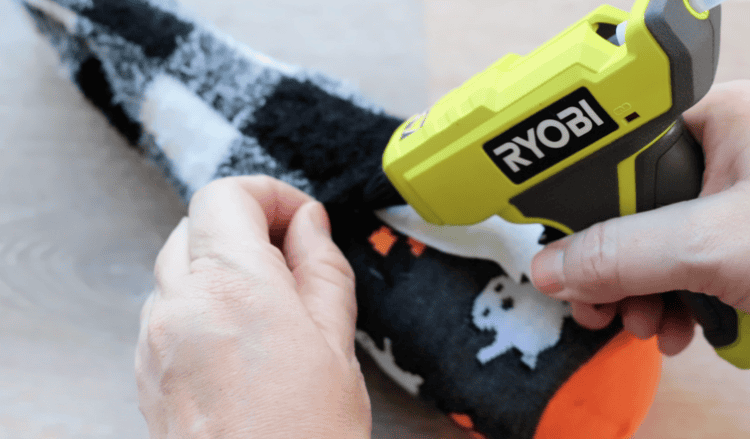
Step 11: Add a few dots of hot glue under the hat to keep it in place.
No Sew Sock Gnome FAQs
Faux fur is a popular choice for making gnome beards, and the beard looks darling. I prefer using white felt instead, as it is incredibly affordable and easy to work with.
Adult crew socks work best because they are larger than kids' socks. You can use an ankle sock for the body, but definitely use a crew sock for the hat.
More Sock Crafts To Make


MADE THIS CRAFT AND LOVED IT? 💛 Please leave a STAR rating and COMMENT below! Post it to Facebook or Pinterest to easily share with friends!

No Sew Halloween Sock Gnomes
Equipment
- hot glue gun
Materials
- 1 adult sock for body (crew or ankle)
- 1 adult sock for hat (crew)
- 1 ½ cups rice
- pillow stuffing
- 2 hair ties
- 1 half wooden ball (or pom pom or wooden bead)
- felt
- cutting template for beard
- 1 pencil (optional)
- 1 pom pom (optional)
Instructions
- Fill a jar or cup with rice.
- Slide the body sock over the jar, and turn the jar over to allow the sock to fill with rice.Pull the jar out of the sock.
- Add a couple of handfuls of pillow stuffing on top of rice. The sock should measure 6-7" from the bottom to the top of the pillow stuffing.
- Secure the opening with a hair tie.
- Cut hat sock as shown, cutting just before the ankle. Set foot portion to the side (can use to make another gnome sometime). You'll be using the side with the finished edge band.
- Turn the piece with the edge band inside out. Gather the cut (unfinished) end and secure it with a hair tie. Trim of excess.
- Turn the sock right side out. You should now have a gnome body and a gnome hat.
- Cut out a felt beard using the cutting template. Glue beard onto the front of the gnome.
Pointy Hat
- If you'd like your hat to stand up nice and tall, insert a pencil into the opening of the body. It should stick out a few inches. You can add a bit of hot glue around it to keep it in place.
- Slide hat over pencil. Arrange the hat so that the top is pointy and touching the top of the pencil.
Floppy Hat
- For a floppy hat, simply slide the sock hat onto the gnome and hot glue it into place. You can hot glue a pom pom to the end of the hat if you'd like.Note: floppy hats work best with regular socks (not fleece or bulky fuzzy socks).
- Glue the nose onto the front of the gnome.
- Add a few dots of hot glue under the hat to keep it in place.


Leave a Reply