Breathe new life into an old chair and learn how to reupholster a swivel rocker with step by step photos and tips! 


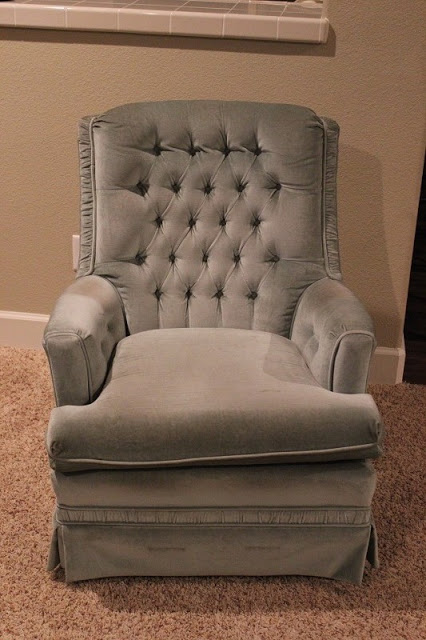
I recently received my Grandmother's sitting chair. The one that I remember her having in her home for YEARS. She rarely watched TV, but when she did it was in this chair. And she usually was working on a sewing project while she was doing so. She passed away in September and this was one of the items left in her home that was going to be given away to a thrift store. This would be my first upholstery project, but I thought that I'd give it a go.
The chair had been in the family for 25 years and still had good bones. It would be nice to have a new chair with old memories. So I decided to take the plunge to reupholster a swivel rocker.
The chair had been in the family for 25 years and still had good bones. It would be nice to have a new chair with old memories. So I decided to take the plunge to reupholster a swivel rocker.
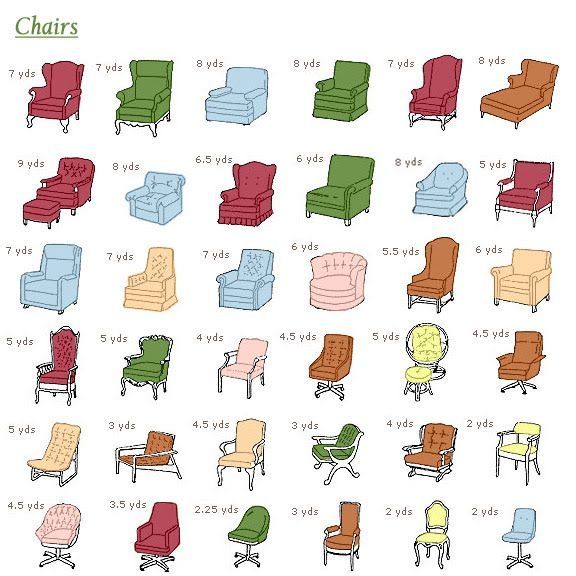
I wasn't really sure where to start on a project this big. After all, it isn't every day that you sit down and decide to reupholster a swivel rocker. So I went on pinterest and found this guide to buying fabric. It said that I would need about 7 ½ yards for a chair this size and it was dead on. I purchased 8 yards and had some left over. The fabric that I bought wasn't as thick as what was on the chair before, but it was still sturdy home decor fabric.
So I had my fabric...now what?
What I learned is that upholstering a piece of furniture is just a big puzzle. I didn't create a full tutorial since every chair is different, but the following things would be the same for any chair that you are working on.
What I learned is that upholstering a piece of furniture is just a big puzzle. I didn't create a full tutorial since every chair is different, but the following things would be the same for any chair that you are working on.
How to Reupholster a Swivel Rocker
1. Take the chair apart completely.
2. Re-use what you can. (Hardware, piping, etc.)
3. Make new fabric pieces by using the old ones as a pattern and replace batting and foam if necessary.
4. Carefully start putting the chair back together, starting with the piece you took off last and ending with the piece you took off first.Here is how my project went.
Take the Chair Apart
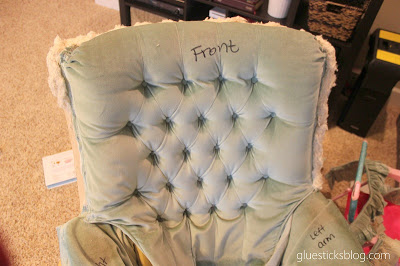
The first thing I did was label the chair. Front/Back/Left Side/Right Side/Ruffle, etc. I marked the whole thing up with a sharpie. I figured if I was ever going to put the chair back the way it was before that the more markings and photos I took, the better! I think I ended up with about 30 photos of the demolition process. Every fabric stretcher and every section where the fabrics met up in a funky way (like around the arms). If I had to choose one piece of advice for someone starting their first re-upholstery project, that would be it. TAKE LOTS OF PICTURES! They really helped when I went to put it back together later.
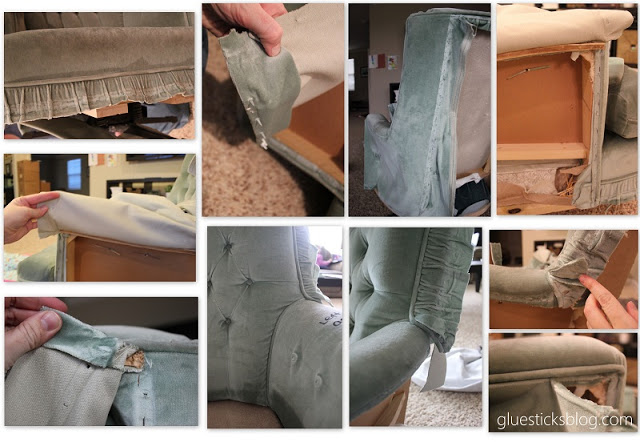
After I marked the chair, I used pliers to pull the staples out. I looked for a good place to start and that was the bottom ruffle. I started pulling staples and carefully removing the skirt and ruffle. Then I went on from there with the sides, the back, the front ruffle, and the arms. Taking pictures of each step as I went. I saved each and every piece, labeled it, and used it as a pattern to cut the new fabric.
I found sewing needles and toothpicks inside of the chair. That made me smile and miss my Grandma! She always had toothpicks in her apron pockets. You just never know when you are going to need one 🙂 And sewing needles. My grandma was an amazing quilter and made so many beautiful quilts and dresses for her daughters and grandchildren. For her birthday last year I compiled a book as a tribute to her and the legacy she left on our family.I vacuumed everything out of the chair. The needles, toothpicks, staples, etc. I also inspected the wooden frame to make sure nothing was broken or warped. It was in perfect condition.
Re-Use What You Can
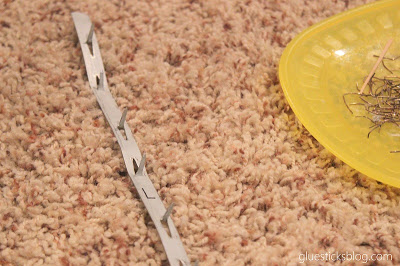
I kept the original fabric stretcher strips, the foam cushions, wood tack strips  and the piping from the chair. I just cut out the casing and pulled the piping out.
I also kept the button wires. The covers had to be replaced (I bought them in a kit at Joann's) and was able to string them with the long wires that were in the original ones which made it easy to put back in.
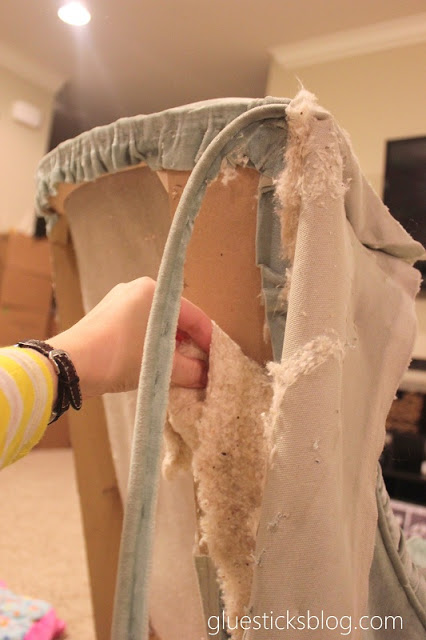
The batting was old and falling apart so I bought a bag of batting to replace it when I put the chair back together.
After 3 nights of taking out staples....hundreds of them, the chair was empty and bare bones! And it was at that moment that I thought to myself, "What the heck did I just do?!?!?" But there was no turning back now!
Put It All Back Together
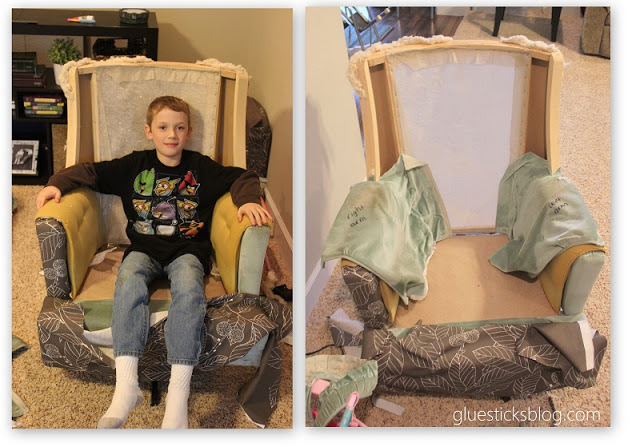
And so I started slowly putting it back together!
Using the foam t-cushion as a pattern I made a slip cover for it with a velcro back. I used the previous cushion fabric as a pattern to make the new one. Sewing it up exactly as it was before.
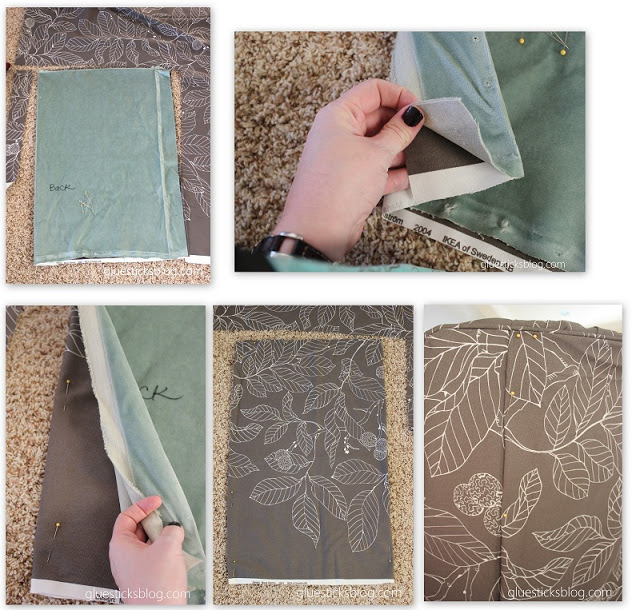
I found that the easiest way to get a perfect pattern piece was to lay the old one on top, cut around it and then use the folds as a guide for the new seam allowances. I'd pin the folds and then pin it to the chair to make sure it fit before stapling it on.
When stapling the new fabric and wood strips back on the chair, I hammered over the staples to really make them set and also create a flush surface.
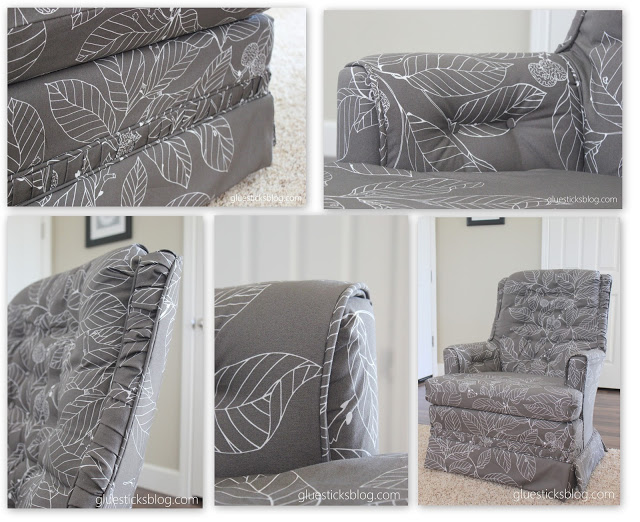
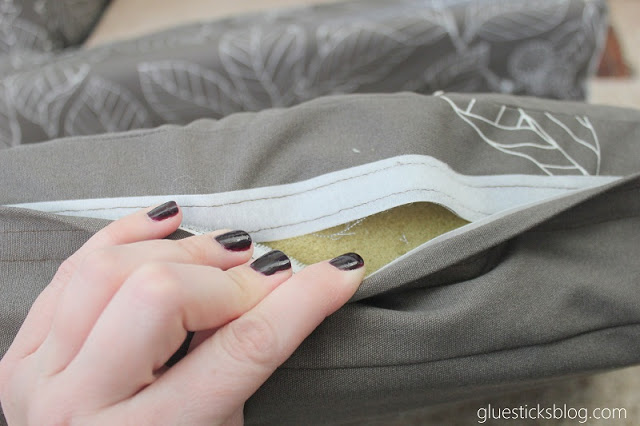
 It was like a big puzzle. Working from the last piece I took off of the chair, backwards, and finishing up with the ruffle and skirt that I took off the first night. The skirt was pretty easy to do since I tucked the old skirt inside the new one. Basically, I made a bunch of flap pockets (open on the top) and slipped the older one inside. I wanted them to be fairly heavy so that it would hang right and it worked out great.

After a few coats of Scotch Guard, the chair was ready to start a new life in our home! Start to finish, it took about 2 ½Â weeks since I didn't work on it every day. If I had worked on it every night I could have finished it in about 6 nights. I have to say, it was one of the most labor intensive projects that I have ever done, but I was so darn proud of myself when it was finished. Now I know that I can do it!
***
Supplies I used:
Staples (⅝")
Heavy Duty Pliers
Staple Gun
Hammer
Scissors
Pins
Sewing Machine
Sturdy Home Decor Fabric (Mine was from IKEA)
Batting
***
If you have any questions about starting a project like this, please don't hesitate to ask! Obviously I am not an expert since this was my first project and I learned as I went, but I'd be happy to help if I can.
If you liked learning how to reupholster a swivel rocker you might also like...


pameyson says
I have a chair very similar to this. It was my moms and I also rocked my last child in it for HOURS ! I dont have a sewing machine and have done very little sewing. I want so much to save this chair though. I dont know anyone that does this. Any ideas ? :_(
Brandy says
I looked into getting a slipcover for this one before I decided to reupholster it, but it was more expensive than I would have liked. I'm wondering if that might work for your chair since sewing isn't an option for you. Good luck!
Shan says
YOU ARE MY HERO!!!! Wow! I am so in awe of you! It looks phenomenal! Way to go girl! LOVE IT!
Leather Armchair says
Is this upholster fixed on the wooden stuff with any kind of glue stick or it is sewed..?
Sofa Beds
Aldis Green says
Well, its not that much easy as it seems..
Commercial Furniture
Jenny Eanes says
Wow what a great job! I love the fabric too;)
Judi says
You did an amazing job!!!!!
Debbie - Painted Therapy says
Wow! Absolutely gorgeous!
Kathy Wallace says
You did such a awesome job! I wish I had read your blog before I sent my chair to be recovered, I think I would have attempted it myself.