Gluesticks Blog

  • About
    • About Me
    • Contact Me
    • Terms and Privacy Policy
  • Sewing
    • My Book
    • Kids Sewing Projects
    • All Sewing Projects
  • Crafts
    • Kids Crafts
    • Paper Crafts
    • Free Printables
    • All Crafts
  • Holidays
    • Christmas
    • Halloween
    • Patriotic Holidays
    • Easter
    • St. Patrick’s Day
    • Valentine’s Day
    • Gift Ideas
      • Teacher Gifts
      • All Gift Ideas
    • Parties
  • Home
    • Home Decor Projects
    • Cleaning & Organizing
    • Gardening
    • Motherhood
  • Recipes
    • Kids in the Kitchen
    • Appetizer Recipes
    • Bread Recipes
    • Dessert Recipes
      • Cake Recipes
      • Cookie Recipes
      • All Dessert
    • Main Dish Recipes
    • Slow Cooker
    • Sides & Salads
    • Holiday Recipes
    • All Recipes

June 3, 2019 By Brandy 5 Comments

Home » Sewing » Kids Sewing Projects

10 Minute Teddy Bear Sleeping Bag Tutorial

Filed Under: Kids Sewing Projects

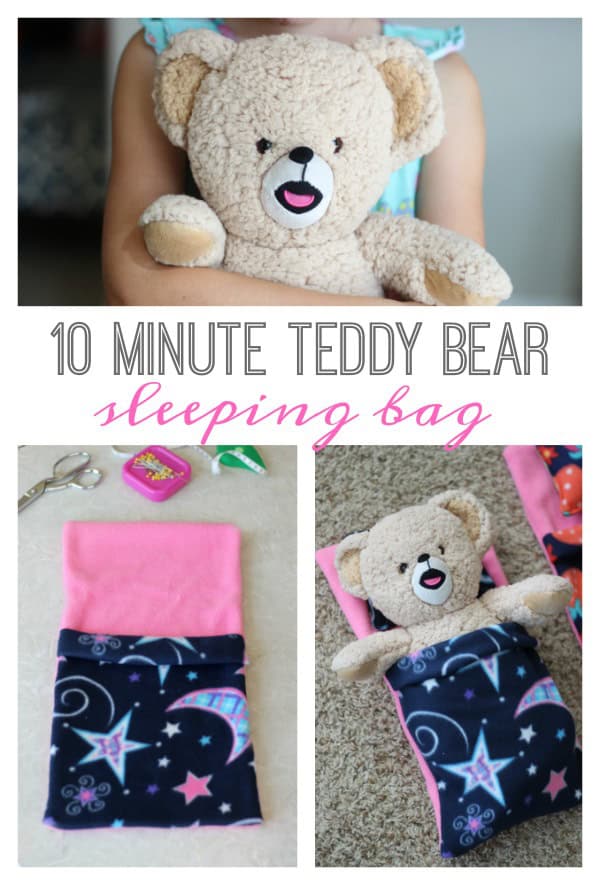
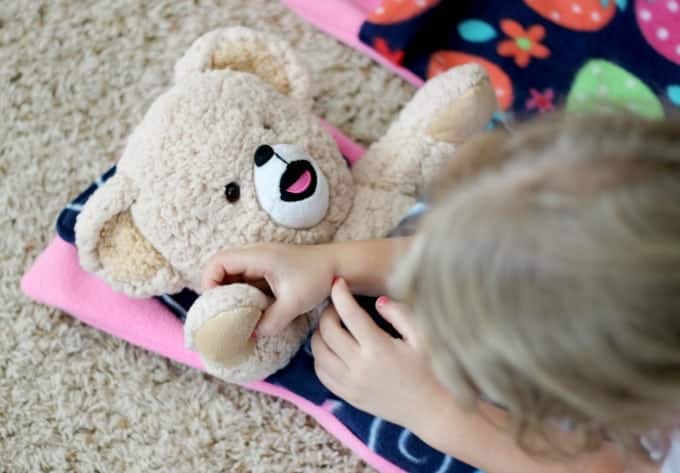
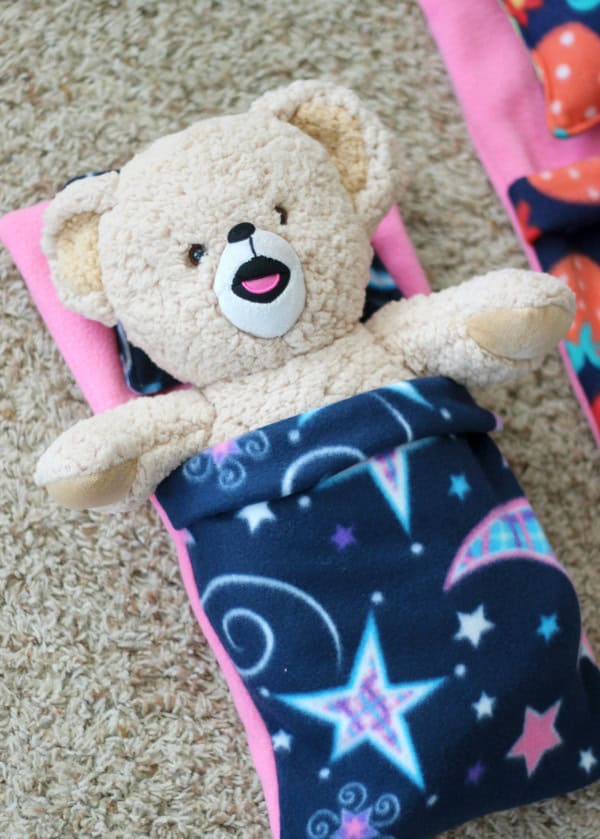
This 10-minute teddy bear sleeping bag tutorial is a great beginning sewing project for a child and also makes a great gift. Keep teddy warm and cozy wherever you go. It will fit any 15-16″ stuffed animal. This shop has been compensated by Collective Bias, Inc. and its advertiser. This post contains affiliate links.

DIY Teddy Bear Sleeping Bag
child holding stuffed animal
We all have that one toy that we remember above the rest from our childhood. Mine was a teddy bear that my aunt gave me. A Snuggle® bear to be exact. She gave my sister and I each our own when we were 3 and 4 years old and we adored them! We would stay up at night talking in our room and when my mom would tell us to quiet down and go to sleep we’d say, “It wasn’t us talking, it was our Snuggle bears!” True story…the bears wouldn’t keep it down 😉

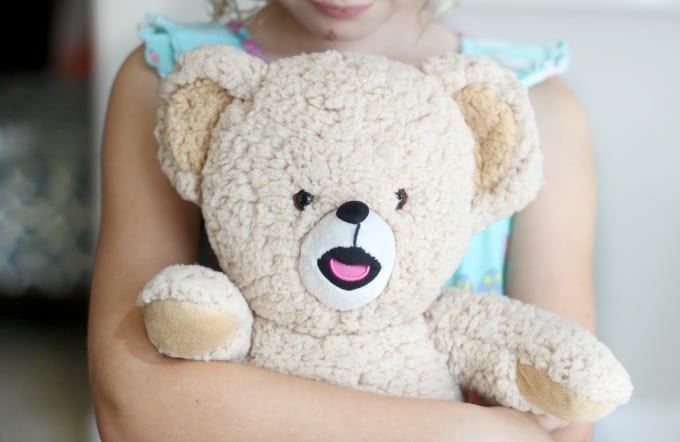
My bear is long gone and I had no idea that Snuggle bears were still around until recently. So when I found out, I had to have one again!  My girls love having something cozy to sleep with at night and so we adopted our very own into the family. He is bigger than the one that I had but just as soft. Ruby said he feels like a lamb. And, of course, we made him a sleeping bag because every stuffed animal needs one, right?

This is such a quick project and one that is simple enough for a child to help make. Since most children have a teddy bear or other stuffed animal about this size (15″-16″), it would make a great gift to bring to a birthday party! A cozy fleece sleeping bag and pillow.

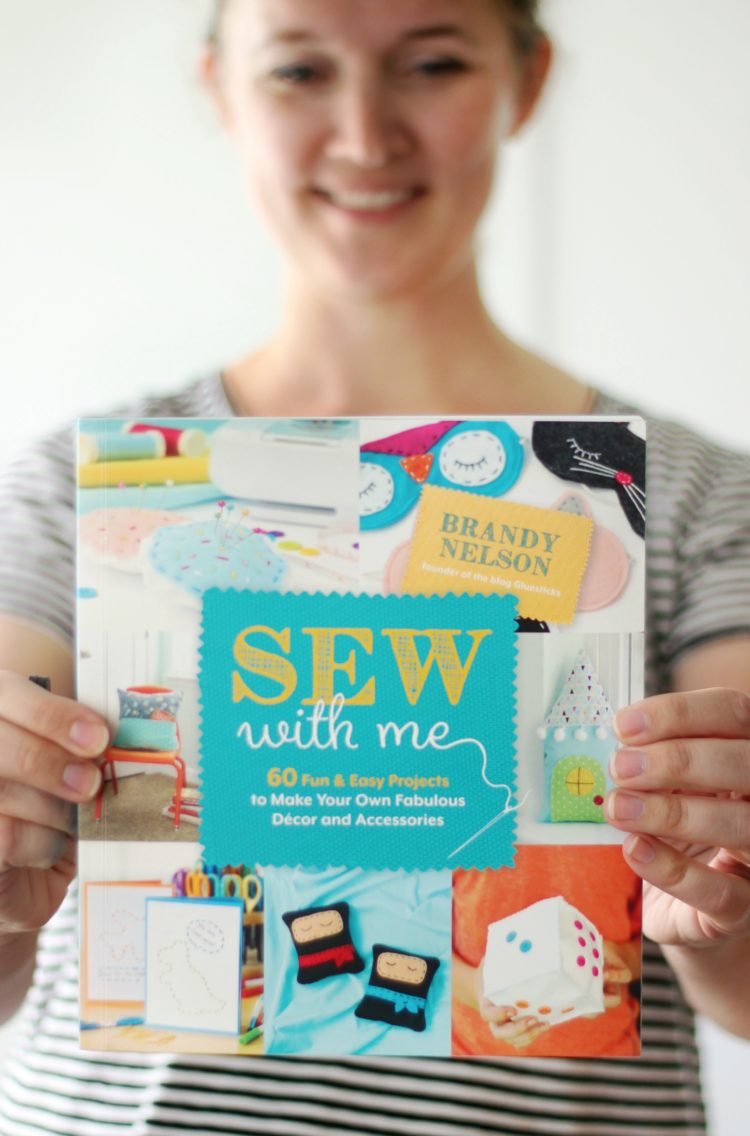
For 60 more sewing projects just like this one, check out my sewing book for kids!

3 more sewing projects for kids!

Heart Plushie

Sugar Cookie Pin Cushion

DIY Teddy Bears


10-Minute Teddy Bear Sleeping Bag Tutorial
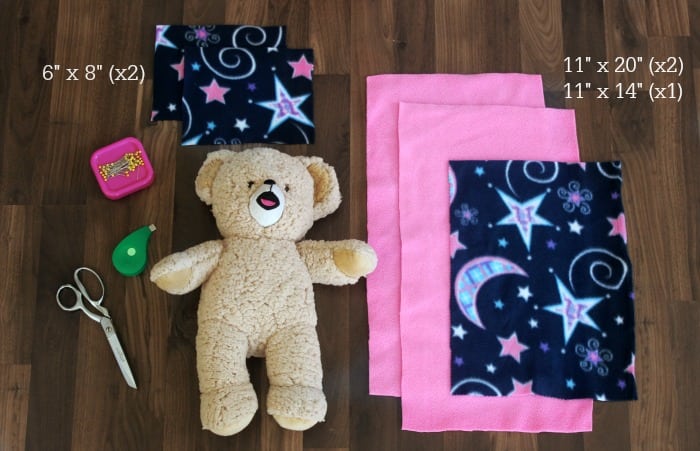
fleece, scissors, pins, measuring tape, fleece fabric

Supplies: 

11″ x 20″ rectangle of fleece (cut 2)

11″ x 14″ rectangle of fleece (cut 1)

6″ x 8″ rectangle of fleece (cut 2 for pillow)

pins

measuring tape

scissors

sewing machine

small amount of polyester fiber-fill for pillow

Before you begin your project, make sure to prewash your fabric to prevent shrinkage. The only time that I don’t prewash my fabrics is when I am making a quilt and actually want it to shrink down a bit in the dryer when completed.  For every other project, a quick wash is all you need. And since this is a project that you want to be soft and cozy, add a bit of Snuggle® fabric softener (according to the package instructions) to your load. 

step by step collage for teddy bear sleeping bag
Lay one of the longer pieces of fleece on your work surface, right side up. Place your shorter piece (11″ x 14″) on top, matching edges. Fold shorter piece over 1 1/2″. Fold over again. Pin. This makes it look like the sleeping bag is rolled down a bit. (I’ll refer to this section as the “folded edge” in this tutorial.)

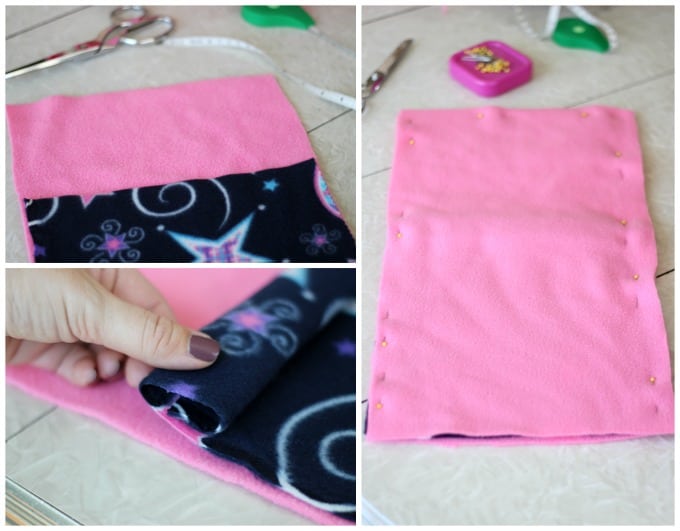
Place the 2nd longer piece of fleece on top, sandwiching the shorter one inside. Pin all the way around, leaving the bottom open.

Sew sides and top, leaving bottom edge completely open. Trim corners. Turn right side out. The folded edge should be inside out.

sewing teddy bear sleeping bag
Sew the bottom seam. Trim seam.

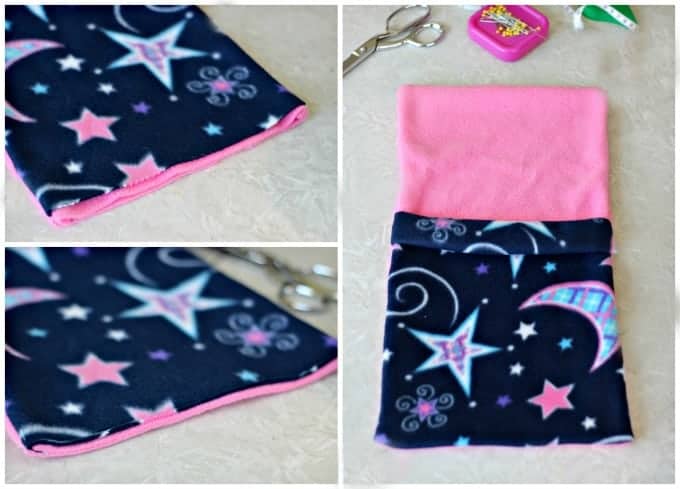
Fold your sleeping bag again so that the folded edge is now facing out.
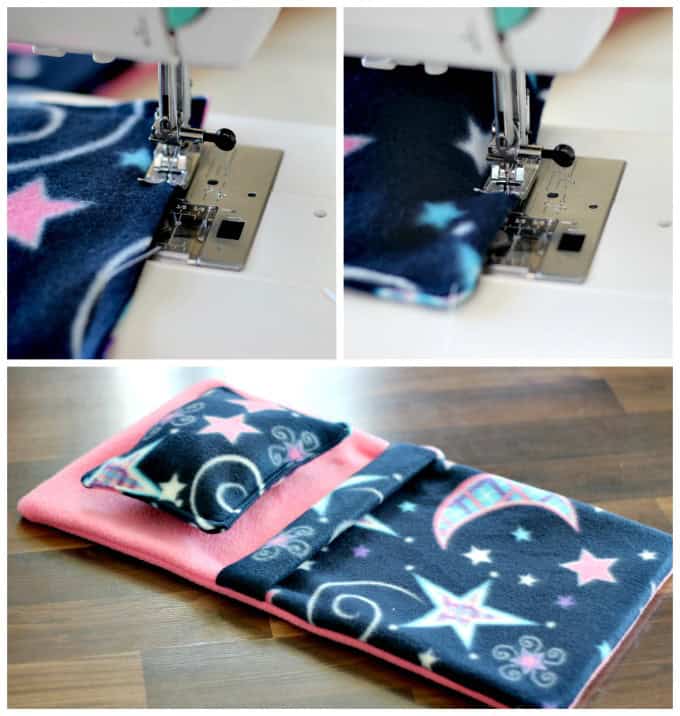
Now for the pillow:

finished sleeping bag and pillow
With right sides facing, sew all for sides of the fleece, leaving an opening to turn right side out. Clip corners, turn right side out and fill with polyester fiber-fill. Top stitch around the entire pillow, catching the seam of the opening as you go.

child putting teddy bear in sleeping bag
We made a sleeping bag for each of the girls’ teddy bears for bedtime snuggles.

finished teddy bear sleeping bag
Did you have a special teddy bear when you were a child? What is your favorite memory with him/her?

Looking for some fun outfits to make for your teddy bear? Check out these cute DIY teddy bear clothes!

Print Friendly, PDF & Email

Related

Share
Pin

About Brandy

Welcome! I'm Brandy, mother to 5 darling kiddos and a cute black lab named Toby. My husband is in the Coast Guard so we've lived all over the place, turning each house into a home. I love baking, sewing, making cute things with my kids, and sharing what I've learned with all of you!

Disclaimer: I am a participant in the Amazon Services LLC Associates Program, an affiliate advertising program designed to provide a means for me to earn fees by linking to Amazon.com without any additional cost to you. As an Amazon Associate, I earn from qualifying purchases.

Previous Post: « Dragon Egg Snack Cups Using Giant Easter Eggs
Next Post: Buckeye Chocolate Peanut Butter Sheet Cake »

Reader Interactions

Comments

  1. Michelle says

    September 18, 2016 at 8:18 pm

    So fun! This would be a great project for my daughter and I to make for her American Girl Doll!
    Thanks
    Michelle

    Reply
  2. Julie says

    September 18, 2016 at 2:37 pm

    Every teddy needs a sleeping bag like this, what a lovely idea.

    Reply
  3. Anne Weaver says

    September 7, 2016 at 7:40 am

    Oh cute! I have a Craft Gossip post scheduled for later today that features your tutorial: http://sewing.craftgossip.com/?p=89595 –Anne

    Reply
    • Brandy says

      September 7, 2016 at 7:44 am

      Thanks so much!! 🙂

      Reply
  4. Sarah Ingle says

    September 6, 2016 at 12:32 pm

    This is too cute! What a great way to get the kids involved in an easy, and memorable, sewing project. Thanks for sharing! #client

    Reply

Leave a Reply Cancel reply

Your email address will not be published. Required fields are marked *

Recipe Rating


This site uses Akismet to reduce spam. Learn how your comment data is processed.

Primary Sidebar

I'm Brandy! I love to create and share my ideas through easy-to-follow recipes and tutorials. MORE ABOUT ME

Follow Along

  • Facebook
  • Instagram
  • Pinterest

Disclaimer: I am a participant in the Amazon Services LLC Associates program. As an Amazon Associate, I earn from qualifying purchases, at no cost to my readers.

My Amazon Store

Get My Best Projects and Recipes!

My Sewing Book for Kids!

kids sewing book cover
  • Home
  • Website Accessibility
  • My Book
  • Privacy Policy

Copyright © 2025 Log in

Gluesticks blog logoLogo Header Menu
  • About
    • About Me
    • Contact Me
    • Terms and Privacy Policy
  • Sewing
    • My Book
    • Kids Sewing Projects
    • All Sewing Projects
  • Crafts
    • Kids Crafts
    • Paper Crafts
    • Free Printables
    • All Crafts
  • Holidays
    • Christmas
    • Halloween
    • Patriotic Holidays
    • Easter
    • St. Patrick’s Day
    • Valentine’s Day
    • Gift Ideas
      • Teacher Gifts
      • All Gift Ideas
    • Parties
  • Home
    • Home Decor Projects
    • Cleaning & Organizing
    • Gardening
    • Motherhood
  • Recipes
    • Kids in the Kitchen
    • Appetizer Recipes
    • Bread Recipes
    • Dessert Recipes
      • Cake Recipes
      • Cookie Recipes
      • All Dessert
    • Main Dish Recipes
    • Slow Cooker
    • Sides & Salads
    • Holiday Recipes
    • All Recipes