This bottlebrush tree wreath is a stunning holiday decoration. Use $1 trees from your local craft store and my easy-to-follow tutorial!
You might also like my tomato cage Evergreen topiaries, Target Dollar Spot Pumpkin Wreath, or Farmhouse Egg Wreath.
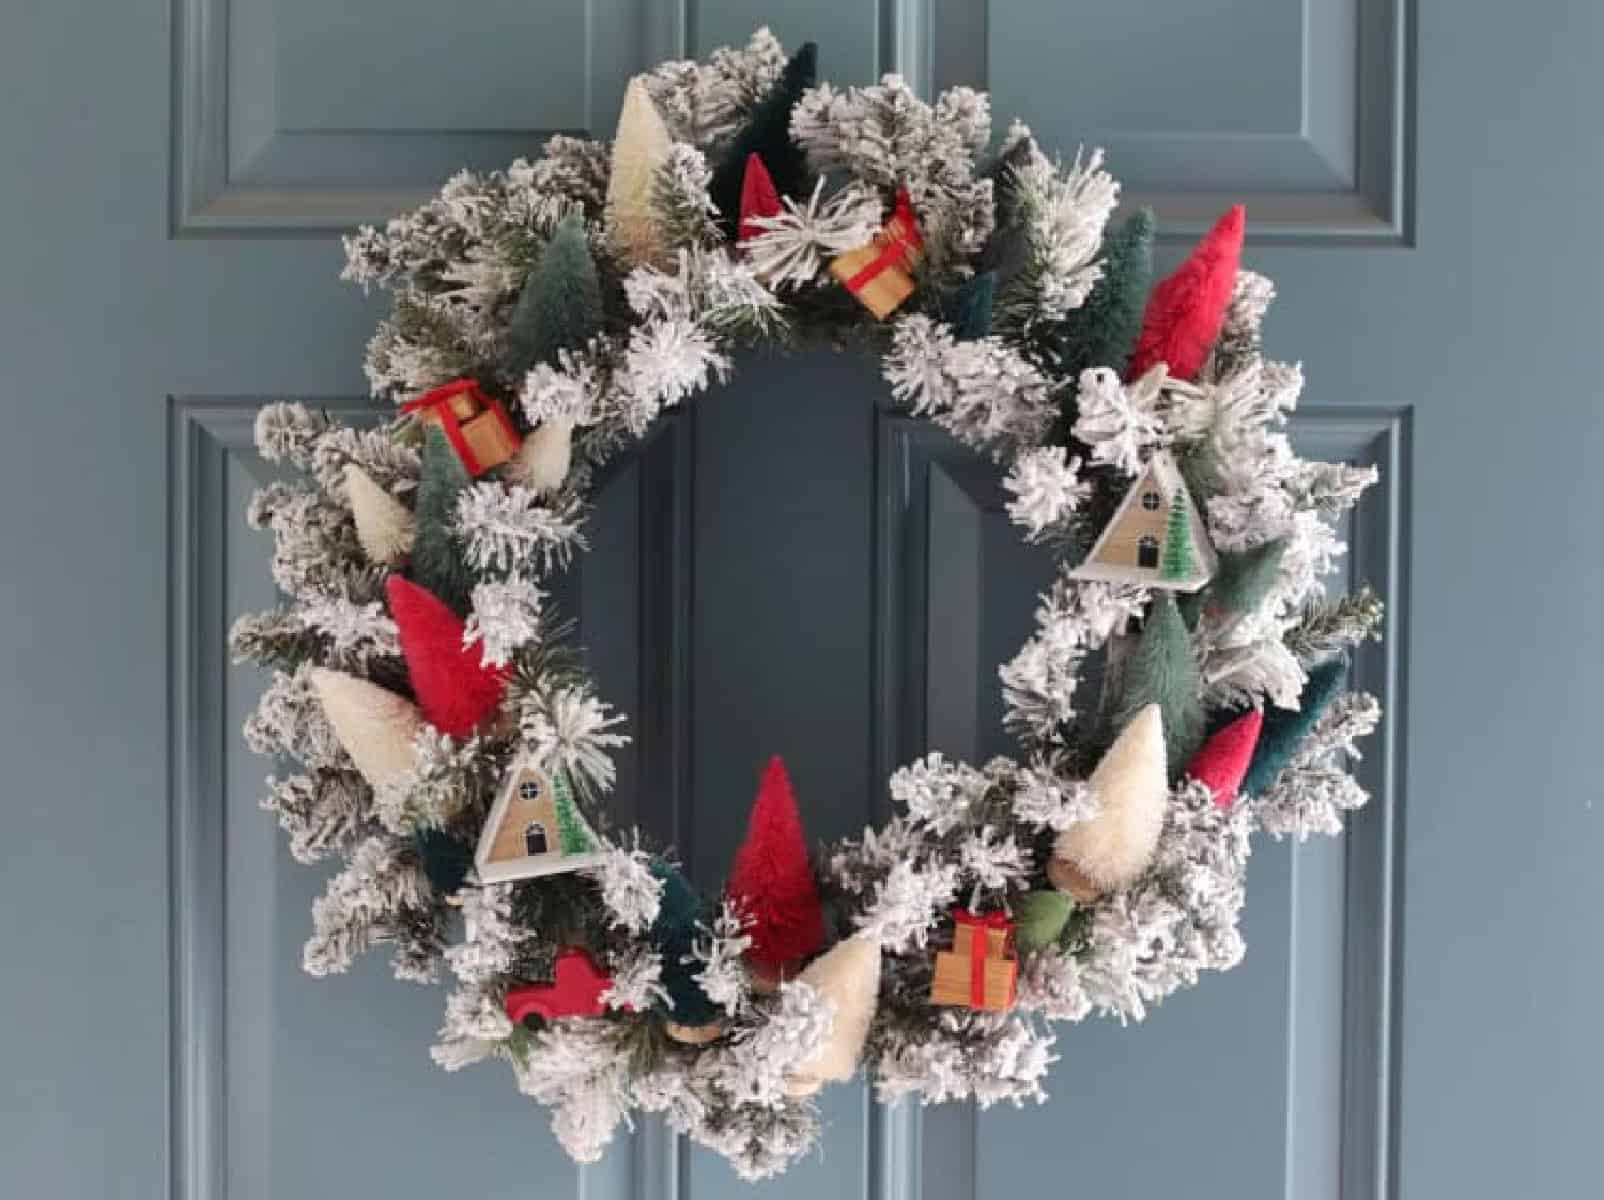
Bottlebrush tree wreaths are pricey if purchased at a home decor store, but you can make one at home for a fraction of the price! If you can hot glue, you can make this wreath. It really is THAT easy.
Why I Like This Project
- Large wreath. This wreath is 24" in size, so it makes a statement on your front door. You can, of course, make a smaller wreath if you'd like.
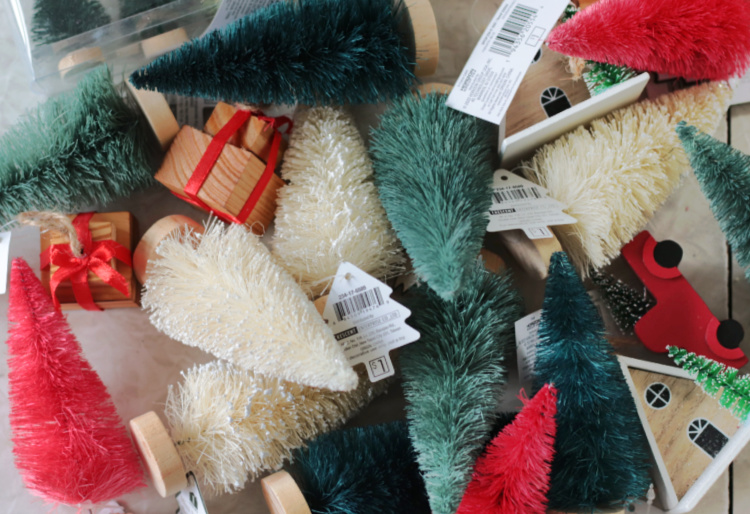
- Inexpensive. Most craft stores sell small bottlebrush trees for around $1 during the holidays. You can also find multipacks in a variety of colors. ANY bottlebrush trees and small objects would work for this wreath. You can check Dollar Tree, Walmart, Michaels, or Hobby Lobby to see what they have. I just loved that everything I purchased was $1 each (the tiny trees came in an 8-pack for $5).
- Sturdy wreath. This wreath is sturdy and will last for years. My wreath is 3 years old and is just as bright and beautiful as the first day I hung it on my front door.
Jump to:
Tips and Tricks
- Get creative. Use whatever miniature decor and objects you'd like to complement the trees. I found these $1 wooden ornaments and cut the twine hangers off. You can't even tell.
- Purchase extra embellishments. When deciding how many items to purchase, it all depends on how big you want your wreath to be. You don't have to use as many as I did, but I recommend buying more than you think you'll need. You can always return the extra trees that you don't use, and stores don't always restock the holiday decor, so they might not have much of a selection the closer it gets to Christmas.
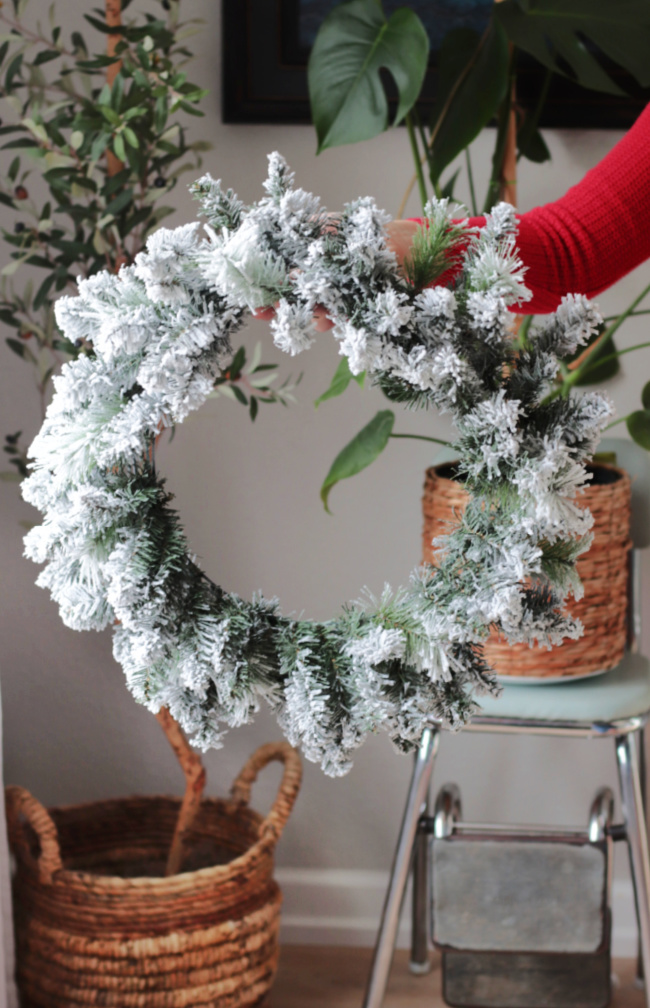
- Wreath base. If you have an old wreath base from another project, this is an excellent way to use it! I highly recommend using a flocked wreath base because the snowy elements work well with these trees and holiday houses. For the size of trees that I used, I wouldn't go smaller than an 18" wreath. I purchased this 24" flocked wreath base from Walmart for $13.47. Once fluffed, it's gorgeous and a great deal.
Supplies
- Wreath base: I used a 24" flocked wreath base.
- Bottlebrush trees: I used two sizes: 4" and 2". The 2" trees are great for use as fillers. They balance out any areas that might not be as full as others.
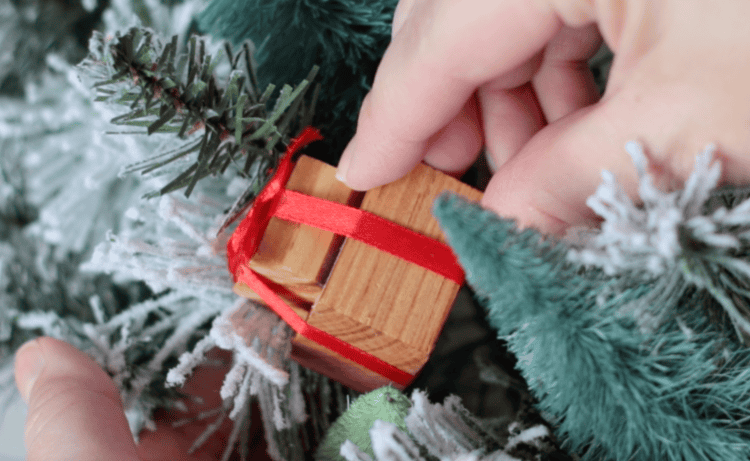
- Fillers: I bought 2 houses (would have liked to have had 3, but they only had 2), a small red truck, and a few wooden gift box ornaments.
- Hot glue gun and glue
See the how-to card for full information on ingredients and quantities.
How To Make a Bottlebrush Tree Wreath

Step 1: Fluff the wreath thoroughly. It's incredible how a matted-down wreath will come to life once fluffed.
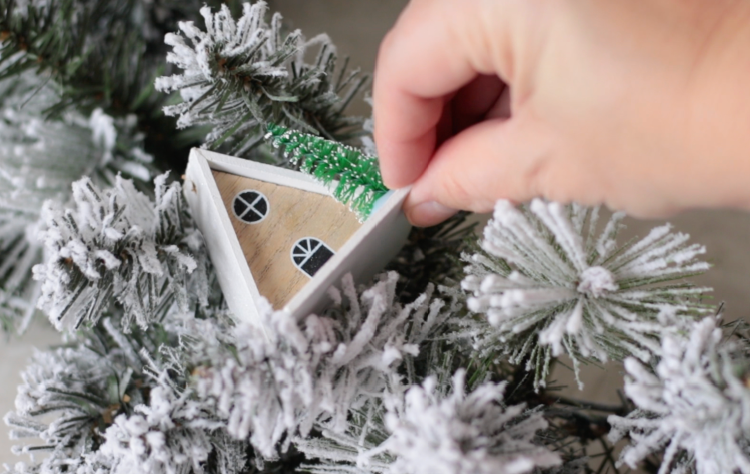
Step 2: Tuck the bottle brush trees and holiday fillers into the wreath, but DO NOT GLUE them into place yet. This is a great time to fiddle with the placement of everything, moving it around until it looks just right.
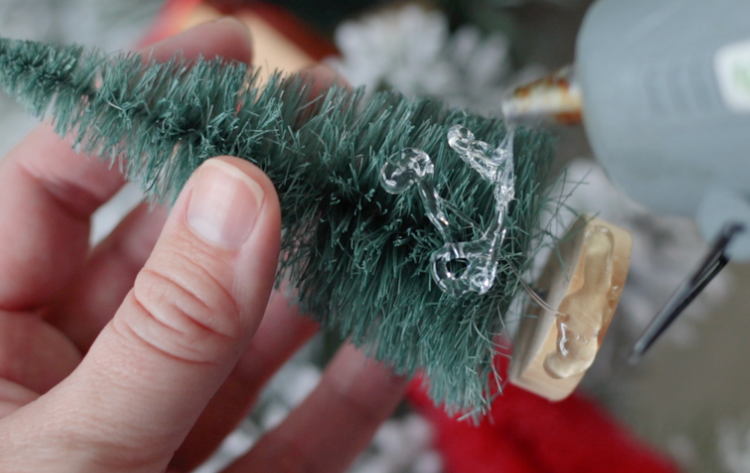
Step 3: Once you've settled on the arrangement of your items, hot glue them into place. When positioning the items, have the holiday fillers close to the front of the wreath, and tuck the trees slightly behind, to hide the wooden bases.
Step 4: Once the items have been secured with hot glue, go around the ENTIRE wreath, making sure everything is nice and secure. I used two additional glue sticks during this step. Adding dots here and there.
Give the wreath a good dusting at the end of the season to clean off any debris from hanging outside. Place in a wreath bag or box. Then store it in a place where it can lie flat and not be compressed.
Bottlebrush Wreath FAQs
Give the wreath a good dusting at the end of the season to clean off any debris from hanging outside. Place in a wreath bag or box. Then store it in a place where it can lie flat and not be compressed.
This is ultimately up to you and depends on the depth of the wreath. You can hang it on the door if the wreath fits, or simply hang it on the storm door.
Hang the wreath at eye level, with the ribbon hanging on the nail a bit higher. I typically shoot for having the top of the wreath covering the peephole on my front door.

More Holiday Crafts To Make

MADE THIS CRAFT AND LOVED IT? 💛 Please leave a STAR rating and COMMENT below! Post it to Facebook or Pinterest to easily share with friends!

Bottlebrush Tree Wreath
Equipment
- glue gun
Materials
- 1 24" flocked wreath base
- 4"-5" bottle brush trees
- 2" mini bottle brush trees
- small houses, trucks, etc.
Instructions
- Collect a variety of bottle brush trees and holiday fillers.
- Fluff wreath thoroughly. It's amazing how a matted down wreath will come to life once fluffed.
- Tuck the bottle brush trees and holiday fillers into the wreath, but DO NOT GLUE them into place yet. This is a great time to fiddle with the placement of everything, moving it around until it looks just right.
- Once you've settled on the arrangement of your items hot glue them into place. When positioning the items, have the holiday fillers close to the front of the wreath, and tuck the trees slightly behind, to hide the wooden bases.
- Once the items have been secured with hot glue, go around the ENTIRE wreath make sure everything is nice and secure. I used two additional glue sticks during this step. Adding dots here and there.


Leave a Reply