If you've ever felt intimidated by candy making, give this English toffee recipe a try. My recipe will help you get it right the first time with step-by-step instructions, photographs, and video. It's a family recipe that has been a holiday staple for over 35 years.
If you've tried making toffee and had the questions: "Why is my toffee soft?" or "Why won't my toffee turn brown?" you've come to the right place! I'll answer those questions and show you how to turn your next batch around in the right direction. You might also like our Churro toffee recipe or Take 5 toffee recipe.
One of my FAVORITE holiday treats is this English toffee. My aunt made this for our family every year for Christmas, and I always looked forward to it! When I grew up and started my own family, I asked her for the recipe so that I could start making it for gifts.
My first batch was...gritty. Eww. And soft. I was SO bummed! When toffee is undercooked, it's not only soft and gritty, but it tastes bad, too. I wasn't going to give up. Making it is so much cheaper than buying it, so I tried again, and the second batch turned out great! I realized that I hadn't cooked it long enough. It's been smooth sailing ever since. I've made dozens and dozens of batches of toffee using this method, and it turns out perfect every time.
Why I Love This Recipe
- Easy to make. Toffee isn't hard to make and uses pretty basic ingredients! This method doesn't even require a candy thermometer.
- Simple ingredients. Sugar, butter, vanilla, and salt. That's the base of the recipe. Add nuts if you'd like, and don't forget to coat it in chocolate.
- Can be made in advance. If you bake for family and friends during the holidays, English toffee is a great treat to add to your lineup. You can make it days in advance since it stays fresh for a week at room temperature, which is considerably longer than most baked goods.
What People Are Saying
I had never made toffee prior to finding your recipe last Christmas. I have since made it seven or eight times and it has been perfect every single time. I just made the first of this season’s batches on a different stove and it was still perfect! Thank you so much for sharing this recipe!
Just made my first batch of your toffee and it came out pretty much exactly like you said it would! Your very clear instructions made it a breeze, and I’ll now be making several more batches to give as Christmas presents.
My first batch was the aforementioned disaster. But I just made my second, and it is beautiful and perfect!
Jump to:
Tips and Tricks for Perfect Engligh Toffee
- Do not double the recipe. My aunt told me it is better to make this toffee in single batches so that is what I have always done.
- Use a wooden spoon. Metal spoons will heat up as the mixture heats up. A good old-fashioned wooden spoon or silicone spatula works well, as they do not conduct heat.
- Use a clean, dry pan for each new batch.
- Cook at medium-high heat. Don't be afraid to crank the heat up once the mixture begins to simmer. This is not a low-and-slow recipe. It's HIGH and fast. On my stove, I cook it at a 6 or 7 out of 10 (medium-high).
- 5 minutes is a guide. By all means, if after 5 minutes your toffee still isn't the color of a brown bag, keep it on the stove for another minute or so. Every stove cooks differently. The 5-minute timer is a guide.
Ingredients
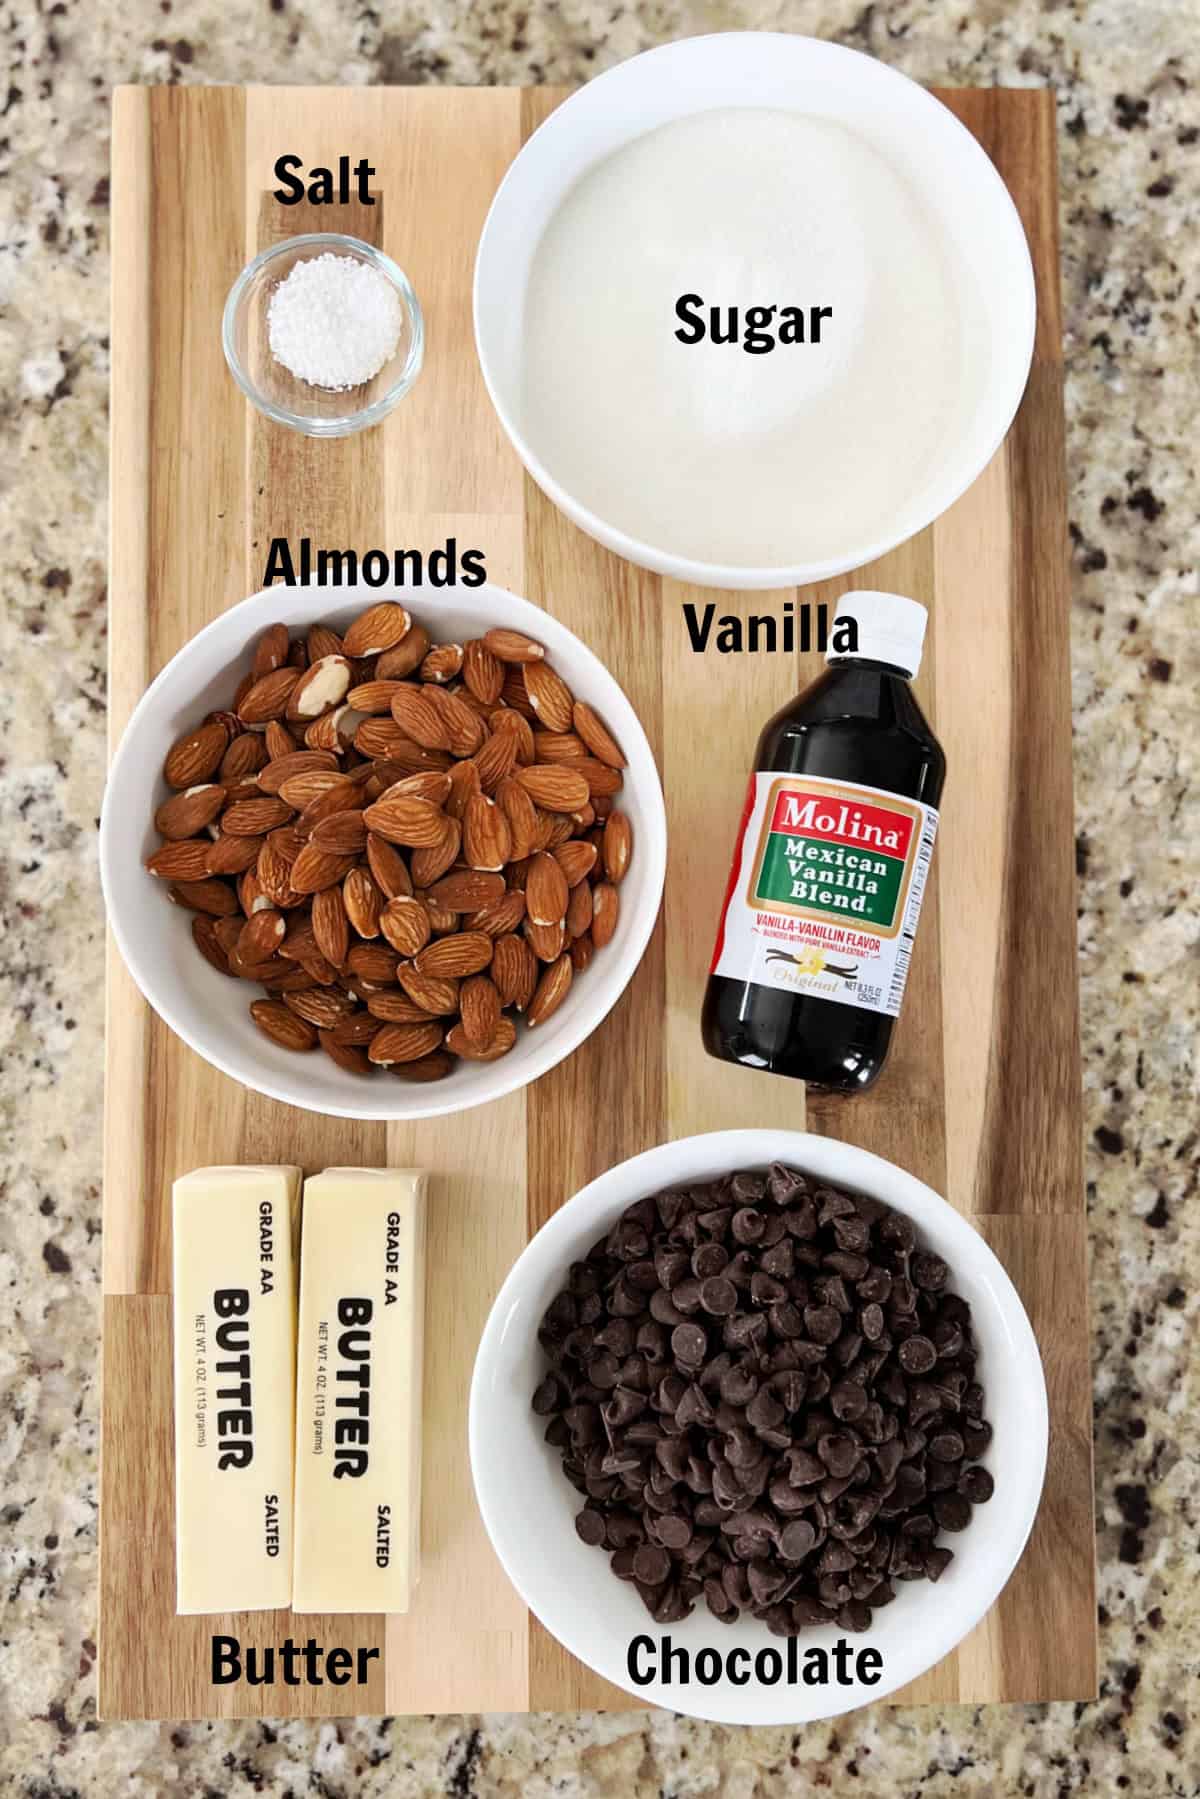
- Butter: Use salted butter and DO NOT use margarine.
- Sugar
- Vanilla
- Salt
- Almonds: I like using whole almonds in the toffee and sliced almonds on top, pecans or walnuts would be delicious too.
- Chocolate: The toffee is coated in melted chocolate. Use chocolate chips or melting wafers.
See the recipe card for full information on ingredients and quantities.
How To Make English Toffee
Before you dive into our English toffee recipe and make your first batch, be sure to read through my entire post and the helpful tips at the end! You can also watch the video in the recipe card or check out my Instagram highlight videos titled “Toffee” where I make a batch in real time.
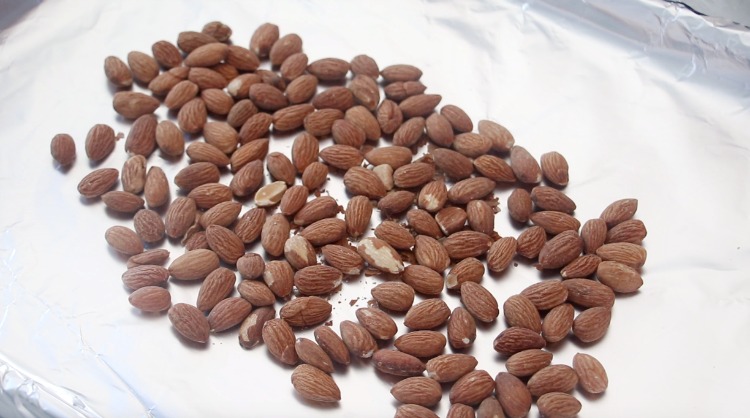
Step 1: Line a baking sheet with foil. If you'd like almonds inside the toffee, not just on the top, toss a handful of sliced or whole almonds onto the baking sheet (about 1 cup). You can also use walnuts, pecans, mixed nuts, or just leave the nuts out all together.

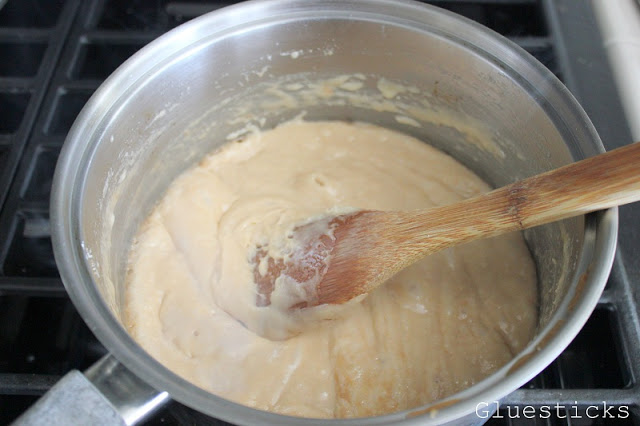
Step 2: Heat butter, sugar, vanilla, and salt in a heavy saucepan on medium heat until the butter is melted. Turn the temperature up to medium HIGH and stir constantly until the mixture comes to a boil.
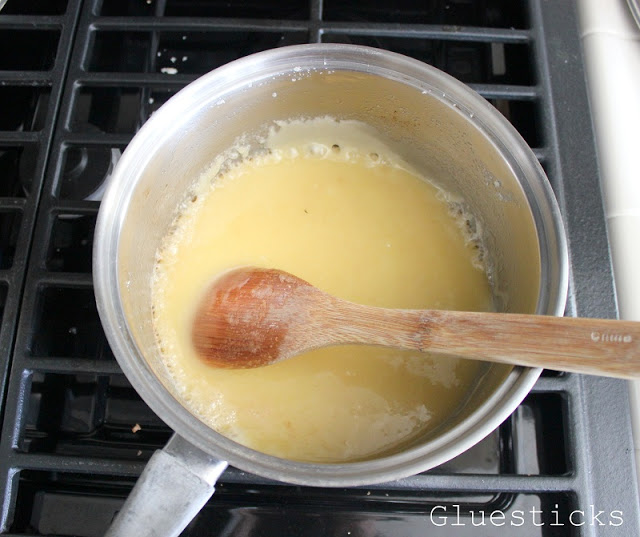
Step 3: Set your timer for 5 minutes and DO NOT let ANYTHING disturb you while you stir. The photo above is what it looks like after stirring for two minutes.
Step 4: Keep stirring. After 4 minutes, it has lost its yellow color and is turning brown. It is also looking frothy. But it is not done until it has turned the color of a brown paper bag. It may look done, and you may think it is burning, but keep stirring until your timer goes off. It may even smoke a tiny bit, and that is ok. If you are really concerned, lift your pan off the burner (while you are still stirring) to remove it from the heat, but still stir until your timer goes off.
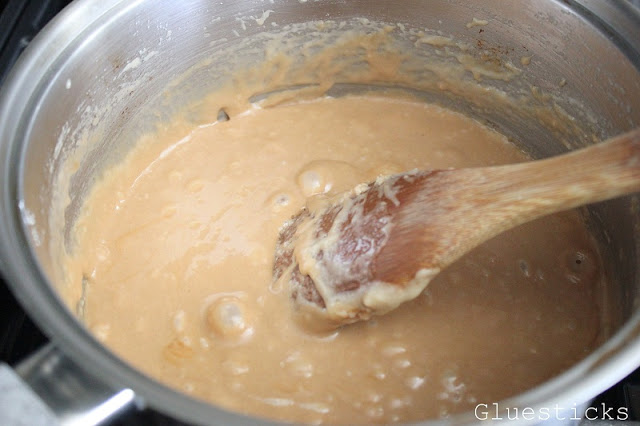
Step 5: After 5 minutes it should be nice and BROWN. There is a definite difference between 4 and 5 minutes of cooking. That extra minute makes all the difference in the texture. Remove from heat.
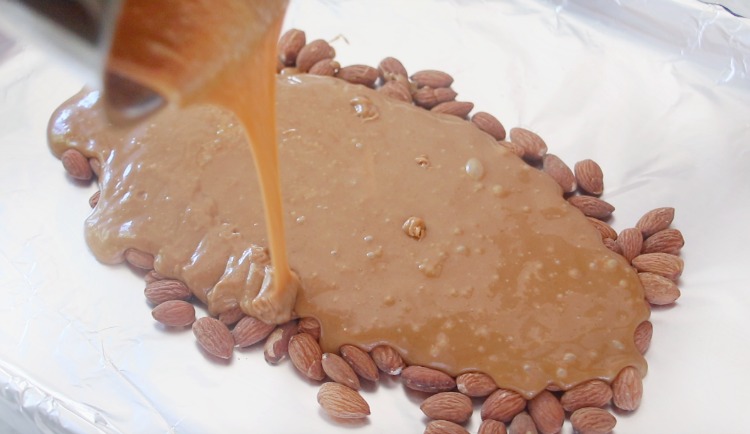
Step 6: Immediately pour hot toffee onto your foil-lined baking sheet. If you added nuts to your baking sheet, pour the toffee over the nuts. Do not scrape the bottom of the pan. As you pour, the bottom will brown, and you don't want that in your toffee.
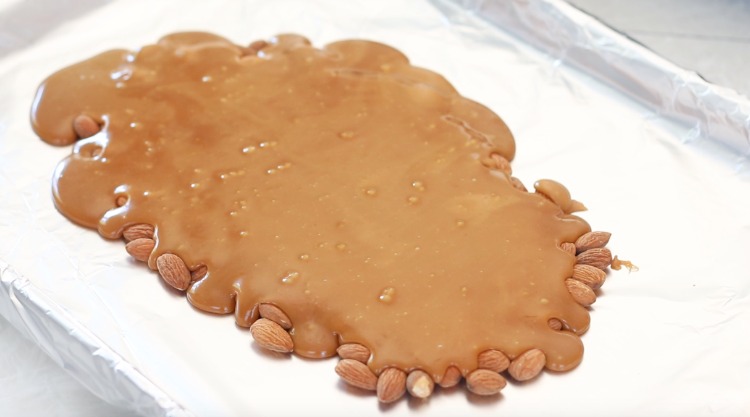
Step 7: Let cool. It should harden within a couple of minutes.

Step 8: Spread melted chocolate over the toffee with a small spatula or butter knife. Sprinkle with additional nuts, if desired.
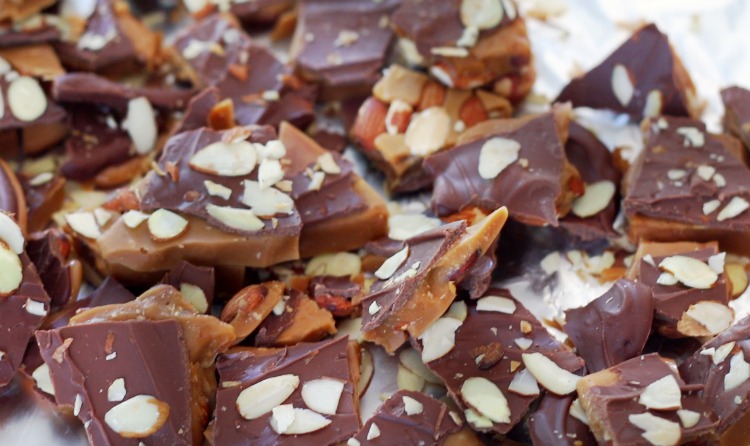
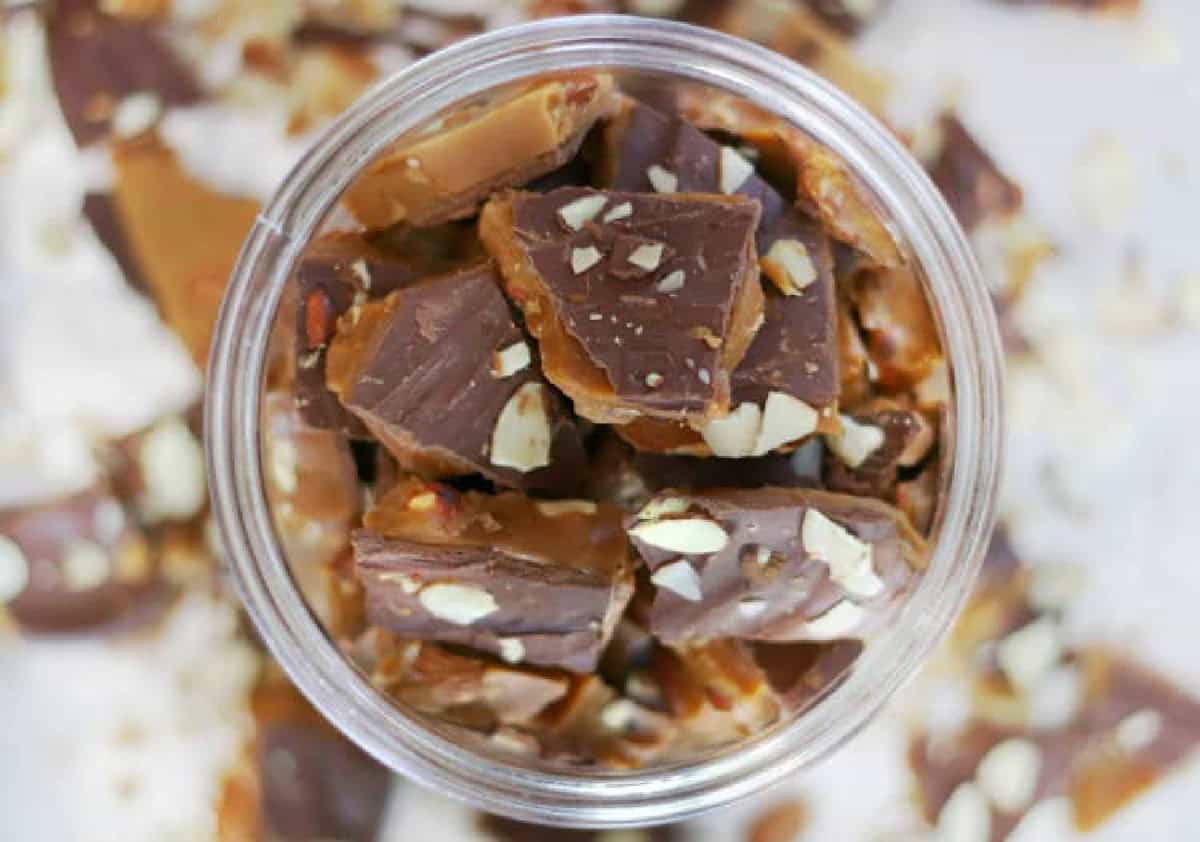
Step 9: Once the chocolate hardens, break the toffee into small pieces. Store in an airtight container indefinitely.
And that is it! No temps, no candy thermometer, no special tools required. JUST HEAT, and lots of it.
English Toffee FAQs
Do you like Skor Bars, Heath Bars or Almond Roca? If so, you'll love our English toffee recipe. It is SO MUCH BETTER than any of those! English toffee is made from sugar and butter and heated to the hard crack stage for a crunchy, buttery candy. I've heard that traditional English toffee isn't made with nuts, but we won't even go there. Toffee simply isn't the same without almonds. Many versions only sprinkle nuts on top of the chocolate, but mine has whole almonds in the toffee too. Of course, if you aren't a fan of nuts, you can leave them out.
No. English toffee must be made with butter. Butter is a key ingredient in any caramel or toffee recipe.
There are a couple of things that could be happening. 1: Your heat might not be high enough. 2: I haven't ever experienced this, but I have heard that if you use SALTED butter that it is better for toffee making. I only buy salted butter so maybe that's why I've never had my toffee separate. You also need to make sure that you are CONSTANTLY stirring the mixture.
It will turn brown if the heat is medium-high and you cook it for 5-6 minutes. Crank up that heat, don't let it simmer on low. It will start out yellow, then become light brown, then finally the right brown paper brown that you are looking for. Just keep stirring and cooking!
If your toffee doesn't have a hard texture (where you can snap it in half) you did not cook it long enough. Again, the 5-minutes is just a guide. Cook it until it is the color of a brown bag.
Toffee should be a combination of sweet and salty. A mixture of butter and caramel has a nice snap when broken into pieces. If your toffee is soft or gritty or tastes bitter, see the tips above for troubleshooting.
Toffee can be frozen up to 2 months. It also lasts quite awhile at room temperature if stored in a container.
Fill your pan with hot water and set it aside. It will start dissolving the toffee left inside and make it easier to clean.

More Candy Recipes To Make


MADE THIS RECIPE AND LOVED IT? 💛 Please leave a STAR rating and COMMENT below! Post it to Facebook or Pinterest to easily share with friends!

English Toffee Recipe
Equipment
- baking sheet
- foil
- sturdy pan
- wooden spoon
- measuring cup
- measuring spoons
- spatula
Ingredients
- 1 cup butter (salted) DO NOT USE MARGARINE
- 1 cup sugar
- ½ teaspoon vanilla
- pinch salt
- 1 cup almonds
- 1 cup chocolate chips or melting chocolate
Instructions
- Line a baking sheet with foil. If you'd like to have nuts in your toffee, toss a handful of almonds onto the baking sheet. Set aside.
- Heat all of your ingredients (except for the nuts and chocolate) in a nice sturdy saucepan on med heat until butter is melted. Turn temp up to medium high and stir constantly until mixture comes to a boil.
- Set your timer for 5 minutes and DO NOT let ANYTHING disturb you while you stir. You must keep stirring your butter/sugar mixture so that it does not burn. And you must use a WOODEN spoon.
- Keep stirring until your timer goes off. It may even smoke a tiny bit and that is ok. If you are really concerned, lift the pan off of the burner (while you are still stirring) to remove it from the heat, but still stir until your timer goes off.
- Immediately pour hot toffee onto your foil-lined baking sheet. If you added nuts to your baking sheet, pour the toffee over the nuts.
- The toffee will be about ¼-1/2" thick. Do not scrape the bottom of the pan. As you pour, the bottom will brown and you don’t want that in your toffee.
- Fill your pan with hot water and set it aside. It will start dissolving the toffee left inside and make it easier to clean.
- Let cool. It should harden within a couple of minutes.
- Melt Ghirardelli bricks or wafers, Wilton melting chocolate, chocolate chips, or any other variety of melting chocolate in the microwave at 30-second intervals until smooth.
- Spread across your toffee with a small spatula or butter knife. I use about 2 Ghirardelli bricks per batch. If you melt too much that’s ok, it will harden again and you can just microwave it again another time for another use.
- Sprinkle with sliced almonds, if desired, while the chocolate is still soft. After it has set up, break toffee into pieces.
Notes
- Do NOT double the recipe
- You must use a WOODEN spoon
- Use a clean, dry pan for each new batch.
- Cook over high- medium/high. (My stove is gas and tends to cook really hot, really fast. So I usually drop the heat to medium for my toffee, but in years past when I had an electric flat top stove, med-high worked best.)
- The 5 minute cook time is just a guide. If you hit 5 minutes and your toffee still isn't the color of a brown paper bag, add an extra minute. Cook times vary on each stove.
Nutrition
Here is a collection of holiday candy recipes to try from Taste of Home.


Sandra says
Just wanted to let you know that the first time I tried this recipe it came out perfect, however the second time wasn't as great. The toffee turned out soft and sugary and wouldn't set. I figured I just didn't cook it long enough. My question is can i put it back and cook it again after it has cooled. I hate wasting ingredients but I didn't try to cook it the second time.
Brandy says
I hate wasting ingredients too, especially 1 cup of butter! I'm so sorry that happened, but at least you know you can make a good batch like the first one. I agree, the second batch probably didn't cook long enough. I honestly didn't have an answer for your question so I found a forum online and someone posed the same question. The consensus was that it wouldn't hurt to try to reheat it, but it most likely wouldn't set up right. If you do try it, I'd love to know how it turns out in the end. This would be good to know for others who may have the same problem!
Heather @ French Press says
I love toffee,but only tried making it once - it was NOT good. this looks like a great step by step
Brandy says
Yes! Most likely it was the cooking time. Don't be afraid to see a little smoke start. Just keep stirring like mad so that it doesn't burn. If you need to raise the pan off the heat for a second you can do that and then return it back to the heat, but keep stirring the whole time. Undercooked toffee will not set up right. It's definitely worth a second shot!
Glad you could save it! That sounds delicious!
Katie Mar says
i just made this (twice- the first time was a failure haha) and it is AMAZING! yum!
Brandy says
Your experience sounds like my first experience too! The first batch flopped, but it's been great ever since! So glad you enjoyed it!
Tara says
I use a similar recipe and today was my first time ever dealing with separation. So frustrating. 2 ruined batches! My last batch separated also and i was too busy stirring to be able to google. So I remembered my hollandaise separation trick and splashed some water in it and whisked it back. Worked like a charm! After I was done, i googled it and realized it was because it started raining while i was cooking. Grrr. Oh well, hope the water trick helps someone else!
Gemma Hartley says
Just found this recipe on Pinterest, and wanted to say thank you. I made it tonight and it is amazing. I will definitely be making this again and again!
Brandy says
Oh wonderful! I'm so glad you liked it and that it turned out perfect for you! There is a science to it, but when it comes out it is sooo good! Thanks for giving me feedback and have a wonderful night!
Brandy
Carri Cates says
Love this recipe. It was so easy to make and is so tasty. Made 6 batches for my coworkers and another batch for me. Thank you, this is a keeper.
-carri
Brandy says
Hi Eclarien,
I'm so sorry that yours didn't turn out. I know how frustrating that can be because my first batch didn't turn out either. I mentioned in my post that it was soft and didn't set up. I followed the recipe exactly, even cooked it for 5 minutes, but there were a couple of things I realized as I made my second batch that helped. The second batch turned out great! I was kind of afraid tot cook it at med-high to high heat. I kept thinking that it was going to burn so I think I cooked it lower than I should have. And also, I started my timer too soon. The next time I made sure to start it after the mixture started boiling and then I kept stirring for 5 minutes even when it started to smoke a little. But every stove is different. My stove in this house cooks much higher and faster (it's gas) than the stove at my other house (electric). So I have to adjust according to that. I hope you try making it again! I'd like to add your comment to my blog so that others can get troubleshooting help as well. I've had a couple of people email me with their success story. Amber (her comment is on my blog) had her first batch turn out soft, but after troubleshooting with me, she's made 4 perfect batches since! I appreciate you letting me know!
Brandy
Gluesticks
Patty says
Hi Brandy and Eclarein.
I have been making toffee for several years now. My family and friends love it! With regards to the separation of the butter from the sugar, I have had this happen to me whereby the chocolate does not adhere to the toffee because there was on oil slick of butter on it. Sometimes I would dab the toffee with a paper towel to sop it up. But what works best for me is to stir with a small whisk, this way the butter and sugar remain incorporated and don't separate out. I really don't think it is a big deal to have to use a wooden spoon, the pan you are cooking the toffee in itself it metal! So what is the big deal to have to use a wooden spoon? The pan I always use is copper on the outside stainless steel on the inside. The whisk is of good quality. I have found this helps a lot. I also use a candy thermometer. There are differences of opinion as to what degree the toffee needs to get to so I use the ice water drop method and if it hardens up and has a good crunch factor, I quickly pull it off the heat and pour it in the prepared pan.
Have fun making toffee!
Patty
Brandy says
Thanks Patty! I don't know the reasoning behind the spoon either except my aunt said I have to use it, haha! Thanks for the tips!
Brandy says
From Amber:
Hi Brandy,
I'm the 12 year old that asked a lot of questions about toffee making. I thought maybe you'd like to know that I'm the MASTER toffee maker right now. At school, I share a lot of what I make with my friends. They all LOVED the toffee.
today was the 3rd time i made toffee. (i had to go to safeway after school to buy a box of butter, haha.) This time, I made it perfectly. it was BEAUTIFUL. I've sent pictures for you :). It looked like glass; super reflective.
Making the toffee is very fun. Cleaning is kind of a hassle, but seeing the very reflective toffee is just so rewarding. On my previous batch, I marbled dark and white chocolate and it was too pretty to break apart and devour.
I just wanted to thank you for your advice & easy instructions for toffee! I've had a wonderful experience with it; obviously, I love the toffee too.
Brandy says
Hi Amber!
I am SO GLAD you got back to me with the results! I am so impressed with your toffee. I think it is beautiful and I love the white chocolate chips on it too. Like I said in my blog post, my first batch FLOPPED and turned out gross, but the second one was much better. You're a pro now and shouldn't have any issues in the future! It is one of my favorite Christmas treats and so much cheaper to make than buying a Skor or Heath candy bar.
Thanks again for the photos. I'd like to share one on my facebook page if is ok with you. It's always fun to see my reader's photos and results! Just let me know,
Have a wonderful night!
Sherry says
Are the almonds raw or roasted, salted? It doesn't say, and I'd like to know before I try the recipe please!
Brandy says
Sherry, it’s all personal preference! I’ve used raw, toasted and roasted. I prefer no salt because the toffee is made with salted butter already, but if you want to use lightly salted nuts you can!
Gail Springsteen says
I always wondered about the wooden spoons, too, so I googled it. Here's the first response I got:
There are basically two reasons why a recipe would ask you to use of a wooden spoon.
The first reason is mechanical. Wooden spoons are rounded, smooth, relatively soft and non-abrasive. This means that they are comfortable to hold when applying pressure to beat a mixture. The action of a wooden spoon is to push the ingredients together until they are blended. Always use a wooden spoon when making sauces unlike a metal spoon, they won’t transfer out the heat and mess with the temperature in unpredictable ways. If you are making sauces that are particularly troublesome, like hollandaise, this could solve curdling problems. Also, wooden spoons are less likely to damage nonstick pan surfaces.
Metal spoons are harder and sharper, with an action which tends to,cut through the mixture. A wooden spoon is ideal for folding in ingredients that do not want over mixing such as adding flour to a creamed mixture or folding in egg whites. The design of a metal spoon does not make them very comfortable when hard beating is required and the hard, sharp edges of the spoon may cut or damage ingredients or the mixing bowl and scratch the coating on pots and pans.
The second reason is chemical. Wood is an unreactive material and is unlikely to react with the ingredients in the mixture. Metal is more reactive, particularly with acidic ingredients, and is not suitable for use in some cases.
Wooden spoons are an important utensil in the kitchen and most good cooks have more than one.
You should always hand wash wooden spoons with soap and warm to hot water only. Never wash them in a dishwasher. If after washing the first few times they have a fuzzy feel to them, don’t be alarmed, this is natural. The grain will raise the first few times any wood is put into water. Some people refer to it as the curing process. Lightly buff them with a Scotchbrite Pad or fine sandpaper and then oil them with any edible oil. After buffing or sanding a few times they will stay smooth.
Brandy says
Thanks for the info! I put my wooden spoons in the dish washer all the time, but will start washing them by hand. They are, by far, the ones I use the most and I need to not be so lazy and take care of them!
Brandy
Gleusticks
Germein Garland says
Can I use a Teflon pot to make my Toffee in?
Brandy says
Hi Germein! I don't have any Teflon pans so I'm not sure how the high heat would affect it. I'm sorry!
Rhissanna says
You know, I might even try this, as you make it look do-able. I have a sugar thermometer, but I like the sound of a recipe that just uses a timer and some basic observation skills. Thank you for sharing Aunt's tips!
Anne says
I usually don't have problems but just wasted my butter. This is a terribke recipe. I followed directions and the butter separated
Brandy says
It’s not the recipe. It should be medium-high, but every stove cooks differently. It may take a batch to get the stove/cooking times perfect for yours.
Brandy says
Hey Amber!!
You have a lucky friend to receive this. Hopefully I can help with your next batch.
Refrigerated butter is fine, but I haven't ever used frozen. If you don't have time to let some sit and soften, you can microwave it for a few seconds at a time (turning after every 6 seconds) until it softens.
For a stove like yours I would cook it at a 6 for melting the butter/sugar and raise it to a 7 to boil it for the 5 minutes. If that seems too high, drop it back down to a 6.
When the toffee is brown, it will be kind of frothy, like a little foamy in consistency. I hope that makes sense. It will look significantly different than just melted butter mixed with sugar like it did when you first set the timer.
Let me know if you have any more questions!! 🙂
Brandy
Gluesticks
a m b e r says
Hi Brandy,
sorry i'm 12, and not terribly smart, so here goes:
1) my stovetop isn't labeled as med high, high; it only has the numbers 1-8. what should med-high be?
2) i tried this and it turned out funny. i used butter that was frozen. next time, should i use room temperature butter?
3) after the toffee is done, like a paper bag, what should the consistency be?
my friend loves toffee so that's why i tried to do this today 🙂
thanks,
amber
Brandy says
CountryBelle,
I've never lived in high altitude so I am not sure if it makes a difference. Hopefully someone else will see this post with a good answer for you!
Brandy
Gluesticks
CountryBelle says
I tried it this afternoon with success. Although, I should have pulled it off the stove maybe 5 secs sooner, just because I had a little bit darker syrup in spots. Otherwise awesome recipe! Tastes very similar to a skor bar. (I added coarse sea salt instead of almonds, cuz that's what I had on hand) Yummy!
CountryBelle says
I am at a really high altitude... anyone out there have experience with that and this recipe??
Thank you!
Aubrey says
It’ll turn out just take longer to boil/cook.
Susan says
I was excited to try this recipe because I can’t eat store bought heath due to an almond allergy. In case this helps others in higher elevation, I am at 3000 ft elevation and it took 8 minutes to turn the brown color. Texture and flavor turned out perfectly!
Brandy says
Wonderful to hear!!
Cheri Thurgood says
This is basically my recipe too but I double my batch everytime. I have a gas stove, use unsalted butter and scrape the bottom of my pan. I use the 5 minute standard but I also spoon a bit out and do the crunch test, just a strand of toffee and eat it before I ever remove from the heat. Separation happens because the butter has been previously frozen or the batch hasn't been stirred constantly. I never use foil because heat will add aluminum into your candy. I use parchment. I also never use whole nuts, I chop them up for bottom and tops.
Brandy says
Hi! Did you try my recipe? Just wondering why it's rated 4 stars if you didn't make it.
Jody says
I'm at 3500 ft and wgen using a cabdy thermometer I generally decrease the final temp by 2° F for each 1000 ft. So if the recipe calls for a temp of 238F when I make caramels, I cook to 232 or 233F, otherwise my caramels are hard instead of soft.
LeighAnn says
Holy Moley, I need this!