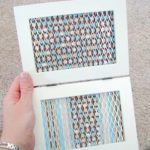
Make a darling picture frame earring and jewelry holder using a hinged picture frame and a bit of wire sheeting!

If you are looking for earring stud organization you'll definitely want to check out our DIY earring box and DIY jewelry box! A great project for kids and moms, alike!
Derrick took the kids out to run errands and gave me an afternoon to myself. This doesn't happen very often with three small kids so I decided to make something fun. A holder for my earrings! I use items that I already had on hand and love how it turned out.

It was as simple as opening my frame, removing the glass, covering the back boarding with scrap paper and adding pieces of mesh in place of the glass. Derrick had this mesh in the garage, but you can use any kind of mesh that you'd like. They sell many types at your local hardware store. Small chicken wire would work as well.

You can use any size of frame that you'd like. I used a 4x6 one that I had, but an 8x10 one would be perfect if you have a lot of dangly earrings.
3 More Projects That You'll Love!
Picture Frame Earring Holder Tutorial
Picture Frame Earring Holder
Make a darling earring and jewelry holder using a hinged picture frame and a bit of wire sheeting!
Yield: 1
Cost: under $10
Equipment
- wire snips
Materials
- 1 hinged frame
- rubber cement or glue
- scrap book paper
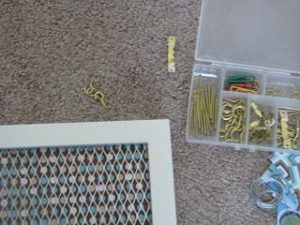
- wire mesh
- necklace hooks optional
- frame hooks
Instructions
- Open frames and remove glass. Discard glass.

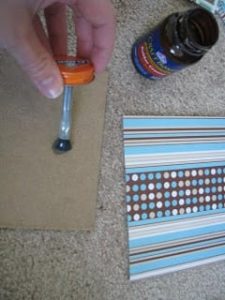
- Cover each cardboard piece with glue and a piece of scrapbook paper.
- Cut mesh to the same size as the boards.
- Reassemble frame with mesh on the front and scrapbook covered board behind.
- Add jewelry hooks for necklaces, if desired.

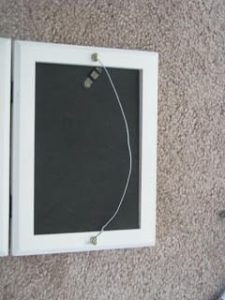
- Add a wire hanger to hang frame on the wall.

This post is a refresh of a post originally shared in 2009.
HJC Editor says
Your tutorial is an awesome inspiration! Many thanks for sharing. I would like to feature your designs at http://www.handmade-jewelry-club.com/
Contact me here if you have a concern.
Jane
http://diylessons.org/
Mandy's Creative Corner says
Brilliant idea! I love how it turned out =) Thanks for the inspiration!!
Allie says
Genius! Going to have to do this!
You should come link this up at my Making It With Allie Party!
AllieMakes.Blogspot.com
Its A Blog Party says
What a great idea! The earrings are adorable too!
Thanks for linking up!
~Liz
ificould says
This is such a great idea! It really turned out so cute! Love it so much, I posted a link on my blog: http://ificould-ificould.blogspot.com/2010/03/picture-frame-jewelry-holder.html
If you want, grab a button saying you were featured: http://ificould-ificould.blogspot.com/p/featured-sites.html
Thanks for the great idea! Love your blog!
Missy