Gluesticks Blog

menu icon
go to homepage
  • Sewing
  • Crafts
  • Recipes
  • About Me
    • Facebook
    • Instagram
    • Pinterest
  • subscribe
    search icon
    Homepage link
    • Sewing
    • Crafts
    • Recipes
    • About Me
    • Facebook
    • Instagram
    • Pinterest
  • ×
    Home » Craft Tutorials » Kids Crafts

    DIY Lip Gloss

    August 3, 2013 By Brandy 24 Comments

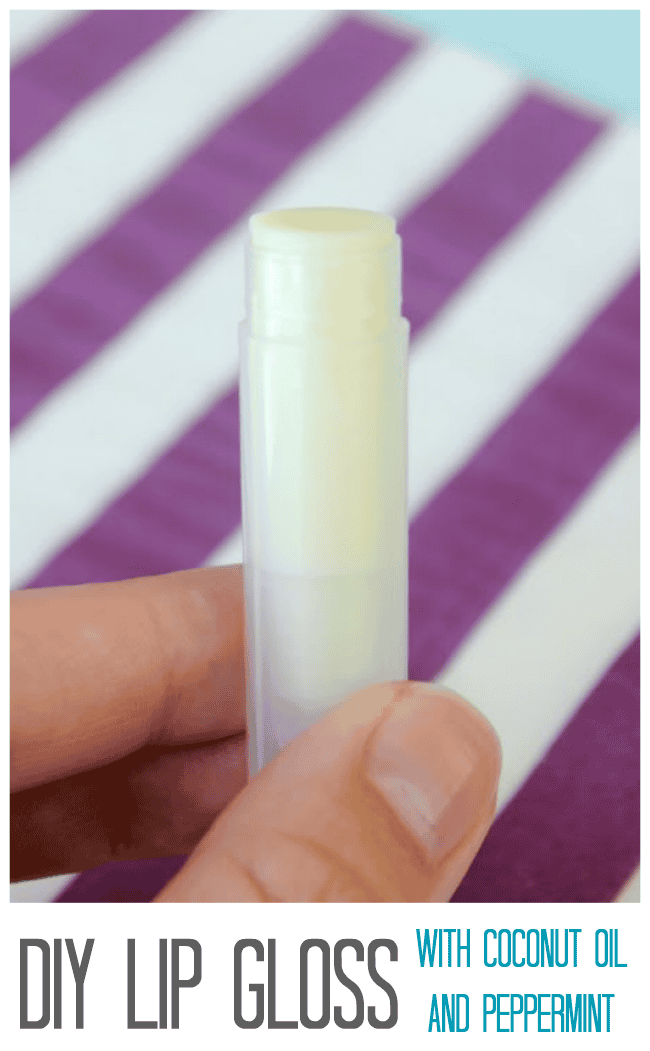
    DIY lip gloss is incredibly easy to make. If you can melt and pour, you can make lip gloss. Like Burt's Bees? You can make your own version of their peppermint lip gloss yourself for a fraction of the price. Prefer something sweeter? Add your own flavorings and scents to create any variation you want! This post contains affiliate links.

     coconut lip gloss

    First, you will need to gather your ingredients. I purchased some in the grocery store and the rest online.
    wax pellets
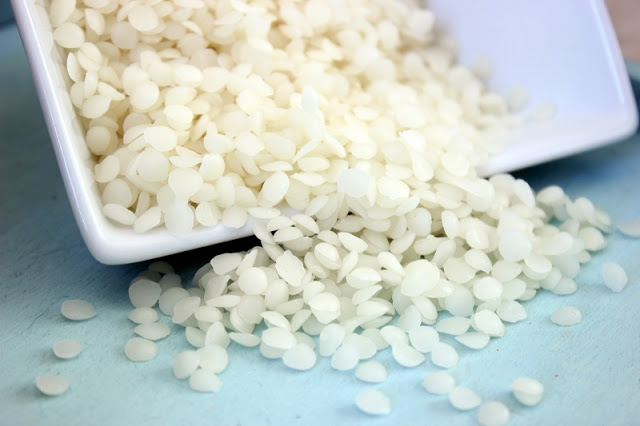
    Beeswax pellets: I purchased these on etsy for a couple of bucks. This small baggie will last me a long time.
    coconut oil, vitamin e and olive oil
    Coconut Oil: You can find this at the grocery store in the baking aisle. I purchased Spectrum organic coconut oil. There are so many uses for coconut oil so even though you will only use a few tablespoons in this recipe, it won't go to waste.
    Vitamin E Capsules: You can find a small bottle for less than $1 at the drug store.
    Olive Oil: easily available at the grocery store.
    3 bottles of essential oil
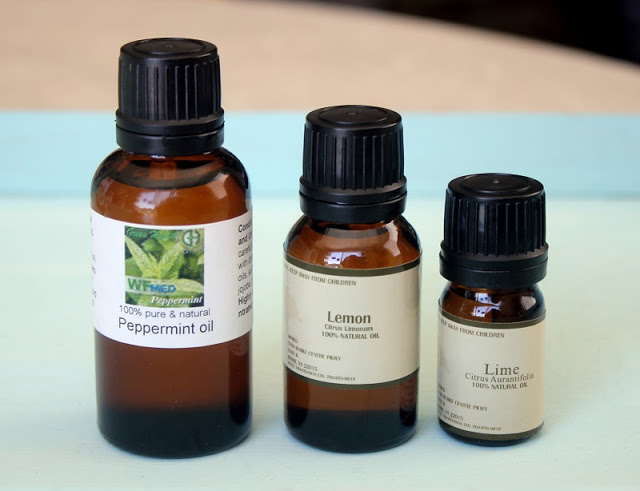
    Essential Oils: I purchased mine on E-bay, but you can find these from a variety of companies.
    bottle of scented oils
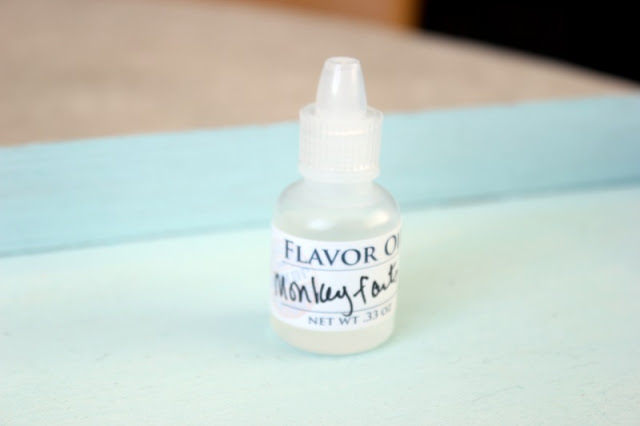
    Flavor Oils: If you choose not to use essential oils, you can find a variety of flavor oils on etsy. Kaylee chose "Monkey Farts" to scent her DIY lip gloss. (It smells like bananas and fruit---in case you were curious).
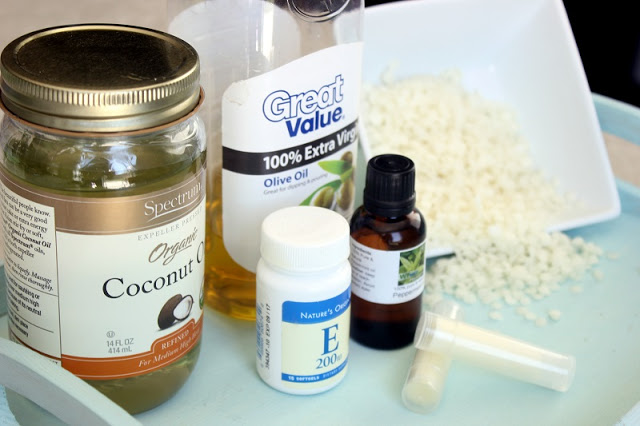
    coconut oil, vitamin e and olive oil
    Lip gloss tubes: I've purchased the lip gloss containers (screw on lids) from Bulk Apothecary for a great price, and you can find the lip gloss tubes like the ones above on Amazon.
    Medicine syringe: This makes pouring the melted ingredients into the tubes quick and easy.
    Microwaveable dishes: I used glass ramekins. Something throw away would be even better so that you don't have to clean them. Just toss them in the trash when you are finished!
    Gathering your ingredients is the hardest part. Now that you have decided which types of oils/scents you'd like to use, let's makes some lip gloss!
    This recipe makes 12 tubes with some to spare. I divided it into 3 small individual batches so that we could make a variety of scents: peppermint (think Burt's Bees!), lemon lime, and monkey farts. So each smaller recipe made about 4 tubes. If you want to leave it unscented or only use one oil, just make the whole batch.
    You can mess with the measurements to make the lip gloss more/less firm. I've adjusted this one to make a consistency that I like, but if you'd like one even softer you can add an extra tablespoon or so of coconut oil to your batch and experiment from there.

    DIY Lip Gloss

    makes 12 tubes
    3 Tablespoons. beeswax pellets
    3 vitamin E capsules
    4 Tablespoons. coconut oil
    3 Tablespoons. olive oil
    20-24 drops essential oil or flavor oils
    melted wax pellets
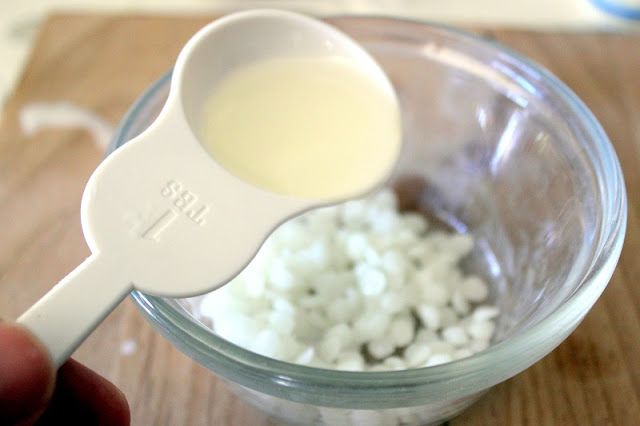
    Place all ingredients (except for essential oils) into a microwaveable dish. Just cut the tips and squeeze out the oil from the vitamin E capsules. Microwave at 30 second intervals, stirring after each one, until beeswax is melted. It will take between 60-90 seconds. Dip a small spoon in your wax, life it out, and let it cool. Test the consistency by running your finger across it. If you'd like it to be a bit more smooth, you can add your extra oil now. Microwave again, and re-test.
    pouring scent into lip gloss mixture
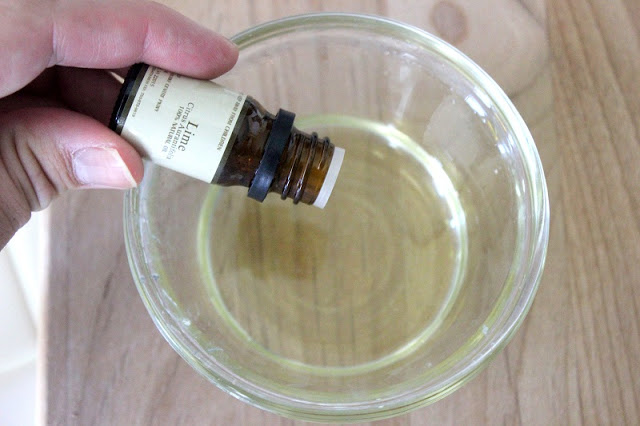
    Add your oils to your liking.
    syringe with hot liquid
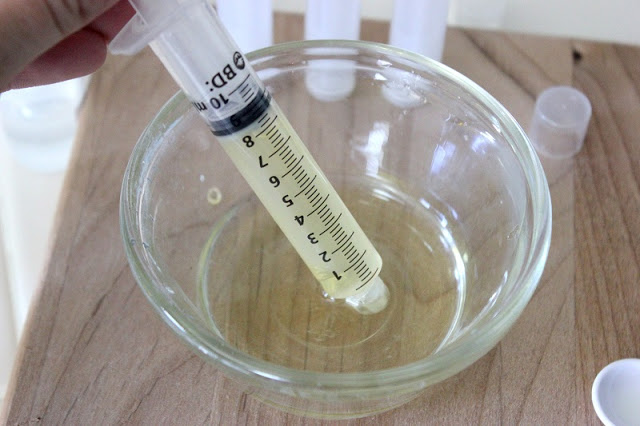
    Using your syringe (and working quickly!) fill your tubes all the way to the top. Keep adding individual drops of the mixture until it is almost over-flowing. The mixture settles and this prevents a dip in the center of the tube.
    hand holding lip gloss
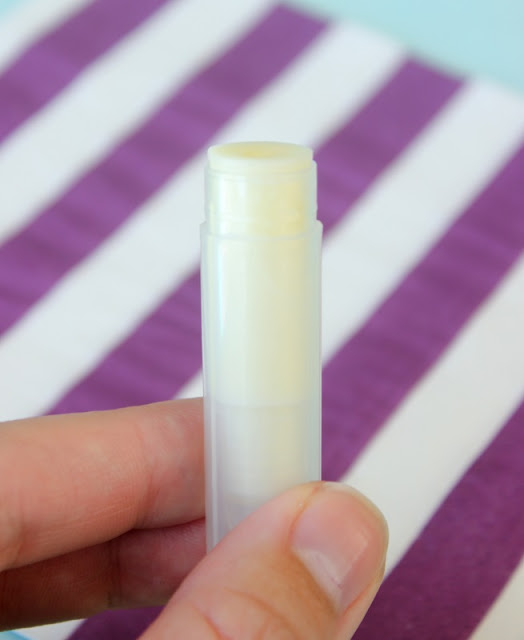
    Let stand until firm and completely cooled before adding caps. This was such a fun project and I am looking forward to making more as gifts. Like I said before, experiment with your ingredients. I may try adding more oil the next time around to see what that does. My first batch was drier than I would have liked, but the second batch turned out great. It set up well, went on smooth and feels amazing. The peppermint makes your lips feel nice and tingly.
    4 sticks of lip gloss
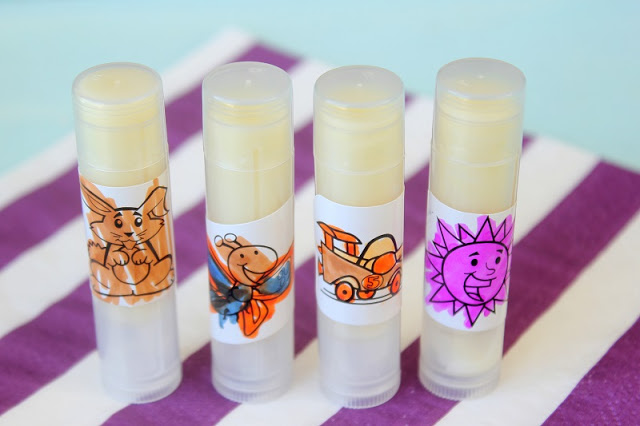
    Kaylee added stickers to hers so that she could tell them apart from mine. We even made an unscented tube (the race car) for Aaron.
    If you could choose any scent combination for a DIY lip gloss, what would it be? I'd love suggestions on what kind to make next time!
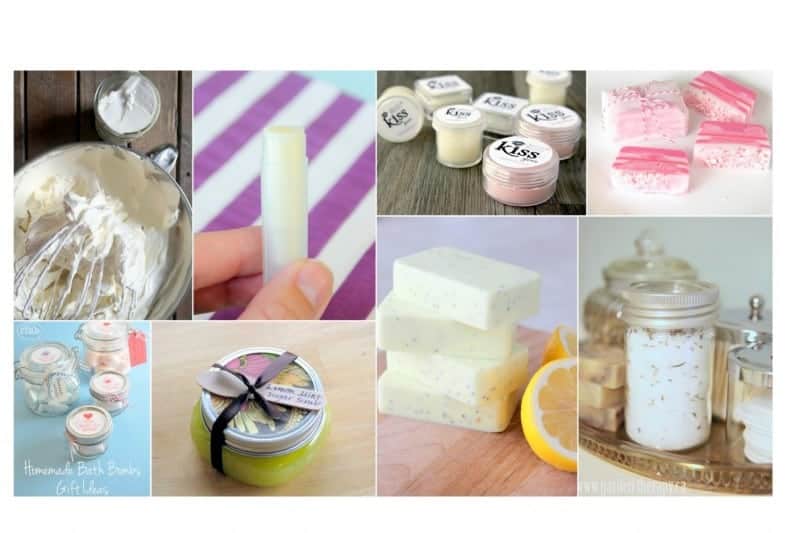
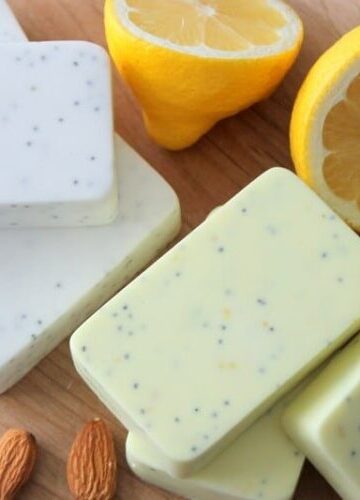
    If you enjoy making your own beauty products, you may enjoy this collection of homemade beauty gifts that I put together below!

    collage of homemade beauty gifts

    Homemade Beauty Gift Ideas

    Related

    Share
    Pin

    More Craft Tutorials

    • basket of pillow treats
      YW Camp Pillow Treat Tags (Free Printables!)
    • two summer camp printable tags with drink packets
      Summer Camp Flavored Water Printable Tags
    • printable chapstick gift cards with chapstick
      "Don't Worry Be Chappy" Chapstick Printable Tags
    • Journaling Handout (Easy Gift Idea)

    About Brandy

    Welcome! I'm Brandy, mother to 5 darling kiddos and a cute black lab named Toby. My husband is in the Coast Guard so we've lived all over the place, turning each house into a home. I love baking, sewing, making cute things with my kids, and sharing what I've learned with all of you!

    Comments

    1. Martha says

      November 30, 2016 at 6:49 am

      I am looking forward to making some lip balm . I'm curious about the olive oil ... if the balm is not used in a timely manner - will it start to taste "rancid"? Can I use almond oil for the oils needed? Thanks!!

      Reply
      • Brandy says

        November 30, 2016 at 9:05 am

        Hi Martha! I haven't had any issues as we've used it within a few months of making it, but I don't see why you couldn't use almond oil.

        Reply
    2. CJ Huang says

      May 19, 2016 at 5:49 am

      I've wanted to make this for a while now, but never quite got the ratios right. Yours look good, and I'm liking the monkey farts. 😛

      Reply
    3. JESS44903 says

      May 17, 2016 at 9:20 am

      I totally pinned this. Love the idea and it looks so easy!

      I would love for you to share this with my Recipes, Crafts, Tips and Tricks Facebook group: https://www.facebook.com/groups/pluckyrecipescraftstips/

      Thanks for joining Cooking and Crafting with J & J!

      Reply
    4. Rufio says

      March 10, 2014 at 7:07 pm

      Is there another wax to use other than Beeswax...I'm allergic.

      Reply
      • Brandy says

        March 10, 2014 at 8:41 pm

        Hi Rufio,

        I would think that paraffin wax might be an alternative. I buy it for my wax hand warmer by the brick and it melts down easily. Here are other cosmetic grade waxes: http://heaneyl.hubpages.com/hub/Natural-and-Synthetic-Waxes-for-Home-Based-Cosmetics Hope this helps!

        Reply
    5. Kathleen Boehmig says

      February 17, 2014 at 5:23 am

      Love it, thanks!! FYI, only Young Living essential oils are certified (by outside agencies) pure enough for ingestion internally. Many others shouldn't be used on the skin, & even several YL oils aren't recommended for application to skin. Just be aware of this...there are many people with sensitive skin & allergies. Anyway, I can't wait to try this! Thanks again!

      Reply
    6. Barbara says

      February 13, 2014 at 6:36 am

      Please be careful - companies send legal teams after people who misuse their brand names. (My husband worked for one that did that routinely, and you'd know their name instantly!) People are sued for infringing on their copyrights and patents. "Chapstick" is a brand name belonging to Pfizer. What you are making should be called "lip balm" instead, as that is what you are making. You aren't making Chapstick, as only Pfizer can do that. I'm not scolding or criticizing; I just want you to be aware that you could be sued, and I'd hate to see that happen. It has happened to more people than you might realize. I'm going to make your lotion bars when I get the materials together, but I want a commercial lip balm with sunscreen because I live in the deep south where such things are very necessary. Thank you for the information!

      Reply
      • Brandy says

        February 13, 2014 at 8:45 am

        Thank you Barbara, I had no idea! I will definitely revise things.

        Reply
    7. april @ illistyle says

      February 04, 2014 at 2:58 pm

      Wow! I love the flavor oil name, and the stickers ~ so cute!

      Reply
    8. Frena says

      January 08, 2014 at 9:25 am

      I was thinking of making this, but I'm not that good at working quickly, so can I re-melt the beeswax after I've melted it?

      Reply
      • Brandy says

        January 08, 2014 at 8:16 pm

        Yes, you can just warm it up again if it hardens too quickly!

        Reply
    9. Tammy says

      December 12, 2013 at 12:03 am

      If you would like color in your lip balm you can add shavings from a tube of lipstick. Will be much lighter after it sets than it is in liquid form.

      Reply
      • Brandy says

        December 12, 2013 at 8:29 am

        Good tip! I love that instead of trying to guess what color it will be using the dyes!

        Reply
    10. otilialitrang says

      August 07, 2013 at 11:06 pm

      Thanks for the information Brandy.

      Reply
    11. Brandy says

      August 07, 2013 at 6:09 pm

      Otilialitrang, blogger won't let me reply directly to your comment, so I will e-mail you as well. 3 T of pellets is about .75 oz or 21g. Hope that helps!

      Reply
    12. otilialitrang says

      August 06, 2013 at 10:08 pm

      Great Tutorial. Can you please tell me how many grams is 3 tablespoons of beeswax pellets? I cannot get pellets where I am. They come in larger pastilles instead. Thanks

      Reply
    13. Jenny says

      August 06, 2013 at 6:42 pm

      Thanks so much for this tutorial, Brandy! I've been thinking lately about giving lip balms another try. Your recipe sounds very nice, and I think I would like the consistency. I'll have to give this a try someday!

      Reply
      • Brandy says

        August 06, 2013 at 8:16 pm

        Awesome! You'll have to let me know how they turn out!

        Reply
    14. Anne-Marie says

      August 05, 2013 at 5:40 pm

      Nice tutorial! And I love those cute little labels on the final product. =)

      Reply
    15. Soap Crafter says

      August 03, 2013 at 5:27 pm

      I would make a suggestion: IN your list of ingredients you should change 20-24 drops essential oil or scents to 20-24 essential oils or flavor oils. You do not want to use fragrance oils in this recipes.

      Reply
      • Brandy says

        August 04, 2013 at 3:04 am

        Yes, thank you! I will re-word that part. Thanks!

        Reply
    16. barbara santini says

      August 03, 2013 at 12:39 pm

      Does iy feel thick n creamyvwit tye beeswax? I made candy flavor gloss but I used some petrolium n I dnt like the way it came out... 🙁 I like thick try gloss

      Reply
      • Brandy says

        August 04, 2013 at 3:09 am

        This isn't a lip balm that you would scoop out of a tube with your finger. It is harder with the beeswax. If you added more coconut oil it would come out softer. You can experiment with the consistency. The ingredients/ratios I used make a firm, but smooth chapstick. Hope that helps!

        Reply

    Leave a Reply Cancel reply

    Your email address will not be published. Required fields are marked *

    Recipe Rating


    This site uses Akismet to reduce spam. Learn how your comment data is processed.

    Welcome!

    I'm Brandy! I love to create and share my ideas through easy-to-follow recipes and tutorials.

    More about me

    Popular

    • cookies on wire cooling rack
      Mrs. Fields Blue Ribbon Chocolate Chip Cookies
    • variety of beadable pens with silicone beads
      Beadable Pen Tutorial (Easy Gift Idea!)
    • chocolate chip cookie on baking sheet
      Snoop Dogg's Rolls Royce Cookies
    • two metal stamped bracelts on table with marker and metal stamps
      Easy Metal Stamped Bracelets

    Seasonal

    • ring bowl with 3 rings inside and 2 sitting next to it
      Easy Hand Stamped Rings Tutorial
    • DIY Jewelry Box for Kids to Organize Rings and Earrings!
    • yw camp shrink art keychains
      YW Camp Shrinky Dink Keychains
    • 100 grand bar with bite taken out of it
      Homemade 100 Grand Bars (3 Ingredients!)

    Footer

    ↑ back to top

    About

    • Privacy Policy
    • Accessibility Policy

    Newsletter

    • Sign Up! for emails and updates

    Contact

    • Contact

    As an Amazon Associate, I earn from qualifying purchases.

    Copyright © 2025 Gluesticks Blog