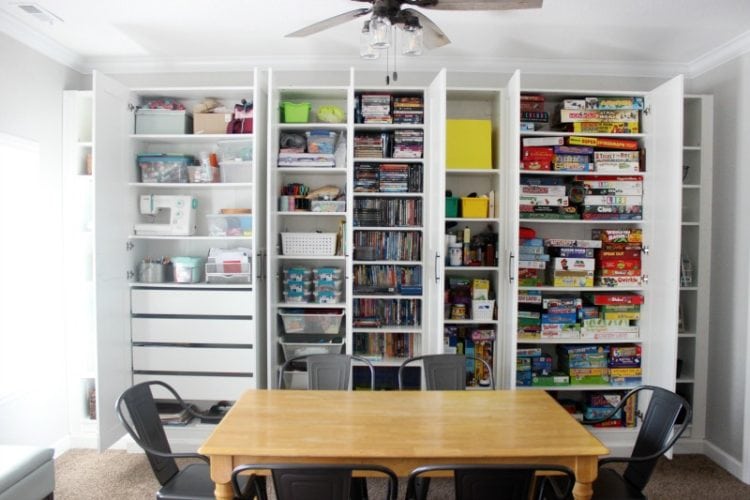
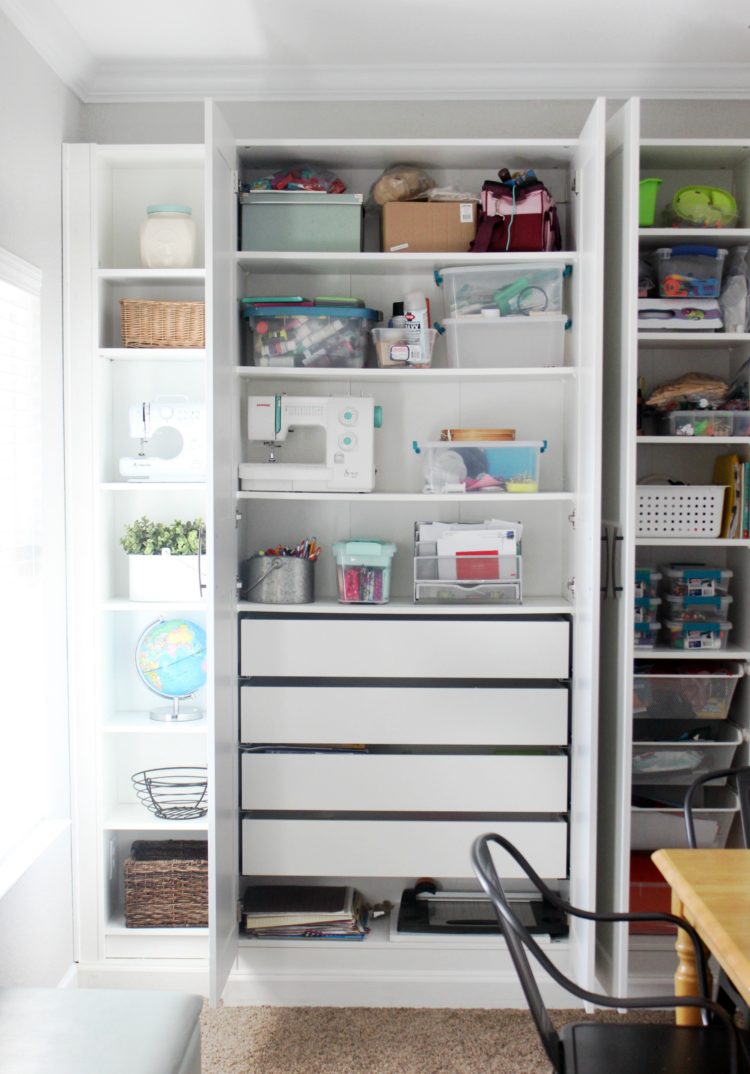
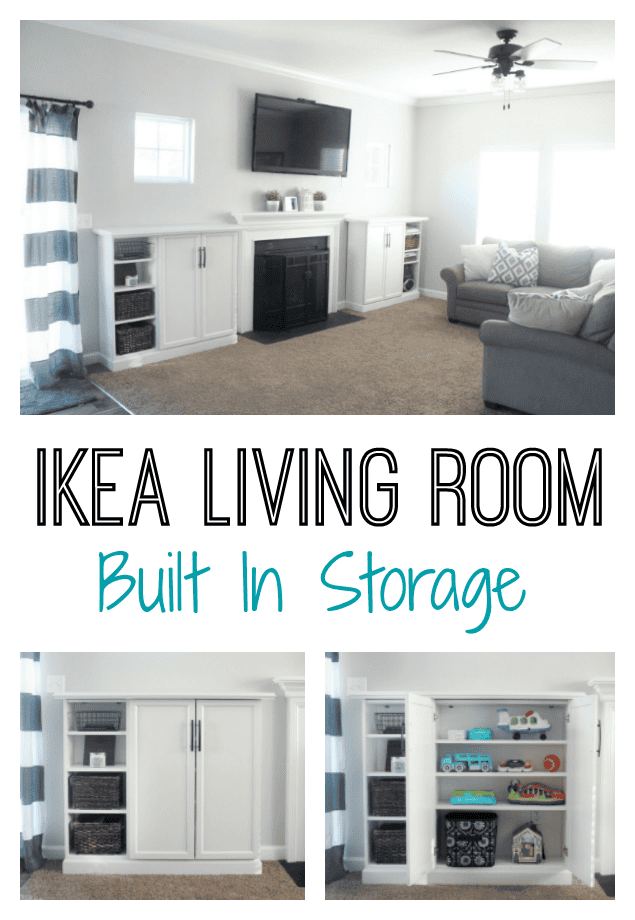
These IKEA built-ins were created by using a combination of wardrobes and bookcases. A place for everything and everything in its place.
Come see what we did for our living room to store toys and media in lieu of a large entertainment center! Another IKEA hack using Billy bookcases and trim!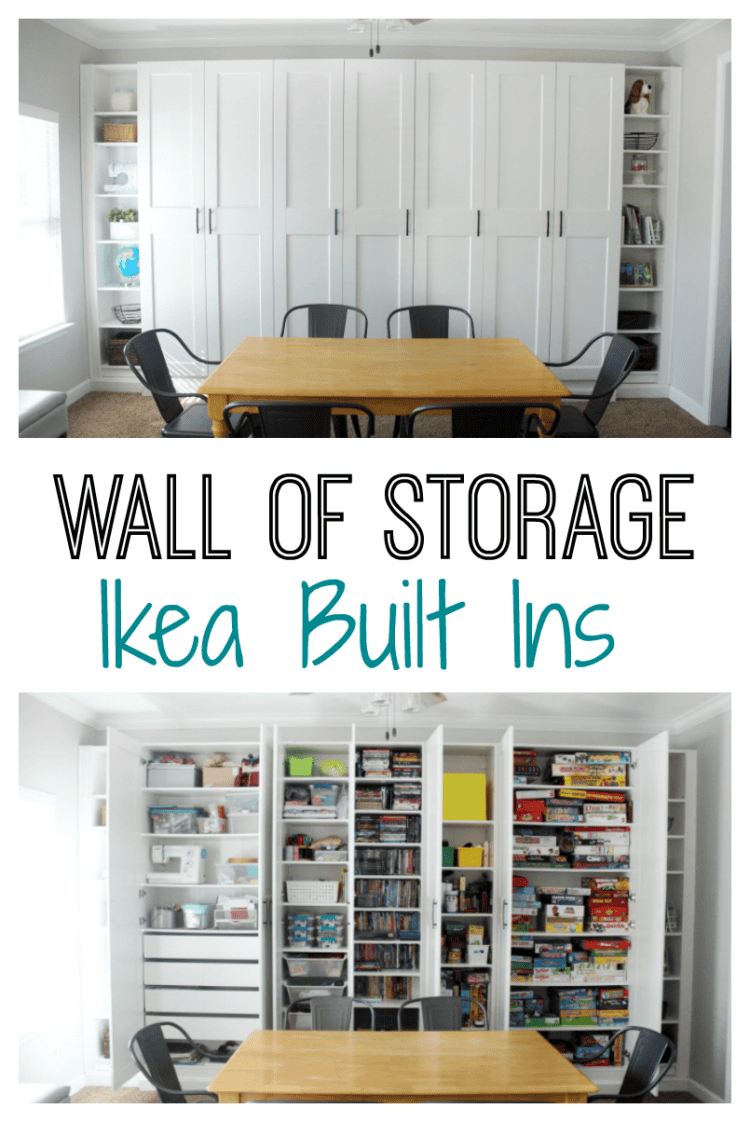
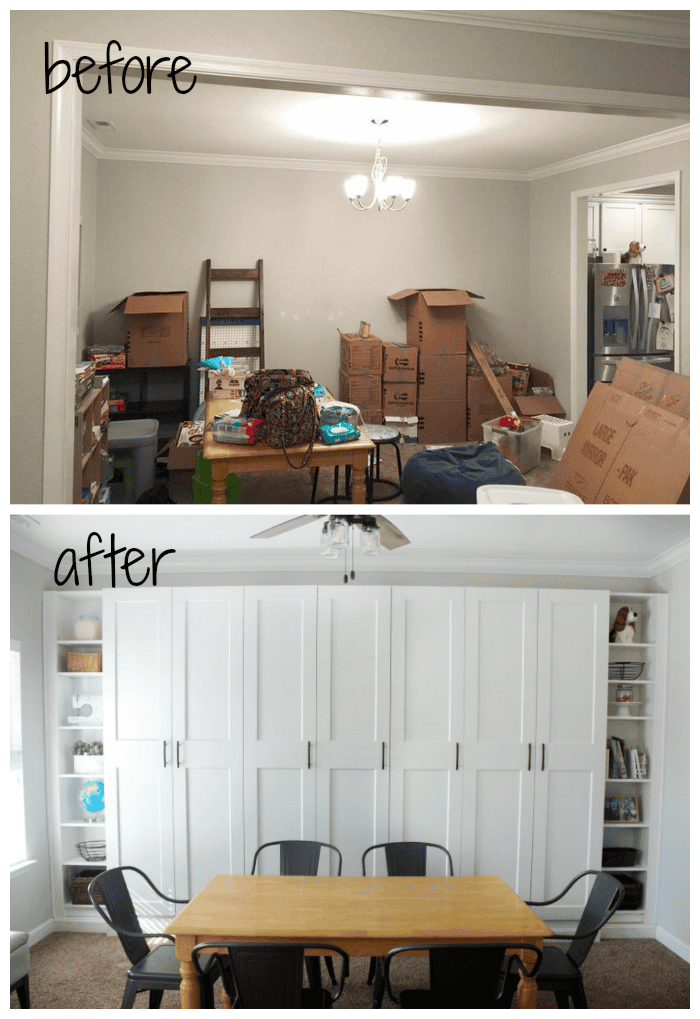
When we moved into our home last summer we quickly realized that we would need to come up with some creative storage solutions for a home that was built for 4 people---not 7. We unpacked the bedrooms and living room and put everything else in the formal dining room. Now, many families actually utilize their formal dining rooms, but we never have. We eat in the kitchen dining area and so this space was just an open room for us.
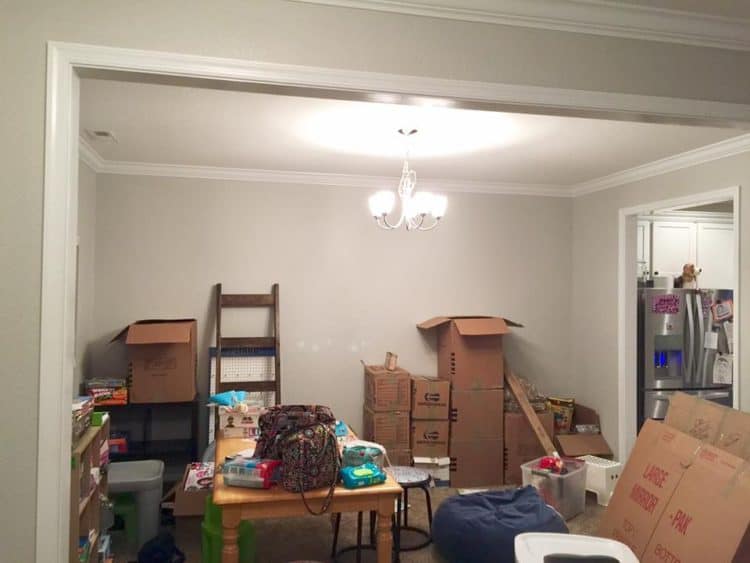
We went back and forth about what we should use the room for and ultimately decided that it needed to be a storage room with lots of shelving. The room where we kept all of our games, DVDs, and craft supplies. That's a tall order for a single room. Especially when it is the FIRST room that you see when you walk into the house.
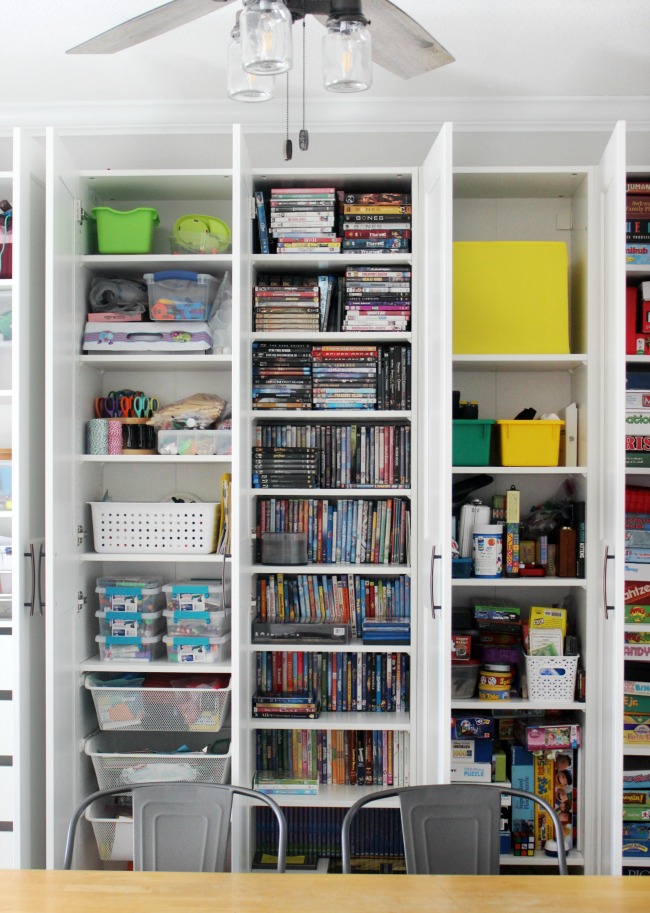
A lot of IKEA billy bookcase hacks use open shelving. I could have simply bought a bunch of Ikea Billy bookcases and added the glass doors that they offer (I believe it’s glass top and wood bottom), but I didn’t want to see inside the cabinets. These are meant for hidden storage. I think what we came up with is a good balance of decor on the side shelves and functional base cabinets storage hidden behind the wardrobe doors.
How to decide which items to purchase to make IKEA built-ins for an entire wall.
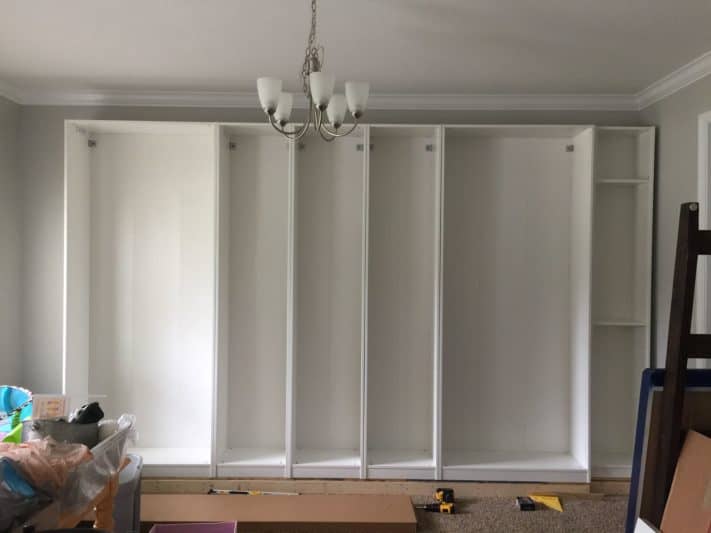
I spent hours designing a space with semi custom built-ins that I hoped would work for our family. IKEA’s DIY design program has a lot to be desired. It’s about as helpful as some of the instructions for assembling some of the other IJEA products. It froze on me a couple of times and I had to start over completely. It also doesn’t have the capability of letting you mix and match items that should be in separate rooms. ie: I wanted to use bedroom wardrobes mixed with office bookcases, but it didn’t let me combine both items into my digital design layout.
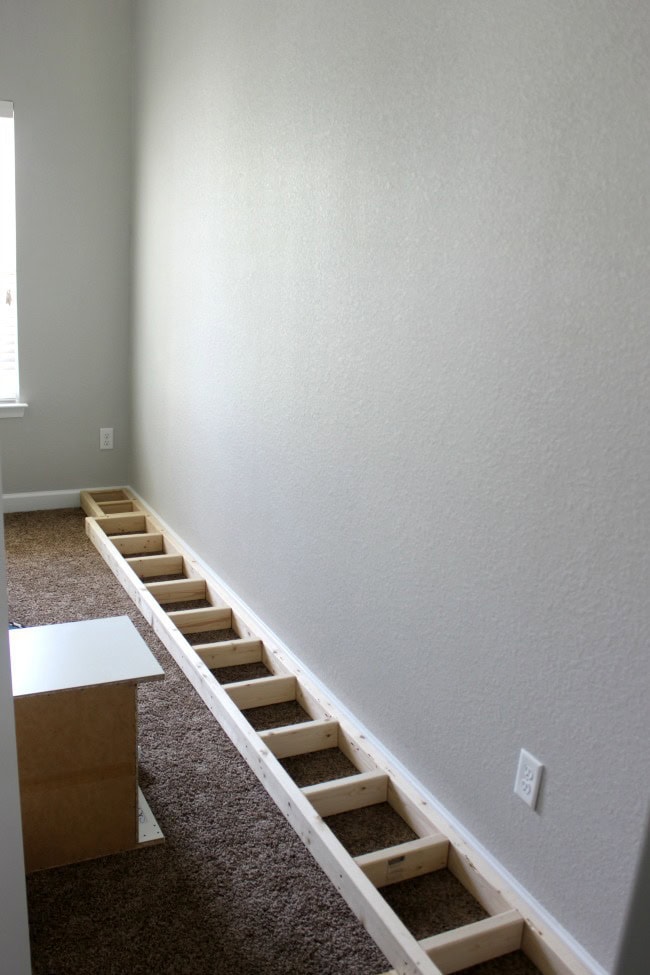
When everything was all said and done, I had a hodgepodge layout of what I wanted, and my husband got started on the building process.
Every room is different, but I'll share the products we used for our IKEA built-in hack at the bottom of the post so that you can mix and match them to fit your space!
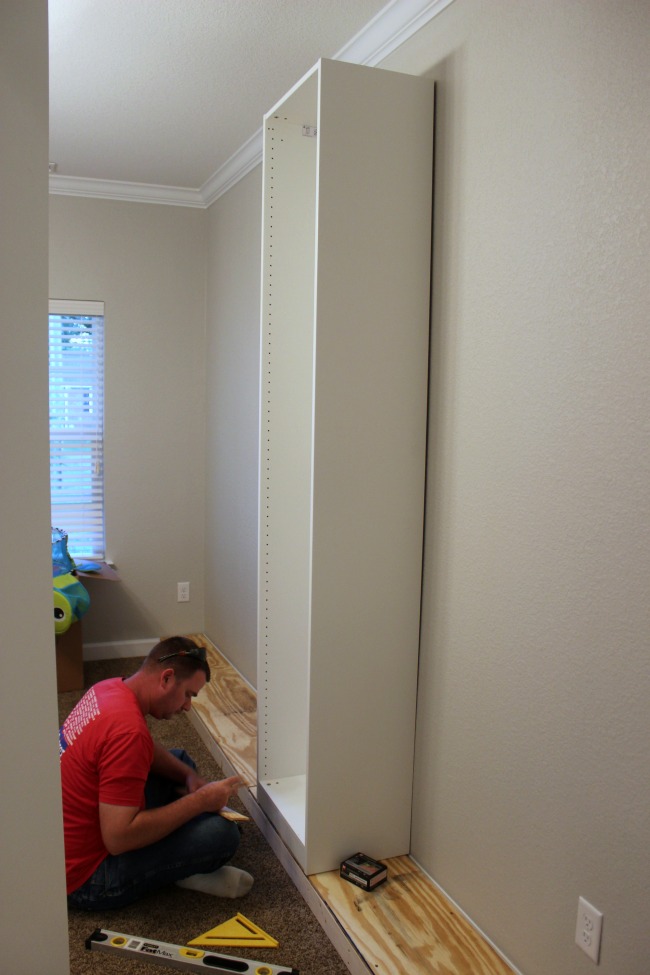
How to customize IKEA DIY BUILT-INS from wardrobes and bookcases.
Our unit does not go all the way to the ceiling. There wasn't enough room to add any other type of cabinet or storage so I found some wire baskets from Target and will use those to store fabric and other items. This option preserves the crown molding already installed near the ceiling.
Here are the finished custom IKEA built-ins.
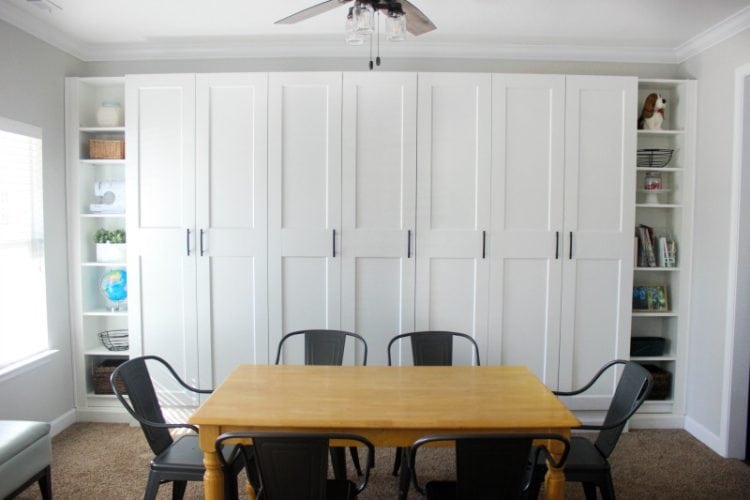
It took a couple of weeks, working here and there, for Derrick to put everything together and then I spent an ENTIRE DAY filling them up and organizing everything.
Items needed to make IKEA Built-Ins to cover an entire wall:
Wide Shelves and Narrow Shelves
Handles from Lowe's (but you can find handles and knobs any home improvement store or Amazon)
Dining Chairs from Walmart (out of stock right now)
With lumber, hardware, and trim, our grand total to make these IKEA built-ins was around $1300.00.
It was an investment for sure, but one that will pay off. This was a game-changer for our storage problem and will be a selling feature someday if we move.
If you have any questions and making our semihandmade IKEA built-ins I’ll do my best to answer them!
You might also like these organizational projects...
Built-In Living Room Storage with IKEA Bookcases

Kamala says
Great project and your husband must have spent a long time building. We did a similar thing with Ivar shelving since we lived in a rental. We slowly added bit but bit pieces in our living room until we had wall to wall shelving. Not as polished as yours but super handy when moving and they just came out with Ivar doors if you need extended shelving elsewhere or garage .
Brandy says
Thank you Kamala! And totally, I love the IKEA options because it adds so much functional space and the doors hide everything! 🙂
Amy says
We have such limited storage in our house, and a space where this would be perfect. Looking in your comments I think I have 6” less of wall space. I notice you said you had some extra space around, but I’m assuming 6” is enough of a difference that we should figure out a different configuration? Also did you use the 79” tall or 93” tall Pax wardrobes? I have planned to do this for like 6 months and think I’m finally ready to pull the trigger. Although I think all the Pax items are out of stock now 🤪 thank you for sharing this!
Brandy says
The extra space that we had around was about 3" on each side. It worked out perfectly to have enough room to slide the unit in and then add some trim work. We used the 93" tall Pax wardrobes and still had room to later add metal baskets across the top of the entire built in for fabric and notion storage! It's a big commitment, so I completely understand taking your time pulling the trigger. the IKEA room design app was awful (maybe they've improved it since we made this) so I had to basically do all of the measurements on my own and find items to fit, but it was definitely worth it! Good luck!
Dri says
LOVE, LOVE, LOVE this setup - so much so that I think we're going to start this weekend! Same scenario here - a den right when you walk in our front door, and an unused dining room on the other side. Storage is needed so desperately to clean up the first impression! Quick question - I noticed the Billy bookshelf (even with extension) is about 1/2" taller than the PAX - did you do anything to try to even them out, or did you just let them stay slightly different? It's such a small difference, didn't know if it was really noticeable at all? I can't tell in your photo at all. Thanks!
Brandy says
We didn’t do anything, you literally can’t tell! 🙂 Good luck! It’s been such a game changer in our home!
Myranda says
Did you anchor the units to the wall at all?
Brandy says
Yes, they are anchored. I can’t remember if the cabinets came with hardware already or not, but they are secured!
Robin says
How did you attach the shelves to the wardrobes? I can’t tell if they were already set up for shelves or you had to prepare them some how.
Brandy says
Hi Robin! They come with a few shelves and you can purchase extras. They attach on pegs like bookshelves.
Breanne says
I am not seeing the shelves on the ikea website for the 13" depth, just the 22". Do they actually have the 39" wide shelves with the 13" depth?
Brandy says
You should be able to toggle between to two using link. Click on the right side of the page where it says "size", and it will give you all of the options. https://www.ikea.com/us/en/p/komplement-shelf-white-00277989/
Kristen Abrams says
Hi there, We are loving the DIY Built-Ins and are considering doing this in our playroom for hiding toys and extra storage. I just wanted to ask why you did the bottom plywood part? To make it look more custom? We have tile and just curious if we should include this step. Looks beautiful nonetheless! Love that I came across on Pinterest.
Brandy says
Hi Kristen! I'm so excited for your new toy storage! We added the base so that we could trim out the bottom. You can totally set up this system without it on tile flooring.
Kristen says
We finished the project this past weekend and it’s so beyond perfect!!! Thank you thank you for posting!!!
Brandy says
Yay!!!! I'm so glad you finished it! I've received lots of comments from those who planned to do it, but this is the first time anyone has come back to let me know how it turned out! Ours is invaluable. So functional!
Rodney says
Is the base on top of carpet? Can't tell for sure from the photos.
Thanks.
Brandy says
Hi Rodney! Yes. He built it right over the carpet.
Jody says
Hi from Australia!!!!
This is great and exactly what I’m looking to in my too large dining room.
May I ask what the length of your wall is??
And given it’s been broken in for a few years now, is there anything you would change if you had to redo it? More drawers? Less shelves? More wire baskets?
Brandy says
Hi Jody! I'm still as in love with it today as I was when we built it. For us, it's the perfect amount of shelving and drawers. I bought a few extra shelves in case I wanted to add them over the years, but never ended up using them. The length of our wall is 174" and there was about 2" on each side that was open. This made it easier to slide everything in place and add trim to make it look like a built in.
Nicole says
This is exactly what I'd like to do in a similar area of our home. Curious how high did you space your shelves on the right side. Im struggling with figuring that part out. Yours look great!
Brandy says
Hi! The bookshelves or the right cupboard? The bookshelves are adjustable so I move them around, depending on what I'm displaying on them. But they are all about 12" apart. In the right game cupboard they are 12-14" apart.
Lisa says
This is EXACTLY what I'm looking for to create a built-in pantry in our den. Right now we have open shelves and it just looks so cluttered. I was worried that since the PAX wardrobes are designed to hold clothing that weight might be an issue. Do any of your shelves sag under weight?
Also, do you know whether the PAX wardrobe systems ever go on sale?
Thanks for your help!
Brandy says
Hi Lisa! We love our PAX systems! They have held up great and are as sturdy as the billy bookcases that we have from IKEA. Our game closet shelves have started to bow, but it was totally my fault for piling up like twenty board games on each one. Once I thinned out our collection it was much better! I'm not sure how they'd do holding a lot of canned goods. I haven't ever seen them on sale, but that'd be awesome!
Amber says
Hi Brandy!
We are doing an office reno and are copying your system! We are pretty excited! How many of the wide and narrow shelves did you order and what where their dimensions?
Thanks so much for the inspiration!
Brandy says
Hi Amber, YAY for organization! We used 2 of the wide PAX wardrobes and 3 of the narrow ones. The 2 wide ones are on the end with the 3 narrow in the middle. All covered by doors. And then the Billy bookcases on the end. Here are links to the PAX wardrobes with the dimensions! Wide: https://www.ikea.com/us/en/catalog/products/00214572/ Narrow: http://www.ikea.com/us/en/catalog/products/40214565/
Kippi says
Wonderful! Totally jealous!!! Looks pretty and that mega storage is so nice. Happy Crafting, Kippi #kippiathome
Donna @ Modern on Monticello says
This is a great project and inspiration for my basement projects. Thanks for sharing. Visiting from Project Inspired linkup. Pinned this for later.