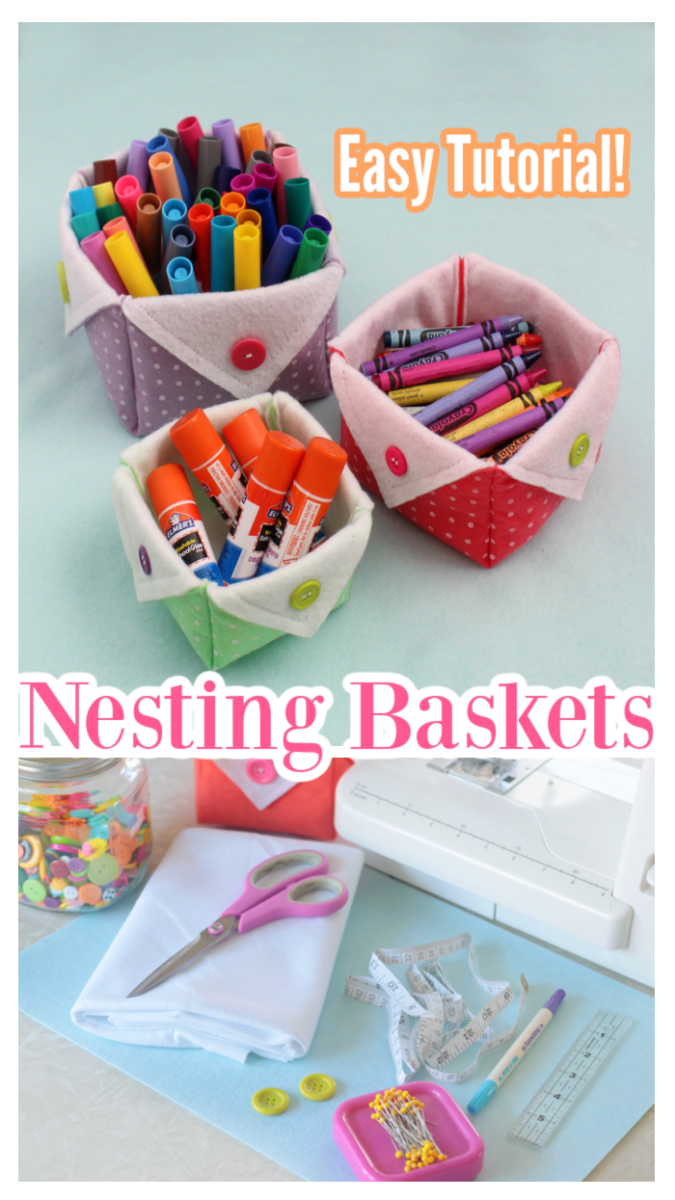
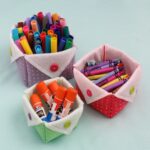
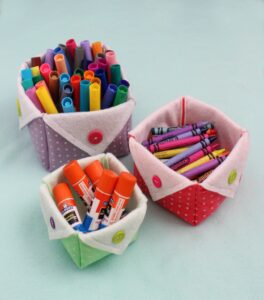
These little felt nesting baskets for storage are the perfect size to hold hair accessories or art supplies. Make one, two, or all three!
You might also like our felt animal bookmarks or our felt bunny tutorial!
Watch our step by step video!

Felt Nesting Baskets for Storage
These nesting baskets come together in just minutes. I love using felt because it is sturdy, easy to work with and doesn't fray. There is no need to trim or hem; sew the two pieces together, fold the corners, and you'll have a cute felt basket to hold everything from glue sticks to crayons or bobby pins to lip gloss!
A version of these cute nesting baskets was featured in my sewing book for kids. I shared how to make three sizes that nest inside each other when not in use. Today I'll share how to make those three sizes plus ANY SIZE basket you'd like. You can buy felt by the yard, so it frees you up to get creative.
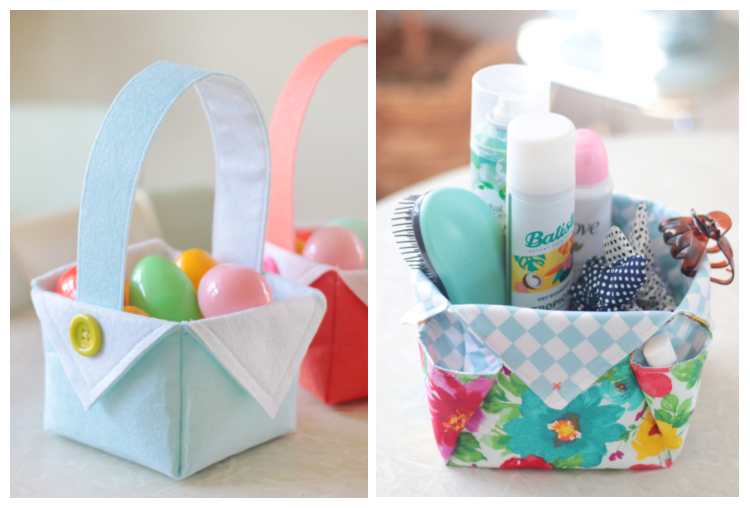
I have lots of easy sewing tutorials on the site! You might also like my felt Easter basket tutorial or my fabric baskets for storage. Both are made similarly to the felt nesting baskets that I'm sharing today.
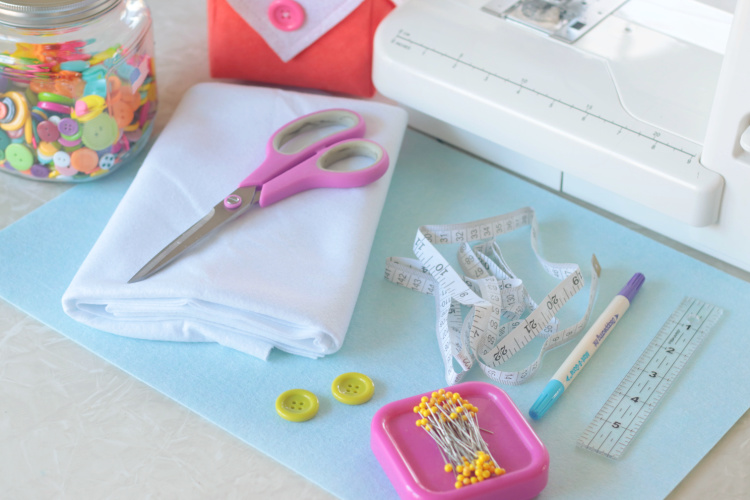
Nesting Felt Storage Basket Supplies
(The products that I used are all linked.)
- Felt: you can use basic craft felt or stiffened felt. Sometimes I use stiff felt for the outer and regular felt for the inner pieces. The stiffer felt (sold at Hobby Lobby or Michael's in the felt section) makes the basket a little sturdier, but both types work well.
- Scissors: These are my favorite craft scissors. They are inexpensive and come in a 3-pack.
- Measuring Tape: measure and cut the felt to size.
- Sewing Pen or pencil: I use the type of sewing pen that has an invisible ink side and a water-soluble ink side.
- Pins
- Needle
- Thread
- Sewing Machine
- 2 Buttons: The size of the button doesn't matter. Use whatever you have on hand! You can also skip the button like I did for my fabric storage baskets and simply stitch an "x" out of colored embroidery thread to secure the flap.
- Ruler or straight edge
Different Sized Nesting Baskets
I include directions for making baskets in various sizes in the "Cutting and Measuring Guide" in the NOTES section of the tutorial. Without a stabilizer, I'd suggest keeping the baskets 10" or smaller.
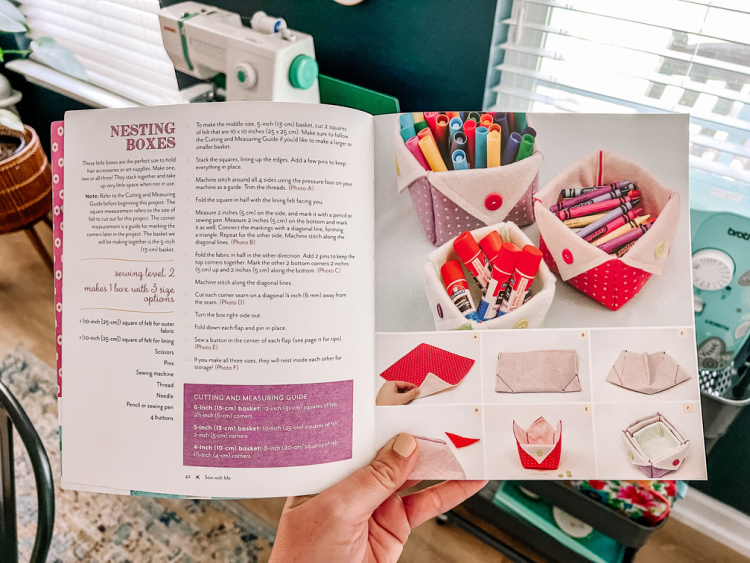
Note: The square measurement refers to the cut-out felt size for this sewing project. The corner measurement is a guide for marking the corners later in the project.
How To Make A Set Of Felt Nesting Baskets
Felt Nesting Baskets for Storage
Equipment
- sewing machine
- measuring tape
- pins
- marker
- sewing needle
- ruler or straight edge
Materials
- 1 12"x12" piece stiff felt for basket exterior
- 1 12"x12" piece felt for basket lining (interior)
- thread
- 2 buttons
Instructions
- Follow the guide in the notes section to cut your felt to the correct size. I'm making a 6-inch basket so the measurements stated in the tutorial will be for one that size.For the best visual tutorial, watch my step-by-step video that plays at the beginning of the post under the first image.

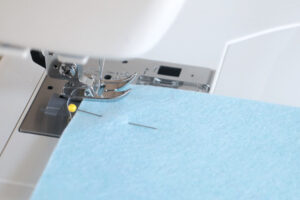
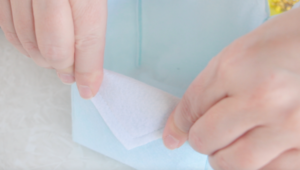
- Stack the 2 squares, line up the edges, and add a few pins to keep everything in place. Note: if you are using patterned felt, make sure the right side of the fabric is on the outside.Machine stitch around all four sides using the pressure foot on your machine as a guide (⅜"). Trim the threads.
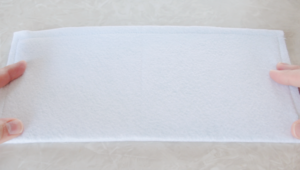
- Now we're going to make the bottom of the basket and sides by creating corners. To do this, fold the square in half with the lining (wrong side) on the outside and the fold on the bottom.

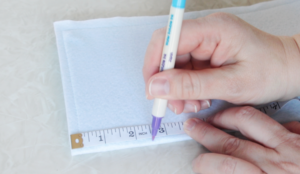
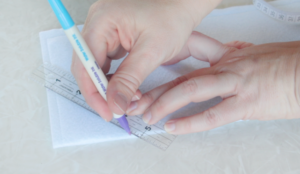
- Measure 2.5” on the bottom and mark it with a pencil or sewing pen. Measure 2.5” on the side and mark it as well. Note: Remember that I'm making a 6" basket so I'm following the measuring guide for that. If you are making a 4" or 5" basket use the measurements in the notes section at the bottom of the tutorial.

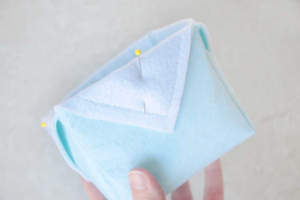
- Connect the two markings with a diagonal line, forming a triangle. Repeat for the other side.
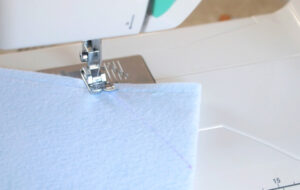
- Machine stitch along the diagonal lines. Fold the fabric in half the other direction and mark the other two corners 2.5” up and 2.5” along the bottom. Machine stitch along the diagonal lines.

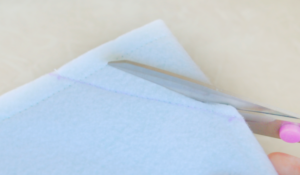
- Cut each corner seam on a diagonal ¼” away from the seam using scissors or a rotary cutter.

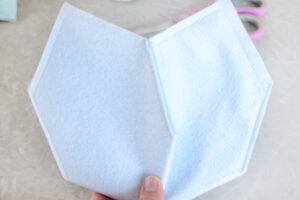
- Your basket should look like this (see photo).
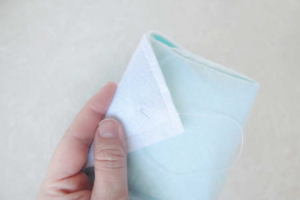
- Turn your basket right-side-out, pushing out corners and creasing side seams to create a basket shape.Fold each flap over.
- Pin flaps into place.
- Thread a needle with matching thread and tack each side down with two stitches in the center. Tie a knot on the back and trim the thread.
- Place a button on top of the flap and sew the button into place. Repeat on the other side of the basket.
- Trim off any loose threads.


Video
Notes
- 4-inch basket: cut 2 (8") squares of felt. One for the outside and one for the lining. In step 4, measure 1.5" corners.
- 5-inch basket: cut 2 (10") squares of felt. One for the outside and one for the lining. In step 4, measure 2" corners.
- 6-inch basket: cut 2 (12") squares of felt. One for the outside and one for the lining. In step 4, measure 2.5" corners.
Margaret says
Thankyou so much Brandy for getting me back to sewing (craft) with you great idea's.
So glad I found you.
Kind Regards from a very appreciative person.
Brandy says
I'm so glad my tutorials have been helpful, Margaret!