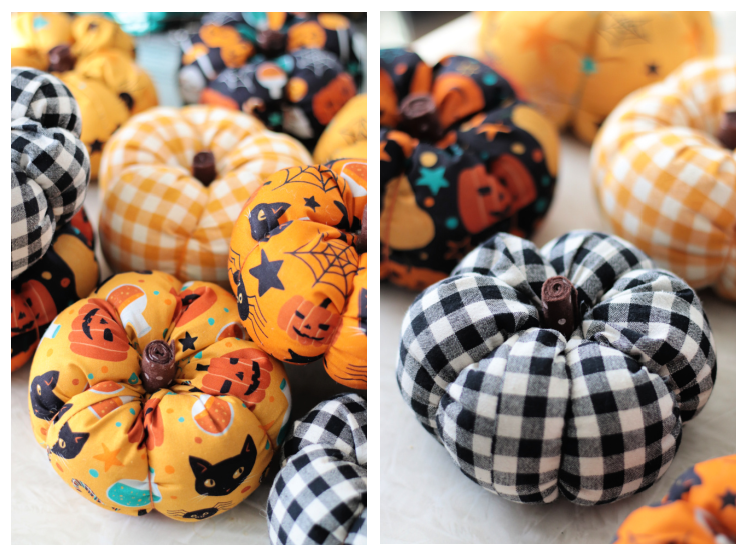
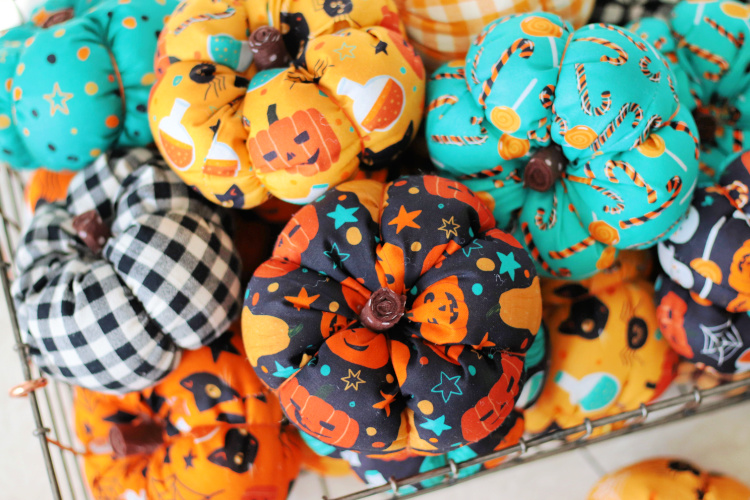
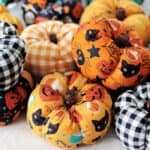
These darling fabric pumpkins are easy to make and are perfect for fall. Make them in any size you'd like with our easy-to-follow tutorial.
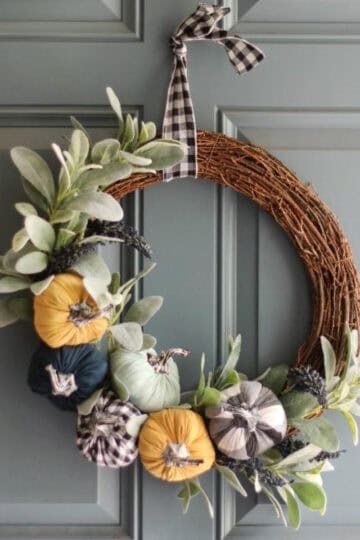
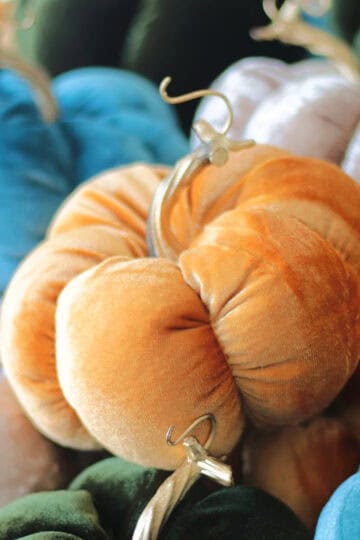
You might also like our 10-minute sock pumpkins, our DIY velvet pumpkins or our Target dollar spot pumpkin wreath tutorial!

Make your own little pumpkin patch this fall with this easy tutorial. A great way to use up scrap fabric. These fabric pumpkins are easy to make! I made a basket of pumpkins to give to the ladies at my church for a training meeting that I am doing. If you're interested in the pumpkin spiritual thought that I shared, you can scroll down to the very bottom of the post!
Why I Love This Project
- Easy to make. If you made our sock pumpkins last year, you'll love this tutorial! Instead of socks, we're using cotton fabric. Fabric pumpkins require a few seams of sewing, but they are simple stitches that can be done by hand or by using a sewing machine (or a combination of both, which is my preferred method).
- Great scrap fabric craft. Fabric pumpkins can be made big or small and are a great way to use up fabric scraps!
- Easy gift idea. These would make great teacher gifts with one of my printable fall gift tags! My favorite one says, “I’m so glad I live in a world where there are Octobers.”
What Others Are Saying
I have been making these pumpkins and sometimes sell them at craft shows, take them, and donate some to nursing homes, and decorate my home and my children’s with them.---Trudy on Pinterest
These could be used as pin cushions!---Tracy on Pinterest
Jump to:
Tips and Tricks
- How to make pumpkins in a variety of sizes: This tutorial makes it easy to create small, medium, and large pumpkins. Take the width measurement and double it for the length measurement. Here are some example measurements below. The pumpkins shown in the photos are made with an 8" x 16" rectangle of fabric. This will create a 5" medium-sized pumpkin.
- Tip for making large pumpkins: I prefer small and medium pumpkins to make because it's easier to pull the needle through the center. The more stuffing you have (from a large pumpkin), the wider the area the needle will have to pull through. Just use a long needle and pliers to make that step easier.
- Get creative with the fabrics: You can use a variety of fabrics from cotton to flannel and muslin to gingham. You can also upcycle fabric from sweaters to make adorable pumpkins. Since the sweater fabric already has holes in it, it's easy to thread a needle through the center of the pumpkin.
Fabric Pumpkin Supplies
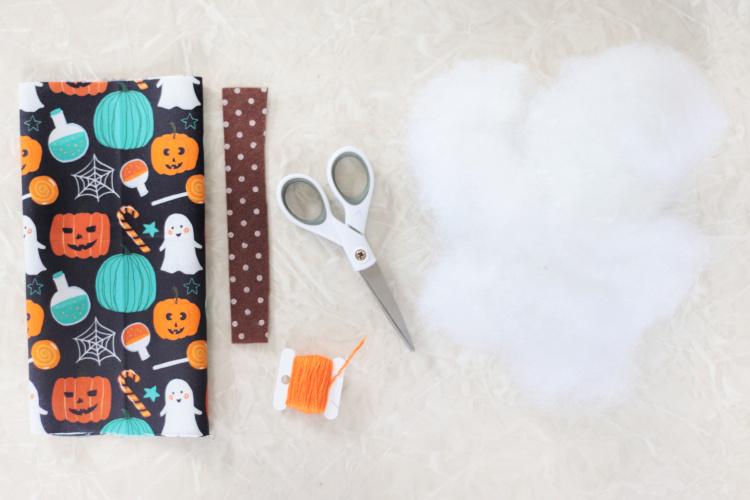
- Fabric (Halloween Prints) (Plaid Prints): My favorite fabrics to use are lightweight cotton prints such as calico or quilter's cotton. They come in so many fun prints and are easy to stitch through. I used a combination of plaid prints and cotton prints for these pumpkins. Flannel or muslin would be a great choice, too.
- Felt Scraps
- Scissors
- Embroidery Thread
- Stuffing
- Sewing Machine/Thread
- Sewing Needles: You can use a regular-sized embroidery needle for the gathering stitches, but a long 3 ½" needle works great for pulling the thread through the thickness of the pumpkin. If you don't have a long needle, you can use a regular needle and small pliers as shown in the instructions.
- Measuring Tape
- Small Pliers (optional)
- Hot Glue/Glue
Fabric Cutting Guide
- Small (5" x 10" rectangle of fabric)
- Medium pumpkin (8" x 16" rectangle of fabric)
- Large (10" x 20" rectangle of fabric)
- Cut a piece of felt that is 1"x 6" for the stem.
- Cut a 2" oval of felt for the bottom of the pumpkin.
If making a larger or smaller pumpkin, adjust the stem size by adding a bit to the width and length.
How To Make Fabric Pumpkins
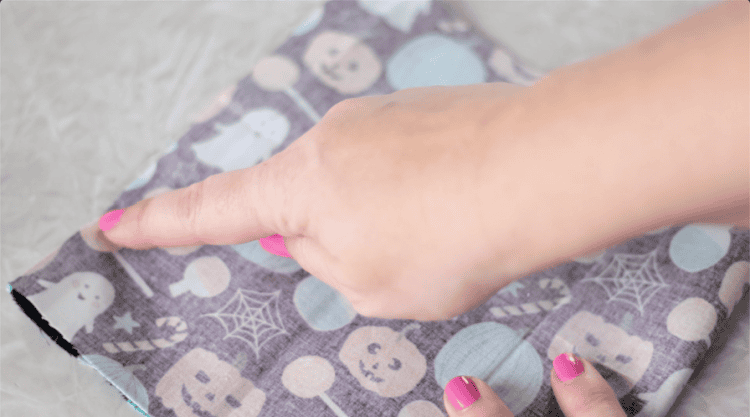
Step 1: Fold the fabric in half with the right sides together.
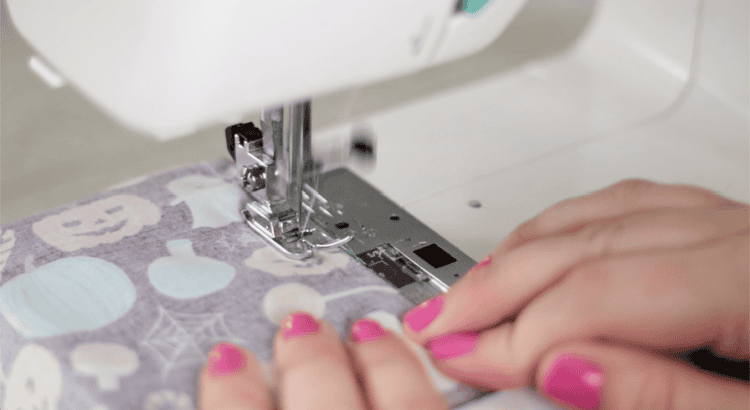
Step 2: Sew along the seam using a ⅜" seam allowance.
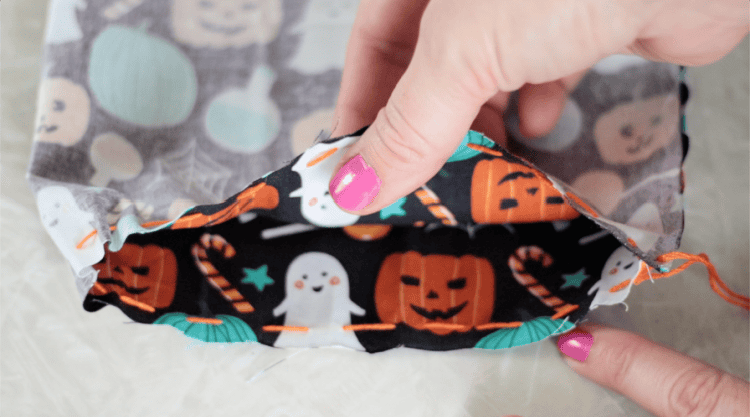
Step 3: You should now have a tube of fabric. Look at the pattern and note which side will be the bottom and which side will be the top.
Thread a long piece of embroidery thread through a needle. Stitch a gathering stitch around the bottom opening of the pumpkin.*
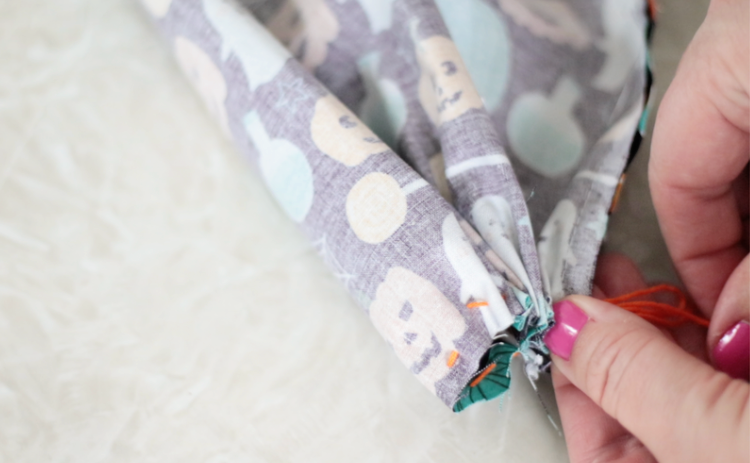
Step 4: Pull the end strings tight to close off the bottom of the pumpkin.
*To gather, you'll create a wide running stitch along the top of the opening, about ¼" away from the edge. Leave the ends of the string long so that you can pull them to gather the fabric later.

Step 5: Tie the strings in a double knot and trim excess. Save the needle and thread for a later step.

Step 6: Turn the pumpkin right-side out.

Step 7: Fill the pumpkin with stuffing.

Step 8: Grab your needle and thread and stitch a gathering stitch around the top opening of the pumpkin.
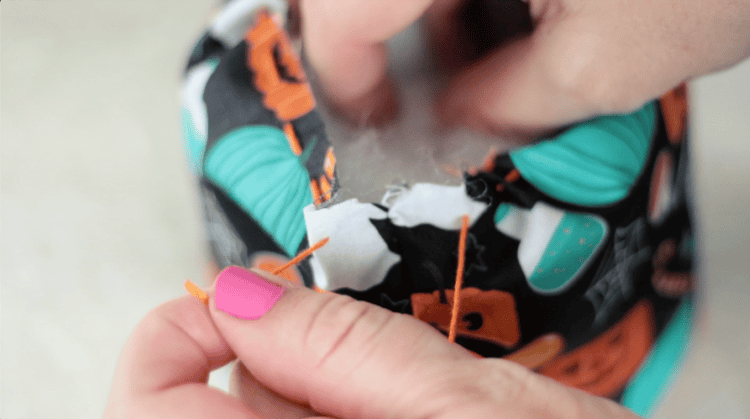
Step 9: Pull the end strings tight to close off the top of the pumpkin.
Step 10: Tie strings in a double knot and trim excess.

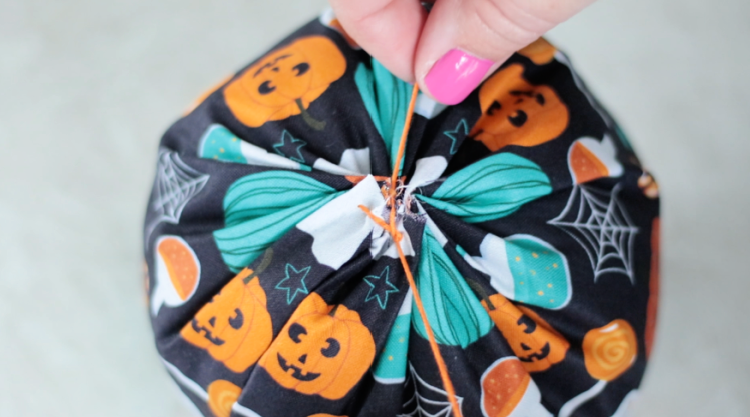
Step 11: Cut a strand of embroidery thread that is 48" long. Thread it through a long needle and tie a knot at the end. Press the pumpkin down to squish it down a bit (this makes it easier to insert the needle if you are using a regular-sized needle). Poke the needle through the center of the pumpkin and out the back. Pull until the knot hits. Bring the needle around to the top again, insert through the center and out the back again, then pull the thread TIGHT. You'll notice that you've created one of the pumpkin grooves on the side of the pumpkin.
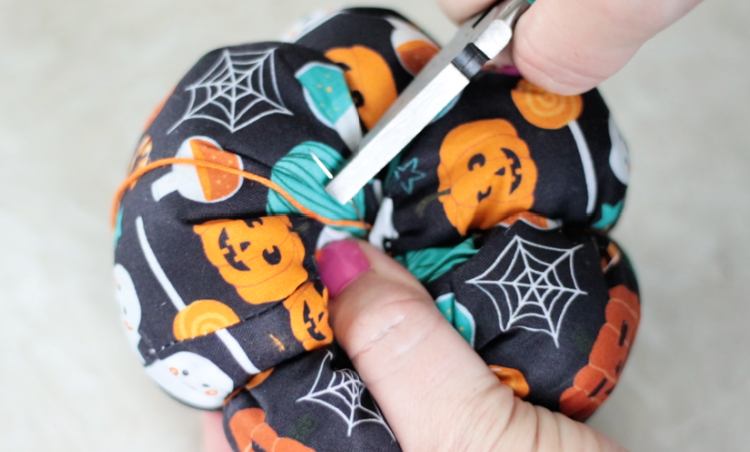
Step 12: Continue this process until you have 6 sections (dimples). Tie a knot in the thread.
If you don't have a long needle, it can sometimes be a little difficult to pull the needle through the stuffing. A small pair of pliers can help grab the needle.*
*I highly recommend referring to my step-by-step video in the "how to card" at the end of the post for a great visual on how to create the pumpkin sections/shape using the thread.
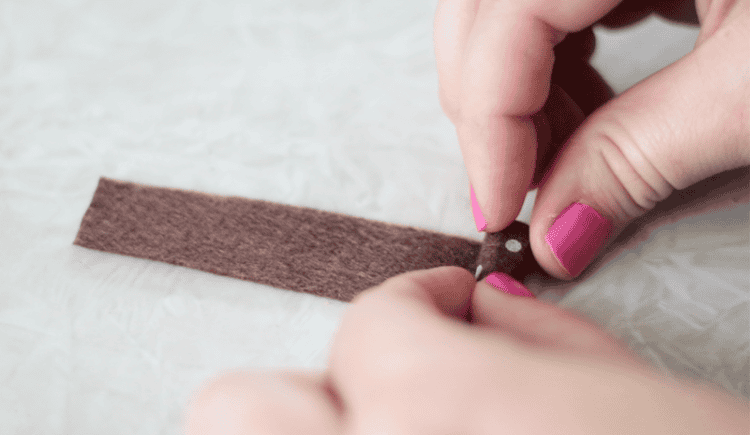
Step 13: Roll up the piece of felt.
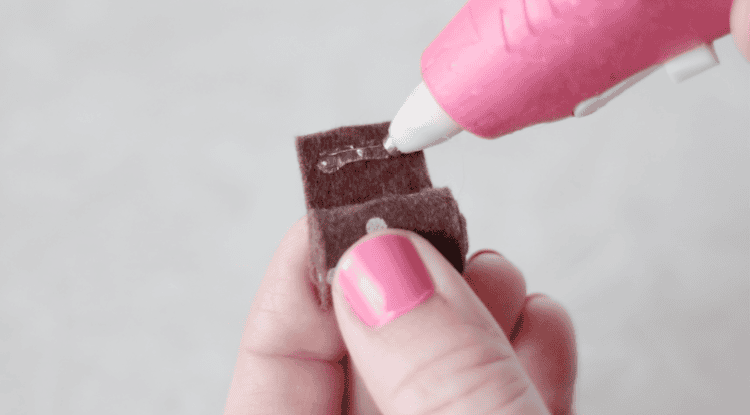
Step 14: Hot glue the end of the piece of felt to secure it.

Step 15: Glue the stem to the top of the pumpkin.
You can also use faux pumpkin stems. I use these when making velvet pumpkins.
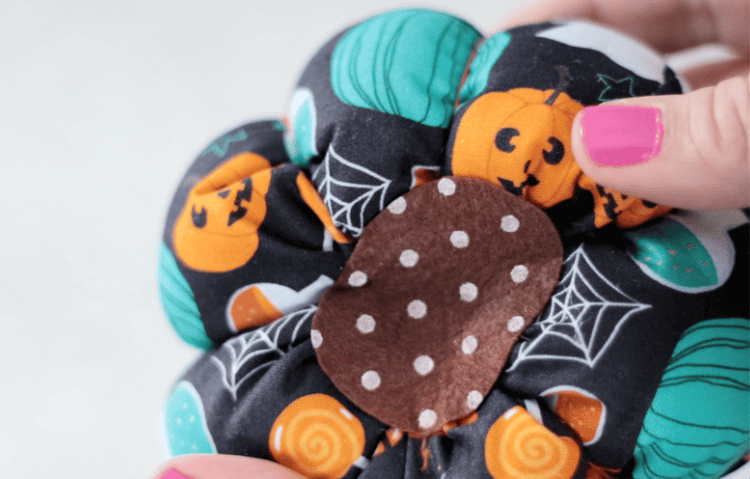
Step 16: Glue the oval of felt on the bottom of the pumpkin (this adds a finished touch and hides any knots and unfinished edges on the bottom of the pumpkin).
Fabric Pumpkin FAQs
My favorite fabrics to use are lightweight cotton prints such as calico or quilter's cotton. They come in so many fun prints and are easy to stitch through. I used a combination of plaid prints and cotton prints for these pumpkins. Flannel or muslin would be a great choice, too.
My go-to stuffing is polyester fiberfill, which is the same stuffing found in throw pillows. You can also use scrap fabric or anything soft to fill the fabric pumpkins.
This tutorial makes it easy to create small, medium, and large pumpkins. Take the width measurement and double it for the length measurement. Here are some example measurements below. The pumpkins shown in the photos are made with an 8" x 16" rectangle of fabric (medium-sized pumpkins).
More Fall Crafts To Make

MADE THIS CRAFT AND LOVED IT? 💛 Please leave a STAR rating and COMMENT below! Post it to Facebook or Pinterest to easily share with friends!
Easy Fabric Pumpkins Tutorial
Equipment
- sewing machine
- measuring tape
- scissors
- long sewing needle
- hot glue gun/glue
- small pliers (optional)
Materials
- fabric
- stuffing (poly-fil)
- embroidery thread
- felt scraps
Instructions
- You can make any size of pumpkin that you'd like by doubling the width measurement. For example, my fabric was 8" wide and 16" long. CUTTING GUIDECut fabric into a rectangle that measured 8" x 16".Cut a piece of felt that is 1"x 6" for the stem.Cut a 2" oval of felt for the bottom of the pumpkin.
- Fold the fabric in half with the right sides together.
- Sew along the seam using a ⅜" seam allowance.
- You should now have a tube of fabric. Look at the pattern and note which side will be the bottom and which side will be the top.
- Thread a long piece of embroidery thread through a needle.Stitch a gathering stitch around the bottom opening of the pumpkin.Note: To gather, you'll create a wide running stitch along the top of the opening, about ¼" away from the edge. Leave the ends of the string long so that you can pull them to gather the fabric later.
- Pull the end strings tight to close off the bottom of the pumpkin.
- Tie the strings in a double knot and trim excess. Save the needle and thread for a later step.
- Turn the pumpkin right-side out.
- Fill the pumpkin with stuffing.
- Grab your needle and thread and stitch a gathering stitch around the top opening of the pumpkin.
- Pull the end strings tight to close off the top of the pumpkin.
- Tie strings in a double knot and trim excess.
- Cut a strand of embroidery thread that is 48" long. Thread it through a long needle and tie a knot at the end.Press the pumpkin down to squish it down a bit (this makes it easier to insert the needle). Poke the needle through the center of the pumpkin and out the back. Pull until the knot hits. Bring the needle around to the top again, insert through the center and out the back again, then pull the thread TIGHT. You'll notice that you've created one of the pumpkin grooves on the side of the pumpkin.
- Continue this process until you have 6 sections (dimples). It can sometimes be a little difficult to pull the needle through the stuffing. A small pair of pliers can be helpful in grabbing the needle.NOTE: I highly recommend referring to my step-by-step video for a great visual on how to create the pumpkin sections/shape using the thread.
- Roll up the piece of felt.
- Hot glue the end of the piece of felt to secure it.
- Glue the stem to the top of the pumpkin.
- Glue the oval of felt on the bottom of the pumpkin (this adds a finished touch and hides any knots and unfinished edges on the bottom of the pumpkin).
Video
Notes
- 6" x 12" (small pumpkin)
- 8" x 16" (medium pumpkin)
- 10" x 20" (large pumpkin)
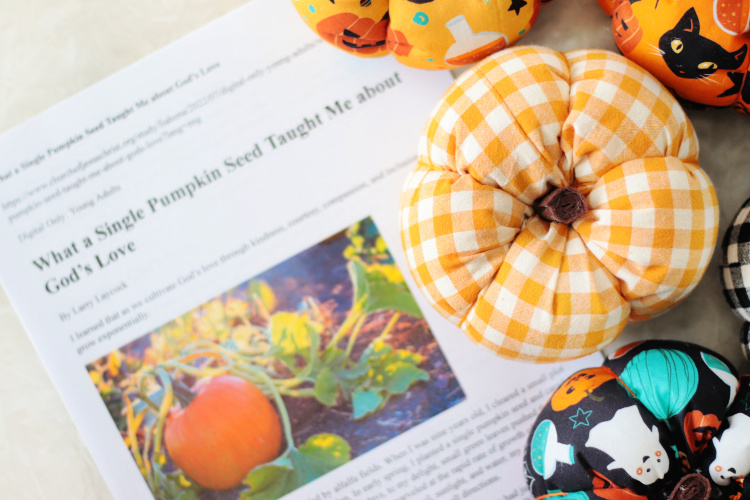
Pumpkin Spiritual Thought
I mentioned above that I am giving these pumpkins as gifts to the ladies in my church. I found a talk called, "What a Single Pumpkin Seed Taught Me about God's Love" by Larry Laycock.
Here are some of my favorite parts:
"My boyhood home was surrounded by alfalfa fields. When I was nine years old, I cleared a small plot on the edge of the fields to plant a garden. In early spring, I planted a single pumpkin seed and cared for it each day, eager for it to sprout. Within days, to my delight, small green leaves pushed through the soil. Over the days and weeks that followed, I marveled at the rapid rate of growth of my small, single pumpkin seed. With divine components of seed, soil, sunlight, and water, my small seed miraculously transformed into multiple vines stretching out in all directions.
A short time later, green bulbs appeared where orange and yellow flowers had just bloomed. And over the course of the summer, the bulbs transformed into large, orange pumpkins. When the harvest arrived, I cut open my pumpkins. I was astonished! Each pumpkin had produced hundreds and hundreds of seeds.
You might be thinking to yourself, “That’s great, but what does this pumpkin seed have to do with me as a young adult?” Well, in observing the seemingly endless supply of seeds from my harvest, I suddenly understood how, with God’s help, the finite (one seed) could be transformed into the infinite and eternal. I saw that “with God nothing shall be impossible” (Luke 1:37). I experienced the truth of the scriptural words “by small and simple things are great things brought to pass” (Alma 37:6).
God created my small pumpkin seed to produce limitless, even infinite, generations of seeds in a never-ending cycle of growth and development. And the same is true for many other things in our lives, including the ability to feel and share His divine love.
Over time, I have come to understand that our loving Heavenly Father has planted within each of us the seed of His eternal love. God loves us enough to plant His love in our souls with the intention that we cultivate and grow it through service, faith, repentance, and covenant keeping.
...If we cultivate God’s love through kindness, courtesy, compassion, and inclusion, it will grow exponentially. Our capacity to love and serve others will become infinite, eternal, and more beautiful than we ever dreamed possible.
As we cultivate the seed of God’s love within us, we can reap the pure love of Christ—charity (see Moroni 7:47). Those who cultivate the seed of God’s love also reap a bounteous crop of friends, fellowship, and increased faith...
As we carefully cultivate the seed of God’s love, we can experience a limitless harvest of eternal love in our family relationships, our Church service, and our personal lives."


Sharla Bowling says
There is no link for the video tutorial -a bit frustrating.
Brandy says
The video plays in the post in two different places. At the top Where it says “watch our step by step video” It also plays inside the step by step instruction card at the end of the post. Not sure how to make it more visible. If you have ad or pop up blockers on your browser make sure they are turned off.