Gluesticks Blog

  • About
    • About Me
    • Contact Me
    • Terms and Privacy Policy
  • Sewing
    • My Book
    • Kids Sewing Projects
    • All Sewing Projects
  • Crafts
    • Kids Crafts
    • Paper Crafts
    • Free Printables
    • All Crafts
  • Holidays
    • Christmas
    • Halloween
    • Patriotic Holidays
    • Easter
    • St. Patrick’s Day
    • Valentine’s Day
    • Gift Ideas
      • Teacher Gifts
      • All Gift Ideas
    • Parties
  • Home
    • Home Decor Projects
    • Cleaning & Organizing
    • Gardening
    • Motherhood
  • Recipes
    • Kids in the Kitchen
    • Appetizer Recipes
    • Bread Recipes
    • Dessert Recipes
      • Cake Recipes
      • Cookie Recipes
      • All Dessert
    • Main Dish Recipes
    • Slow Cooker
    • Sides & Salads
    • Holiday Recipes
    • All Recipes

February 4, 2020 By Brandy 13 Comments

Home » Sewing

How to Make a Pillowcase in 3 Steps Out of Fleece (Video)

Filed Under: Kids Crafts, Sewing

Jump to Project

Make a pillowcase in 3 steps out of fleece. It’s the perfect project for someone new to sewing and the perfect beginning sewing project for kids!

Here are 30 more sewing (and no-sew) fleece projects to make!

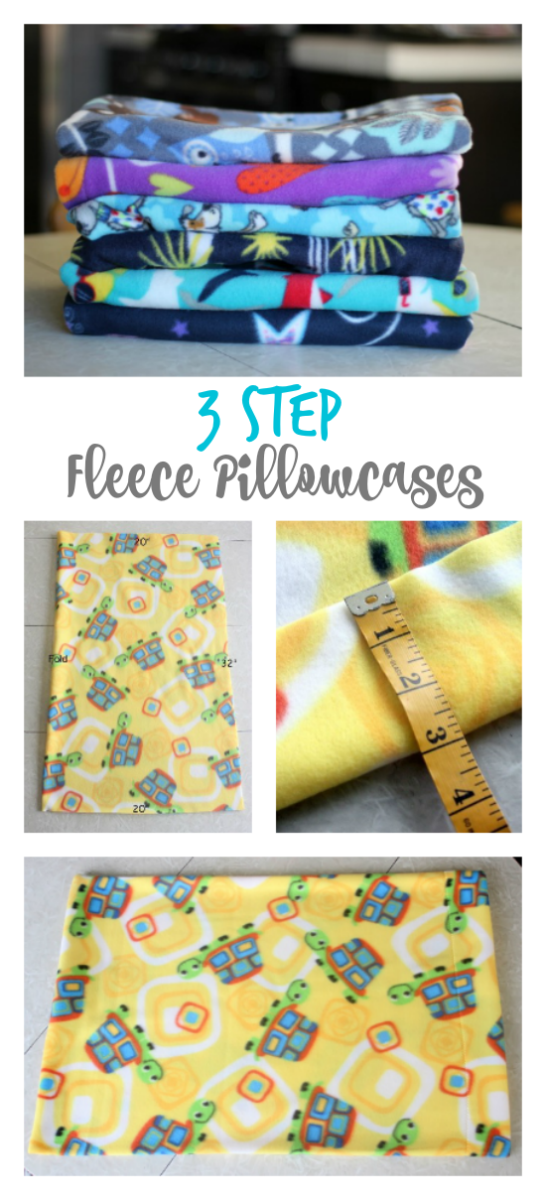
Make a pillowcase in 3 steps out of fleece. It's the perfect project for someone new to sewing and the perfect beginning sewing project for kids!
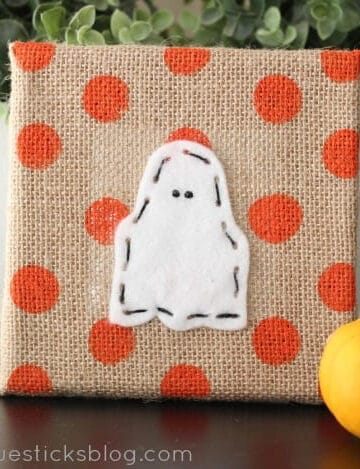
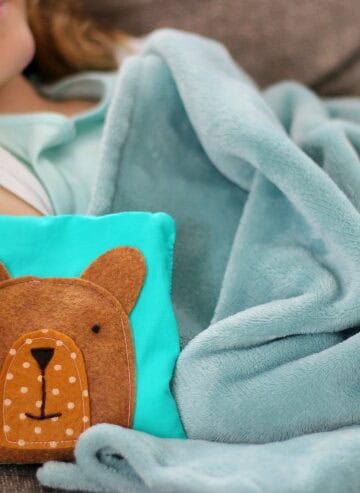
Watch our step by step video!

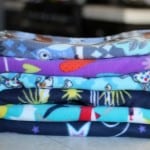
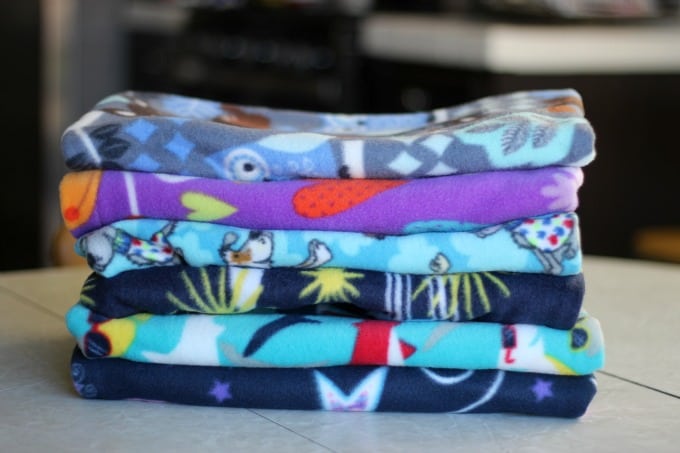
Make 1, 2 or 6 of these to have extras in stock for birthday gifts! A new pillow with pillowcase has become my go-to gift for birthday parties. This year I made a bunch to send to nieces and nephews for Christmas! Go ahead and get a yard of fleece for each one. There will be a little left over. You could even use the extra to make a 2-minute fleece scarf or 5-minute hand warmers!

Here are a few quick cheats to use when you make a pillowcase that really helped me!

#1. I cut one side on the fold. You don’t have to cut on the fold; you can sew that extra side. #2. I hemmed the pillowcase before sewing the side instead of doing it last. It’s just easier, but if you’d like a nice flush side seam, you can hem it last (after sewing up the side).

stack of fleece pillowcases

Pillowcase with a contrasting band: if you’d like to add a band to the pillowcase it’s easy! It just adds an additional step or two. Check out the notes section in the tutorial below for the adjustments needed.

How To Make a Fleece Pillowcase

stack of folded fleece pillowcases
Print
4.50 from 4 votes

3 Step Fleece Pillowcase Sewing Tutorial

Make a pillowcase in 3 steps out of fleece. It’s the perfect project for someone new to sewing and the perfect beginning sewing project for kids!
Active Time10 minutes mins
Total Time10 minutes mins
Cost: $5

Equipment

  • sewing machine
  • scissors or pinking shears
  • pins
  • measuring tape

Materials

  • 1 yard fleece fabric

Instructions

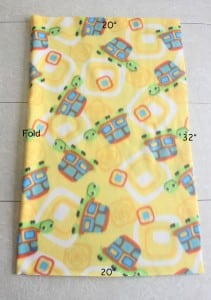
  • You will need a piece of fleece that is 40″ wide and 32″ tall. Cut it on the fold to save time on sewing and that makes your measurements 20×32 on the fold. (dimensions are for a standard pillowcase).
    fleece pillowcase dimensions
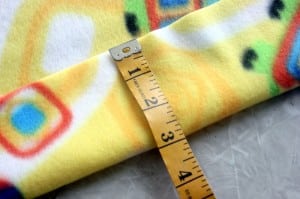
  • Open your fabric and fold up 3″ on the bottom side of your fleece for the hem. Pin and zigzag, keeping the pressure foot along the edge of the cut of fabric. Stitch bottom hem using a zig zag stitch.
    folding fleece pillowcase hem
  • Fold your fabric, right sides together, hem facing out. Stitch sides beginning at the bottom where the hem meets. Use a 3/8″ seam allowance. You should only have to sew the side and top since you cut your fabric on the fold.
    sewing fleece pillowcase
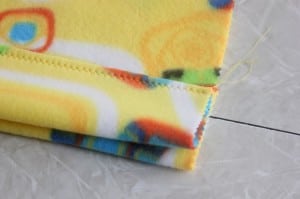
  • Trim seems if necessary. Turn right side out and your pillowcase is done! No ironing, double hems or notions of any kind!
    finished fleece pillowcase

Video

Notes

Pillowcase with a contrasting band: if you'd like to add a band to the pillowcase it's easy to do! Adjust the measurement of the main piece to 24" long instead of 32". Cut a second piece of fabric that is 8" tall and 40" wide. Sew the smaller strip to the main piece along the bottom. Fold up the edge of the band 1" and stitch it into place to create a hem. Continue to step 3. 
Here are a few quick cheats to use when you make a pillowcase that really helped me!
1: Cut one side on the fold. You don’t have to cut on the fold. You can sew that extra
2: Hem the pillowcase before sewing the side instead of doing it last. It’s just easier, but if you’d like a nice flush side seam you can hem it last (after sewing up the side).

stack of folded fleece pillow cases

If you liked learning how to make a pillowcase, you might also like to check out these free fleece patterns or check out more of my sewing with fleece posts:

More Fleece Sewing Projects:

No Sew Fleece Poncho For Kids

Fleece Hand Warmers in 5 Minutes

Fleece Hand Muff

Dinosaur Hoodie with Fleece Spikes

Print Friendly, PDF & Email

Related

Share
Pin

About Brandy

Welcome! I'm Brandy, mother to 5 darling kiddos and a cute black lab named Toby. My husband is in the Coast Guard so we've lived all over the place, turning each house into a home. I love baking, sewing, making cute things with my kids, and sharing what I've learned with all of you!

Disclaimer: I am a participant in the Amazon Services LLC Associates Program, an affiliate advertising program designed to provide a means for me to earn fees by linking to Amazon.com without any additional cost to you. As an Amazon Associate, I earn from qualifying purchases.

Previous Post: « A Year of Free Home Decor Printables
Next Post: French Bread Stroganoff Loaf (Video) »

Reader Interactions

Comments

  1. Missy Erving says

    December 15, 2020 at 6:14 am

    I’m fairly new to sewing and this might seem like a silly question, but do you only sew the hem on one end? Wouldn’t both ends need to be hemmed? thanks!

    Reply
    • Brandy says

      December 15, 2020 at 10:08 am

      Hi Missy! You only hem the side where the pillow slips through. Just fold up that edge and sew across. The other side will be sewn and turned right side out so you won’t ever see it. Hope that helps!

      Reply
      • Missy says

        December 18, 2020 at 5:09 pm

        Thanks. I’m not good at visualizing things like this but I’m sure it will make sense once I get there. 🙂

        Reply
  2. Cookie says

    December 11, 2020 at 6:57 am

    Is it ine yard per pillow slip?

    Reply
    • Brandy says

      December 11, 2020 at 8:49 am

      Yes

      Reply
  3. Kris says

    September 20, 2020 at 10:27 am

    These look great! New to sewing, any idea what the dimensions would be and how much fabric I would need for a king pillow? My three children want to make them but they have full pillows. Any help would be greatly appreciated!
    Kris

    Reply
    • Brandy says

      September 20, 2020 at 10:18 pm

      Hi Kris! I didn’t know the measurement off hand, so here’s a link that shares how big it should be for a king sized pillow. https://www.craftandfabriclinks.com/pillowcases/cases.html

      Reply
  4. Barbara Harris says

    February 17, 2020 at 1:02 am

    Thanks so much for this post. I bought a kit and with your helpful instructions made this for my sweet little 5 year old boy. What a great project for all involved! He loves it!!

    Reply
    • Brandy says

      February 23, 2020 at 11:03 am

      I’m so glad!! 🙂

      Reply
  5. Connie Ward says

    January 1, 2014 at 5:43 am

    Awesome! This might be the niece/nephew Christmas gift of 2014!! Plus side is DS could help pick the fleece for his cousins to have.

    Reply
  6. Stephany says

    December 11, 2013 at 9:20 am

    Great and easy tutorial! I have been planning to make a couple for my daughter, but looking at how easy it is I am going to make some for my nieces too! Thank you very much for sharing.

    Reply
    • Brandy says

      December 11, 2013 at 3:45 pm

      You’re welcome! Your nieces will love them! 🙂

      Reply

Trackbacks

  1. 15 Minute Pillow Cover Tutorial | Gluesticks says:
    September 5, 2014 at 12:57 pm

    […] For another simple pillow cover tutorial (using fleece to make them extra cozy), check out my 3 Step Fleece Pillowcase Tutorial! […]

    Reply
4.50 from 4 votes (4 ratings without comment)

Leave a Reply Cancel reply

Your email address will not be published. Required fields are marked *

Recipe Rating


This site uses Akismet to reduce spam. Learn how your comment data is processed.

Primary Sidebar

I'm Brandy! I love to create and share my ideas through easy-to-follow recipes and tutorials. MORE ABOUT ME

Follow Along

  • Facebook
  • Instagram
  • Pinterest

Disclaimer: I am a participant in the Amazon Services LLC Associates program. As an Amazon Associate, I earn from qualifying purchases, at no cost to my readers.

My Amazon Store

Get My Best Projects and Recipes!

My Sewing Book for Kids!

kids sewing book cover
  • Home
  • Website Accessibility
  • My Book
  • Privacy Policy

Copyright © 2025 Log in

Gluesticks blog logoLogo Header Menu
  • About
    • About Me
    • Contact Me
    • Terms and Privacy Policy
  • Sewing
    • My Book
    • Kids Sewing Projects
    • All Sewing Projects
  • Crafts
    • Kids Crafts
    • Paper Crafts
    • Free Printables
    • All Crafts
  • Holidays
    • Christmas
    • Halloween
    • Patriotic Holidays
    • Easter
    • St. Patrick’s Day
    • Valentine’s Day
    • Gift Ideas
      • Teacher Gifts
      • All Gift Ideas
    • Parties
  • Home
    • Home Decor Projects
    • Cleaning & Organizing
    • Gardening
    • Motherhood
  • Recipes
    • Kids in the Kitchen
    • Appetizer Recipes
    • Bread Recipes
    • Dessert Recipes
      • Cake Recipes
      • Cookie Recipes
      • All Dessert
    • Main Dish Recipes
    • Slow Cooker
    • Sides & Salads
    • Holiday Recipes
    • All Recipes

Rate This Recipe

Your vote:


A rating is required
A name is required
An email is required

Recipe Ratings without Comment

Something went wrong. Please try again.