How to make a hydrangea wreath for a fraction of the price of a custom store bought one. In less than an hour!
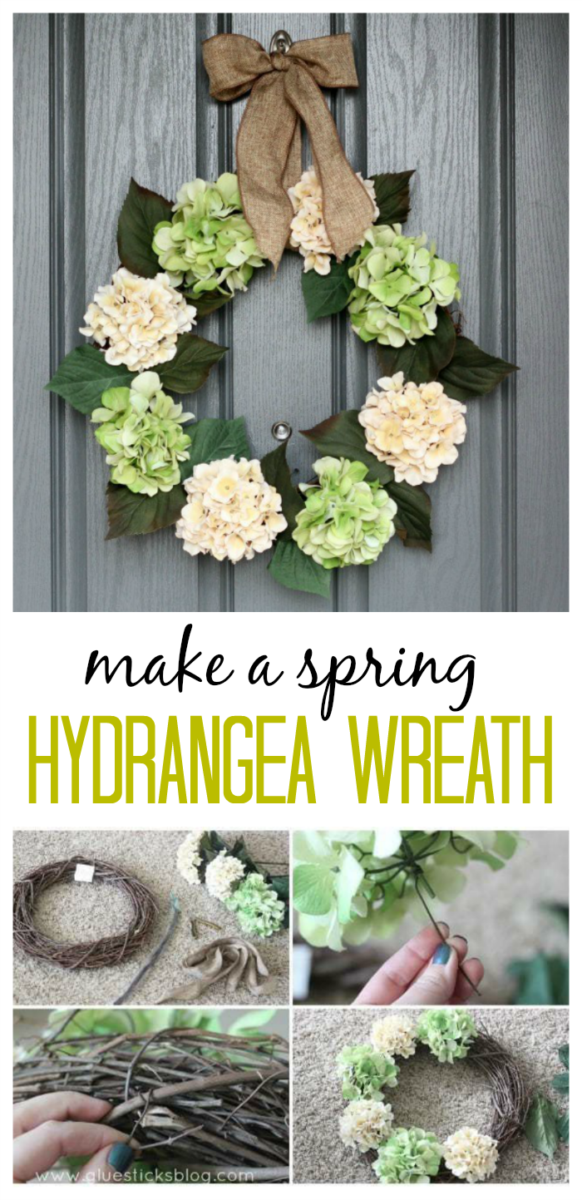
Today I am sharing my new hydrangea wreath that I made for my front door. I was still using my greenery wreath that I made years ago and was ready for something new. I was able to make my wreath for ⅓ of the price of similar ones found online. Sometimes it isn't any cheaper to make it yourself, but in this case it totally was. Let me show you how I did it!
Tips for Making a Wreath:
- Check out your local dollar store for wreath bases and silk flowers before going to the bigger craft stores. You never know what you'll find!
- Stack coupons. Joann's accepts one competitor's coupon with each transaction, along with their coupons. I could have saved even more money if I had waited and used more coupons next month, but I was too impatient. I was able to get all of my flowers for 40% off and only paid full price for my wreath base, wire, and ribbon.
- Arrange everything before starting to attach the floral with wire or glue.
- Re-use old wreath forms if you can. Never throw one out! I turned this wreath into this one after 3 years and the ribbon had faded from the sun.
- Use ribbon or a long piece of fabric to hang your wreath. Functional and cute.
- Click here for ways to hang a wreath on a door without making holes.
3 more wreath ideas:
Dollar Spot (Target) Pumpkin Wreath
To make a hydrangea wreath you will need:
- 18" grapevine wreath base
- 8 hydrangea blooms. You can buy them in single stems or in bouquets, depending on what color you choose. They just need to be 5 or 6" wide blooms.
- 1 package fabric wrapped floral wire stems (brown, 20 pieces)
- wire cutters
- 2 ½ yards ribbon/burlap
Steps for making a hydrangea wreath:
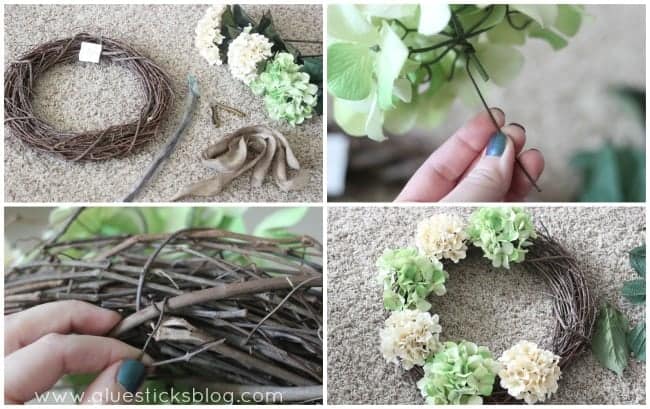
- Gather your supplies
- Trim each bloom, leaving a 1" stem. Cut your brown floral wires in half and wrap around the 1" hydrangea stem.
- Poke hydrangea stem and wire through center of the wreath base and wrap tightly, tucking and wrapping excess around one of the branches in the back. Trim excess if necessary.
- Continue for each bloom, all around the wreath.
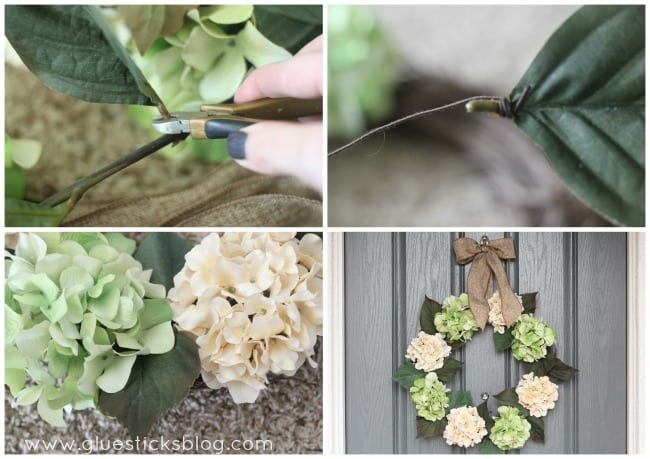
- Trim leaves off of the hydrangea stems.
- Wrap with a piece of brown floral wire.
- Add your leaves in between the blooms to cover up with grapevine showing through.
- Loop your ribbon around your wreath, decide how long of a loop you want and tie it off in a knot. Then tie a bow and trim the ends on an angle.
The ribbon I chose was a wired linen that was sold by the yard and I absolutely love it. The edges are finished so that it doesn't fray and the texture is nice and soft and very easy to work with.
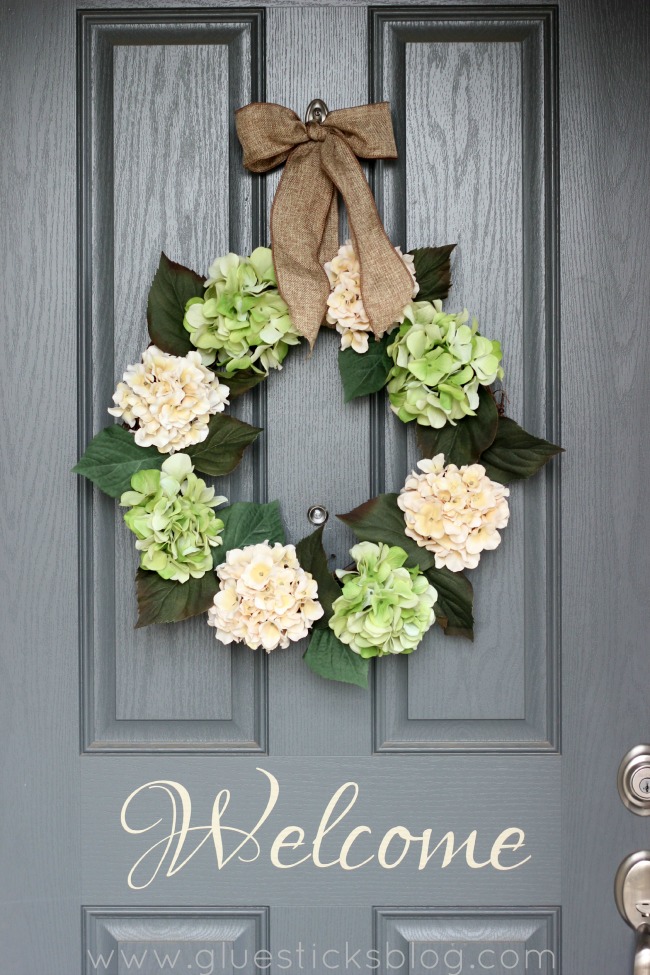
I'm thrilled with how it turned out and think that it really brightens our front door!


Rachel Teodoro says
I wanted you to know that I featured this project on the Create Link INspire party that you linked up to. It's such a great looking spring wreath. Thanks for including it.
Robin says
I really need a wreath for my front door and since I love hydrangeas I have to pin this!! Thank you for sharing at the Creative Muster. Robin | Fluster Buster
Beverly says
I love this wreath. Hydrangeas are my favorite.
Bev
Mommy on Demand says
I love this! Absolutly beautiful! Now I just need some Spring Weather! Thanks for sharing at Happiness is Homemade Link Party....you are being featured this week!
Laurie says
Hydrangea wreaths are my favorite! Yours is very pretty!
Kate says
This wreath came out beautiful! I really admire the fact that you can tie a bow like that! I only really mastered this once on a Christmas wreath I made last year!
Kate | The Organized Dream
Pamela Shank says
This is so beautiful. Hydrangeas are my favorite flowers. I am not crafty but your step by step makes it look do able!
JESS44903 says
This is so pretty!!
I would love for you to share this with my Facebook Group for recipes, crafts, tips, and tricks: https://www.facebook.com/groups/pluckyrecipescraftstips/
Thanks for joining Cooking and Crafting with J & J!
Lori Leeper says
I love the simplicity of this wreath. Thanks for sharing at Dishing It & Digging It!