Gluesticks Blog

  • About
    • About Me
    • Contact Me
    • Terms and Privacy Policy
  • Sewing
    • My Book
    • Kids Sewing Projects
    • All Sewing Projects
  • Crafts
    • Kids Crafts
    • Paper Crafts
    • Free Printables
    • All Crafts
  • Holidays
    • Christmas
    • Halloween
    • Patriotic Holidays
    • Easter
    • St. Patrick’s Day
    • Valentine’s Day
    • Gift Ideas
      • Teacher Gifts
      • All Gift Ideas
    • Parties
  • Home
    • Home Decor Projects
    • Cleaning & Organizing
    • Gardening
    • Motherhood
  • Recipes
    • Kids in the Kitchen
    • Appetizer Recipes
    • Bread Recipes
    • Dessert Recipes
      • Cake Recipes
      • Cookie Recipes
      • All Dessert
    • Main Dish Recipes
    • Slow Cooker
    • Sides & Salads
    • Holiday Recipes
    • All Recipes

April 26, 2019 By Brandy 20 Comments

Home » Sewing

Bandanna Picnic Blanket Tutorial

Filed Under: Sewing Tagged With: Home Decor Sewing

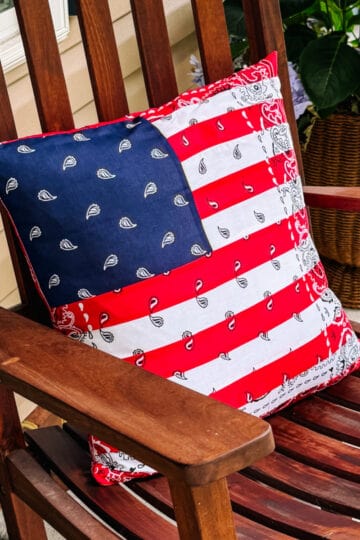
Make a bandanna picnic blanket! So easy and quick and perfect for picnics, the beach, or keeping cozy on a cold day! To simplify it even more, tie the blanket instead of quilting it! This is a great sewing project for beginners. Make a picnic blanket out of bandannas! So easy and quick and perfect for picnics, the beach, or keeping cozy on a cold day! To simplify it even more, tie the blanket instead of quilting it! This is a great sewing project for beginners.

As the kids get older and our schedules get more and more hectic, spending time as a family in the evenings is something that we cherish. Sometimes we eat dinner around the table, sometimes we gather in front of the TV to watch an episode of a show together, sometimes we eat on the go, and sometimes I pick up dinner and we head to the park for a picnic. That is always a favorite for the kids. It is especially a great option if we are all in town running errands. We’ll sometimes grab a pizza and stop to eat before we head home.

bandanna picnic blanket on lawn
Since we spend a lot of time outside in the spring and summer a picnic blanket big enough for our whole family has been on my sewing to do list. The problem is that I don’t have a lot of time to dedicate to quilting lately.  Cue bandannas! I found these darling bandannas at my local fabric store and thought they would make a really fun and QUICK bandanna quilt top! Most of my quilts use 6-8″ squares. These bandannas are 22″ so sewing them together was quick and easy and my quilt top came together in less than an hour. AWESOME. I added batting and fabric for the backing and bound it together. I love how it turned out and it is plenty big for our family. We store it in the back of the van for park days or impromptu picnics.

folding up bandanna picnic blanket
family having a picnic on bandanna picnic blanket
I’m looking forward to absolutely wearing this bandanna quilt out until it is thread bare. Would you like to make one for your family? Today I’ll show you how to make your own bandanna quilt to keep in your car for these impromptu moments.

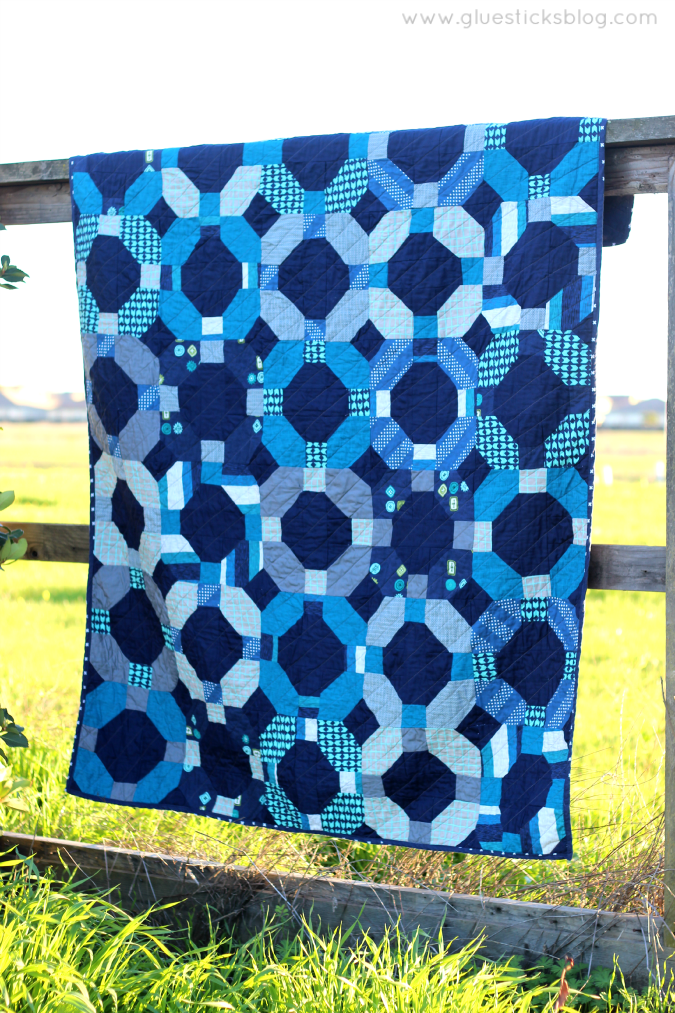
More easy blankets and quilt projects you’ll want to check out:

Puppy Heart Quilt Block Quilt

Easy Pinwheel Quilt

Shortcut Hexagon Quilt

Simple Star Quilt

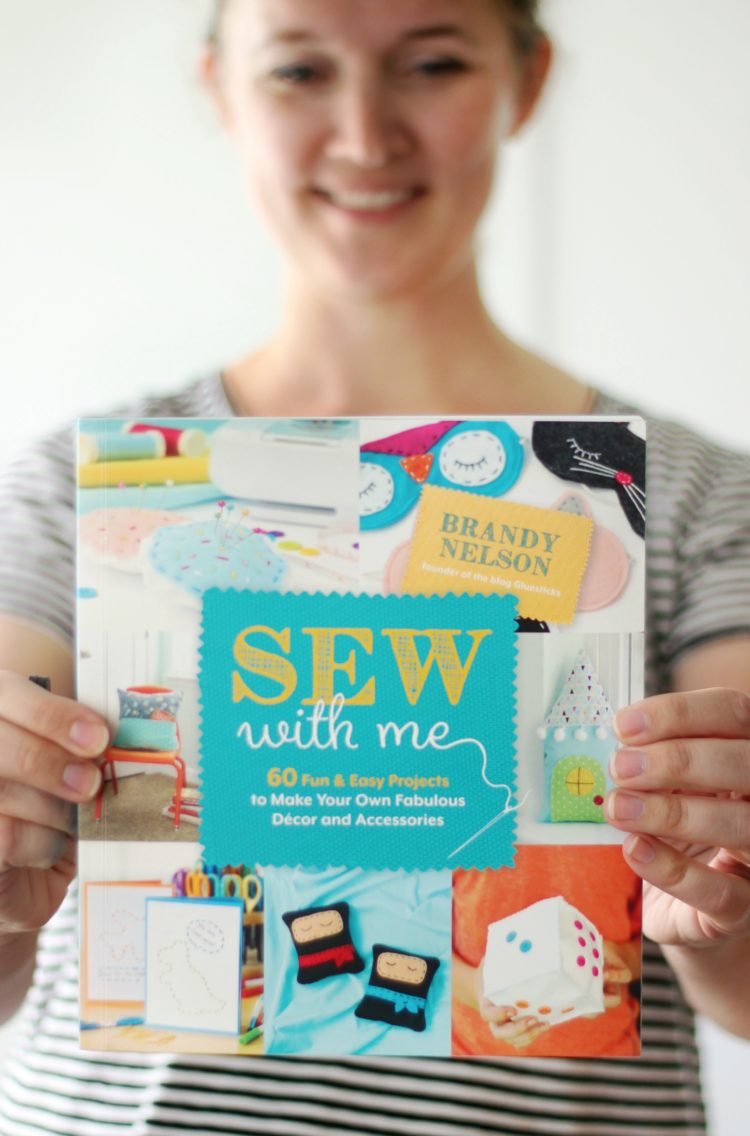
For 60 more sewing projects, check out my sewing book for kids!

Don’t worry, if you don’t know how to quilt or don’t feel like attempting it this time I have another easy option for finishing your bandanna picnic blanket!

front of bandanna picnic blanket using 16 bandannas

Bandanna Picnic Blanket Tutorial

I’m not a master quilter, in fact, I’m self taught. Or Pinterest taught? 😉 Those who have been quilting for decades would probably cringe on how I make my quilts, but that’s ok. They come together fairly quickly and I think I do ok with my little sewing machine instead of investing in a fancy quilting machine.

stack of bandannas on a table with sewing supplies
Determining the size of your bandanna blanket: There are several sizes that you can make your quilt. You can use 9 bandannas (3×3), 12 bandannas (3×4), or 16 bandannas (4×4). Since we have 6 in our family, I made a GIANT 16 bandanna quilt. If you have 4 in your family, a 12 bandanna quilt would be plenty big. A 9 bandanna quilt would be a great play mat at the park for a baby or a picnic for 2!

variety of different colored bandannas mint, checkered, solid, black
To keep things simple I will be referring to the measurements that I used for our 16 bandanna quilt. 

  1. For beginners: If you don’t want to tackle a quilt, just sew your bandannas together and press the back seams open. You have an instant picnic tablecloth or light blanket to use on the grass! This takes about an hour.
  2.  For those a bit more adventurous:  Grab 5 yards of fabric or a queen size sheet, OR sew more bandannas together to create a backing for your quilt! Sandwich batting in between, add a few quilting lines, and bind the edges. I’ll show you how! Since you are using 22″ bandannas for your quilt top you don’t have to cut or measure squares. This cuts out so much time and makes this a project that you can complete in a day. Mine was finished in 3 1/2 hours. If you tie your quilt instead of quilting it you can finish it in about 2 hours.

Supplies for a 16 bandanna picnic blanket:

16 (22″) bandannas

Fabric for quilt backing (about 5 yards)

Thin quilt batting

1 yard coordinating fabric for quilt binding

thread

scissors

pins

measuring tape

How to make a Bandanna Picnic Blanket

Step 1. Iron each bandanna open so that all of the folds are smooth.

unsewn bandannas places in a 4x4 grid on floor
Step 2. Arrange bandannas in any pattern you’d like. Some bananas are irregular and may not line up perfectly. That’s ok, just do your best to align everything together.

rows of bandannas sewn together
Step 3. Sew bandannas together using a 3/8″ seam allowance. Just do one row at a time. Iron seams open.

Step 4. Sew all 4 rows together. Iron seams open.

finished bandanna blanket quilt top
—If you want to stop here you totally can. Picnic tablecloth or light blanket = DONE! Since you used bandannas, the edges are already hemmed! To add batting and a backing, continue reading.

Step 5. Cut out a piece of batting the same size as your quilt top.

quilt top batting and quilt bottom ready to be quilted
 

Step 6. Cut out a piece of fabric/sheet, slightly larger than your quilt top for the backing. If you use 5 yards of fabric for the backing, you will need to cut it in to 2 (2 1/2 yard) sections and sew a seam up the center to create a backing wide enough, and it will still be tight.  Finding an inexpensive queen sized sheet would be a great solution. If you use a queen size sheet it will be wide enough to not have to sew a center seam.

can of basting spray
Step 7. To keep the fabric flat for quilting I like using basting spray. I simply spray it on my batting in small sections and smooth my quilt top over it, smoothing out all of the creases with my hands. Then I repeat for the quilt back. The traditional way is to use safety pins every couple of inches over your ENTIRE quilt. This will keep it from moving and slipping, and puckering while quilting too.

Step 8. Quilting can be as easy or complicated as you want it to be. If you don’t want to quilt at all, you can tie your quilt with small knots of yarn in the center and corner of each square. This would take about 30 minutes. You can find a great tutorial for how to do that here.

To quilt your squares: I use my sewing machine and my a walking foot attachment that feeds the fabric into the machine evenly. I also keep to simple quilt designs.

two ways to quilt bandanna picnic blanket
Here are two easy ones that you could try for this quilt! (Shown with yarn for a visual before I spray basted my quilt) A simple “x” through each square by sewing diagonal lines, or squares by sewing lines through each square, then rotating the quilt and sewing them again. The second is the design I chose, but the “x” design would be the quickest.

The more quilting your quilt has, the flatter it will be, but it also takes time to free motion quilt a quilt this size or to quilt any sort of pattern. I just wanted something to keep the batting secure, so quick and easy was the route I picked.

bandanna blanket being quilted on a regular sewing machine
Step 9. Quilt your design onto your quilt. Roll up the sides of your quilt and secure with chip clips to keep it smooth and easy to feed through the machine. No matter what, it will seem bulky and awkward. Rolling your quilt up nice and tight will help keep it tight and not so heavy.

blanket finished quilting and ready for binding
Step 10. When you finish quilting, Sew a 3/8 top stitch around the edge of the entire blanket. Trim close to the seam. This will create a nice neat edge.

Almost done!

pile of quilt binding
finished quilt with binding
Step 11. Binding. I make my own quilt binding with 2.5″ strips. Here is a FANTASTIC tutorial to show you how to make binding as well as bind your quilt. You could also use bias tape, but I find that binding it with this tutorial is the simplest way.

bandanna quilt on lawn
Step 12. When you’ve finished sewing on the binding, wash and dry your quilt. This is my FAVORITE step. There is nothing better than a fresh, crinkly, quilt straight from the dryer!

You might like…

Gingham Baby Quilt 

Cheerio Patterned Quilt

Print Friendly, PDF & Email

Related

Share
Pin

About Brandy

Welcome! I'm Brandy, mother to 5 darling kiddos and a cute black lab named Toby. My husband is in the Coast Guard so we've lived all over the place, turning each house into a home. I love baking, sewing, making cute things with my kids, and sharing what I've learned with all of you!

Disclaimer: I am a participant in the Amazon Services LLC Associates Program, an affiliate advertising program designed to provide a means for me to earn fees by linking to Amazon.com without any additional cost to you. As an Amazon Associate, I earn from qualifying purchases.

Previous Post: « Simple and Inexpensive Patriotic Wreath Tutorial
Next Post: How to Style and Clean Kitchen Countertops »

Reader Interactions

Comments

  1. Jeannie Thouvenin Turner says

    October 30, 2020 at 1:19 pm

    Love this quilt I’m definitely going to do this. Thank you so much for the beautiful work and effort for your time.

    Reply
    • Brandy says

      October 30, 2020 at 6:38 pm

      Thank you Jeannie!

      Reply
  2. Ellen says

    May 20, 2018 at 7:03 pm

    Several years ago I made window treatments out of bandanas, so this is right up my alley!

    Reply
  3. Christine says

    May 20, 2018 at 4:46 pm

    I love the colors you used. A modern day version of a timeless blanket. Great job!

    Reply
  4. Bright says

    May 18, 2018 at 4:19 pm

    I love it. Its going on my to do list. Great project for teaching my girls to use the sewing machine. All straight lines!

    Reply
    • Brandy says

      May 18, 2018 at 6:28 pm

      Yes! My favorite kind of sewing projects!

      Reply
  5. Susan says

    January 8, 2018 at 9:18 am

    I bought a bunch of bandanas at Dollar Store but when I layer them out I found they are not all same size ?..

    Reply
    • Brandy says

      January 10, 2018 at 6:52 am

      How frustrating! I’m so sorry, Susan! Is there any way to trim some of them?

      Reply
      • Susan says

        January 10, 2018 at 6:47 pm

        I am going to try to stretch a bit and if that does not work I will try trimming.

        Reply
  6. gerri nathanson-cook says

    February 24, 2017 at 7:58 am

    love the quilt. I used a heavy plastic table cloth to back it just in case the ground is a little damp and it does make clean up easier.

    Reply
    • Debbie Blalock says

      October 20, 2017 at 9:31 pm

      Good idea Gerri Mathanson-Cook.

      Reply
  7. createwithjoy says

    May 22, 2016 at 5:59 pm

    Love your beautiful quilt Brandy – thanks for sharing it with us at Create With Joy – congrats – you’re one of our Featured Guests at our Inspire Me Monday Party #229 this week! 🙂

    Reply
    • Brandy says

      May 23, 2016 at 8:00 am

      Yay! Thank you!

      Reply
  8. Navy Wifey Peters @ USS Crafty says

    May 19, 2016 at 3:57 pm

    Such a cute quilt! I have so many bananas, and I had no idea what to do with them until now! Thanks for sharing at the Submarine Sunday Link Party!

    Reply
  9. Estelle @ Petit Bout de Chou says

    May 18, 2016 at 5:41 am

    I love the idea and the colours work so well together. Thanks for sharing.

    Reply
  10. Marigene says

    May 16, 2016 at 3:07 pm

    I love the quilt…I don’t sew, but have a sister that does!
    Let me tell you, those 5 years may sound like a long time, but they will fly by…enjoy those children while you can, once they leave the nest, it is just different.
    Have a great week.

    Reply
    • Sheila Jones says

      October 18, 2023 at 10:42 pm

      Do you have a printable version of the directions?

      Reply
  11. JESS44903 says

    May 9, 2016 at 11:19 am

    OH my gosh. I love this! The colors are perfect together! 🙂

    I would love for you to share this with my Recipes, Crafts, Tips and Tricks Facebook group: https://www.facebook.com/groups/pluckyrecipescraftstips/

    Thanks for joining Cooking and Crafting with J & J!

    Reply
  12. Lauren says

    May 5, 2016 at 2:25 pm

    Love your quilt! I will have to make one! My twins will go to college in five years. It makes me sad to think about it, too!

    Reply
  13. wyominggirlcoastiewife ~ Client says

    May 5, 2016 at 11:32 am

    I love this!!! It’s so awesome that you make your own quilts–this one is so bright and fun and the perfect thing for a pizza park dinner!

    Reply

Leave a Reply Cancel reply

Your email address will not be published. Required fields are marked *

Recipe Rating


This site uses Akismet to reduce spam. Learn how your comment data is processed.

Primary Sidebar

I'm Brandy! I love to create and share my ideas through easy-to-follow recipes and tutorials. MORE ABOUT ME

Follow Along

  • Facebook
  • Instagram
  • Pinterest

Disclaimer: I am a participant in the Amazon Services LLC Associates program. As an Amazon Associate, I earn from qualifying purchases, at no cost to my readers.

My Amazon Store

Get My Best Projects and Recipes!

My Sewing Book for Kids!

kids sewing book cover
  • Home
  • Website Accessibility
  • My Book
  • Privacy Policy

Copyright © 2025 Log in

Gluesticks blog logoLogo Header Menu
  • About
    • About Me
    • Contact Me
    • Terms and Privacy Policy
  • Sewing
    • My Book
    • Kids Sewing Projects
    • All Sewing Projects
  • Crafts
    • Kids Crafts
    • Paper Crafts
    • Free Printables
    • All Crafts
  • Holidays
    • Christmas
    • Halloween
    • Patriotic Holidays
    • Easter
    • St. Patrick’s Day
    • Valentine’s Day
    • Gift Ideas
      • Teacher Gifts
      • All Gift Ideas
    • Parties
  • Home
    • Home Decor Projects
    • Cleaning & Organizing
    • Gardening
    • Motherhood
  • Recipes
    • Kids in the Kitchen
    • Appetizer Recipes
    • Bread Recipes
    • Dessert Recipes
      • Cake Recipes
      • Cookie Recipes
      • All Dessert
    • Main Dish Recipes
    • Slow Cooker
    • Sides & Salads
    • Holiday Recipes
    • All Recipes