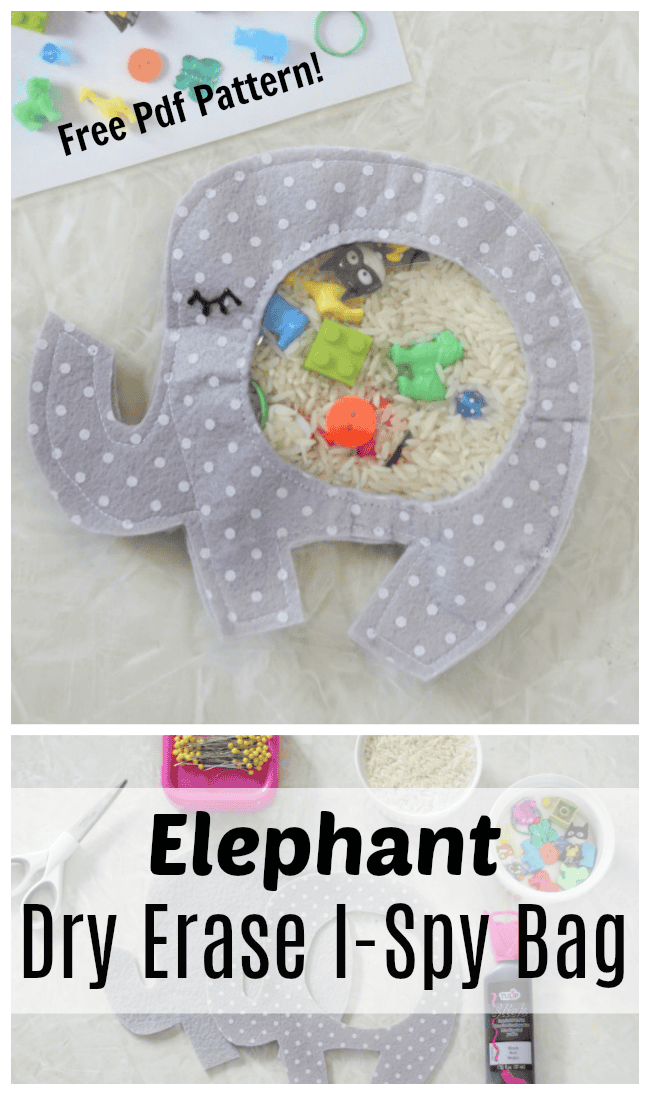
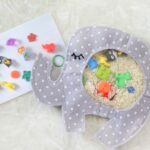
This elephant dry erase I-spy bag is so easy to make and keeps kids busy! A simple sewing project that includes a free cutting template!
Our I-spy sensory box is another fun activity for kids!
Watch our step by step video!
In 2011 I shared a simple tutorial for making a dry-erase I-spy bag. I made two for my boys (who are now 16 and 14 years old1!) and we used them for years and years! It was time to make a new one for Mac, so I updated this post with new photos and a new style.
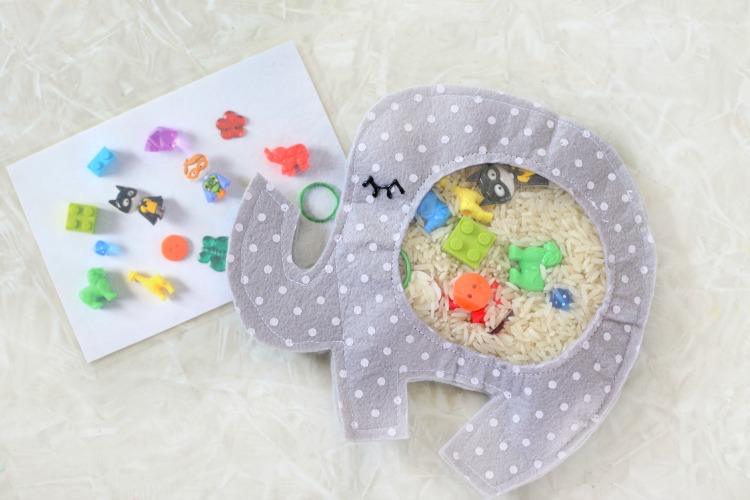
What made our tutorial unique was that it came with a laminated card for kids to mark off the items as they found them. At the time, every homemade I-spy bag came with a list to check off. My boys couldn't read, so a laminated card worked out so much better!
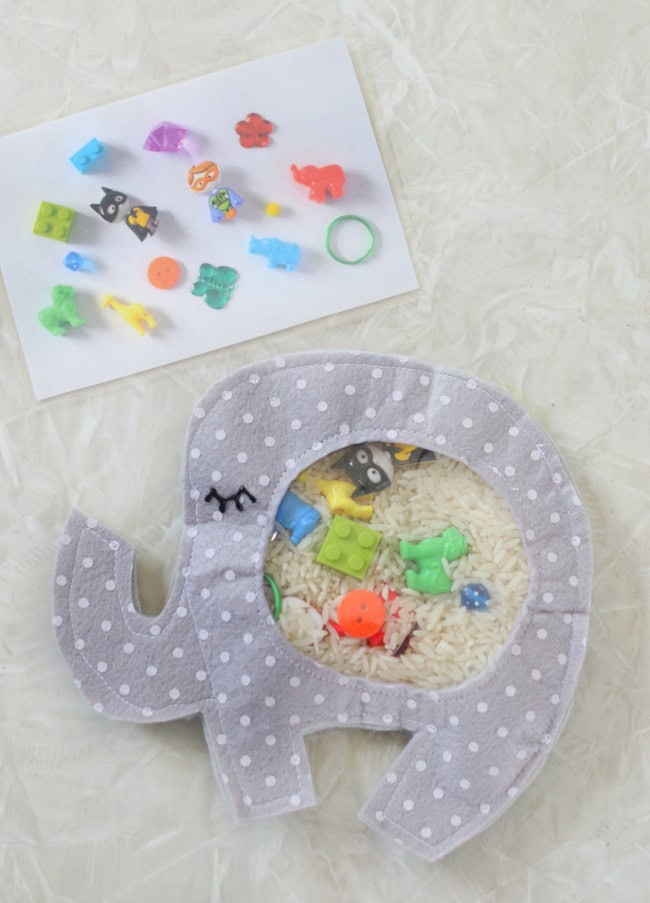
And that little elephant shape? That's new. Just because. You can make this dry erase i-spy bag set in just about any shape you'd like! I created a free pdf template that you can use to make our little elephant. Wouldn't a hippo or pig I-spy bag be cute?
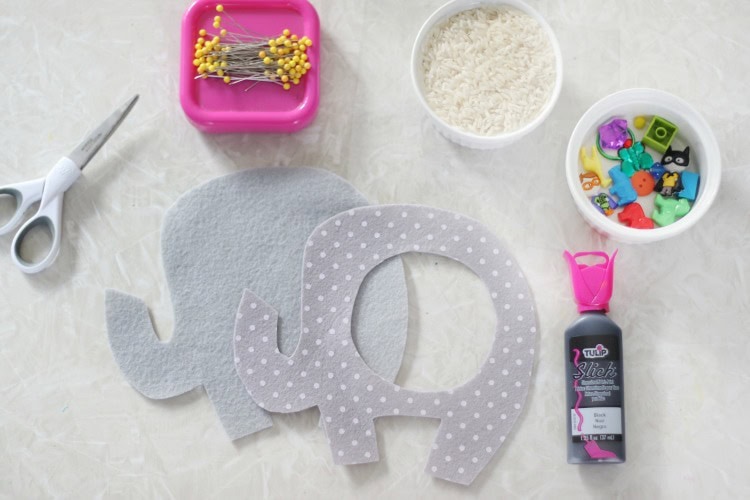
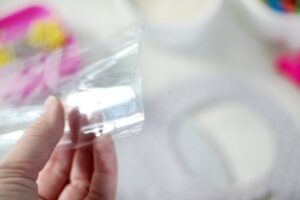
This is a great scrap felt project. You'll need a bit of felt and clear vinyl. I buy clear vinyl by the yard on Amazon, but you can also use the packaging from a shower curtain.
You'll also need fillers for your I-spy bag. I found buttons, beads, legos, and other odds and ends. I always use rice for my I-spy bags because it's cheap and I always have it on hand, but it will eventually create a small amount of dust inside the bag. A popular filler nowadays are these clear bean bag filler beads. You can get a bag for about $5.
How To Add a Pocket To Your I-Spy Bag
Our old version included a pocket in the back to hold the card and a marker. I skipped that step this time, but you can totally add one if you'e like. Just cut out a 3rd elephant shape, cut it in half (width-wise), and stitch it to the back when you sew the other elephant shapes together.. Print the card to fit the pocket, and slide it inside for storage.
More Creative Activities For Kids
Elephant Dry Erase I-Spy Bag Sewing Tutorial
Elephant I-Spy Bag Tutorial
This elephant dry erase I-spy bag is so easy to make and keeps kids busy! A simple sewing project that includes a free cutting template!
Pin Recipe
Yield: 1 bag
Cost: under $5
Equipment
- sewing machine
- pins
- laminator
Materials
Instructions
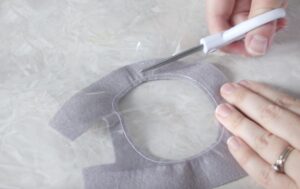
- Cut out 2 elephants from the printable template. Cut a hole in the center of one elephant (using the printable template).

- Cut a square of clear vinyl to cover the hole on the elephant.
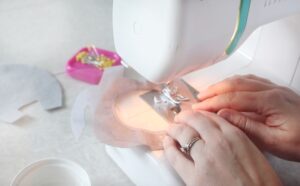
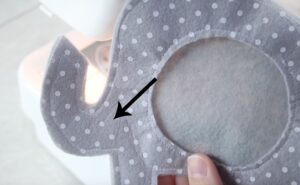
- Sew the vinyl over the window on the back of the elephant. Stitch close to the edge of the circle.Tip: Dip your finger in water and run it over the top of the clear vinyl. Vinyl can stick to the pressure foot on the sewing machineand be tricky to work with, but when it is slightly wet it glides much easier.

- Trim off excess vinyl.Place the back elephant piece behind the front one and pin into place. Stitch around the outer edge, leaving an opening for adding rice and toys.

- Stich from the top of the trunk base to the bottom. This will prevent toys and rice from getting stuck in the trunk.

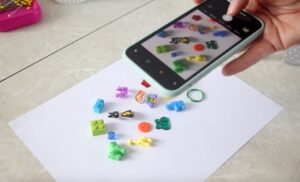
- Lay out the toys and trinkets on your work surface. Snap a photo. Print out the photo and laminate it.

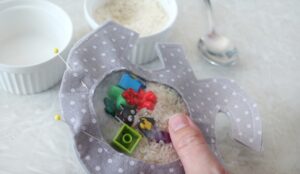
- Fill the elephant with a couple spoonfulls of rice and a handful of small toys and trinkets. Pin the opening closed. Stitch opening closed.

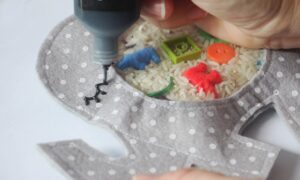
- Add details with fabric paint. Let paint dry.

- Tuck dry erase I-spy bag in your purse or in the car to keep little ones busy!


Faith Pray says
This is brilliant! The dry erasers are a great solution!
Firehousecrafts says
Great tutorial! I think I'm going to make up two of these tomorrow for my boys.
Averyl Minori says
Found you on pintrest. Made your dry erase I-Spy Bag this evening. Your directions were amazingly easy! Thanks so much! I plan to make a few more over the next week to take for my son on our trip across country next month! Thank you!!
pvcmachine says
Great collection of tutorials. Keep it up...PVC Windows
Joan J says
Just wanted you to know I made one of these yesterday. Your tutorial is excellent and the entire project (minus the time it took me to hunt down the paper for my laminator.. argh!) took about 30 minutes. My husband said my 5 yr old grandson would never play with it because it couldn't compare to a Nintendo DS. He was wrong. My grandson thoroughly enjoyed it. Photos on my blog. Thanks so much!
http://joanoh2.blogspot.com
How to be a Housewife
Ani says
That's an awesome idea. I'm looking for great busy activities for a friend who just had her fourth child. I figure a little occupation for her other little ones will be quite helpful. Thanks so much for such a great idea!
Joan J says
What a great idea (and tutorial)! Thanks so much for this. My 5 yr old grandson is about to take his first airplane trip, and this is going to be a great present for him to take along. I've been wanting to do an I Spy bag, but thought I needed little white plastic beads. But rice! Who knew?! I'll be making one of these (or two or three) tomorrow.
Tanoi says
I just made this and it was so quick and easy! I used regular fabric since the fleece options are limited and only available in solid colors here. It still worked great. I'm going to make these for all of the toddlers for Christmas this year. (Brandy, I'll post a pic on CC for you to look at. *smile*)
Marianne says
What a great idea for our trip to Norway this summer. My 2 year old will love this.
Emily says
I've seen these around but love your version with the pockets and laminating the picture! My 3-year-old will love this for our long car rides this summer!
[email protected]
Rachel Harwood says
I just LOVE these! Thanks for sharing your tutorial! These are going on the to-do list 🙂
Love to have you link up to my new link party, For the Kids Fridays!
http://sunscholars.blogspot.com
:)rachel
Laura Emmons says
Can't wait to make this for my Grandson. Thanks
Laura
http://lauraemmons.blogspot.com/
Jan says
Hi! I found you on Craft-o-Maniac's blog hop and am now following. You have soooo many projects I'm interested in. The wooden peg matching dolls and the blue iced shower cupcakes immediately caught my eye. I'm looking forward to reading more.
:)Jan at Jewelry4Change
http://www.jewelry4change.blogspot.com
Jenn says
This is going on my to-do list for sure! Thanks for the great tutorial!