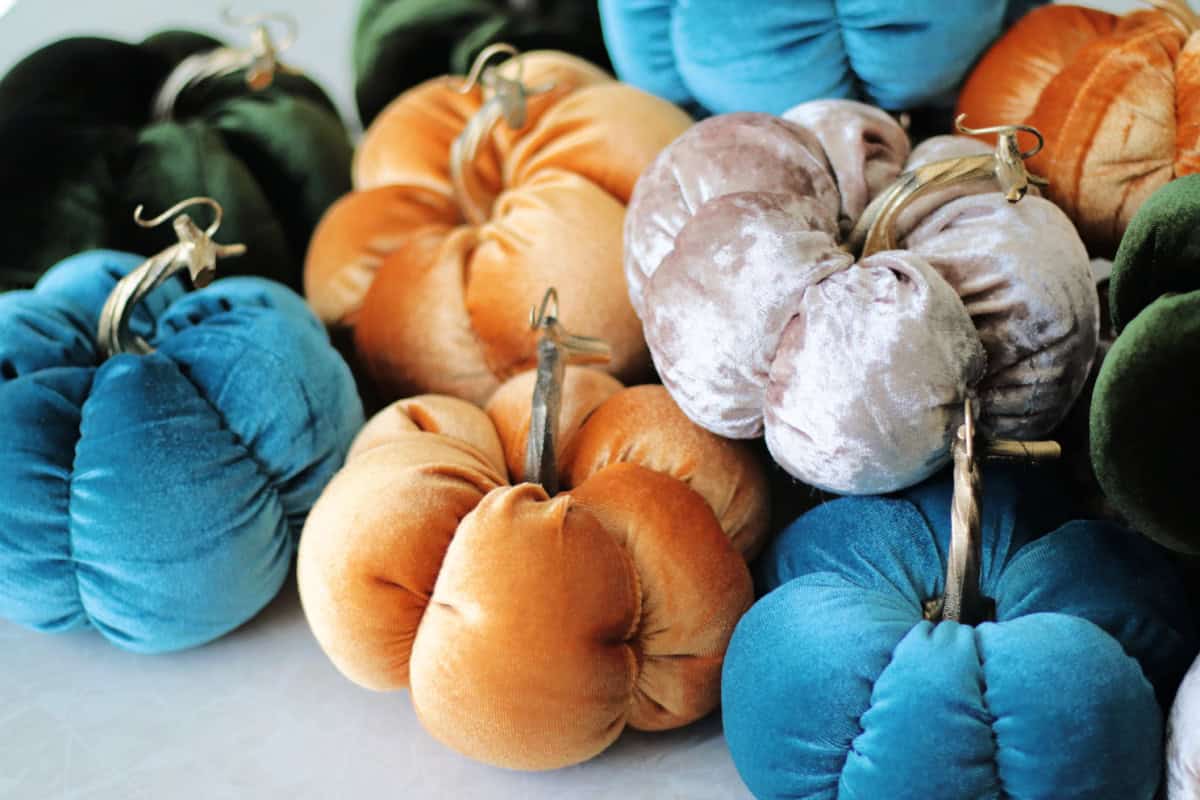
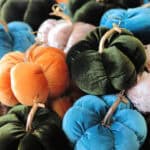
These beautiful DIY velvet pumpkins are easy to make and are perfect for fall. Make them in any size you'd like with our easy-to-follow tutorial.
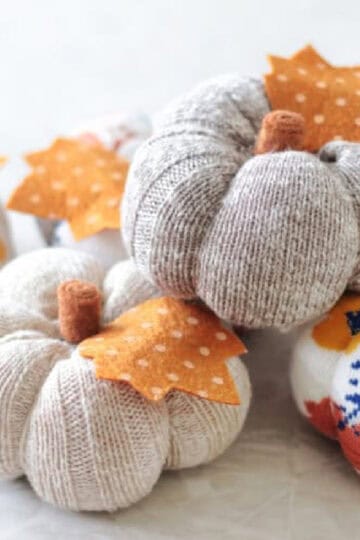
You might also like our 10-minute sock pumpkins, our easy fabric pumpkins, or our Target dollar spot pumpkin wreath tutorial!
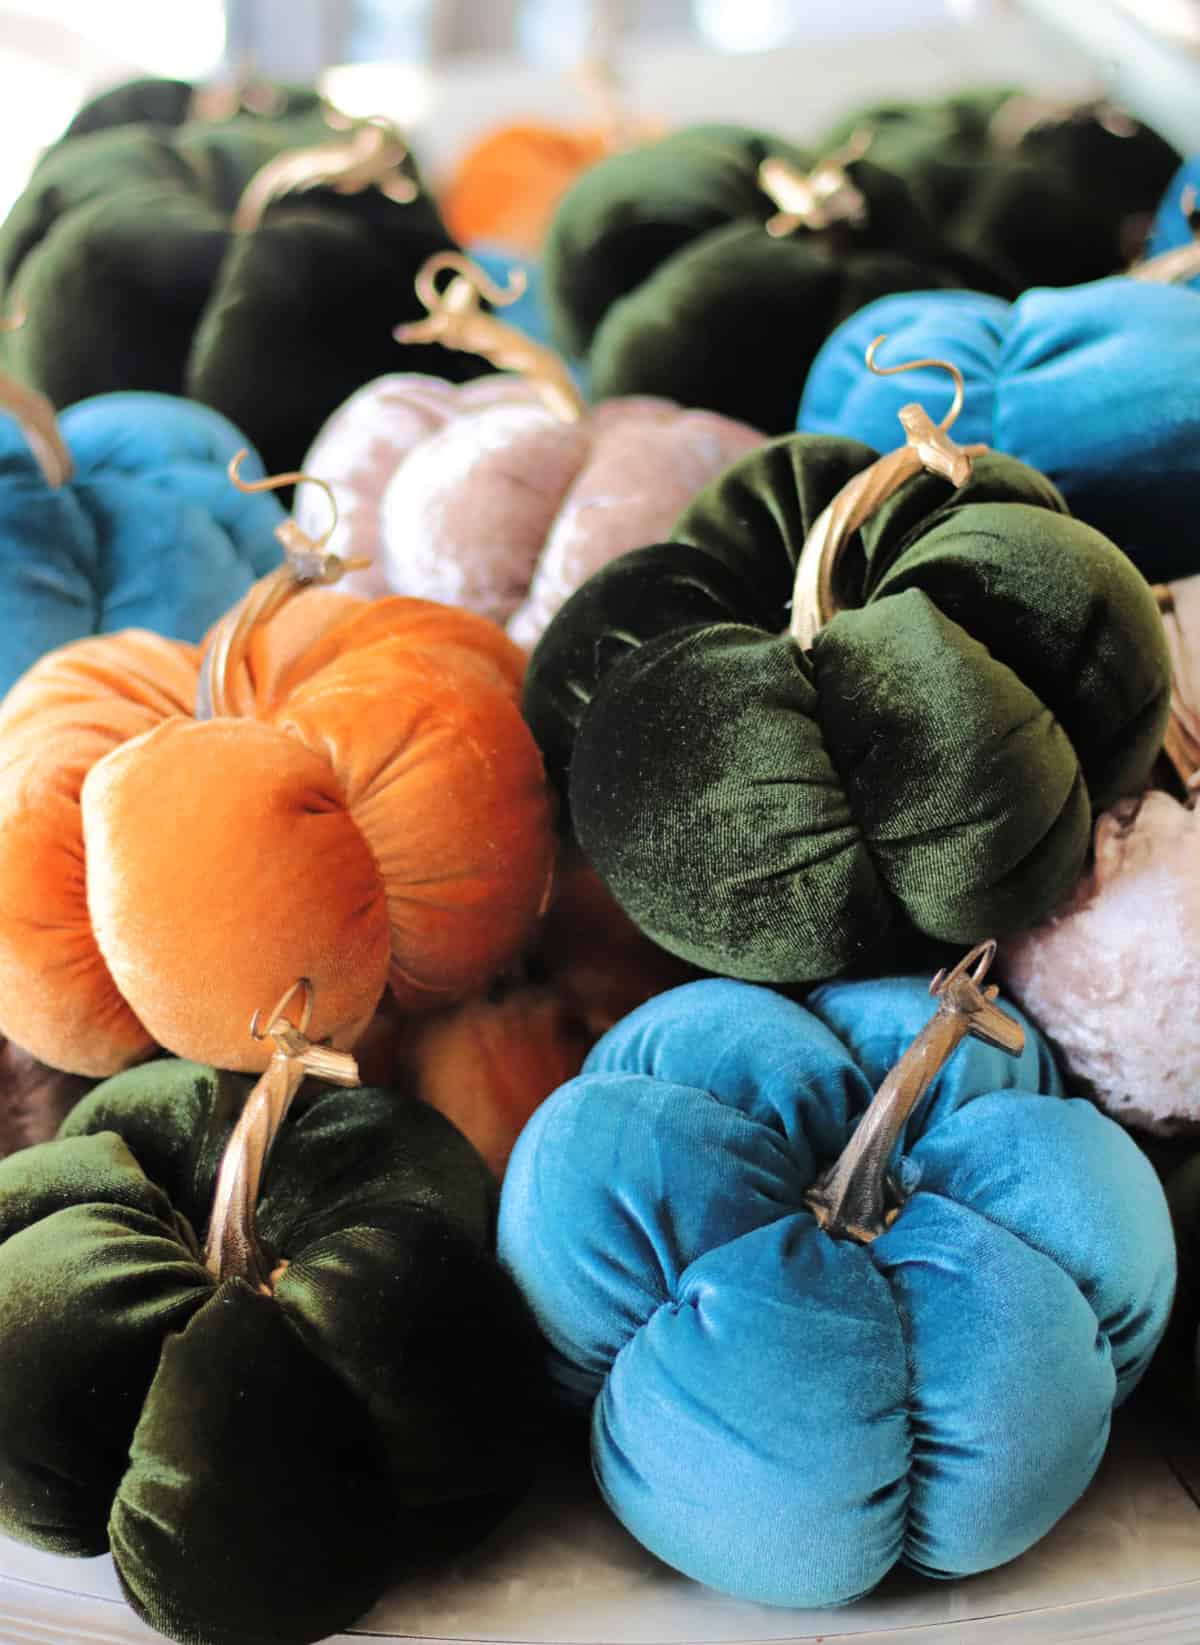
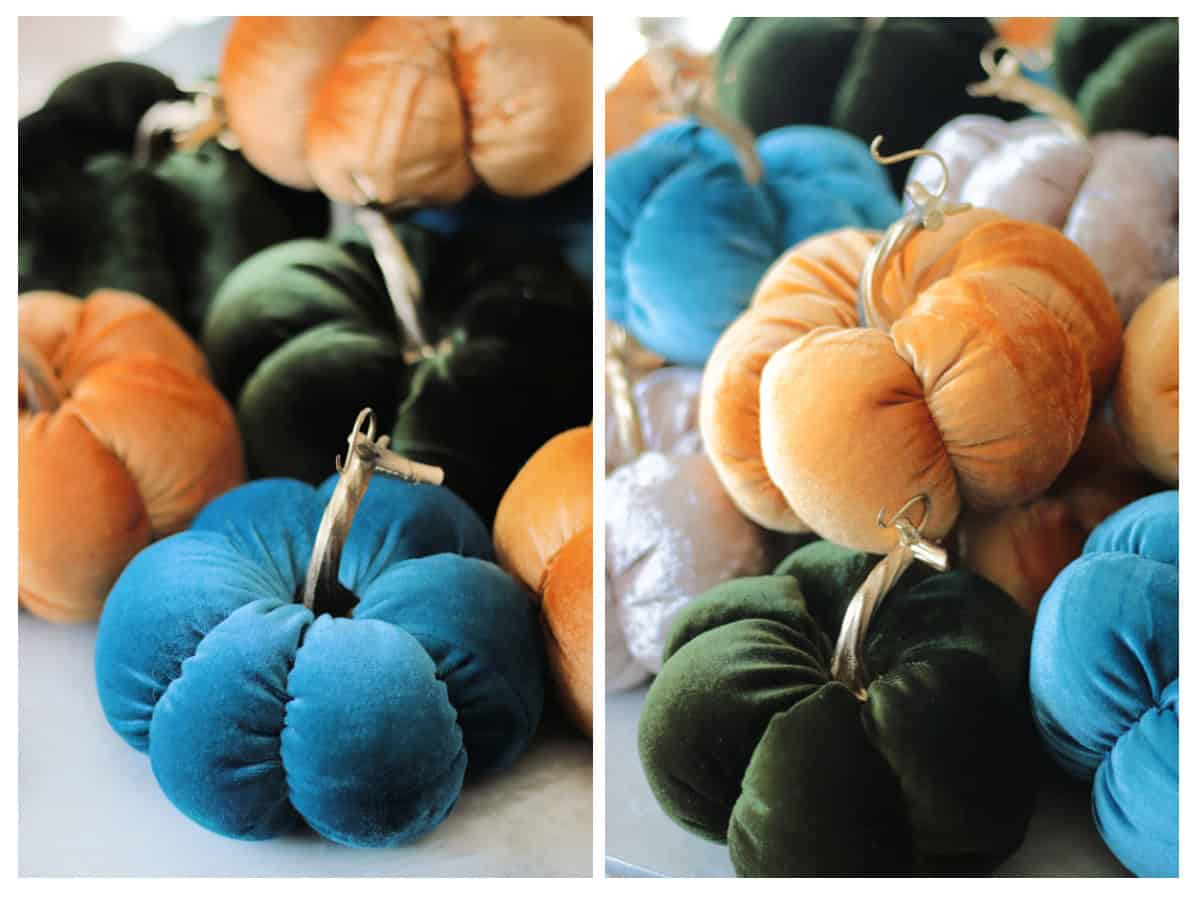
I love decorating with pumpkins in the fall and used my fabric pumpkins tutorial to come up with a sophisticated velvet version this year. These velvet pumpkins feel so luxurious, you'll want to make an entire pumpkin patch of them to decorate your home!
Why I Love This Project
- Easy to make. Velvet pumpkins require a few seams of sewing, but they are simple stitches that can be done by hand or by using a sewing machine (or a combination of both, which is my preferred method).
- Comes in many colors. Stretch velvet comes in so many beautiful colors. I especially like jewel tones. It had to show restraint, only purchasing three colors, I wanted them all!
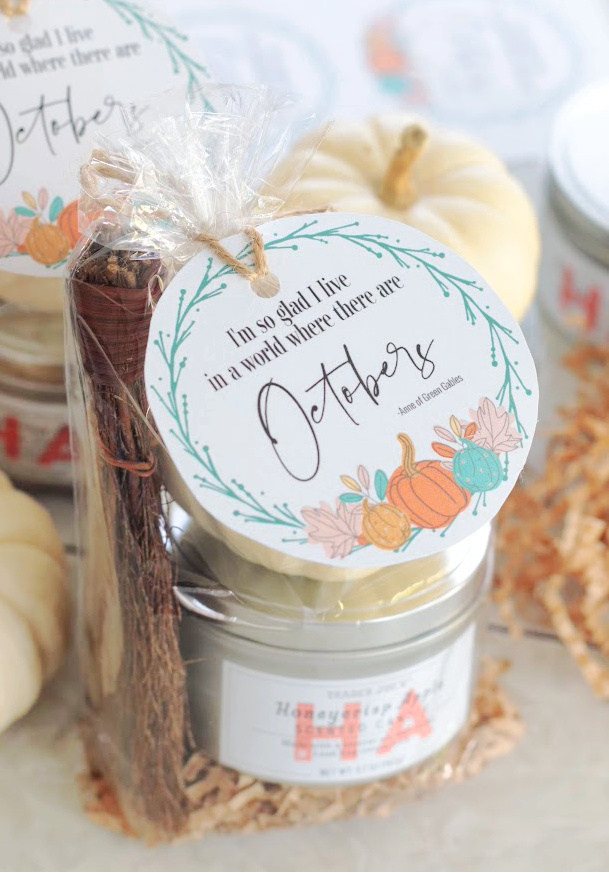
- Easy gift idea. These would make great teacher gifts with one of my printable fall gift tags! My favorite one says, “I’m so glad I live in a world where there are Octobers.”
Jump to:
Tips and Tricks
- How to make velvet pumpkins in a variety of sizes: This tutorial makes it easy to create small, medium, and large pumpkins. Take the width measurement and double it for the length measurement. Here are some example measurements below. The pumpkins shown in the photos are made with a 9" x 18" rectangle of fabric. This will create a 6" medium-sized pumpkin.
- Tip for making large pumpkins: It's easier to pull the needle through small and medium-sized pumpkins; however, you can definitely make large pumpkins. Just use a longer needle!
- Get creative with the pumpkin stems: I found faux pumpkin stems on Amazon and gave them a quick coat of gold spray paint. This is a simple and elegant detail to add to the velvet pumpkins. For my fabric pumpkins, I created stems out of felt. Super simple and easy. Both methods work well; it just depends on what you're looking for. You can also dry out mini pumpkin stems and glue them on to faux pumpkins like these.
Velvet Pumpkin Supplies
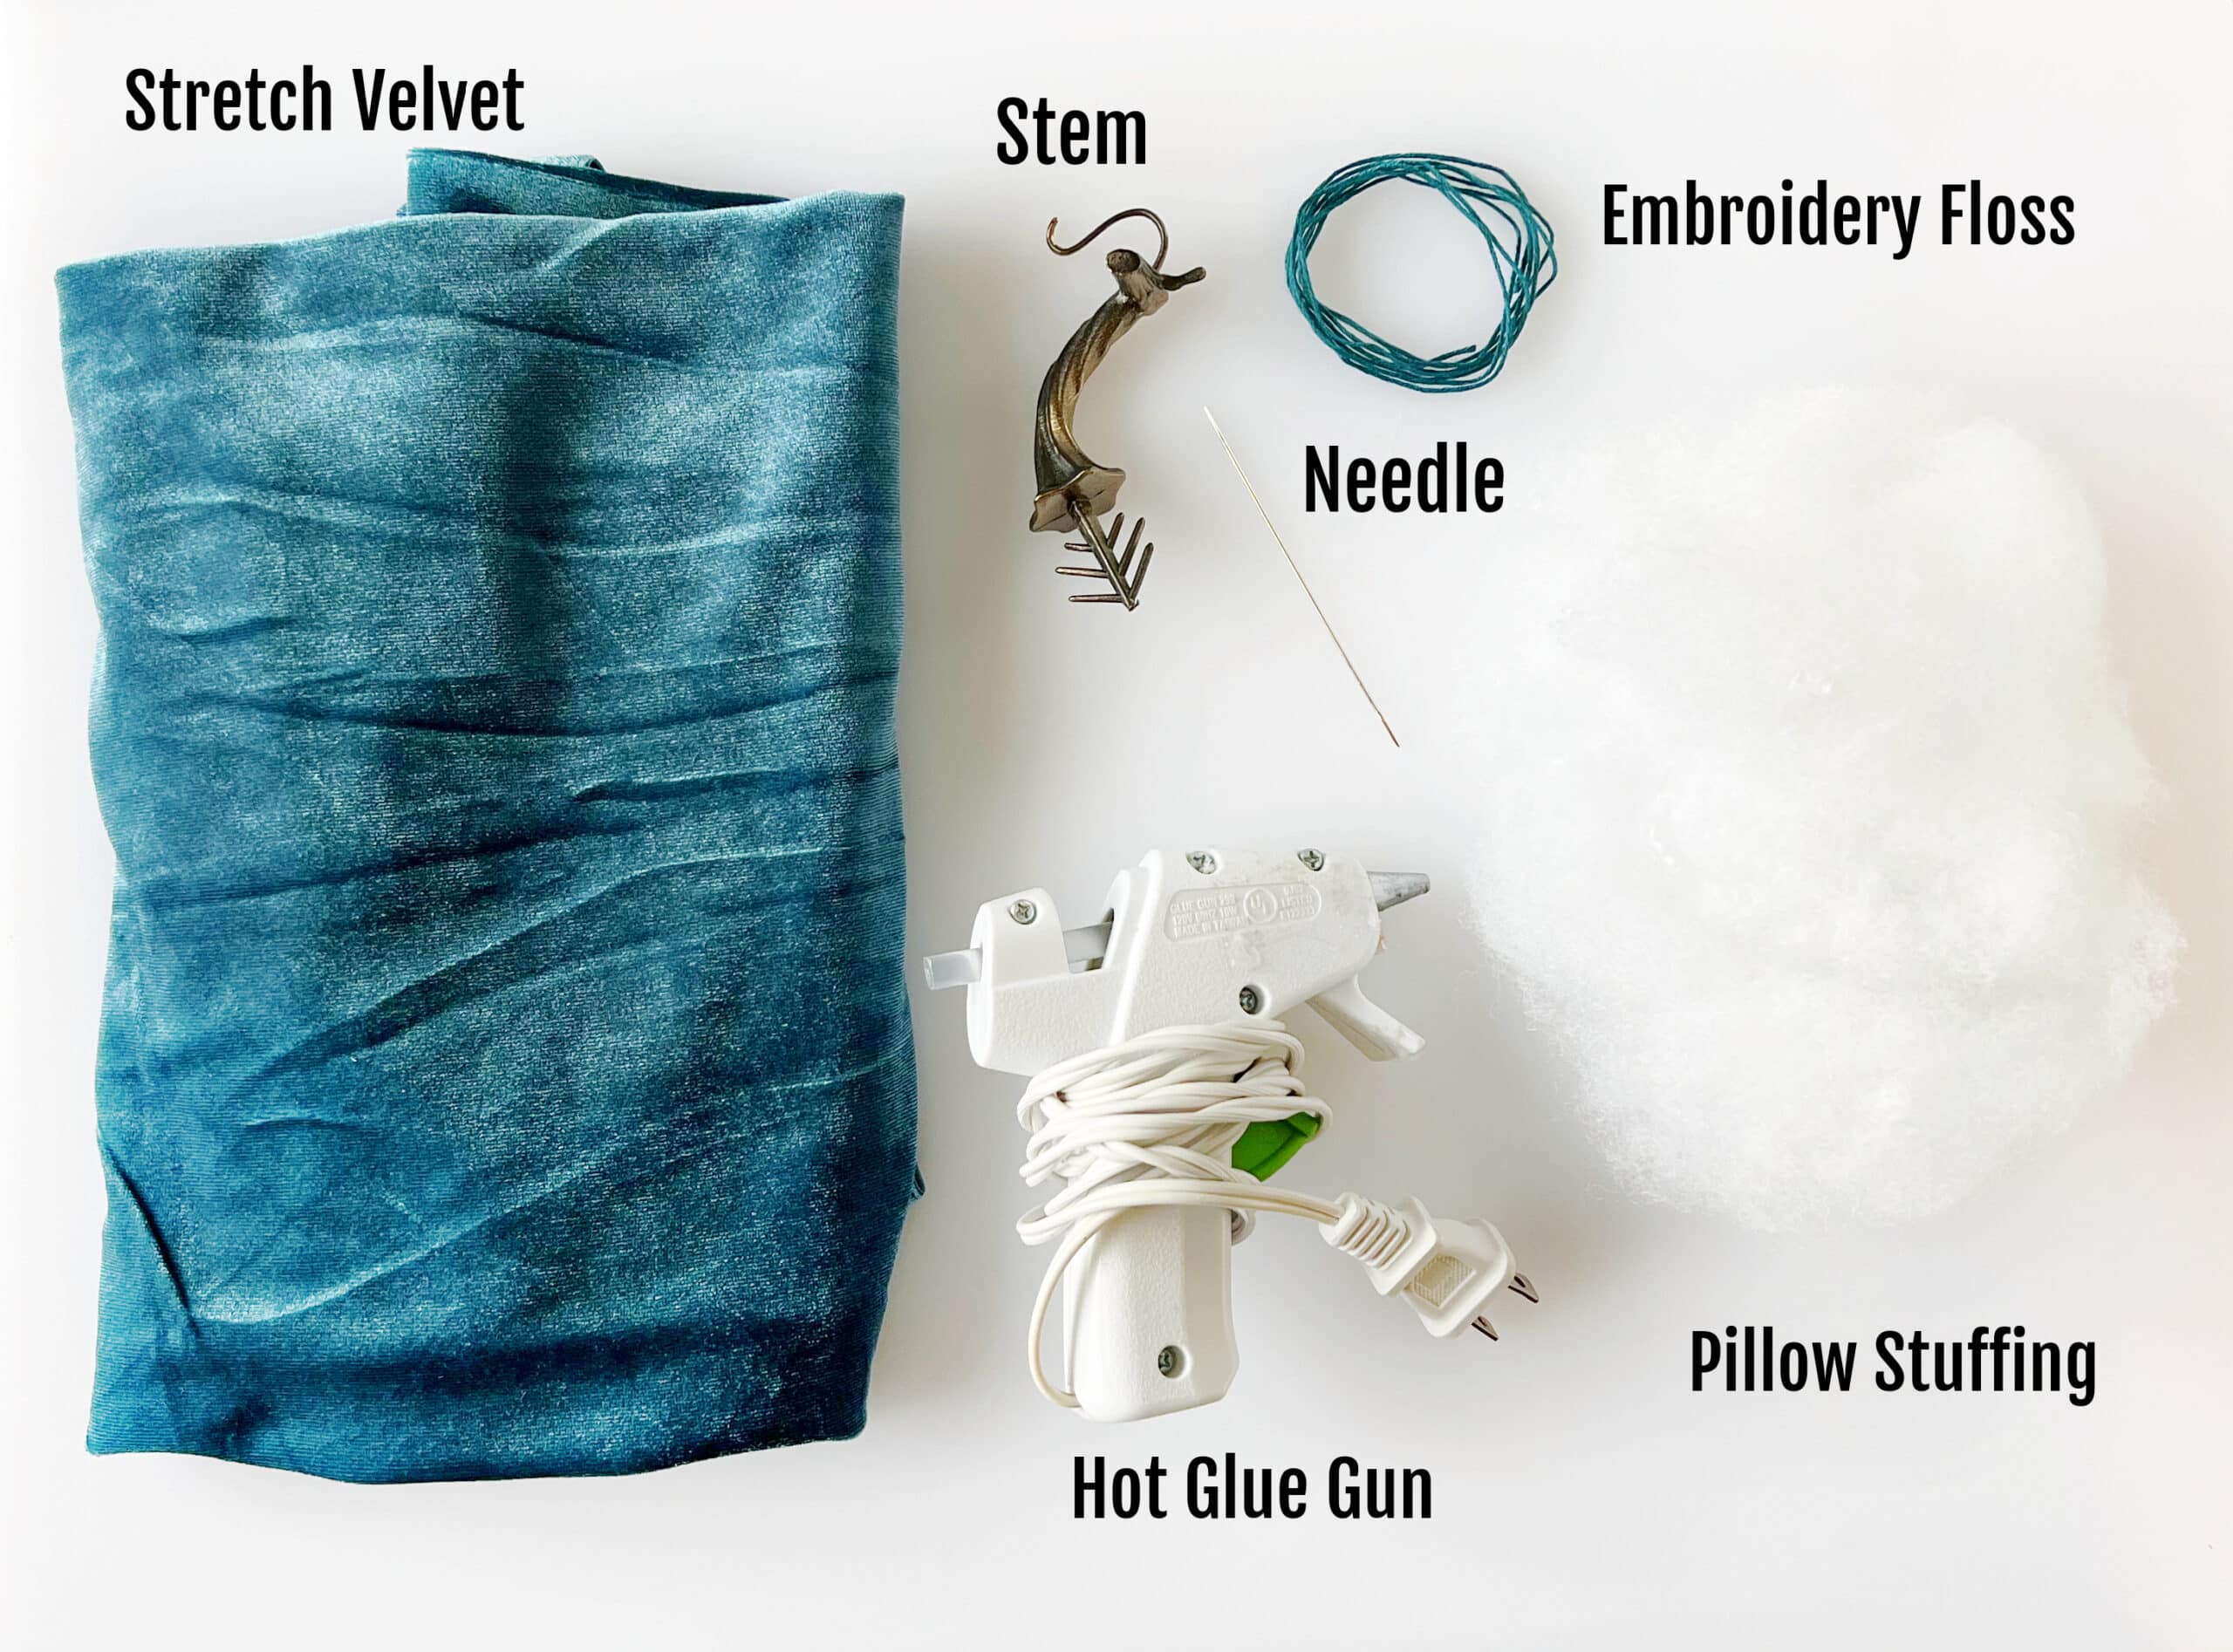
- Stretch Velvet Fabric: I purchased my stretch velvet on Amazon. You can buy it in ½ yard or 1-yard increments, depending on the seller. Each yard will make 12 medium-sized pumpkins!
- Faux Pumpkin Stems
- Scissors
- Embroidery Thread
- Sewing Needle: To do the gathering stitches.
- Stuffing: 2 large handfuls per pumpkin.
- Long Needle (3 ½"): This is a game-changer, making it easier to poke through the center of the pumpkin to create its curved shape. If you don't have these, you can use a regular needle and a small pair of pliers. I give tips for this in the instructions.
- Sewing Machine/Thread
- Measuring Tape
- Small Pliers Optional, but if you don't have long needles, these help pull the needle through the thickness of the pumpkin)
- Hot Glue/Glue
Fabric Cutting Guide
- Small pumpkin (6" x 12" rectangle of fabric)
- Medium pumpkin (9" x 18" rectangle of fabric)
- Large pumpkin (12" x 24" rectangle of fabric)
If making more miniature pumpkins, consider buying a variety pack of pumpkin stems with varying sizes. For the medium and large pumpkins, the stems that I used work well.
How To Make Velvet Pumpkins
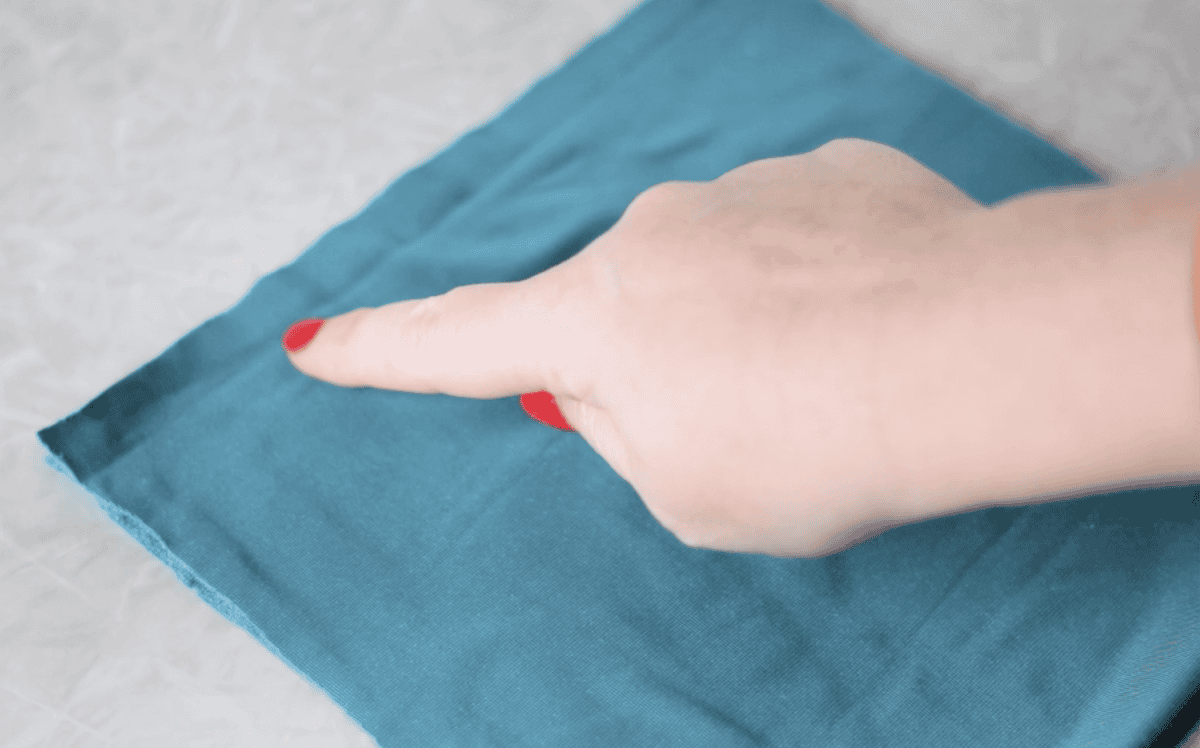
Step 1: Fold the velvet in half, width-wise, with the right sides together.
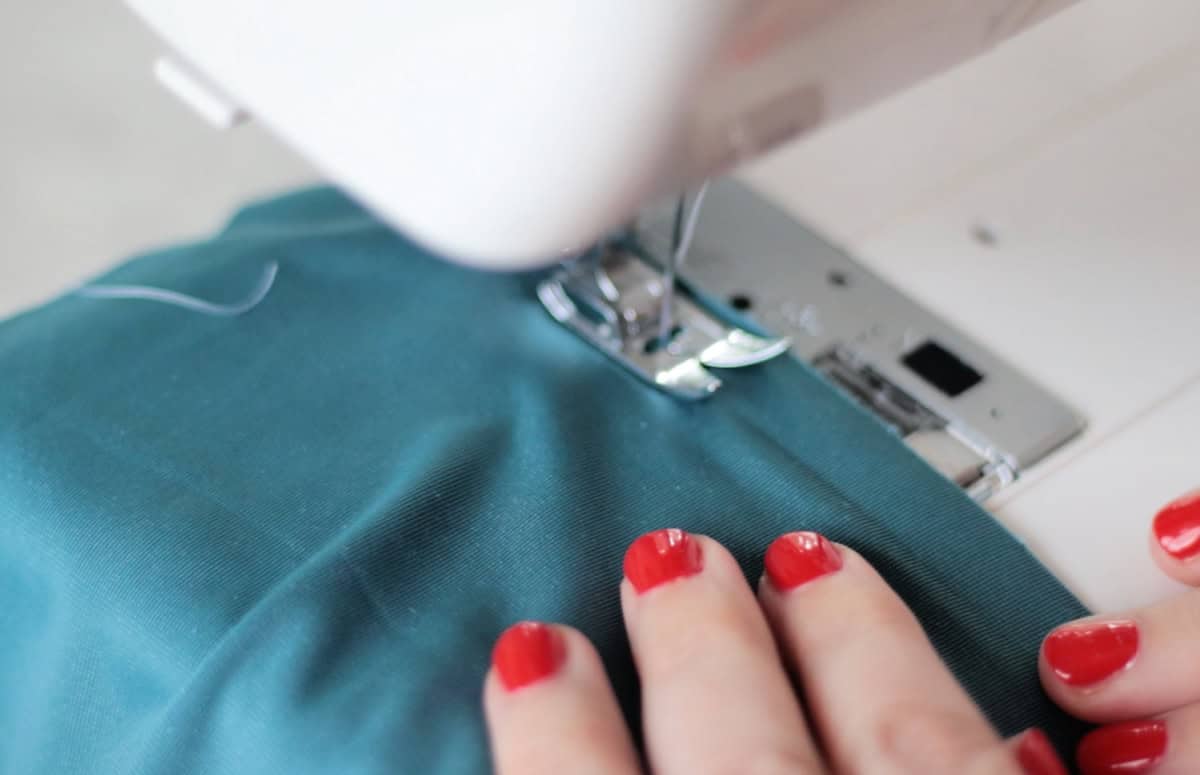
Step 2: Sew along the seam using a ⅜" seam allowance.
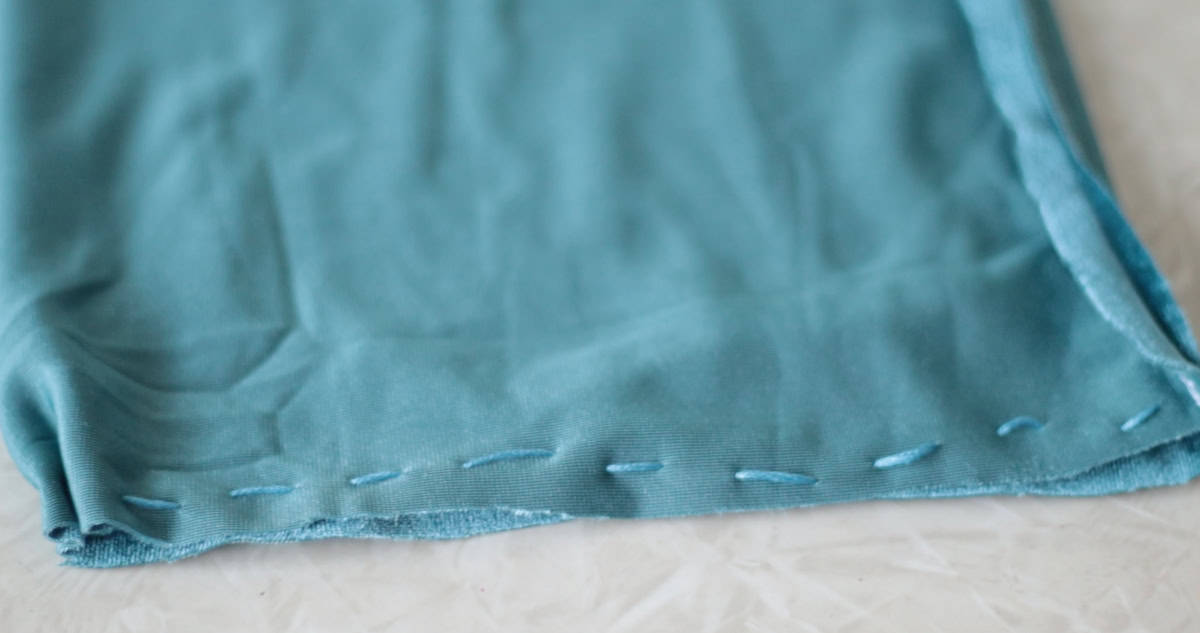
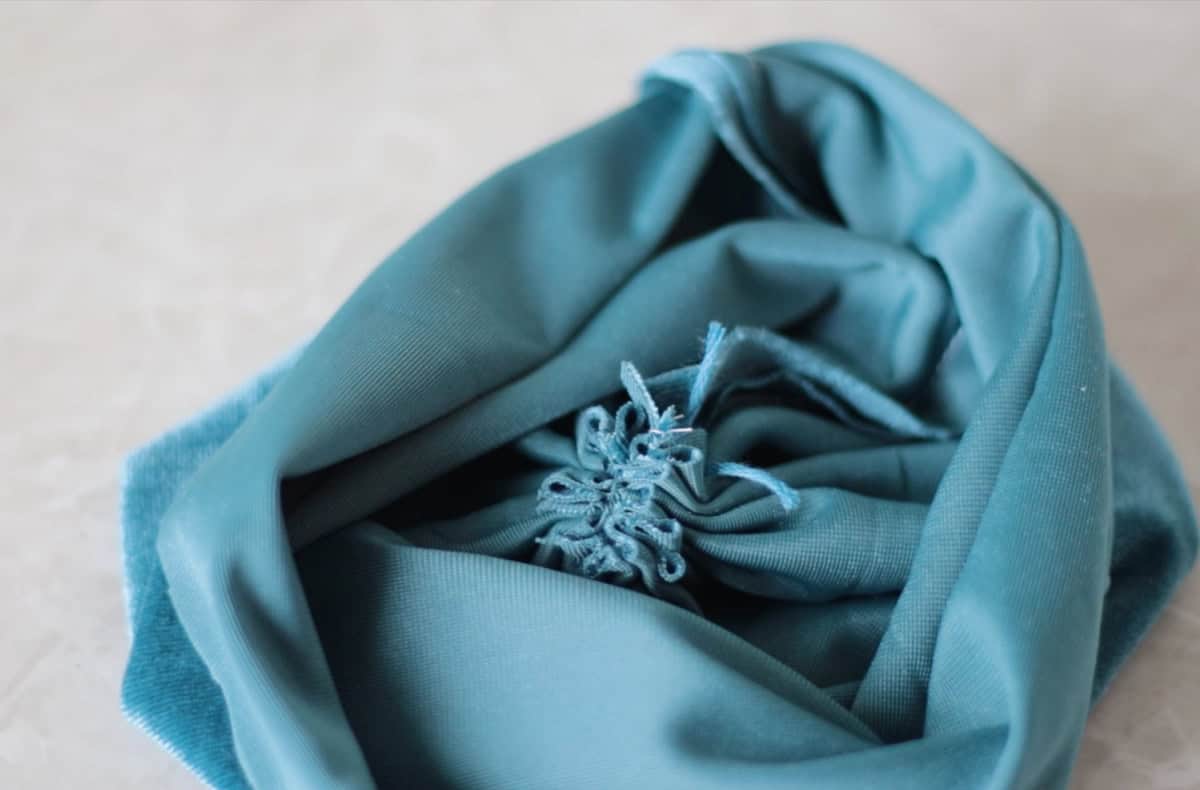
Step 3: You should now have a tube of velvet. Thread a long piece of embroidery thread through a needle. Stitch a gathering stitch around the bottom opening of the pumpkin.*
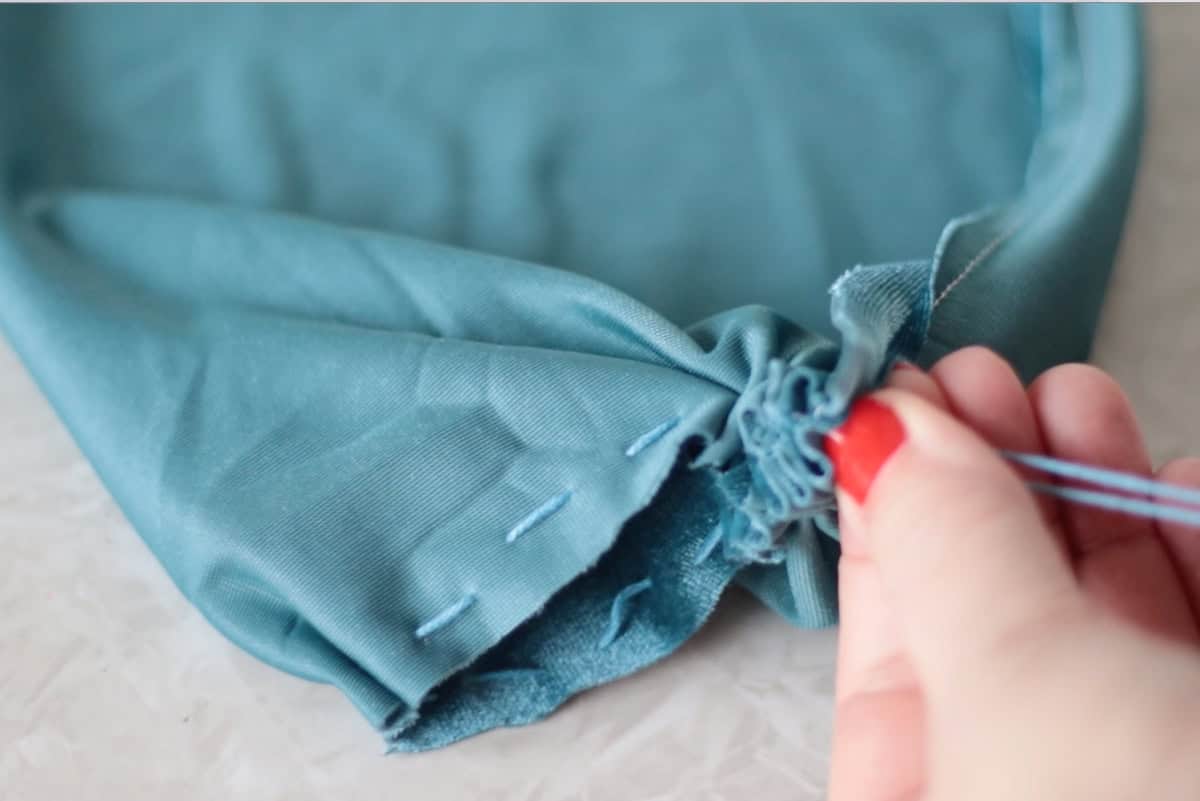
Step 4: Pull the end strings tight to close off the bottom of the pumpkin.
*To gather, you'll create a wide running stitch along the top of the opening, about ¼" away from the edge. Leave the ends of the string long so that you can pull them to gather the fabric later.
Step 5: Tie the strings in a double knot and trim excess. Save the needle and thread for a later step.
Step 6: Turn the pumpkin right-side out.
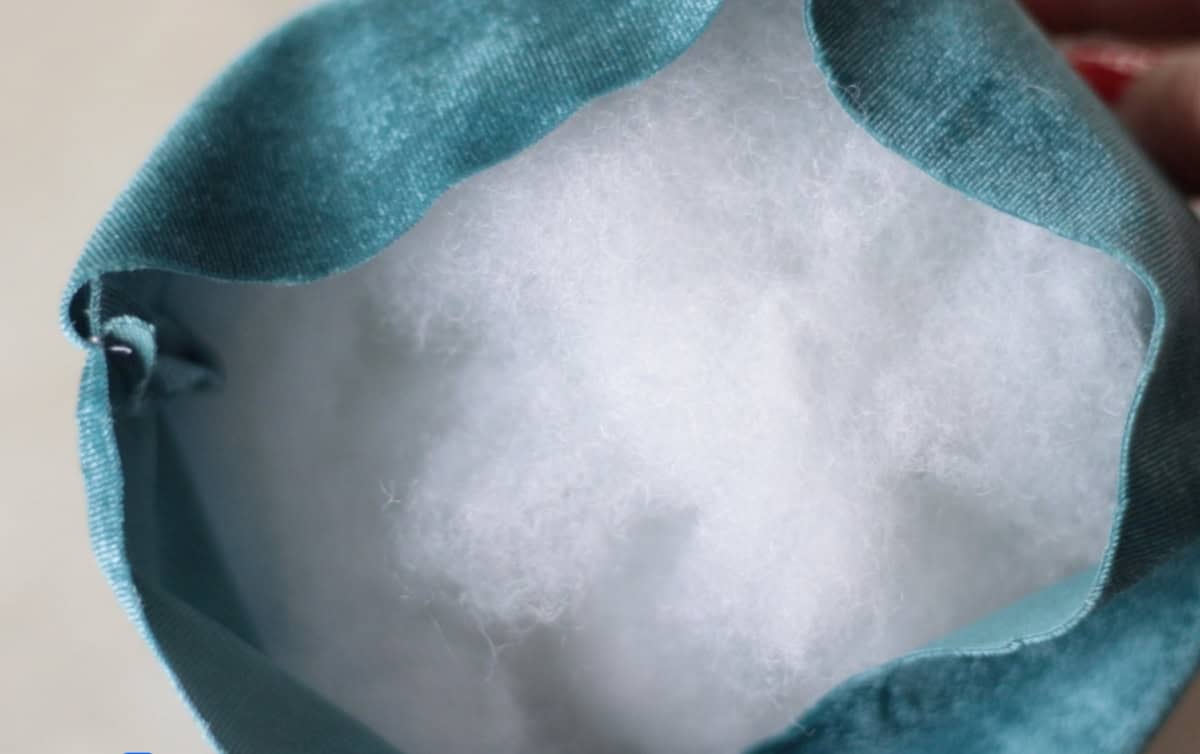
Step 7: Fill the pumpkin with stuffing.
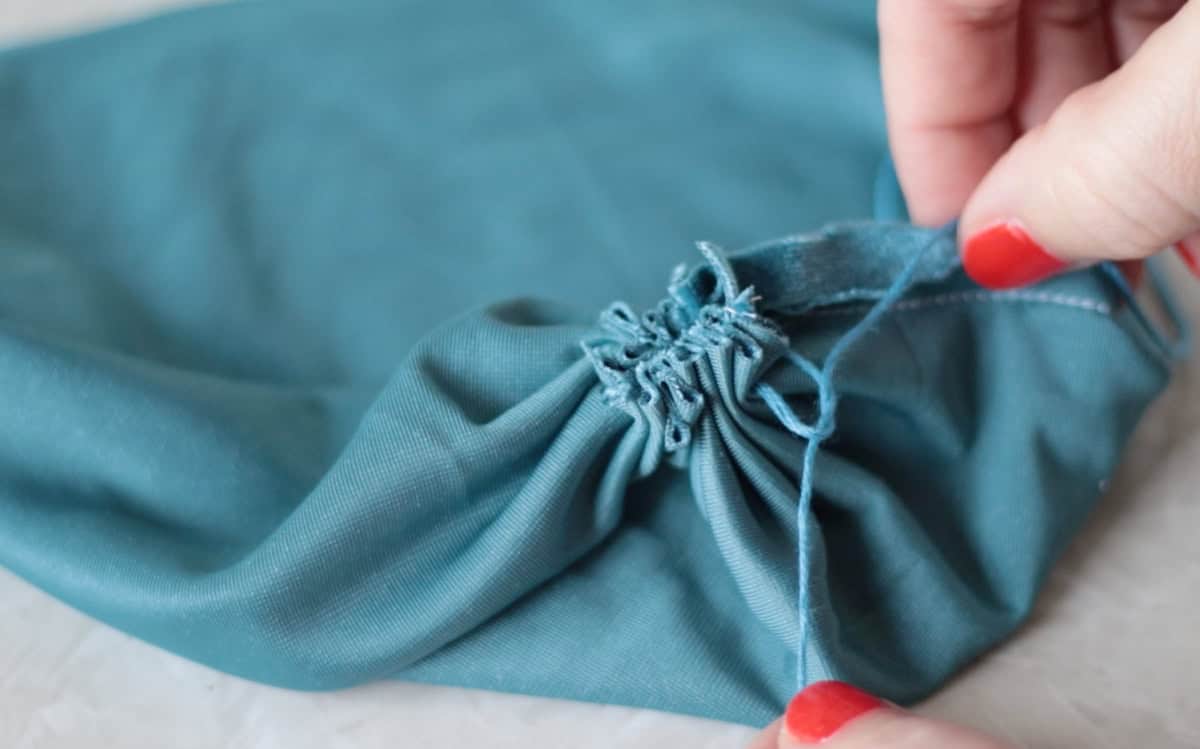
Step 8: Grab your needle and thread and stitch a gathering stitch around the top opening of the pumpkin.

Step 9: Pull the end strings tight to close off the top of the pumpkin.
Step 10: Tie strings in a double knot and trim excess.
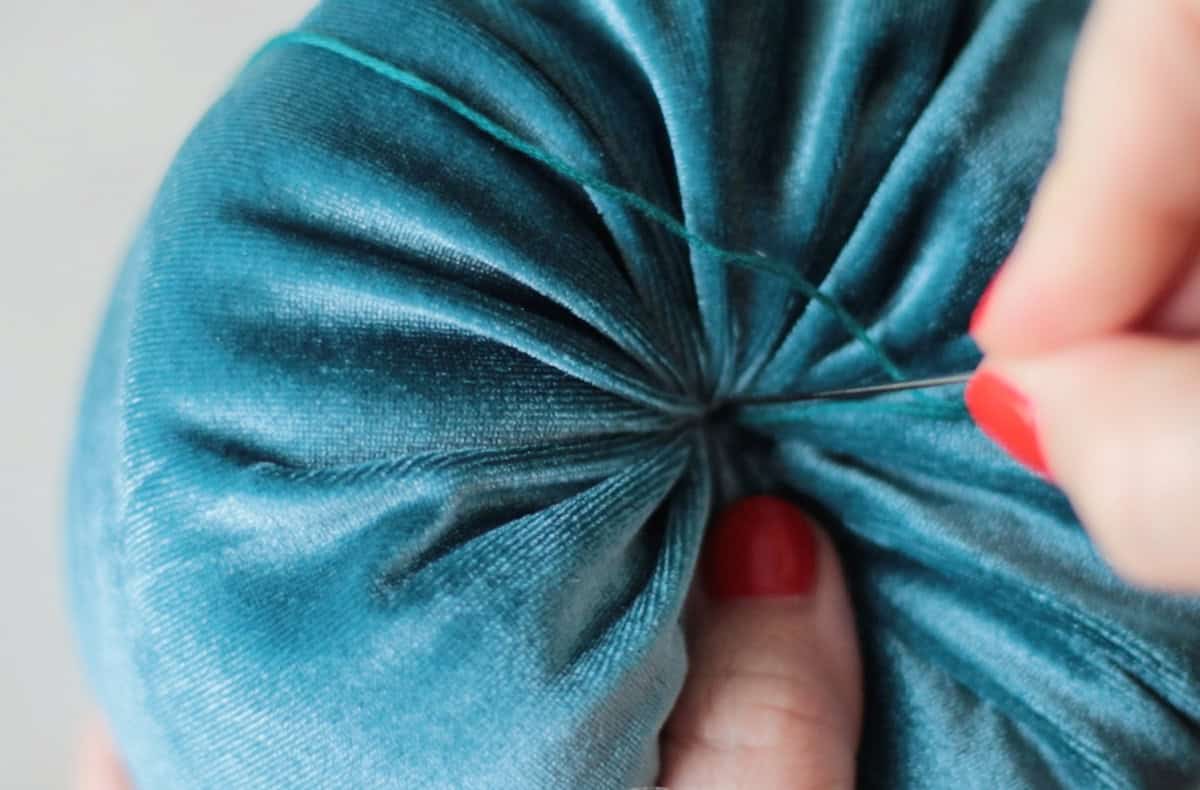
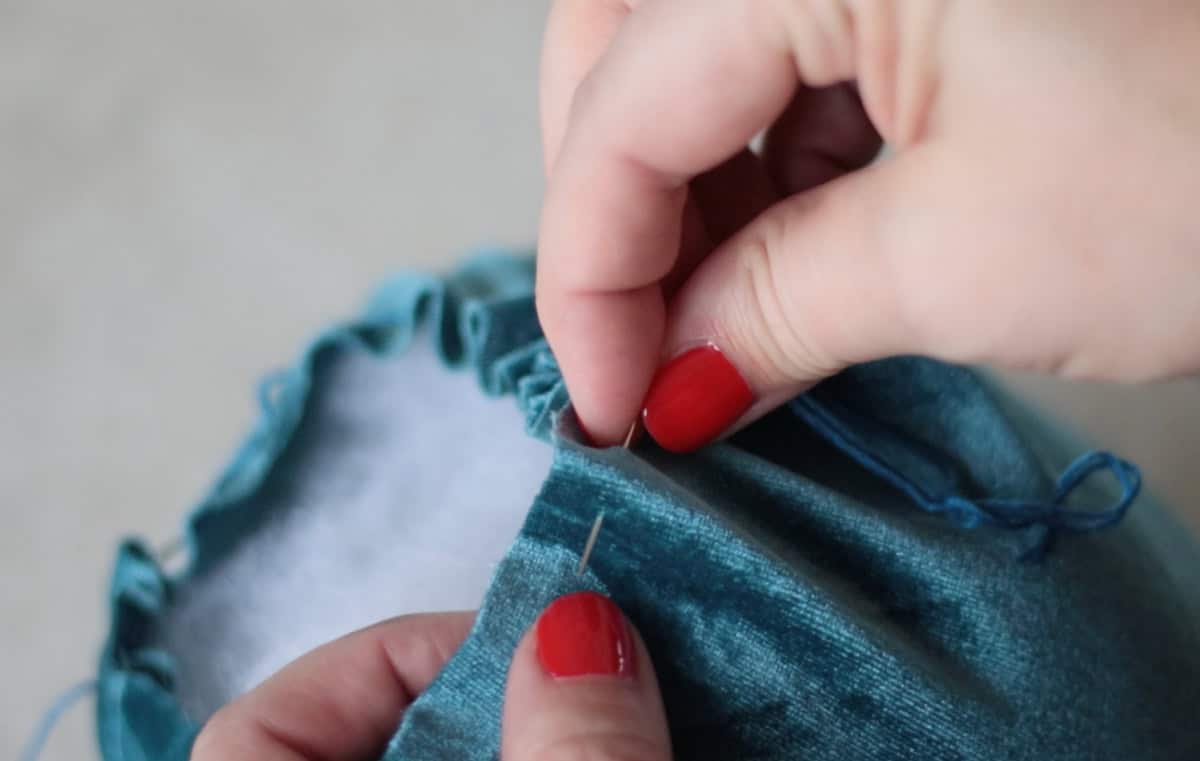
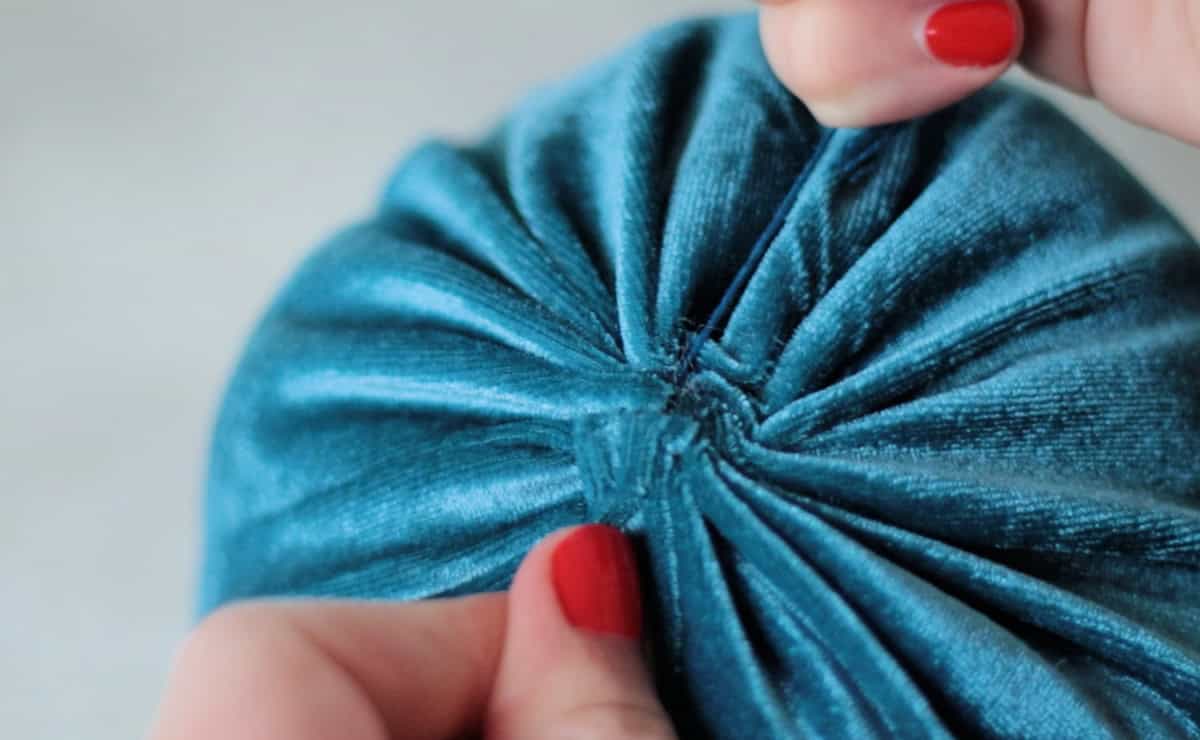
Step 11: Cut a strand of embroidery thread that is 48" long. Thread it through a long needle and tie a knot at the end. Press the pumpkin down to squish it down a bit (this makes it easier to insert the needle). Poke the needle through the center of the pumpkin and out the back. Pull until the knot hits. Bring the needle around to the top again, insert through the center and out the back again, then pull the thread TIGHT. You'll notice that you've created one of the pumpkin grooves on the side of the pumpkin.
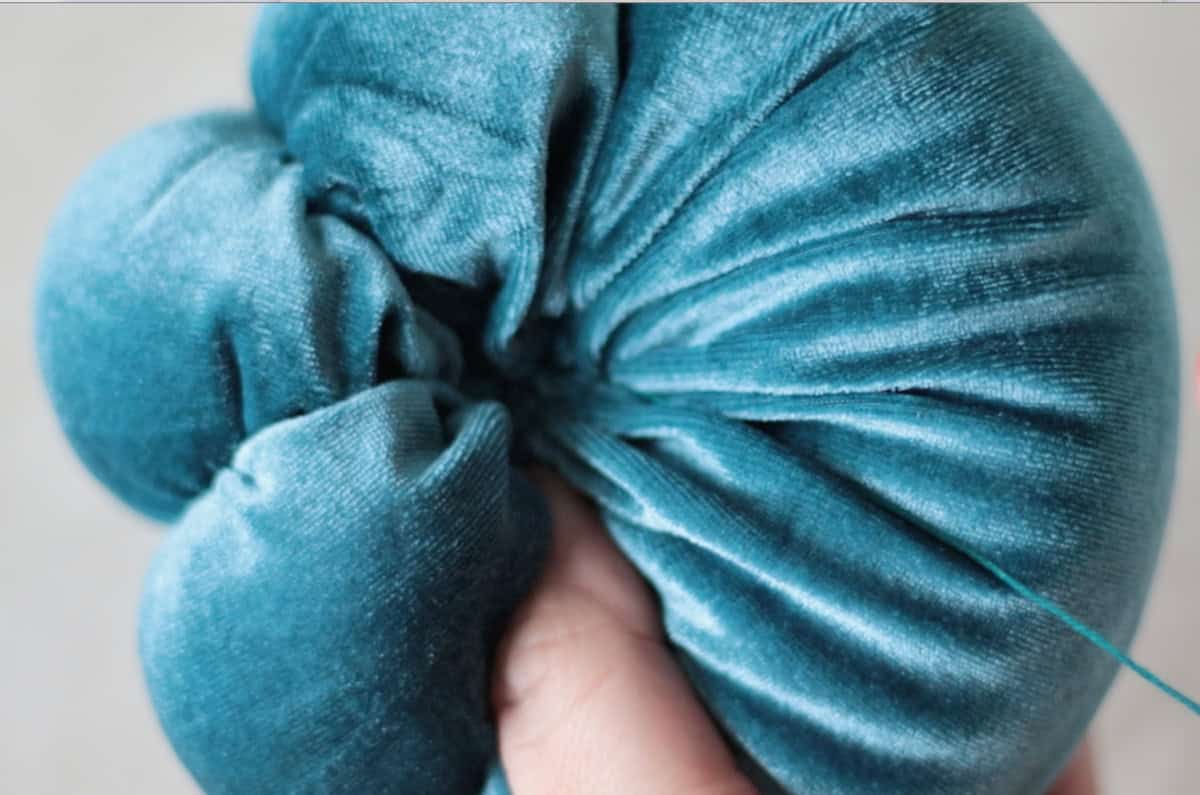
Step 12: Continue this process until you have 6 sections (dimples). It can sometimes be a little difficult to pull the needle through the stuffing. A small pair of pliers can be helpful in grabbing the needle.*
*I highly recommend referring to my step-by-step video in the "how to card" at the end of the post for a great visual on how to create the pumpkin sections/shape using the thread.
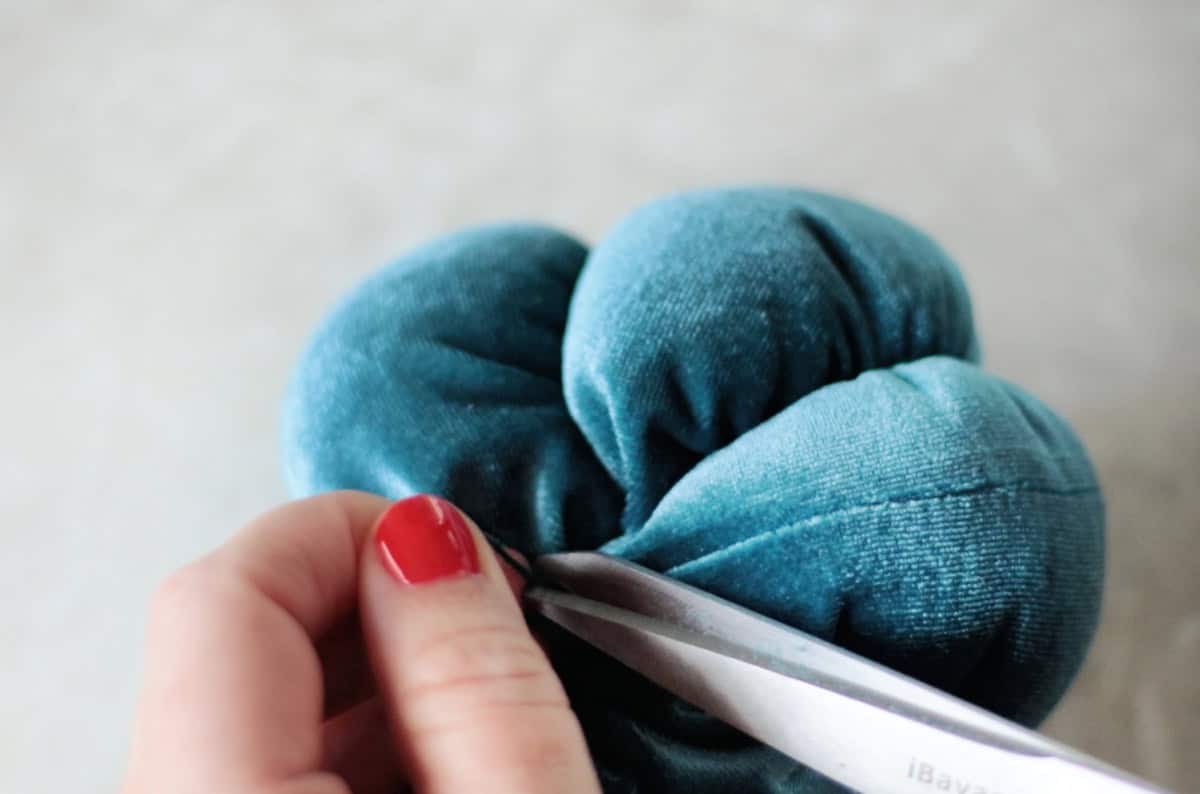
Step 13: Tie a couple of knots close to the pumpkin, then trim the thread with scissors.
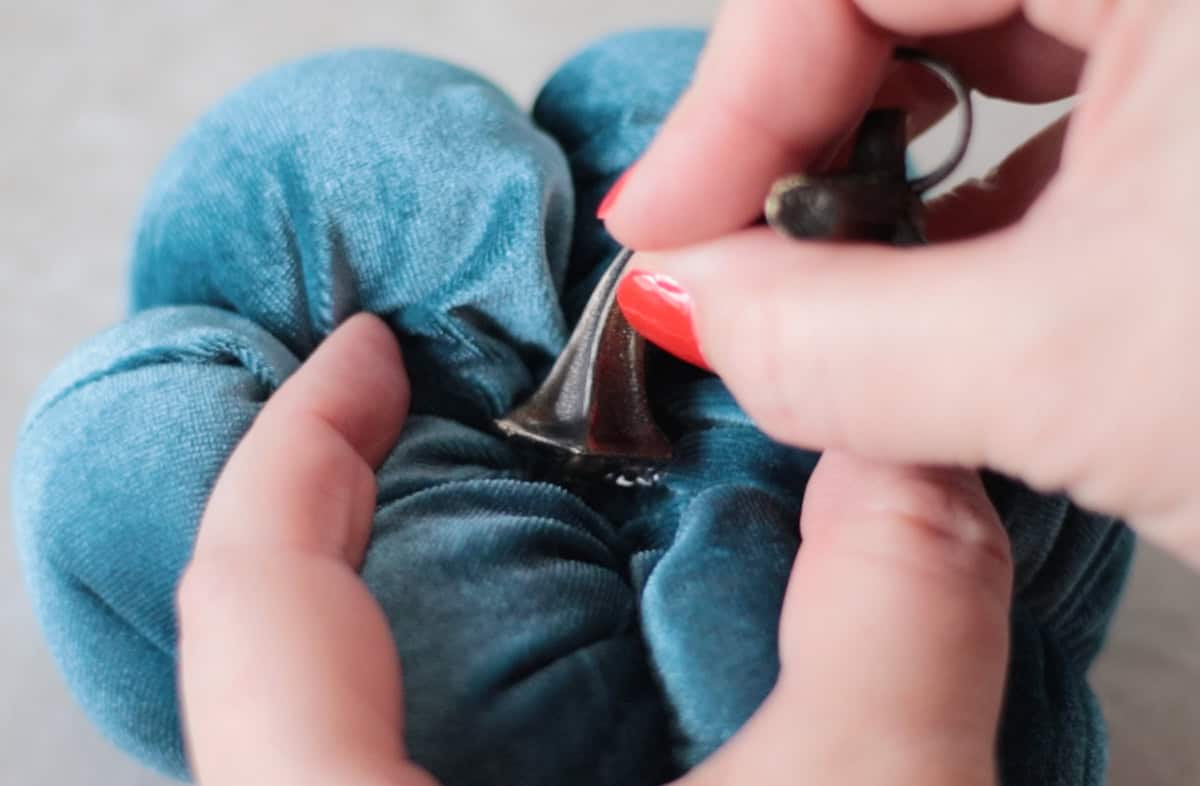
Step 14: Glue the stem to the top of the pumpkin.
Note: The stems come black. I sprayed them with a light coat of gold spray paint, which antiqued them a bit. It was an easy upgrade!
DIY Velvet Pumpkin FAQs
The easiest velvet to work with is stretch velvet. It's soft and shapes easily, and it's also easy to sew by hand or by machine. You can find it on Amazon in over a dozen gorgeous colors.
My go-to stuffing is polyester fiberfill, which is the same stuffing found in throw pillows. You can also use scrap fabric or anything soft to fill the pumpkins.
This tutorial makes it easy to create small, medium, and large pumpkins. Take the width measurement and double it for the length measurement. Here are some example measurements below. The pumpkins shown in the photos are made with a 9" x 18" rectangle of fabric (medium-sized pumpkins).
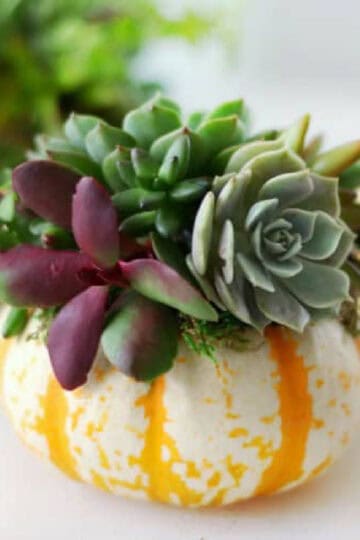
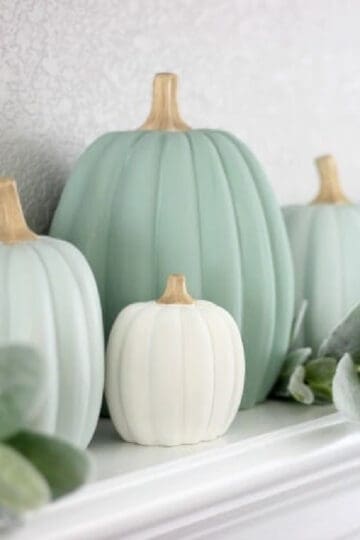
More Pumpkin Crafts To Make
MADE THIS CRAFT AND LOVED IT? 💛 Please leave a STAR rating and COMMENT below! Post it to Facebook or Pinterest to easily share with friends!
Easy Velvet Pumpkins Tutorial
Equipment
- sewing machine
- measuring tape
- scissors
- long sewing needle
- hot glue gun/glue
- small pliers (optional)
Materials
- stretch velvet
- stuffing (poly-fil)
- embroidery thread
- faux pumpkin stem
Instructions
- You can make any size of pumpkin that you'd like by doubling the width measurement. For example, my fabric was 9" wide and 18" long. CUTTING GUIDECut fabric into a rectangle that measures 9" x 18".
- Fold the velvet in half with the right sides together.
- Sew along the seam using a ⅜" seam allowance.
- You should now have a tube of velvet.
- Thread a long piece of embroidery thread through a needle.Stitch a gathering stitch around the bottom opening of the pumpkin.Note: To gather, you'll create a wide running stitch along the top of the opening, about ¼" away from the edge. Leave the ends of the string long so that you can pull them to gather the fabric later.
- Pull the end strings tight to close off the bottom of the pumpkin.
- Tie the strings in a double knot and trim excess. Save the needle and thread for a later step.
- Turn the pumpkin right-side out.
- Fill the pumpkin with stuffing.
- Grab your needle and thread and stitch a gathering stitch around the top opening of the pumpkin.
- Pull the end strings tight to close off the top of the pumpkin.
- Tie strings in a double knot and trim excess.
- Cut a strand of embroidery thread that is 48" long. Thread it through a long needle and tie a knot at the end.Press the pumpkin down to squish it a bit (this makes it easier to insert the needle). Poke the needle through the center of the pumpkin and out the back. Pull until the knot hits. Bring the needle around to the top again, insert through the center and out the back again, then pull the thread TIGHT. You'll notice that you've created one of the pumpkin grooves on the side of the pumpkin.
- Continue this process until you have 6 sections (dimples). If you don't use a long enough needle, it can be a little tricky to pull the needle through the stuffing. In this case, a small pair of pliers can help grab the needle.NOTE: I highly recommend referring to my step-by-step video for a great visual on how to create the pumpkin sections/shape using the thread.
- Hot glue a faux pumpkin stem to the top of the pumpkin.
Video
Notes
- 6" x 12" (small pumpkin)
- 8" x 16" (medium pumpkin)
- 10" x 20" (large pumpkin)

Brandy says
These are so fun to make, I ended up making two dozen this past week to give as gifts to teachers, friends and the ladies at church!