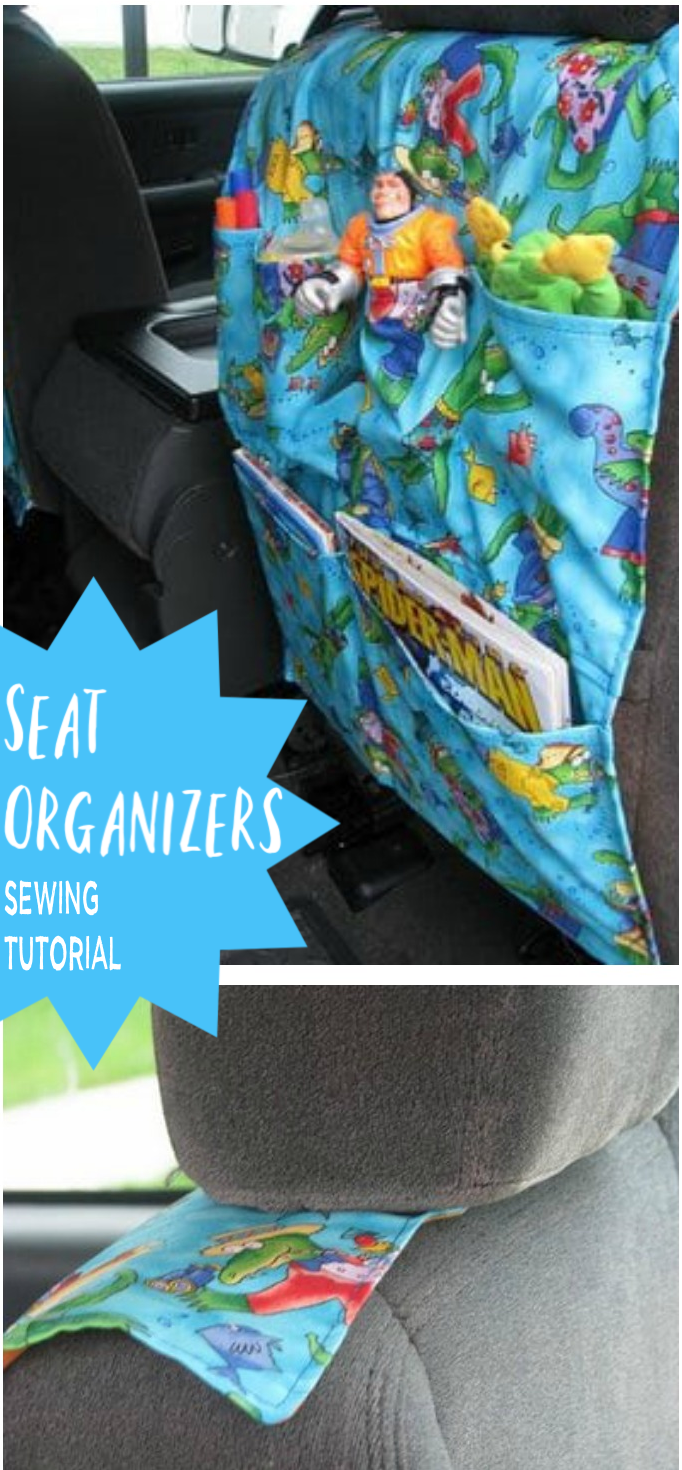
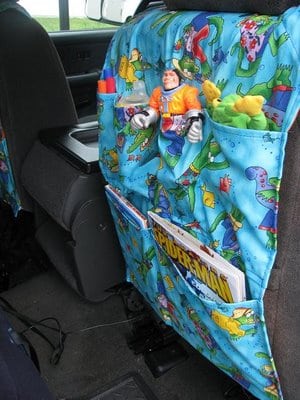
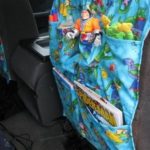
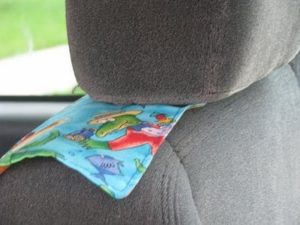
Our children are no strangers to long and crazy road trips. In face, we are heading out on a 3500 mile road trip next week when we head to Utah for my brother's wedding. I thought it would be fun to give the boys each a place to store their things so I whipped up two seat organizers to slip onto the back of our seats.

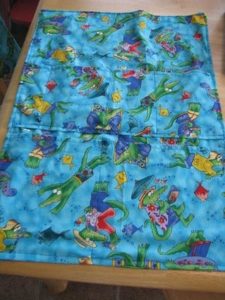
I used some fun and funky fabric to sweeten the deal even more!
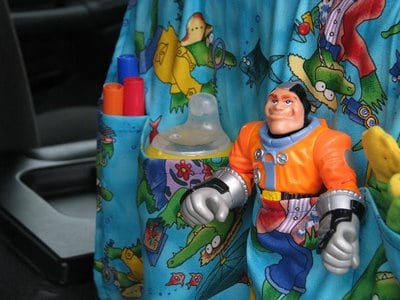
I didn't have a chance to snap photos of every step, but I did take detailed notes of what I did. They are pretty self explanatory---basic straight line sewing and a couple of button holes. The button holes are for the head rest prongs to slide through. Here is a video tutorial for sewing button holes if you need it. You'll also need to attach a piece of elastic to each bottom corner. When you slide the seat organizer onto your chair, this will keep it from flapping against the seat when you fill it.
The elastic will keep it snug against the bottom of the seat. Don't have any elastic? No problem. Sew two pieces of ribbon, one to each bottom corner and tie it onto the seat, tucking the excess ribbon into the crack against the front seat back.
4 More Travel Projects To Make For Kids
Ready to Make a Fun and Funky Seat Organizers?
Fun and Funky Car Seat Organizers Sewing Tutorial
Equipment
- sewing machine
Materials
- 1 yard fabric for front
- 1 yard fabric for back
- ¼" elastic
- measuring tape
- scissors
- pins
- thread
Instructions
Measurements:
- Measure the seat, starting at the top, in front of the head rest, and continue down to the bottom of the backside of the seat. This will be the length. (see photo to get an idea where to start your measurement).

- Measure the width of the back of the seat. This will be the width.
Cutting:
- Cut out two pieces of fabric the length and width of the measurements that you took of the seat.
- Cut out two pieces the width of the seat x 8" tall. This will be the smaller row of pockets.
- Cut out two pieces of fabric the width of the seat x 10" tall. This will be the larger row of pockets.
- Cut one piece of elastic the width of the seat plus 2". Set elastic aside.
Sewing:
- With right sides together, pin the front and the back pieces together, lining up edges. Leave a 4" space open along the bottom for turning right side out later. Stitch around the entire edge, using a ⅜" seam allowance (lined up with the edge of the pressure foot). Clip corners and turn right side out. Fold opening raw edges over, and pin.
- With right sides together, pin the small pocket pieces together. Leave a 4" space open along the bottom for turning right side out later. Stitch around the entire edge, using a ⅜" seam allowance. Clip corners and turn right side out. Fold opening raw edges over, and pin the opening closed.
- Repeat for the large pocket sections.
Let's Make Sure We Have Everything In Order Before We Proceed:
- You should now have 3 finished rectangles of fabric with the openings along the bottom seam pinned closed.
Top Stitching:
- Top stitch across the top edge of both pocket pieces using a ¼" seam allowance.
Elastic:
- Place the piece of elastic on to your work surface. The elastic should be in a horizontal position.
- Place the large piece (seat organizer) on your work surface with the front facing you. The elastic will be lined up along the bottom, behind of the large piece of fabric, sticking out about an inch or so on each side.
Pocket Placement:
- Line up the large pocket section with the bottom edge of the seat organizer. Pin into place.
- Fold the elastic ends over and sandwich the ends between the pocket piece and the main piece. Pin in place.
- Place the small pocket section 2" above the large pocket section. Pin into place.
- Stitch across the bottom seams of each pocket. The sides will still be pinned into place.
Top Stitching:
- Top stitch around the ENTIRE perimeter of the seat organizer, making sure to only stitch the elastic in the corners. This will close the opening at the bottom, and attach the pockets to the organizer along the side seams.

Creating Pocket Sections:
- Stitch vertically starting at the top and going down each pocket section to create small pockets. As a reference, I stitched 3 rows on my small pocket row (to create 4 pockets) and 1 row on my larger pocket row (to create 2 large pockets). You can use whatever sizes you'd like to accomodate your sippy cups, toys, etc.
Button Holes:
- Now all that's left to do is to sew two button holes for the head rest prongs to slide through. Hold the seat organizer against the back of your car seat and decide where the button holes for the head rest prongs will be (mine were about 2 ½" from the top). Sew two button holes. See the notes section for a link to a tutorial for sewing easy button holes.
Installing Seat Organizer:
- Remove headrest and slide elastic over the seat. The elastic will go across the bottom front of the car seat. Line up the button holes with the head rest prong holes. Slide head rest prongs through button holes and push head rest back into place.
Notes
This post is a little makeover of one previously shared in 2010.

andie says
My mom made me something exactly like this when I was a kid (some 25 years ago). It came in handy on long car trips! 🙂
Melissa says
This is such a great idea. My son is getting to the age that this would work out great! Great job!
[email protected] says
Wow, that looks great. What a fun and giftable project- especially with fun fabrics!
Jenn @ Delicious Ambiguity says
This is awesome! I hope you'll come link up to Tot Tuesdays at Delicious Ambiguity!
Diane says
Now how handy would that be! Wish I had had that when my 2 children were small.
Hope you can visit me sometimes over at Pittypat Paperie.
Suzanne says
Love this idea -- absolutely fabulous!
Meg says
This is adorable. Definitely could've used something like this on my 2 day drive to mom's house! Great job!
I would love for you to stop by my blog for a fun giveaway! Have a wonderful day! http://alittleknickknack.blogspot.com/2010/06/vacation-week-giveaway.html
Sam says
I really need to learn how to sew...this is perfect! I've bought some at the store a few years ago and they just never seem to have enough room for everything!
I'm stopping by from Sew Much Ado. Have a great week!
Sam
Mom.Undecided.
http://momundecided.blogspot.com/
Come check out my WW Linky Party!
Amy says
These are cute!! I really need to make something like this for my kids. It would be great to keep some extra toys in the car with out loosing them!! Thanks for sharing!!
Gretchen says
Just found your blog. Loving it! Great work.
Be well.
Gretchen
..SOCIAL BUTTERFLY.. says
Now that is a great idea! thanks!
Jennifer says
You're driving 3500 miles in a truck with 3 small children? Good luck! 🙂 The seat pockets are adorable! I'll have to try these out for our next long car trip.
★All Thingz Related★ says
I really need something like this! Love it!
{REBEKAH}
Ashlee says
This is SO cute, and smart! I'm adding it to my "to do" list of projects! I need one for each child, less fighting maybe??? we'll see!