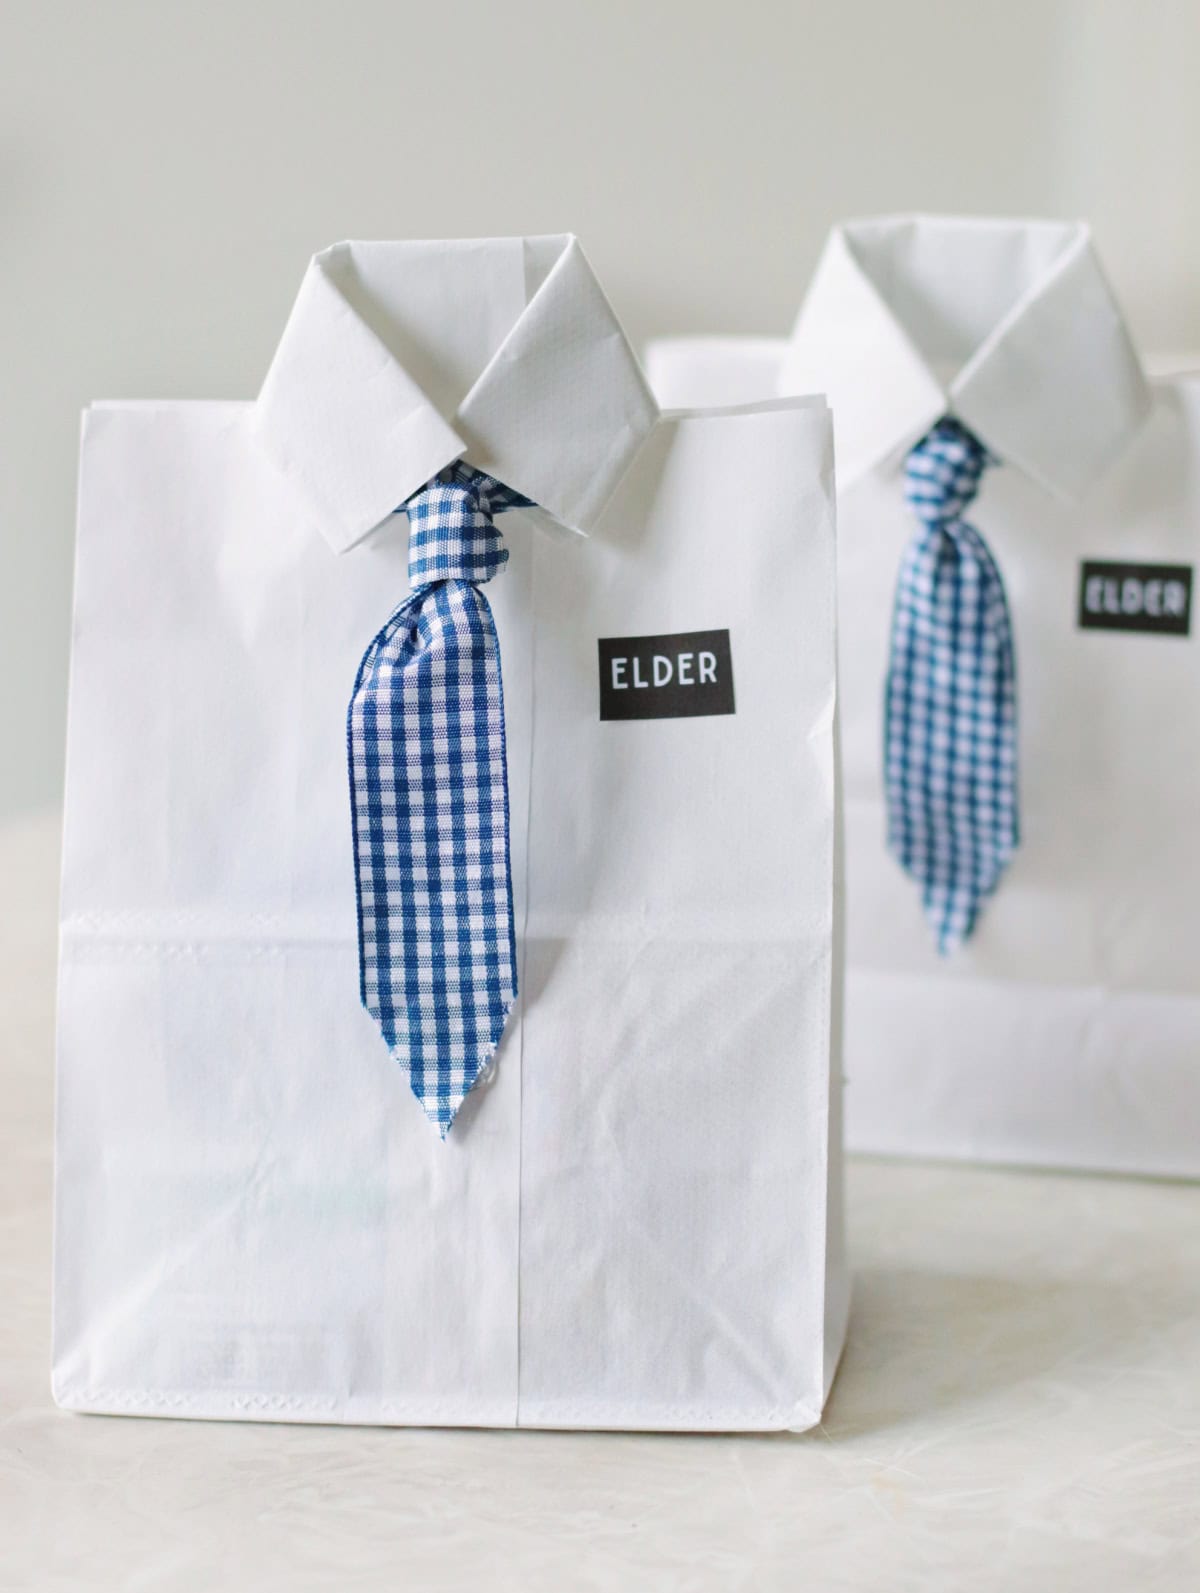
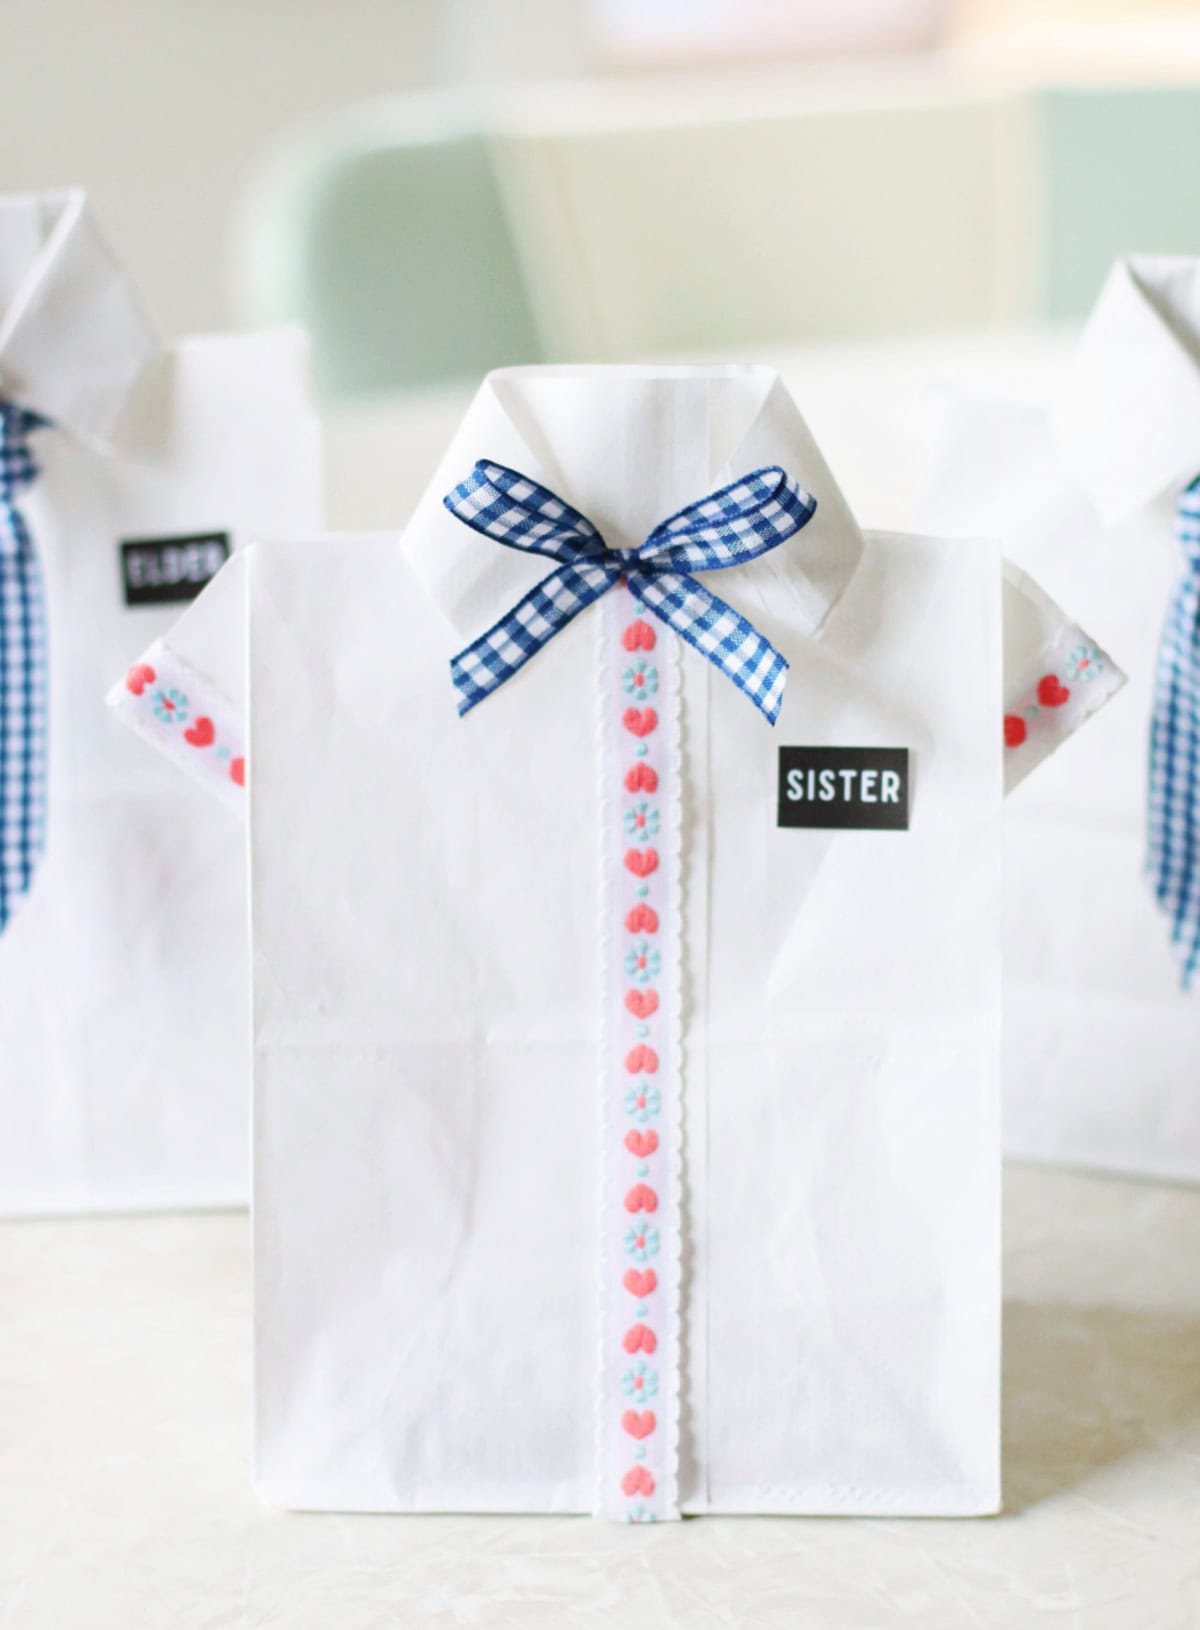
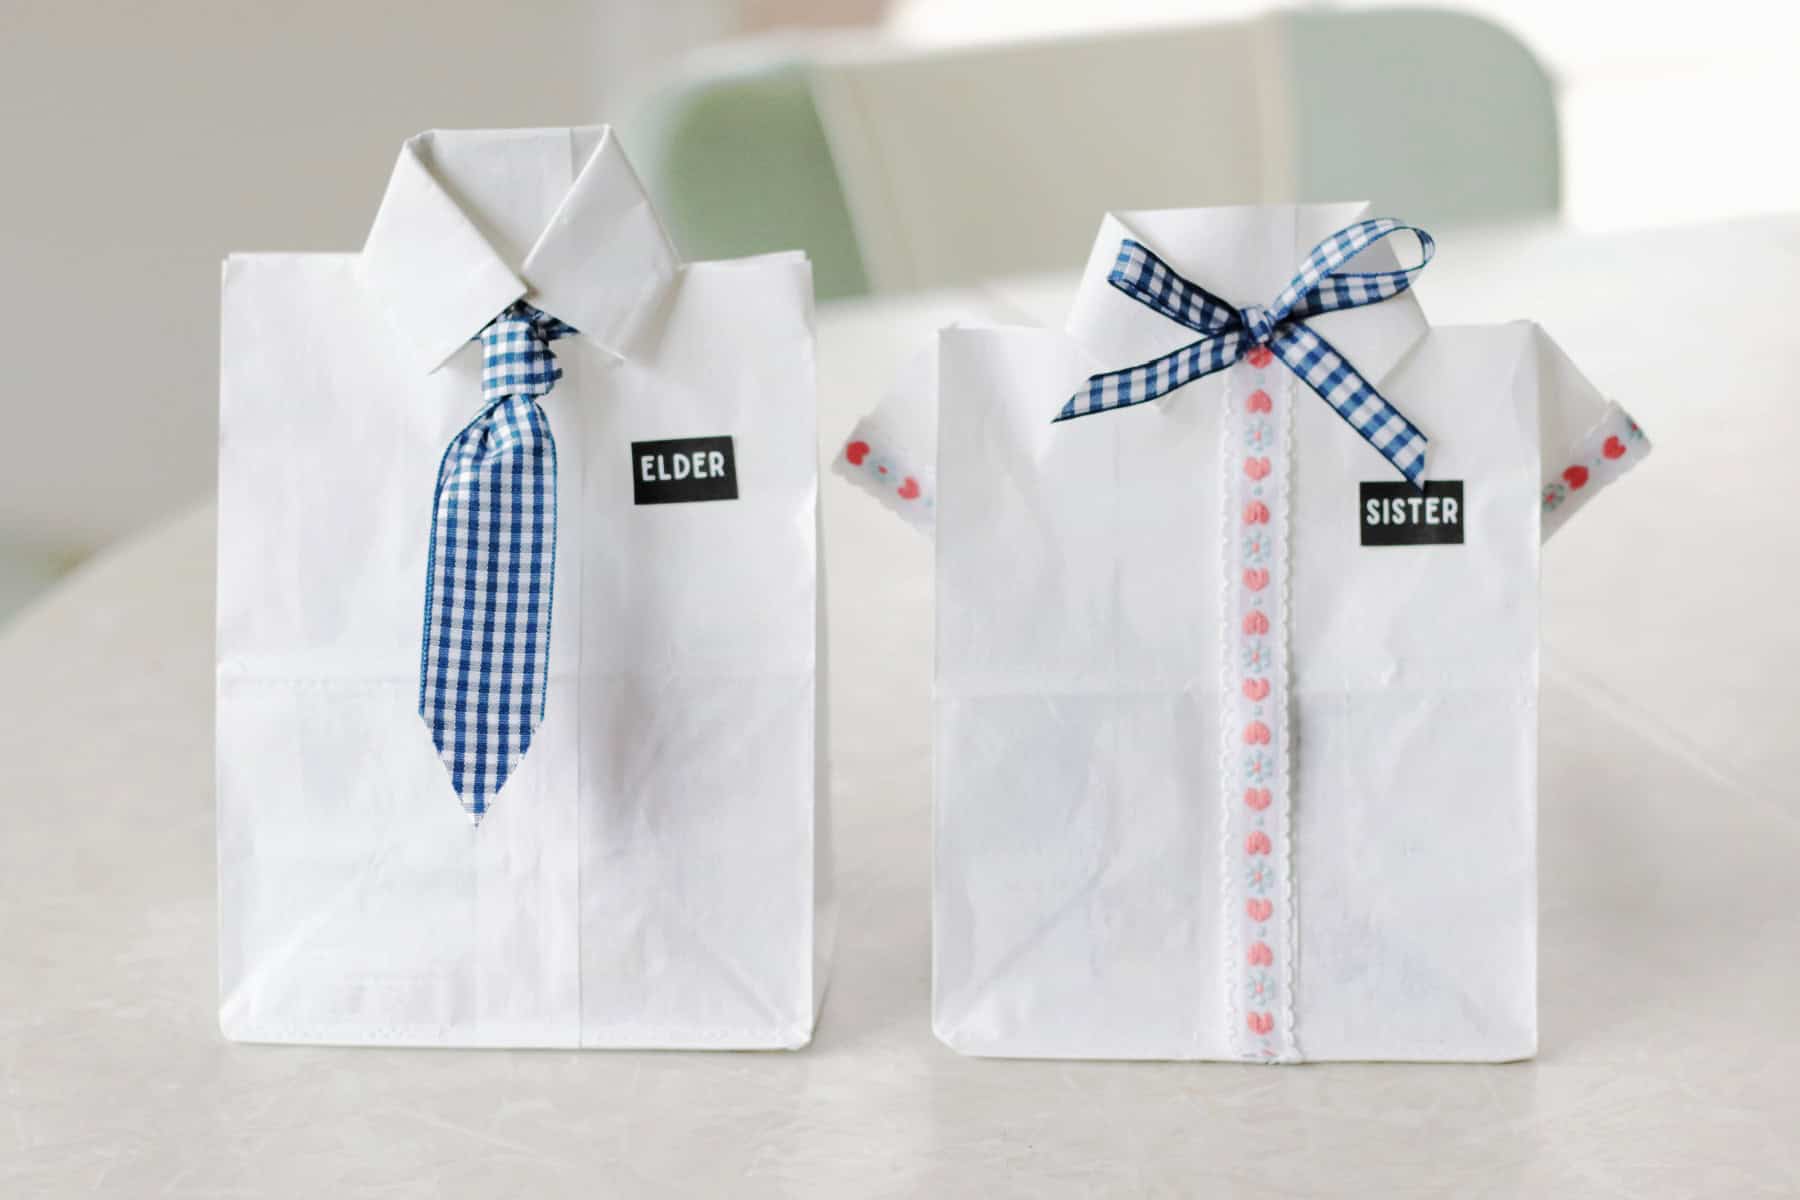
A free tutorial for making darling LDS missionary treat bags from paper bags and ribbon. Fill with candy, socks, or other small gifts for your favorite missionary! They look like dress shirt gift bags for Elders and blouse gift bags for Sisters!
You might also like my 12 Days of Christmas QR code for Christians, my collection of YW Camp Crafts, or my prayer bracelet tutorial.

I am going to assume that if you are here, you already know about LDS missionaries, but just in case, here is a quick rundown! Missionaries from The Church of Jesus Christ of Latter-day Saints typically serve for 18 months to 2 years. They don't get to choose the location of their mission and go with faithful hearts to serve and spread the gospel. You'll recognize them because they go 2 by 2, knocking on doors, while wearing church clothes, and sometimes riding bikes!
I made these cute missionary gift bags for my missionary son and his companion, who are currently serving in the Washington Seattle Mission. I plan on sending them for Valentine's Day, but they would be fun to give to a missionary any time of year! My daughter is good friends with the sister missionaries in our area, so she is giving them treat bags for Valentine's Day, too.
Why I Like This Project
- Easy to make. These cute bags take just minutes to make and are fun to fill with candy or other small gifts like socks, a new tie, or gift cards.
- Fun to customize. Switch up the ribbon for fun, colorful necktie and blouse details. How cute would these bags be with little buttons glued down the front, too?
- Activity for youth or activity days groups. These would be fun for kids or youth to decorate and share with the missionaries in their area.
Jump to:
Tips and Tricks
- Missionary name tags. You can make your own little name tags for a custom gift, or use the ones I made! My tags download 12 per sheet and can be easily cut and glued to the front of the bag.
- Filling the bags. Make sure to read the instructions for when to fill each gift bag. The bags for the Elders are filled at the beginning. The bags for the Sisters are filled midway. If you wait too long to fill them, they'll be closed off and sealed, and you won't be able to!
- Video tutorial. For the best visual, check out the video that I made. It plays under the first image of the post and in the project card at the end of the post. Some details are a little tricky to put into words, so watching the video is the easiest way to see how these little treat bags come together.
Supplies

- Paper Bags: You can use whatever size bag you'd like; just adjust as needed to make the proportions work. I used 5"x10" white paper lunch sacks.
- Ribbon: I used 1" ribbon for the Elder necktie and ⅜" ribbon for the Sister Missionary blouse details.
- Glue: You can use whatever kind of craft glue you prefer. I found hot glue to be the most versatile for both the ribbon and paper.
- Scissors
- Missionary Tags: Download a sheet of printable tags. Super easy, just glue them to the front of the bag!
See the how-to card at the end of the post for full information on supplies and quantities.
How To Make Missionary Treat Bags for Elders
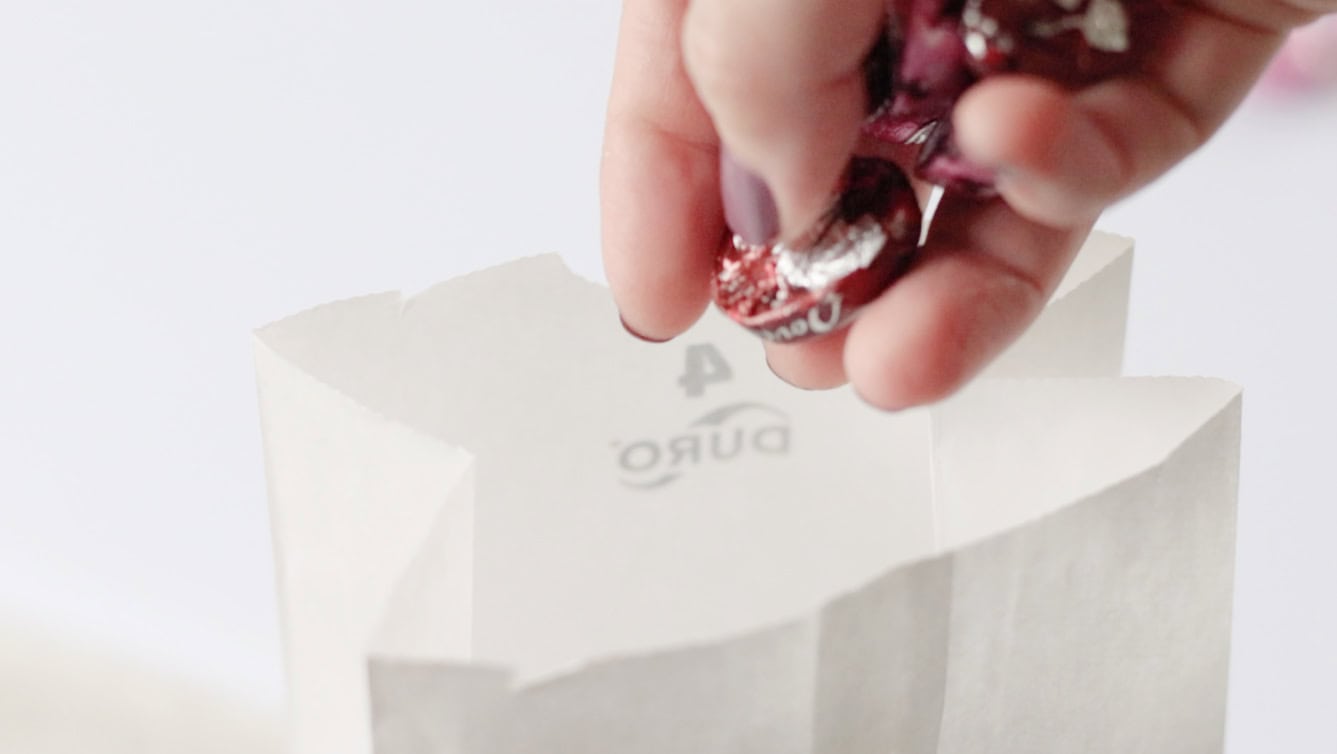
Step 1: Fill the bag with treats, no more than ½ full.
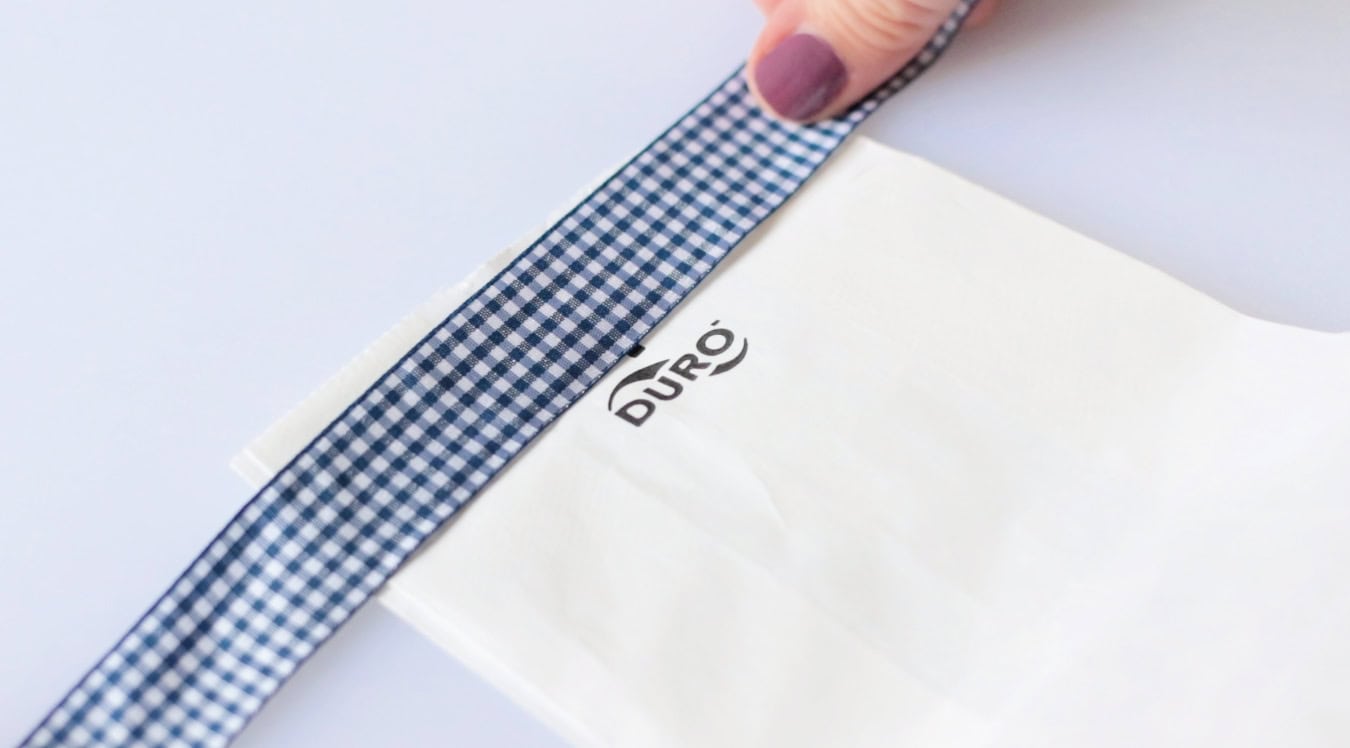
Step 2: Place an 18-20" long piece of ribbon across the top of the bag.
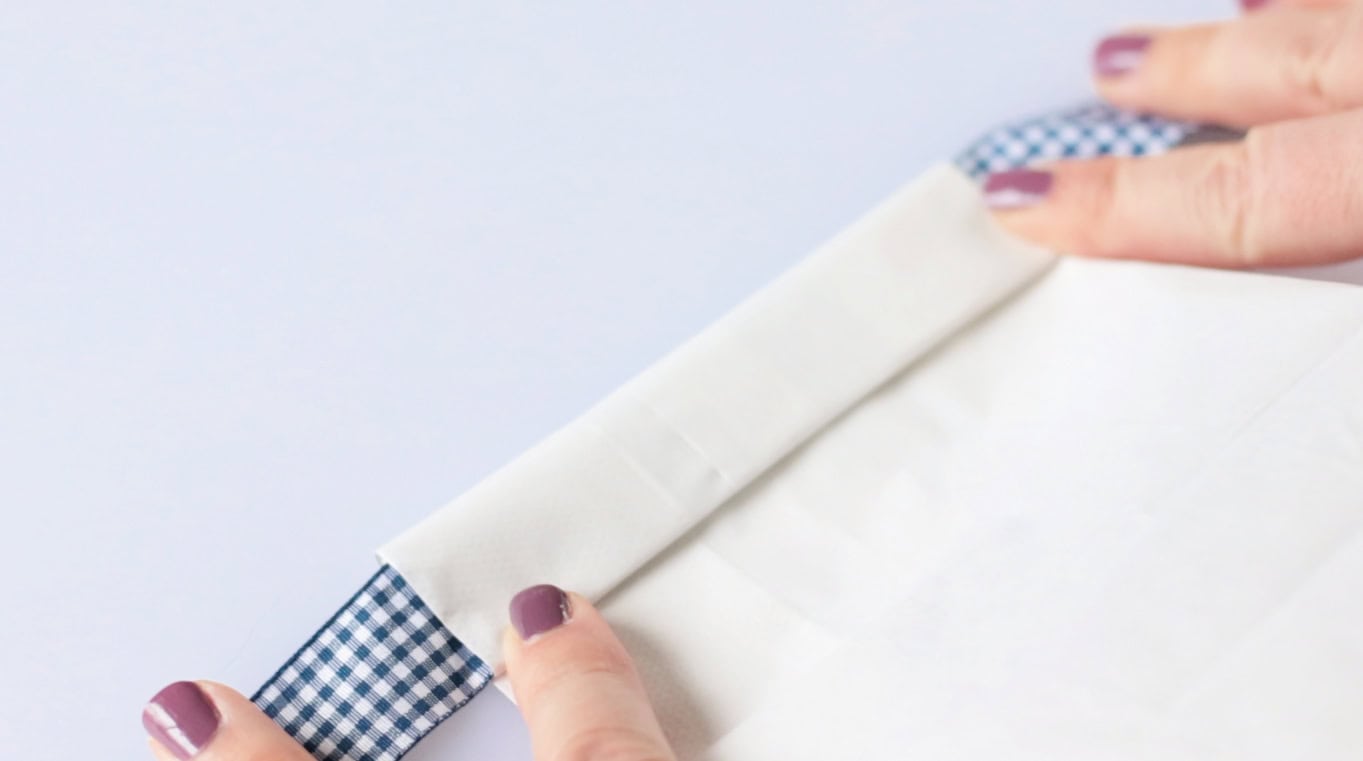
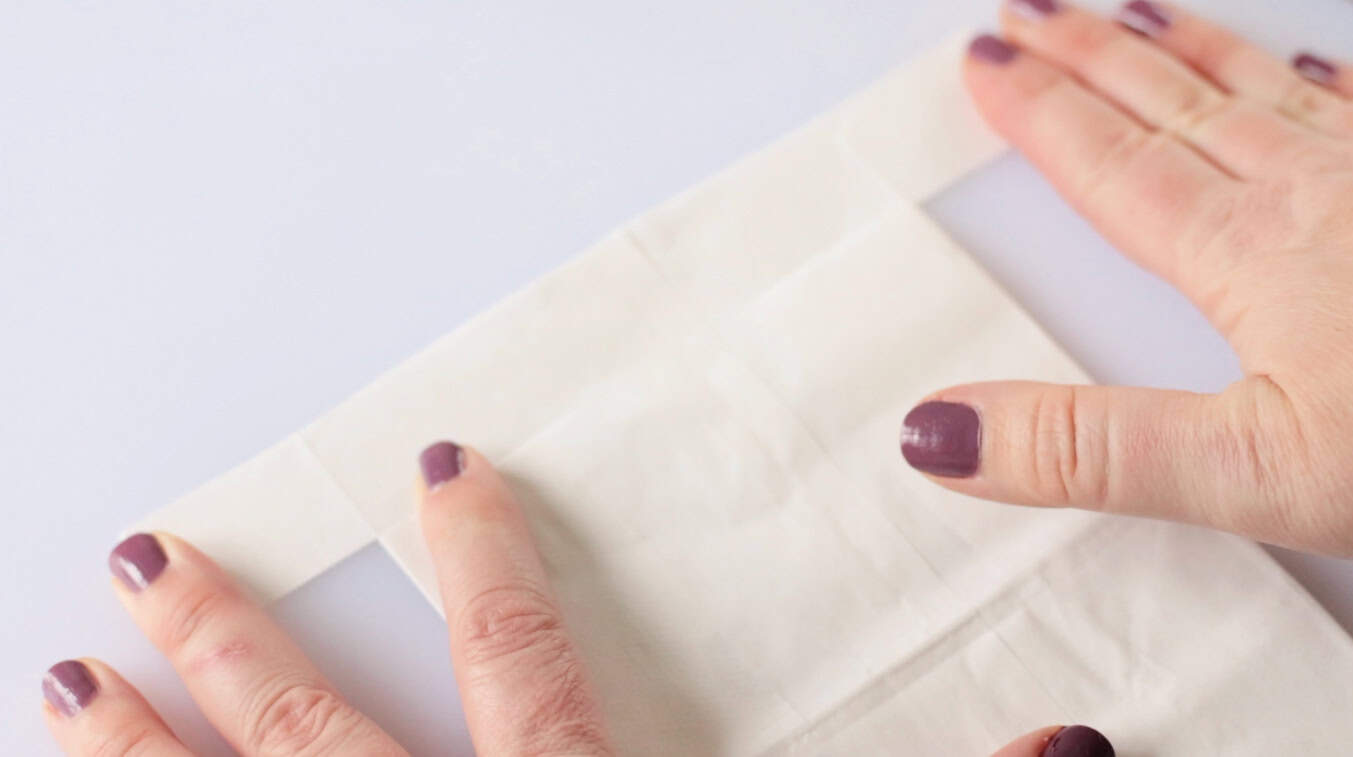
Step 3: Roll the bag over the ribbon 2 times, and flatten the folds with your fingers.
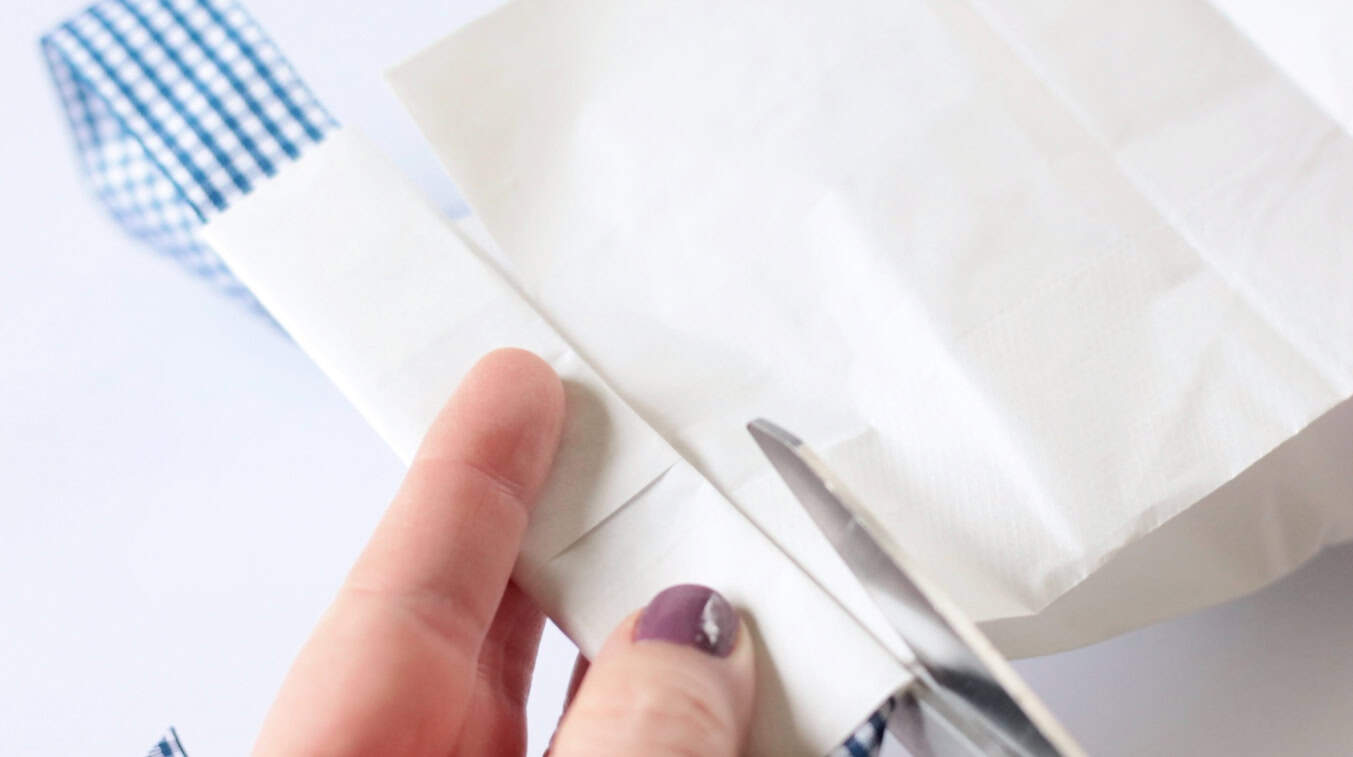
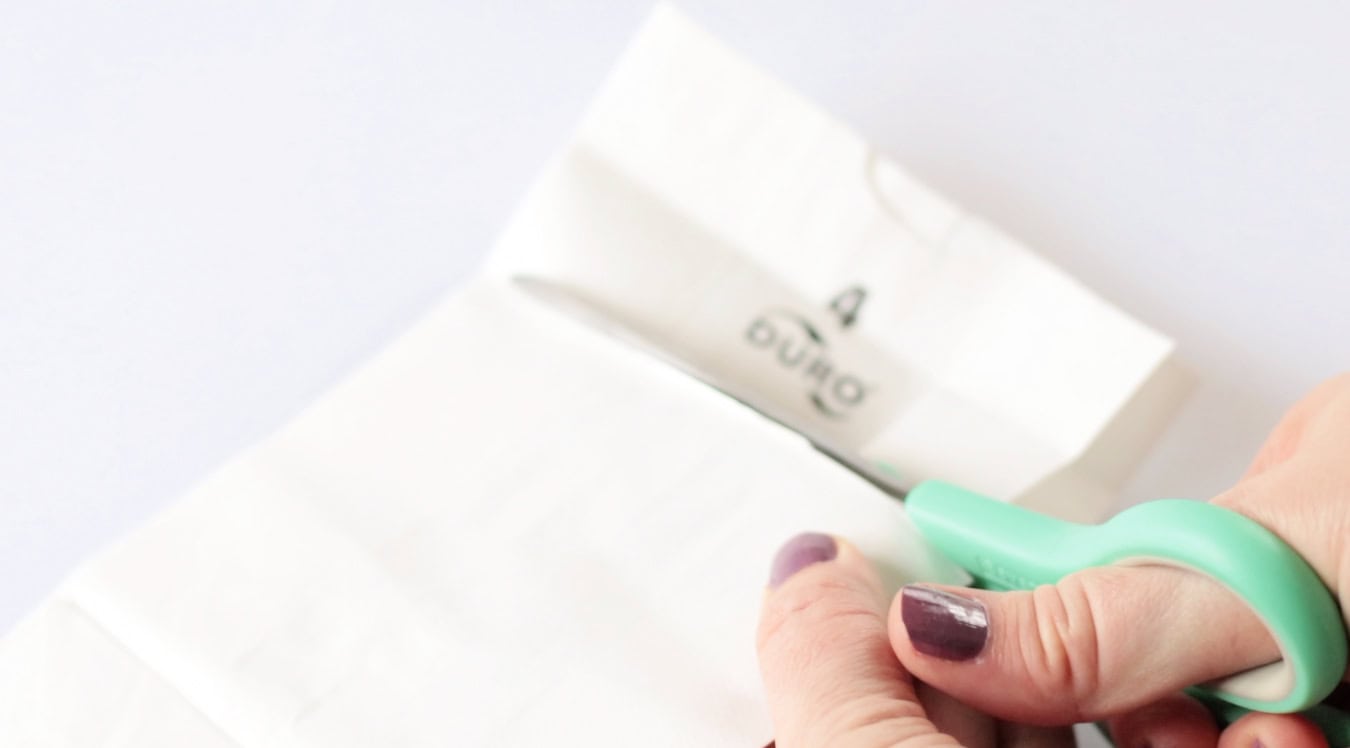
Step 4: Cut a 1.5"-2" slit on each side, just under the fold.
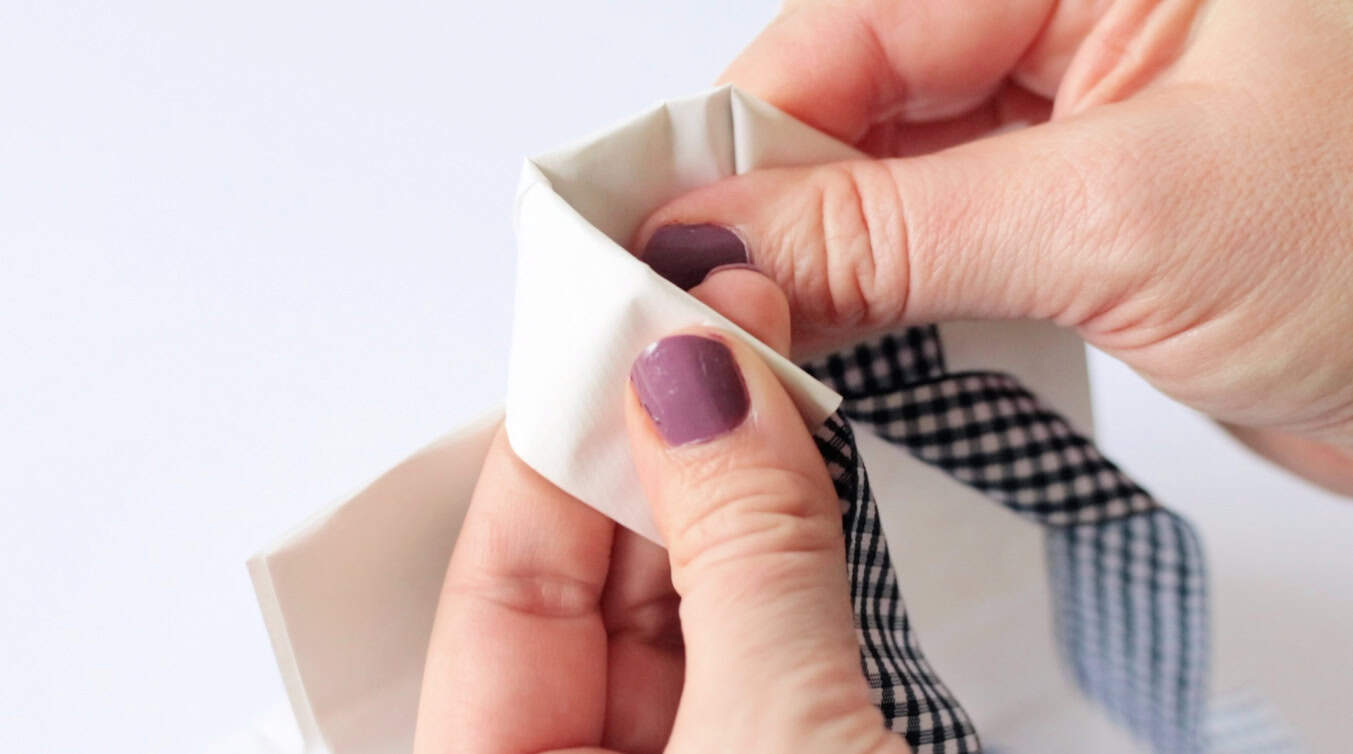
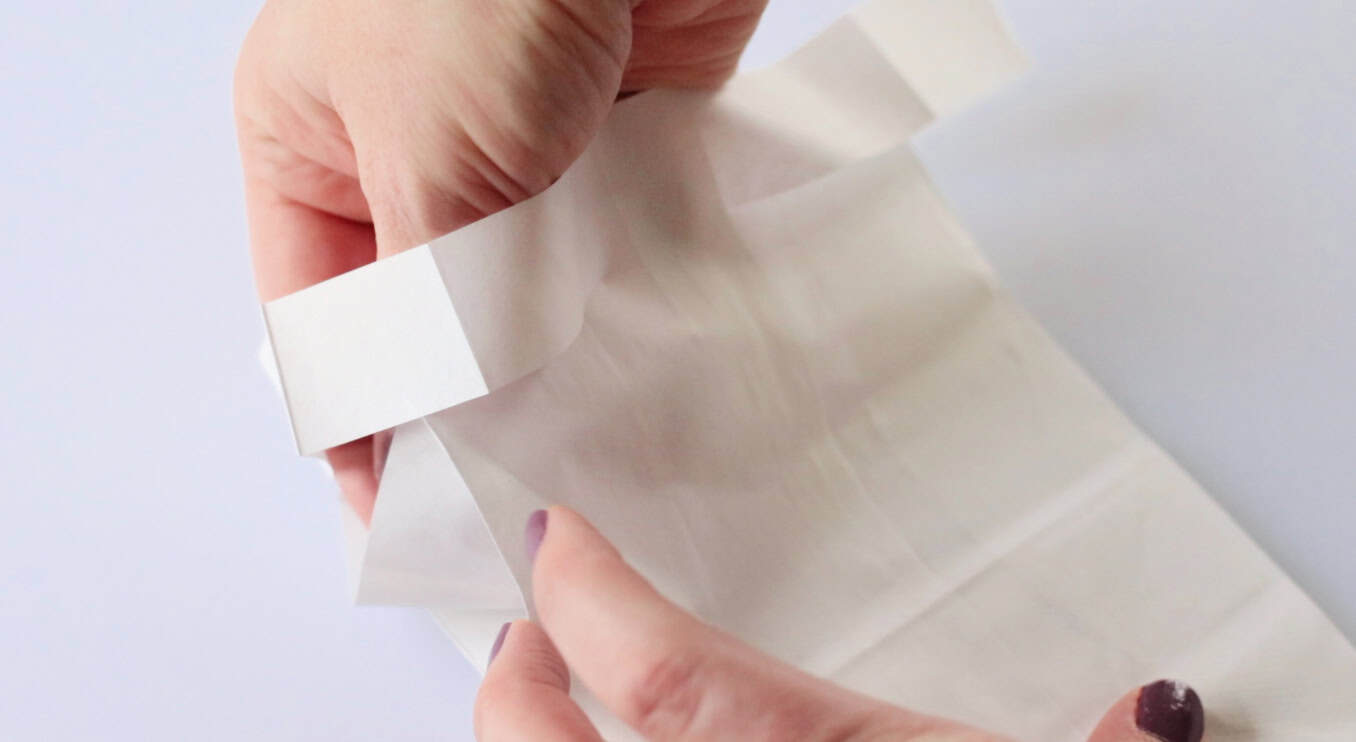
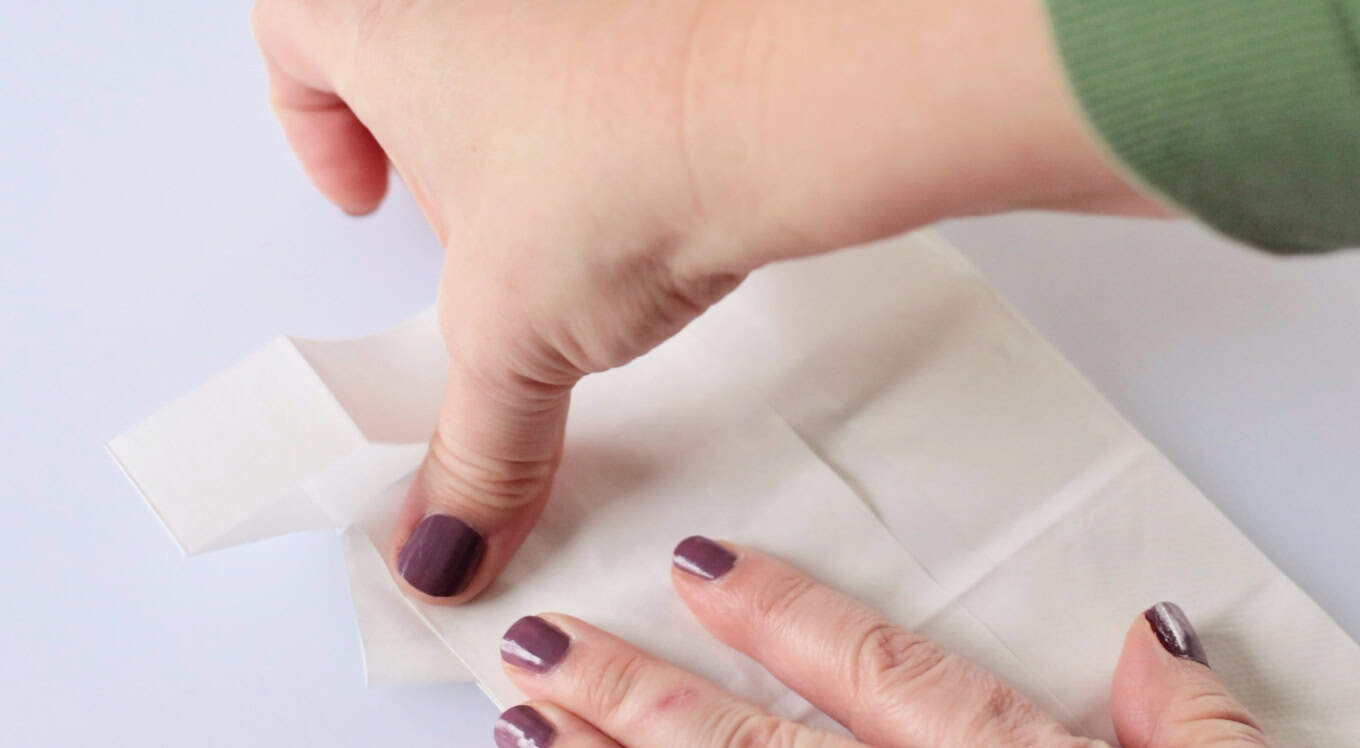
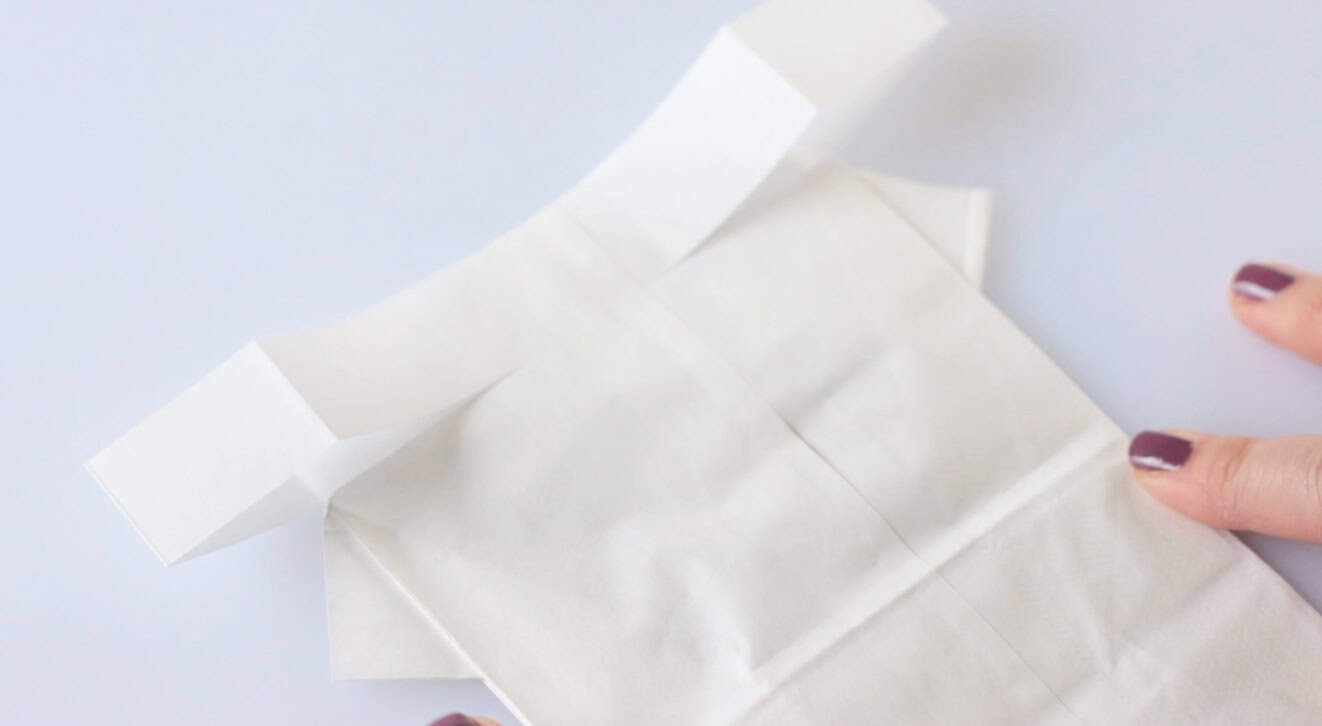
Step 5: Fold each end over to create a collar.
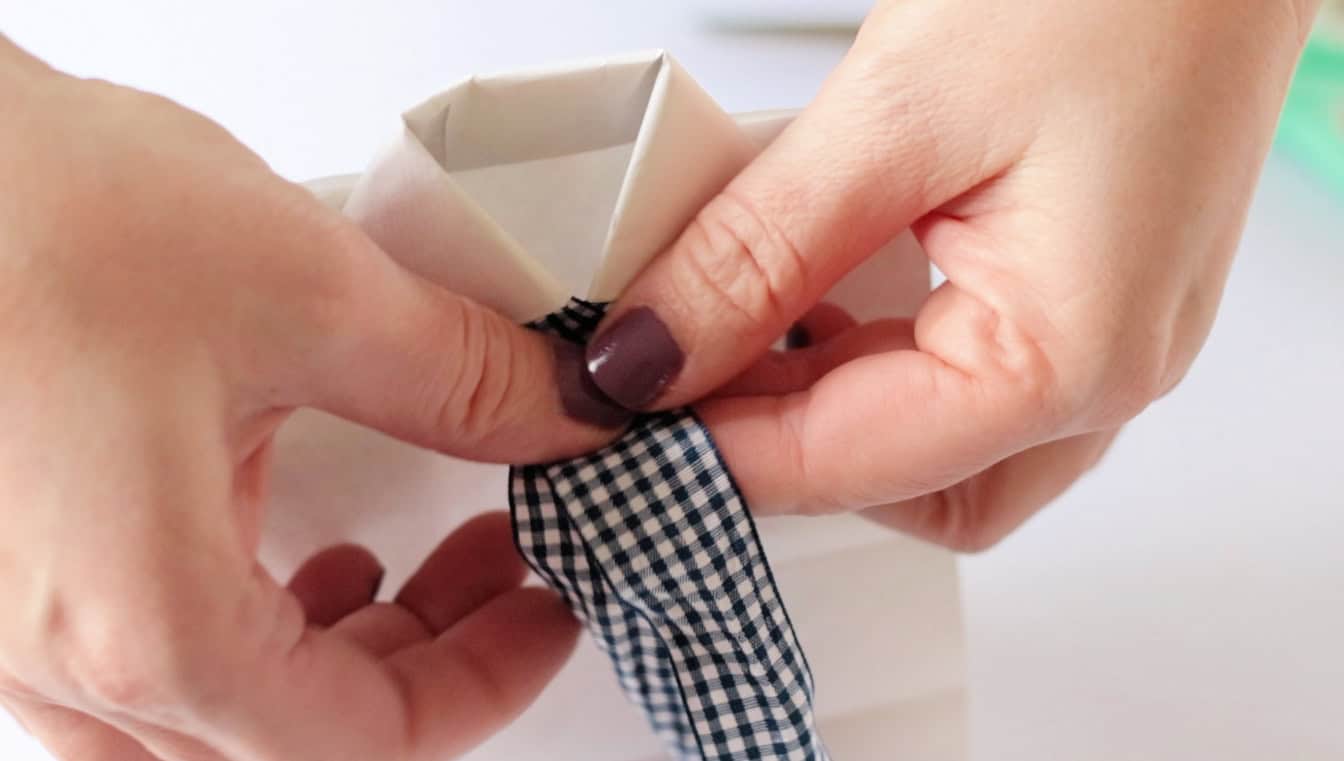
Step 5: Bring the ribbon together in the center of the collar.
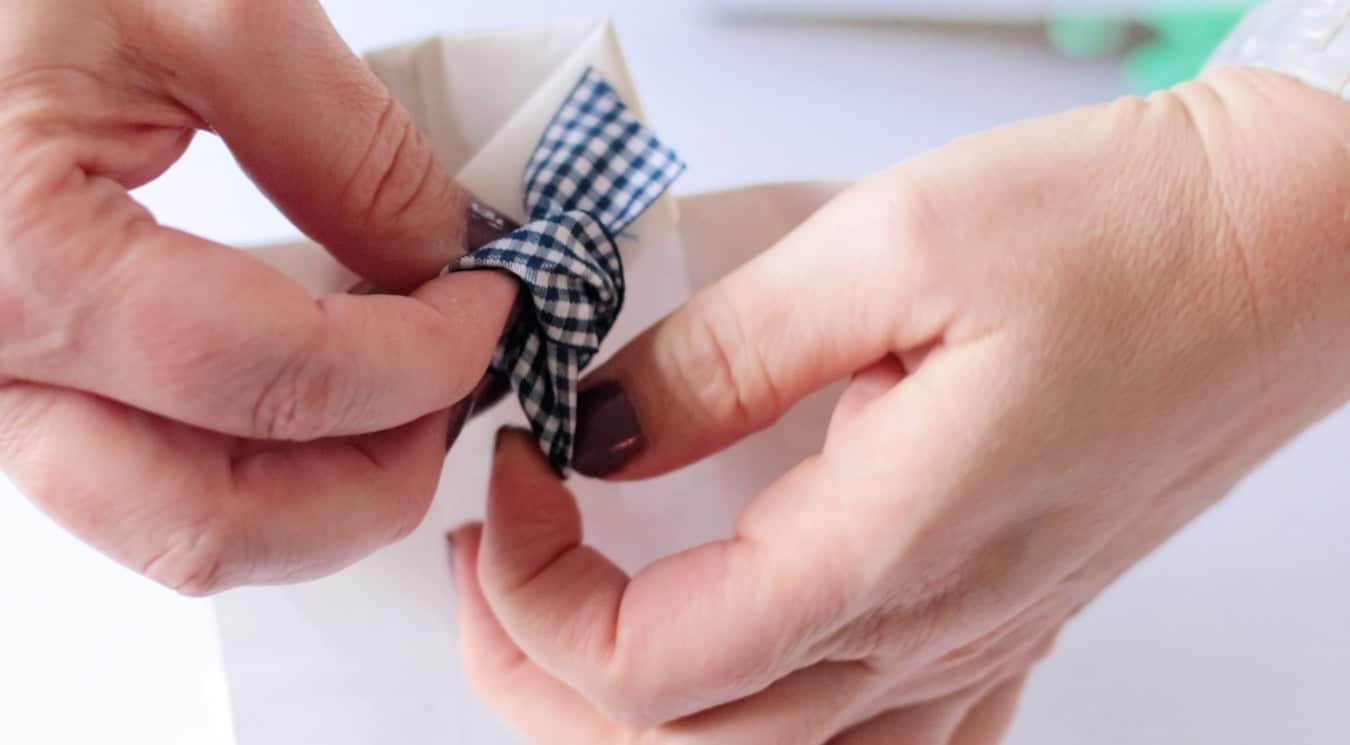
Step 6: Tie the ribbon into a knot.
Reminder: Watch my video to see how I do this step.

Step 7: Cut the ends of the tie diagonally on each side to create a tie shape.
Tip: To keep the two ribbon pieces together for the necktie, add a small drop of hot glue in between after cutting the tie diagonally.
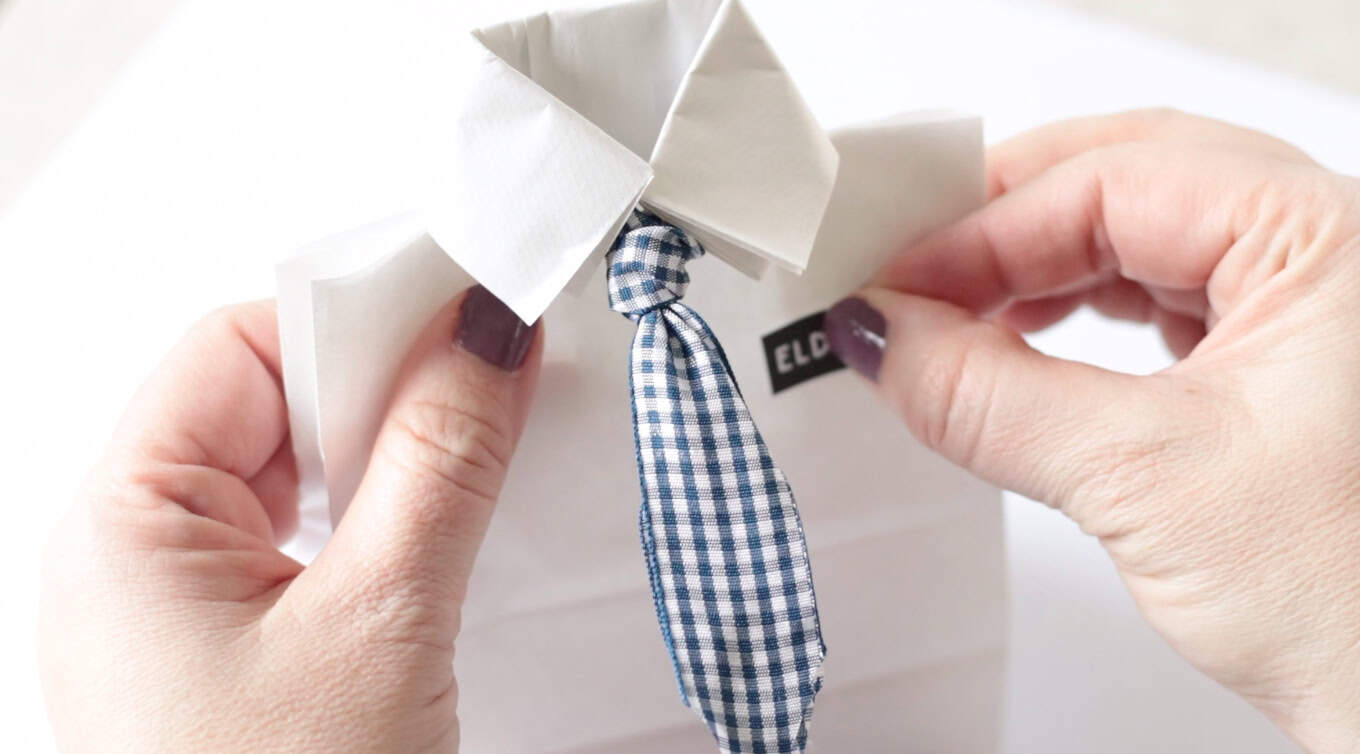
Step 8: Glue a missionary tag on the front of the gift bag.
How To Make Missionary Treat Bags for Sisters
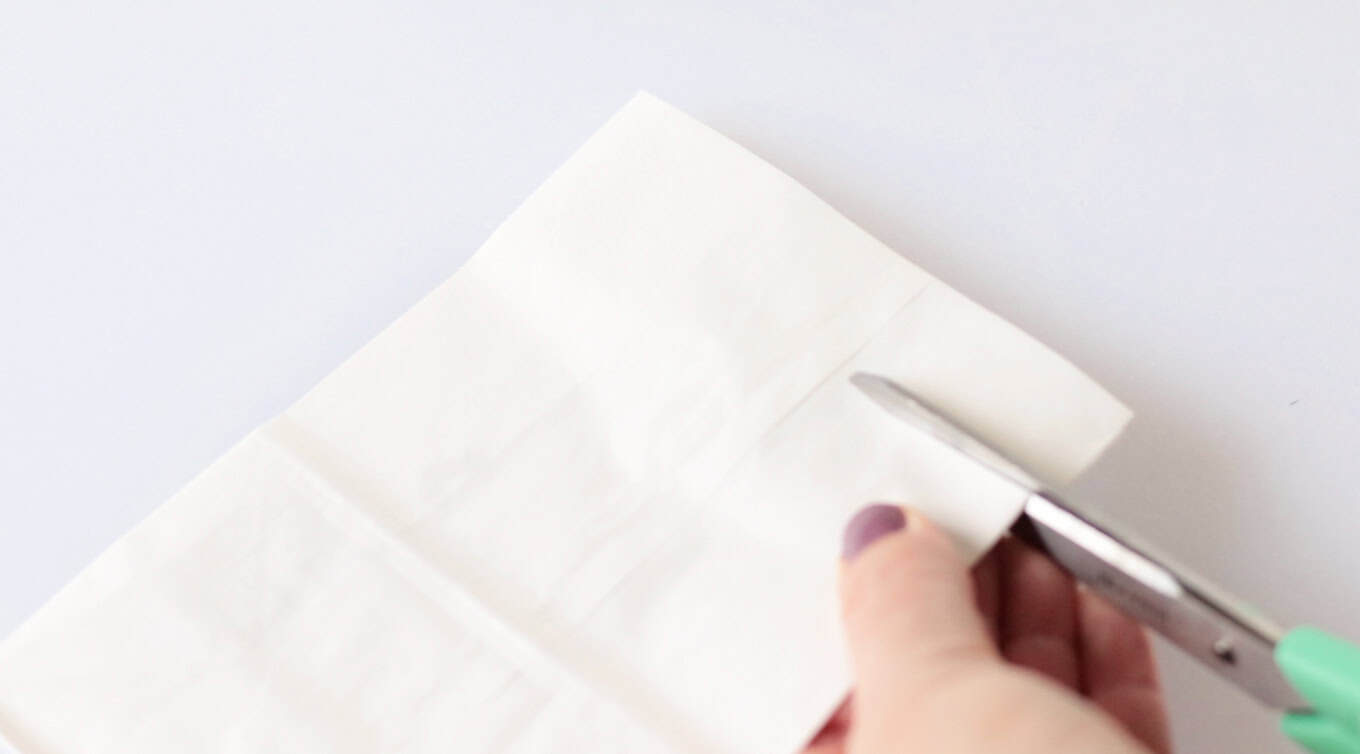
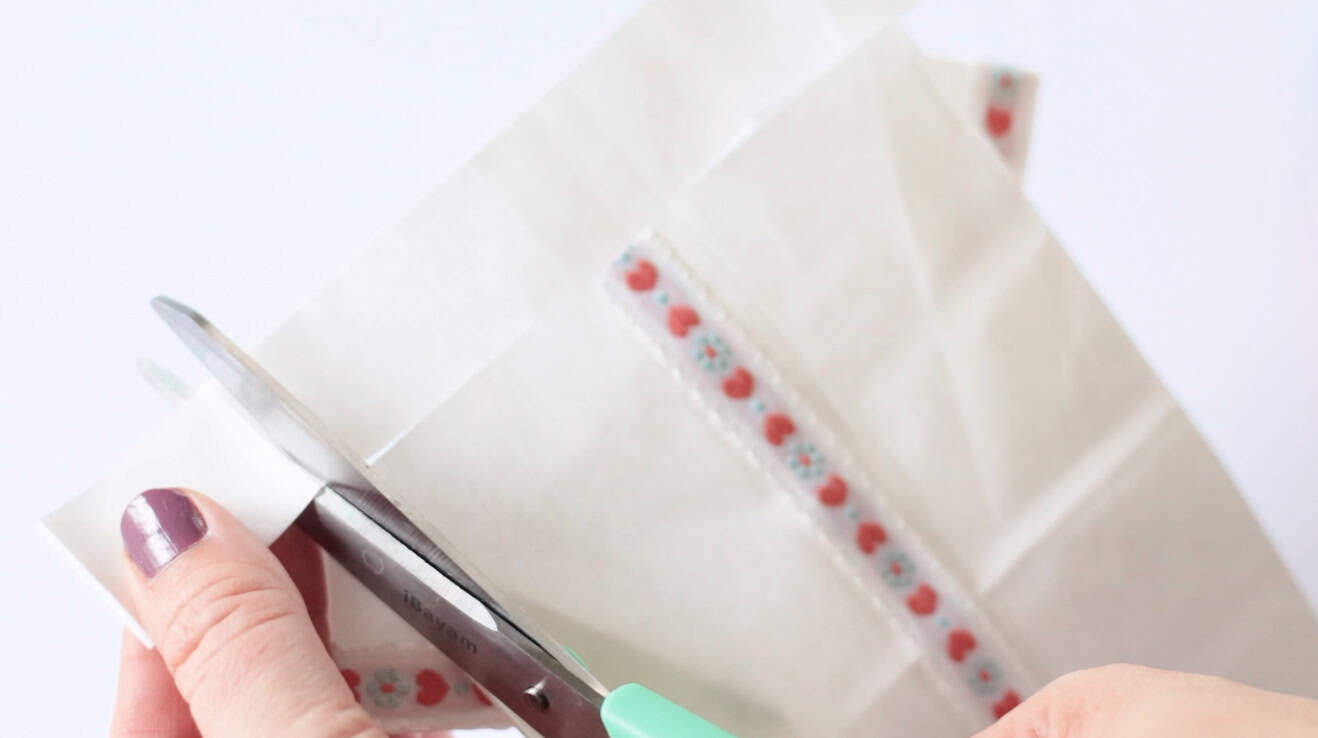
Step 1: This is an optional step. If making bags for sister missionaries and elders at the same time, I recommend trimming 2" off the top of the sister missionary bag so that they are the same height. If you don't trim the top of the bag, the sister missionary bag will be a few inches taller than the elders' bag.
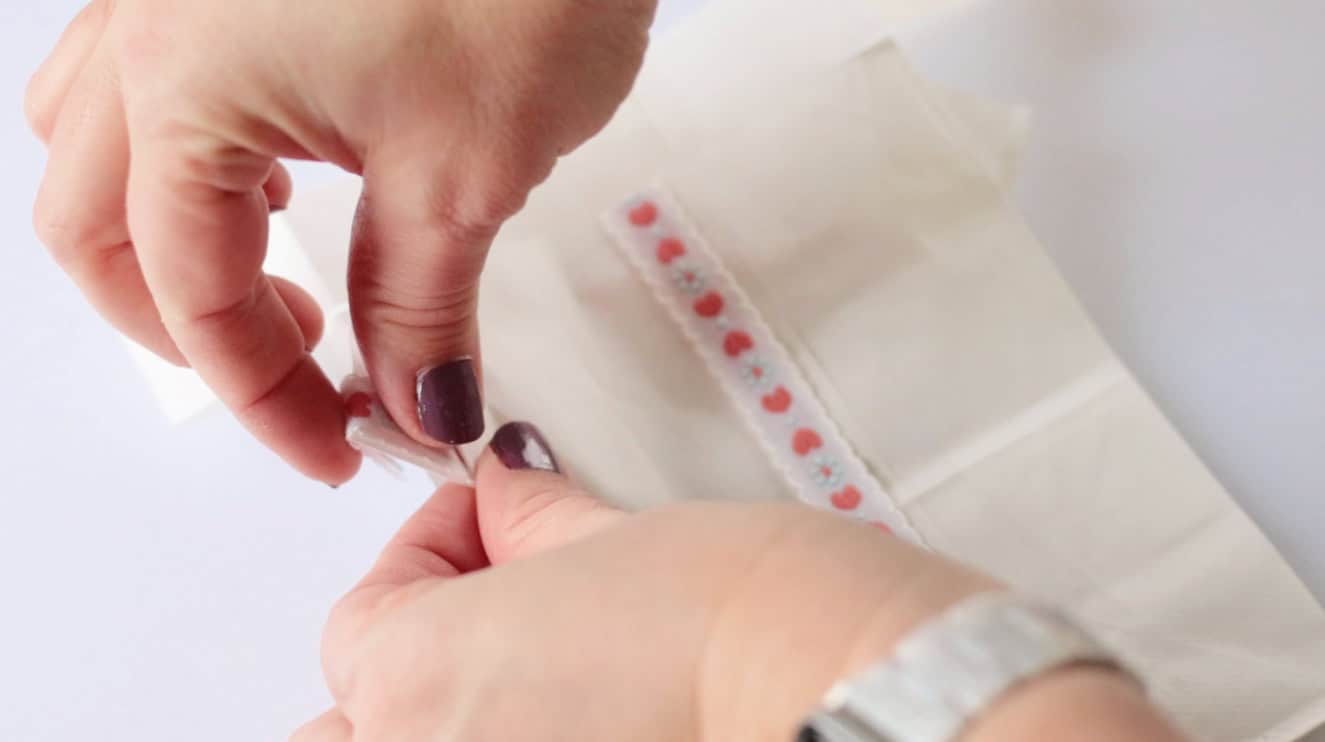
Step 2: Cut a 1.5"-2" slit on both sides, 1" from the top. This will become the collar.
Step 3: Open the collar by bringing the ends of each section to the sides. Flatten.
Step 4: With your bag sides still slightly open, push out against the crease on an angle. This will form the shirt's sleeves.
Step 5: Flatten and repeat on the other sides.
Reminder: Watch my video to see how I do this step.
Step 6: Flatten everything to crease the folds. Your bag should have a strip across the top and two tiny triangle sleeves popping out of the sides.
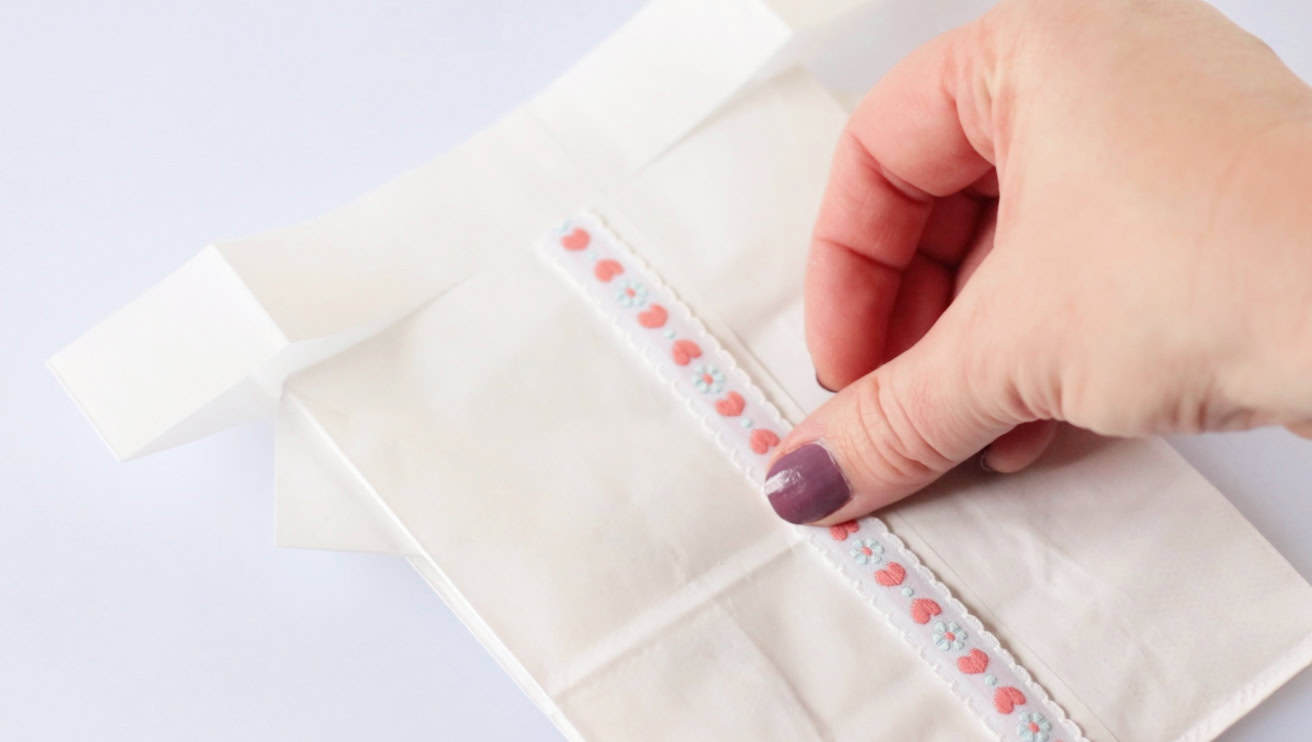
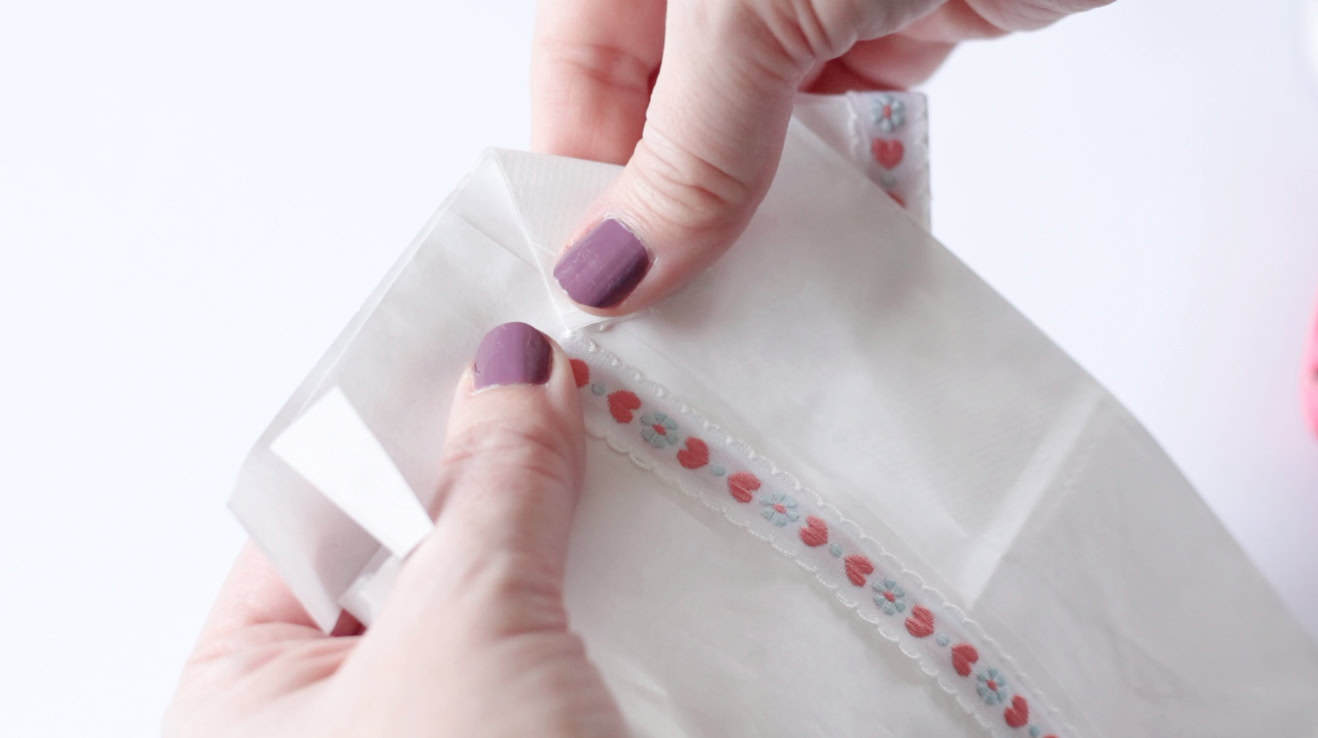
Step 7: Glue a piece of ribbon or buttons down the front.
Step 8: Glue ribbon on the edge of each sleeve of the blouse.
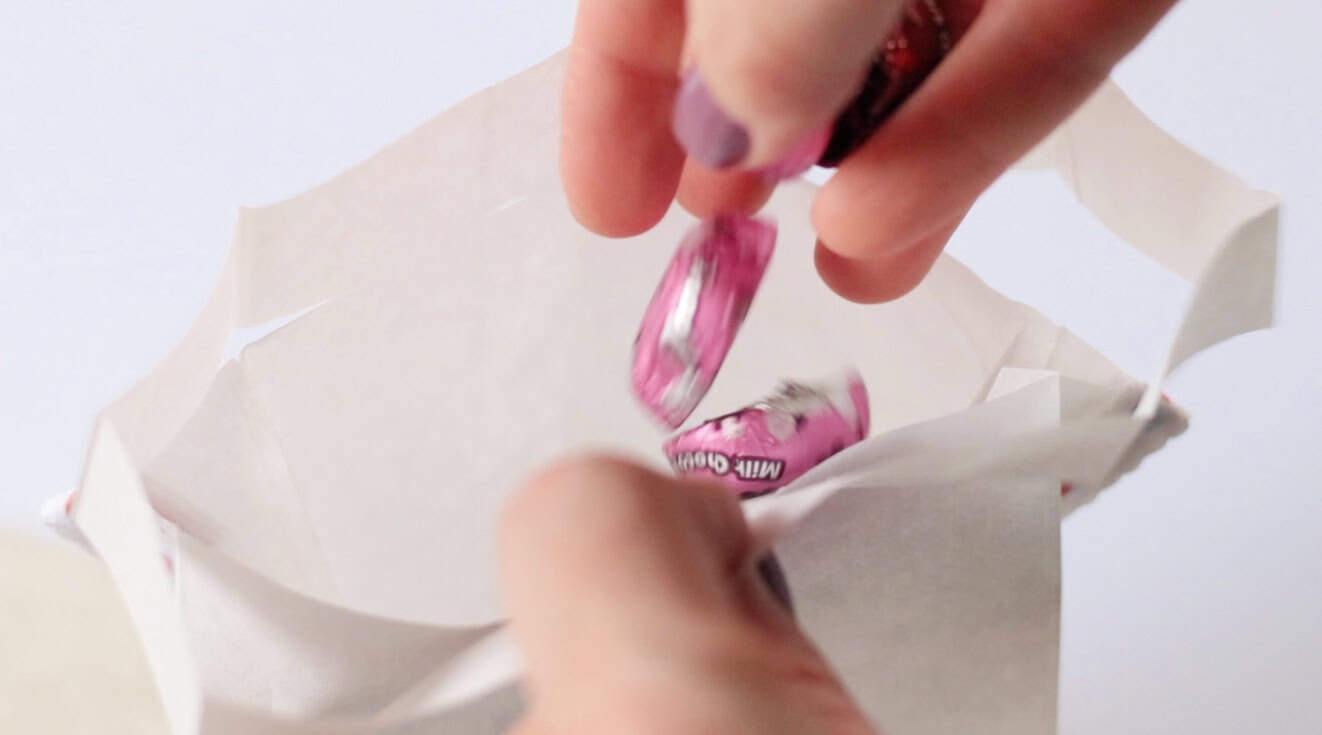
Step 9: Fill the bag with candy and treats, no more than ½ full.
Step 10: For a smaller collar, trim the ends of the collar 1" on each side.
Note: This is an optional step.
Step 11: Fold the collar strips over and glue them into place.
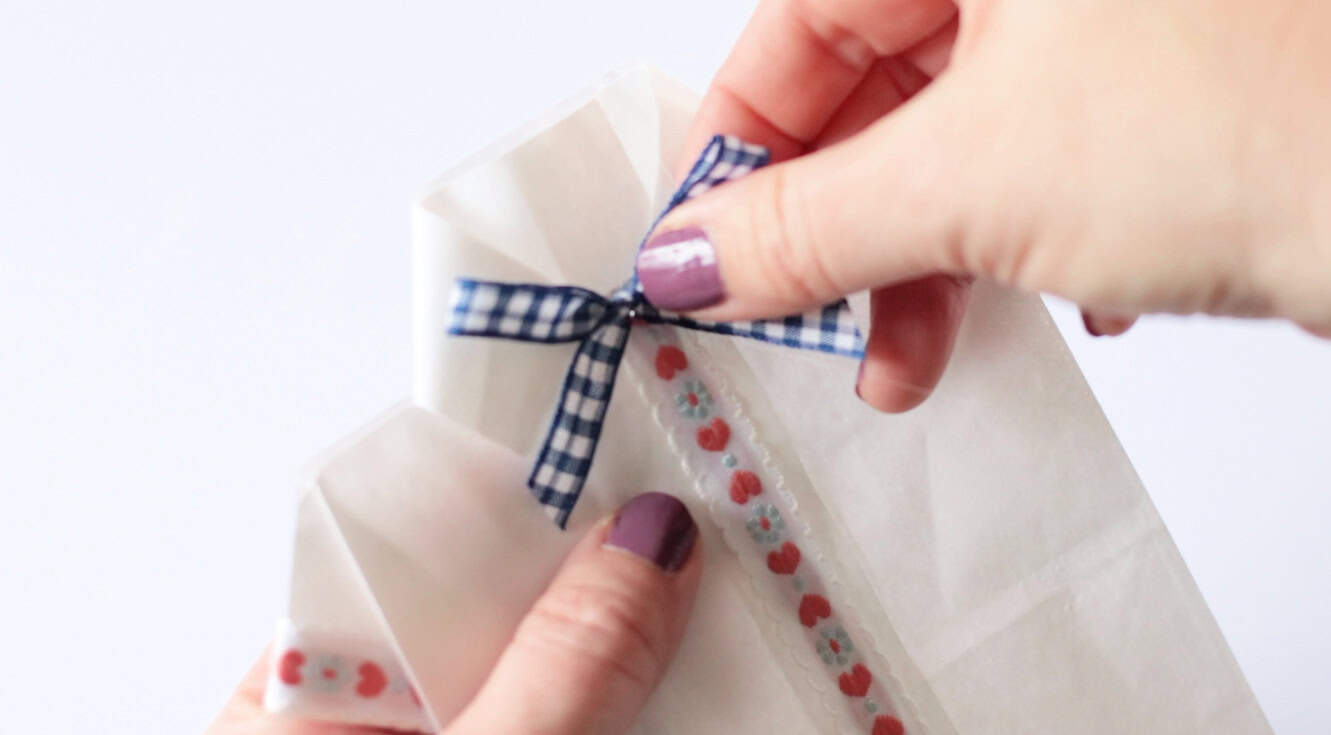
Step 12: Glue a small ribbon bow in the center of the collar.
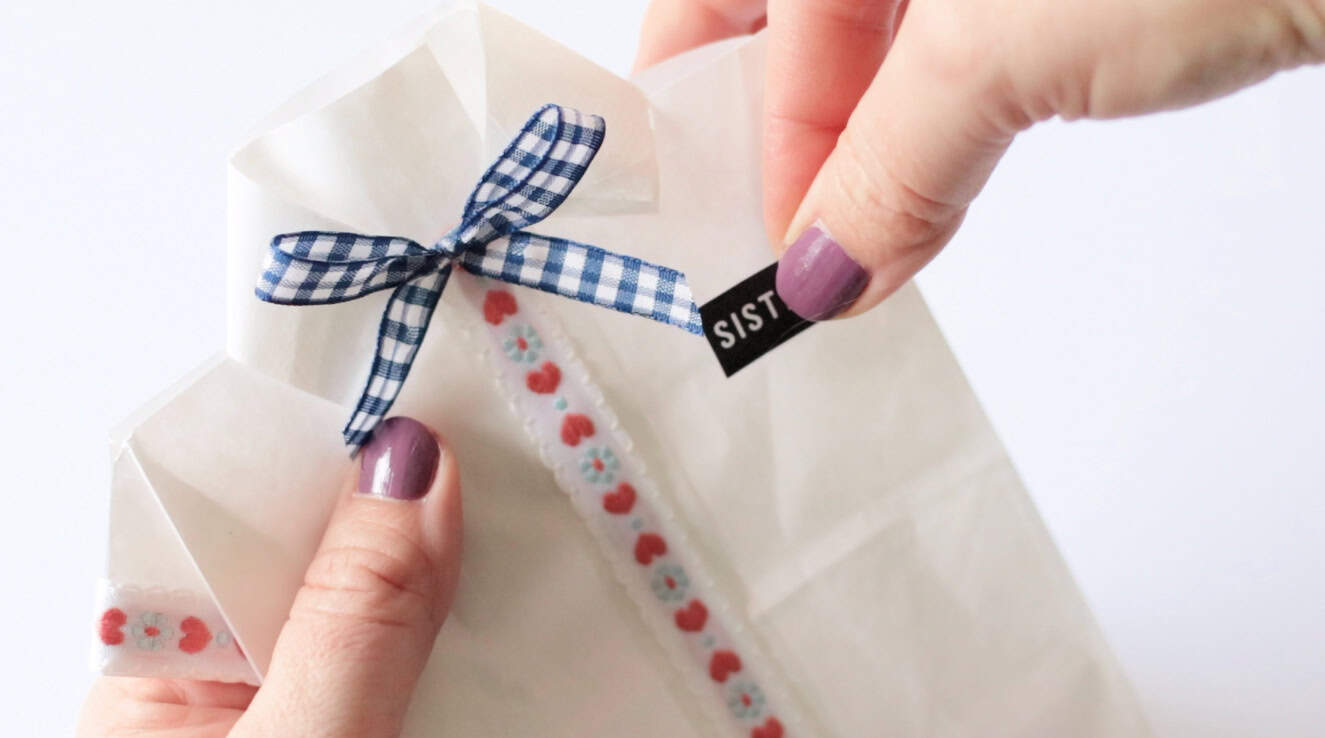
Step 13: Glue a missionary tag on the front of the gift bag.
Shirt and Tie Gift Bag FAQs
Use this method to make a gift bag in any size! Whether a bag with handles or a mini treat bag, the steps are the same!
These are one-and-done gift bags. Meaning, once open, they are not meant to close back up.
For the best visual, check out the video that I made. It plays under the first image of the post and in the project card at the end of the post. Some details are a little tricky to put into words, so watching the video is the easiest way to see how these little treat bags come together.
More Paper Crafts To Make


MADE THIS CRAFT AND LOVED IT? 💛 Please leave a STAR rating and COMMENT below! Post it to Facebook or Pinterest to easily share with friends!

Missionary Gift Bags (Shirt and Tie)
Equipment
- scissors
- hot glue gun
Materials
- Paper bag
- Ribbon 1" for necktie, ⅜" for blouse
- Name tags
Instructions
Elder Bags
- Fill the bag with treats, no more than ½ full.
- Place an 18-20" long piece of ribbon across the top of the bag.
- Roll the bag over the ribbon 2 times, and flatten the folds with your fingers.
- Cut a 1.5"-2" slit on each side, just under the fold.
- Fold each end over to create a collar.
- Bring the ribbon together in the center of the collar.
- Tie the ribbon into a knot.Reminder: Watch my video to see how I do this step.
- Cut the ends of the tie diagonally on each side to create a tie shape.Tip: To keep the two ribbon pieces together for the necktie, add a small drop of hot glue in between after cutting the tie diagonally.
- Glue a missionary tag on the front of the gift bag.
Sister Bags
- This is an optional step. If making bags for sister missionaries and elders at the same time, I recommend trimming 2" off the top of the sister missionary bag so that they are the same height. If you don't trim the top of the bag, the sister missionary bag will be a few inches taller than the elders' bag.
- Cut a 1.5"-2" slit on both sides, 1" from the top.
- Open the collar by bringing the ends of the 1" section to the sides. Flatten.
- With your bag sides still slightly open, push out against the crease on an angle. This will form the shirt's sleeves.
- Flatten and repeat on the other sides.Reminder: Watch my video to see how I do this step.
- Flatten everything to crease the folds. Your bag should have a strip across the top and two tiny triangle sleeves popping out of the sides.
- Glue a piece of ribbon or buttons down the front.
- Glue ribbon on the edge of each sleeve of the blouse.
- Fill the bag with candy and treats, no more than ½ full.
- For a smaller collar, trim the ends of the collar 1" on each side.Note: This is an optional step.
- Fold the collar strips over and glue them into place.
- Glue a small ribbon bow in the center of the collar.
- Glue a missionary tag on the front of the gift bag.

Leave a Reply