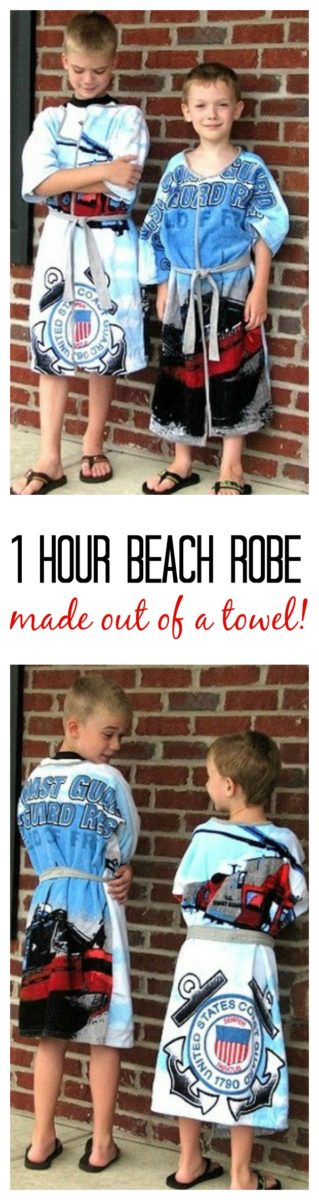
Make a beach robe in an hour using a beach towel with our beach robe tutorial! An easy project that will keep your kids dry after swim lessons or at the beach!
You can make all sorts of things out of towels. We love our hand travel caddies. They work great for storing toiletries while traveling! You can also make wash cloth puppies or a beach bag!
I signed the boys up for swim lessons thinking that it would be a fun refreshing way to spend our mornings during these hot summer weeks....or not! It's been rainy, stormy, and cold! One lesson was cancelled due to all of the thunder and the other two have been chilly. Not what we were expecting, but the boys don't care. They are having fun. I still wanted to make something to keep them warm, especially since their lessons are not at the same time so one has to wait for the other.
Beach Robe Made From a Towel
That is where the beach towel tutorial comes in! I was so happy with how these turned. Especially since I didn't have a tutorial or pattern to follow {and I ALWAYS use a tutorial or pattern when I sew!} So I will officially categorize this project as EASY.
The beach towel tutorial the perfect sewing project for a beginner. Just a few simple cuts and your robe is ready to sew. No sleeves, no gathering, etc. It's all made from one piece....a beach towel.
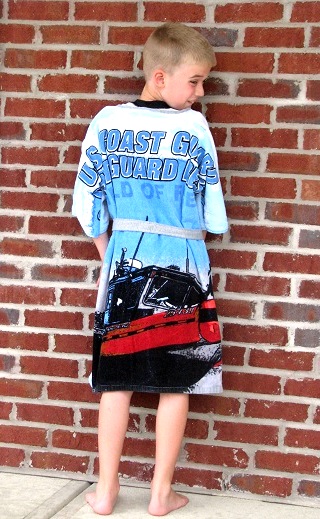
We had two Coast Guard ones that worked perfect. They were HUGE! Regular beach towels would work and even a bath towel would be perfect for a child 3 years old or under.
1 Hour Beach Robe Tutorial
So here is the tutorial. Don't laugh. It took 5 minutes and I think it should be pretty simple to follow.
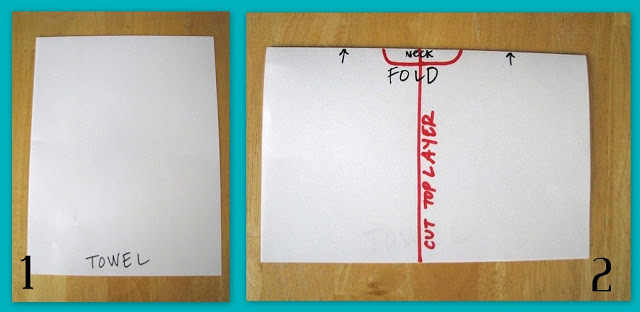
1. Let's pretend that this piece of 8"x11" paper is your bath or beach towel. (Bath towel for ages 5 and under, beach towel for 5+. You can cut down a beach towel to make it smaller as well since they usually have brighter prints than a bath towel)
2. Fold your towel in half with the fold at the top. It is the same piece of paper as in the first photo, just zoomed in a bit so it looks bigger. Cut straight up the middle of the TOP layer of the towel. DO NOT cut through both layers!
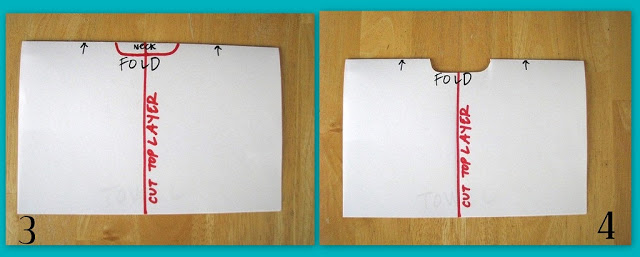
3. When you get to the top fold, round out a section on both sides of the middle cut for the neck. I went about 2.5" in each direction.
4. Your towel should look like this now.
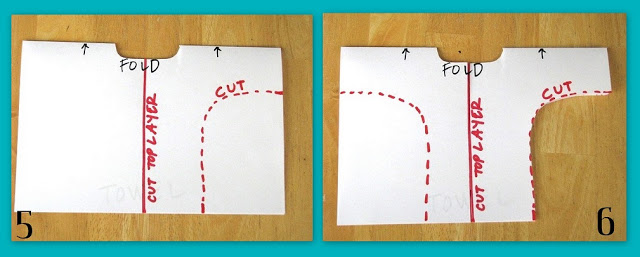
5. Now flip your towel inside-out and try it on your child. Have them stretch their arms out to the sides and mark the under arm and the bottom of the towel where you think you'll want to begin your cuts for the sleeves and sides. Then carefully cut out that section.
6. Keep that section that you cut out and use it as your pattern piece for cutting the other side. That way it is even on both sides.
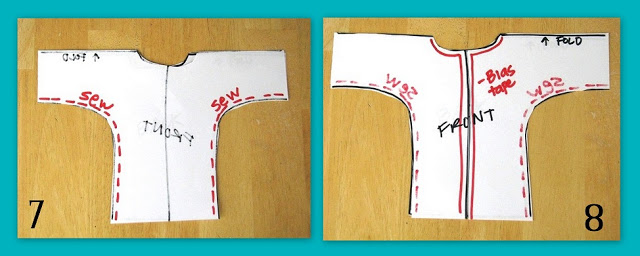
7. Keep towel inside-out and stitch the sides, beginning at the bottom and ending at the bottom of each sleeve.
8. Since you used a finished beach towel, the hems are already in place for the sleeves and bottom of the robe. All you need to do is finish the raw edges that you cut up the front and around the neck. I used some scrap knit fabric and made bias tape from it. Bias tape, twill tape, or ribbon would work.
For the belt: Cut out a piece of fabric 4" x whatever length you want your belt to be. Mine were 48". So 4"x48". Then fold it in half so that it is 2" x whatever length you chose and sew up the side. Turn right side-out and press. Fold in each end and pin, then top-stitch around the entire belt, catching the open ends as you go across each one.
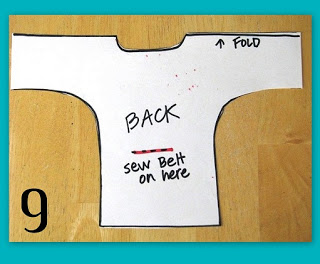
Mark a spot on the back of your robe for belt placement. I sewed mine on in a box/square design about 2" wide to secure it. I had mine hit right above the hips on my boys.
That's it!
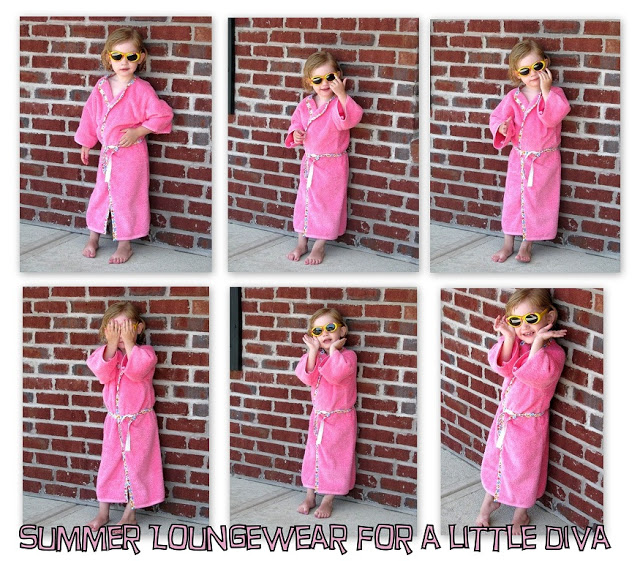
And here is the one that we made for Kaylee! This one was made out of a bath towel.
I am not a professional, heck, just look at the drawings above! But I hope you were able to make some sense from all our beach robe tutorial. Let me know if you have any questions!
If you liked this beach robe tutorial you might also like these easy sewing projects on my Sewing With Kids Pinterest board!


wyominggirlcoastiewife says
These are so fun and of course I'm a sucker for anything Coast Guard 😀
Katie says
I would like to know where you found the Coast Guard towels ?
My son is currently in the CG and the robes would cute gifts for my grand kids
Thanks
Brandy says
Hello to a fellow Coast Guard family!! My husband spent a tour as a Coast Guard recruiter and found those in the storage closet of his office. He brought home a couple for our boys, but I'm not sure if they make/sell them anymore. That was 6 years ago. I'm so sorry!
Katie says
Thanks, next time I am at the exchange I will look and see if they have any there. But thanks for your help