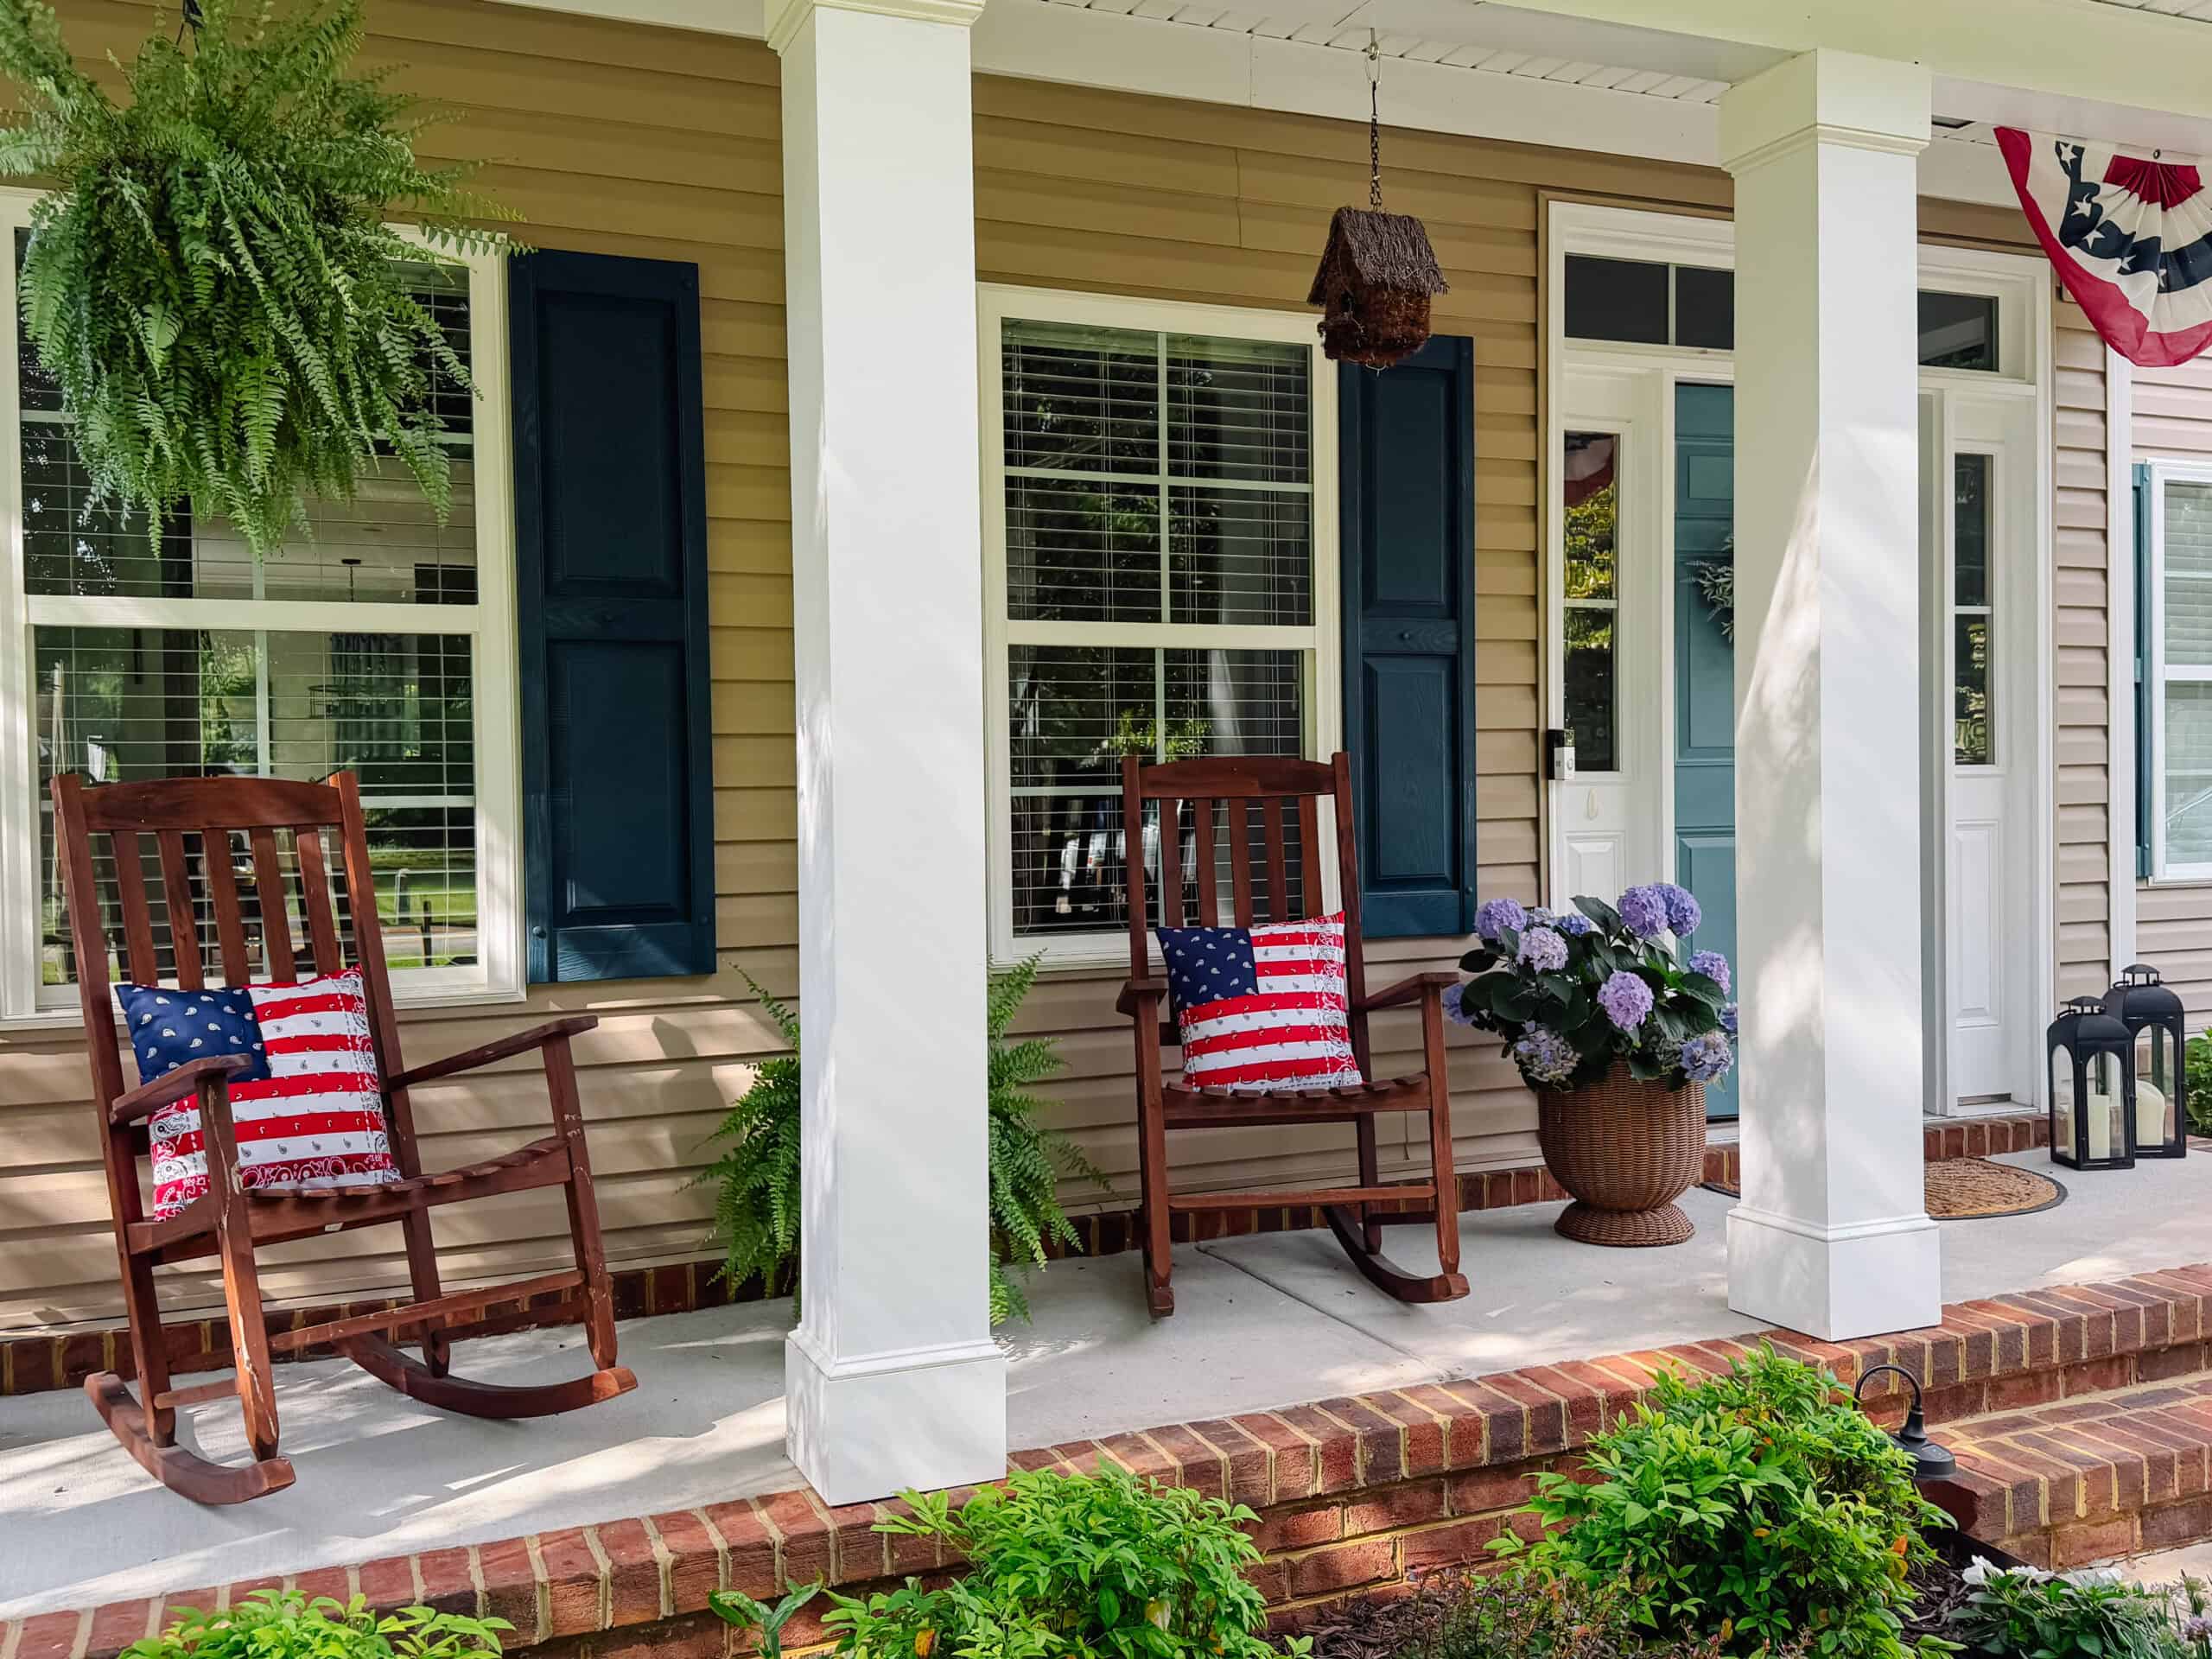
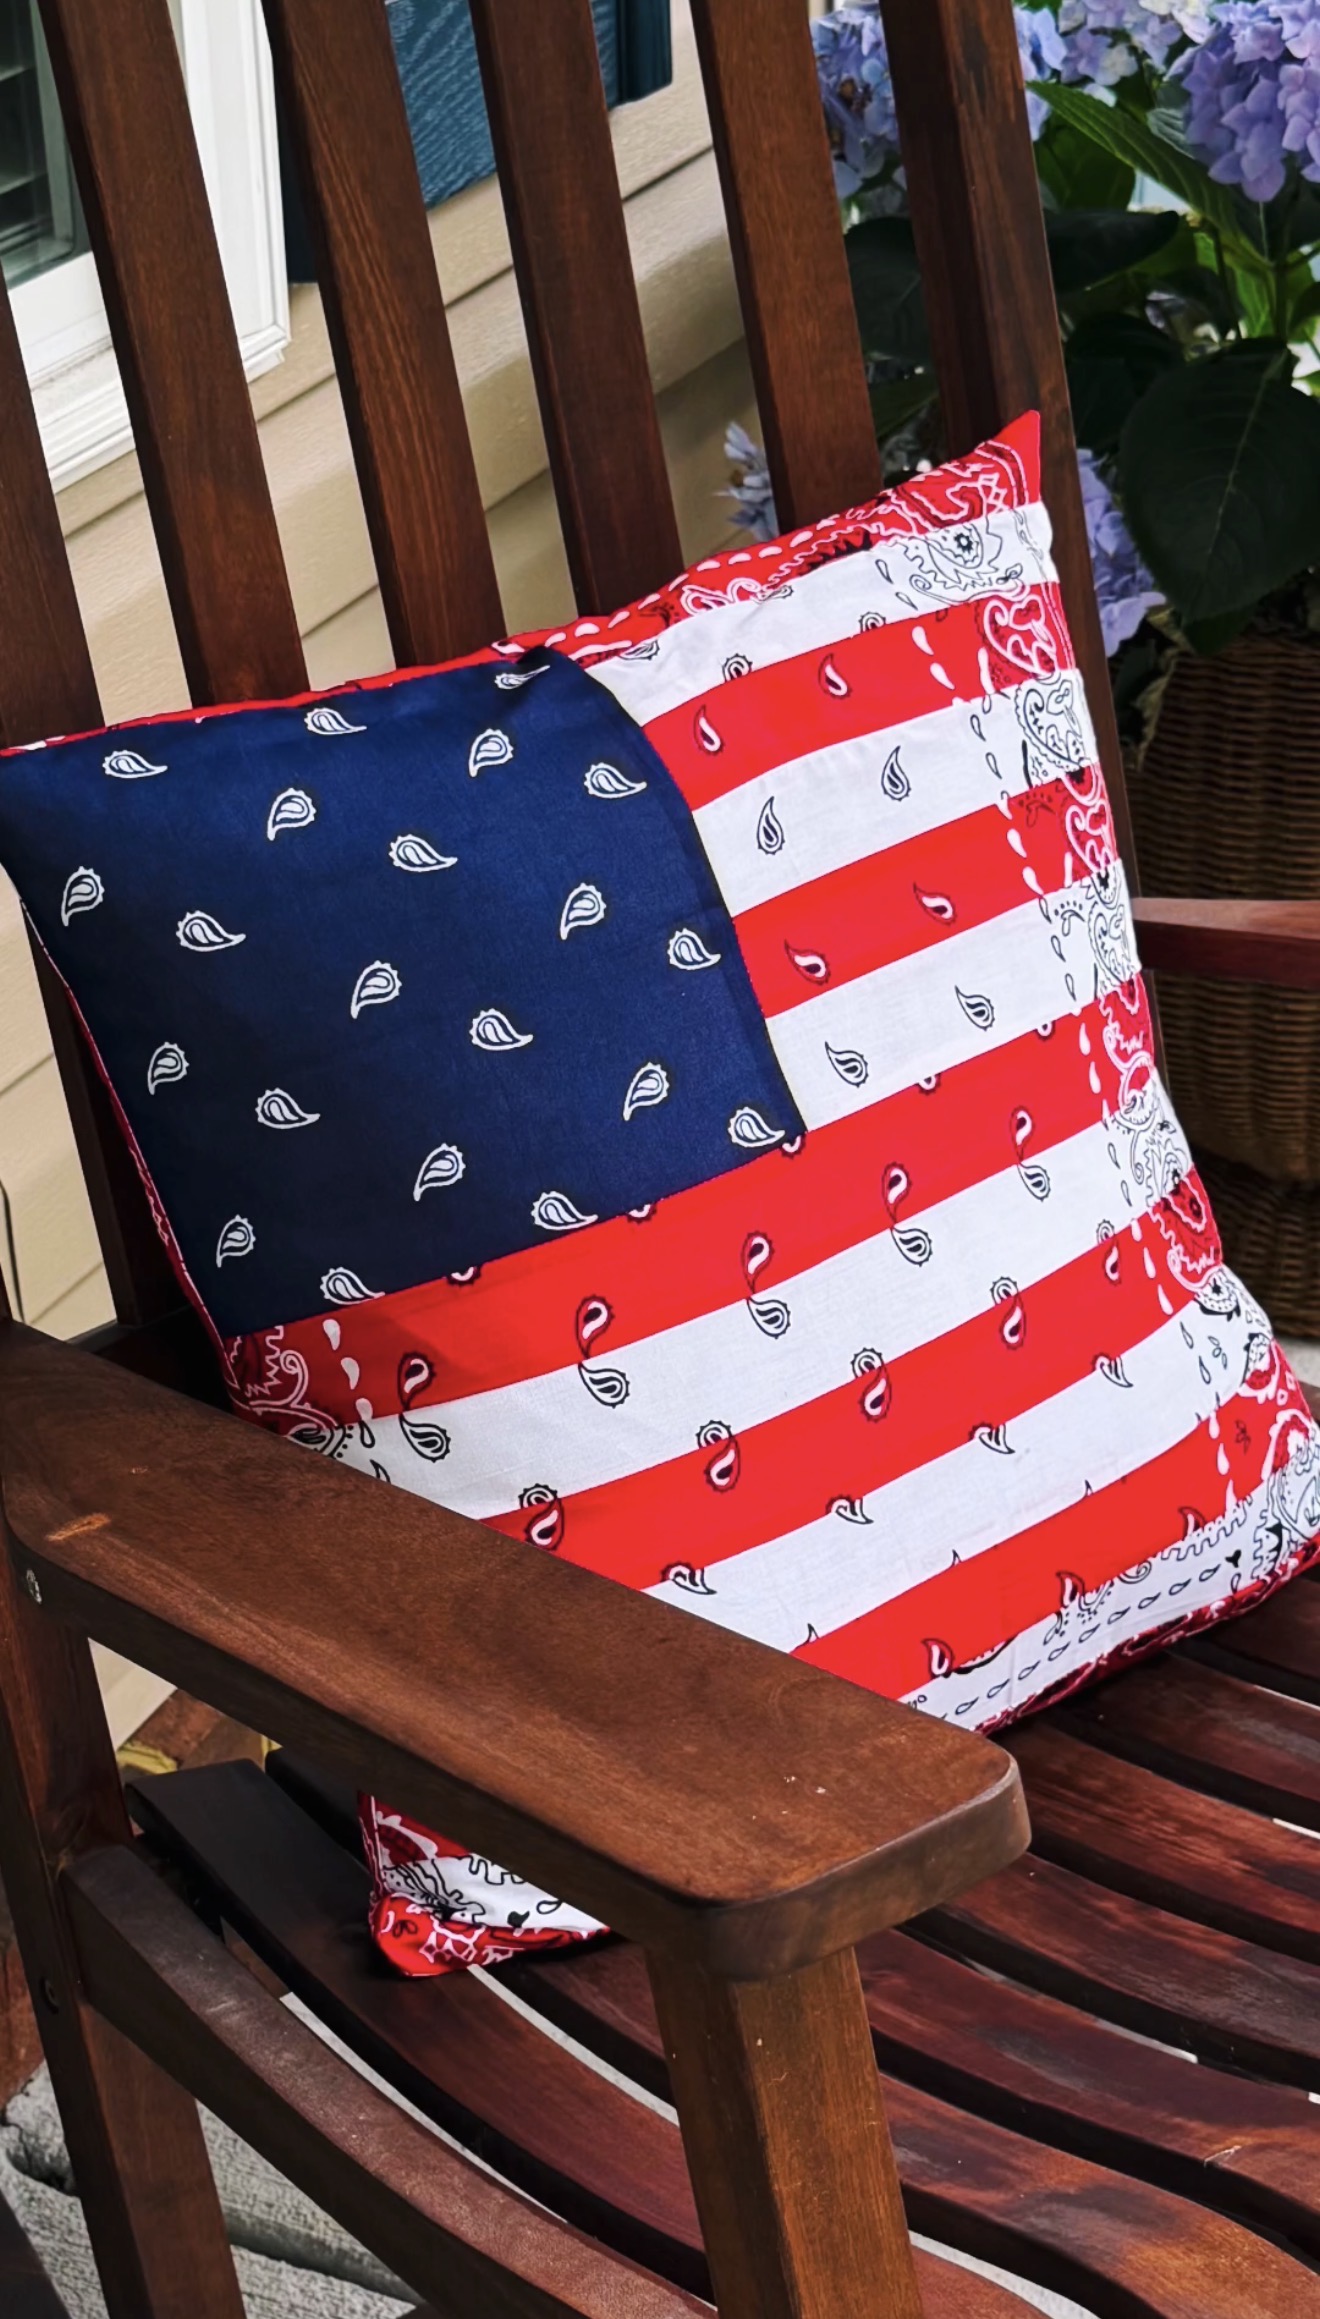
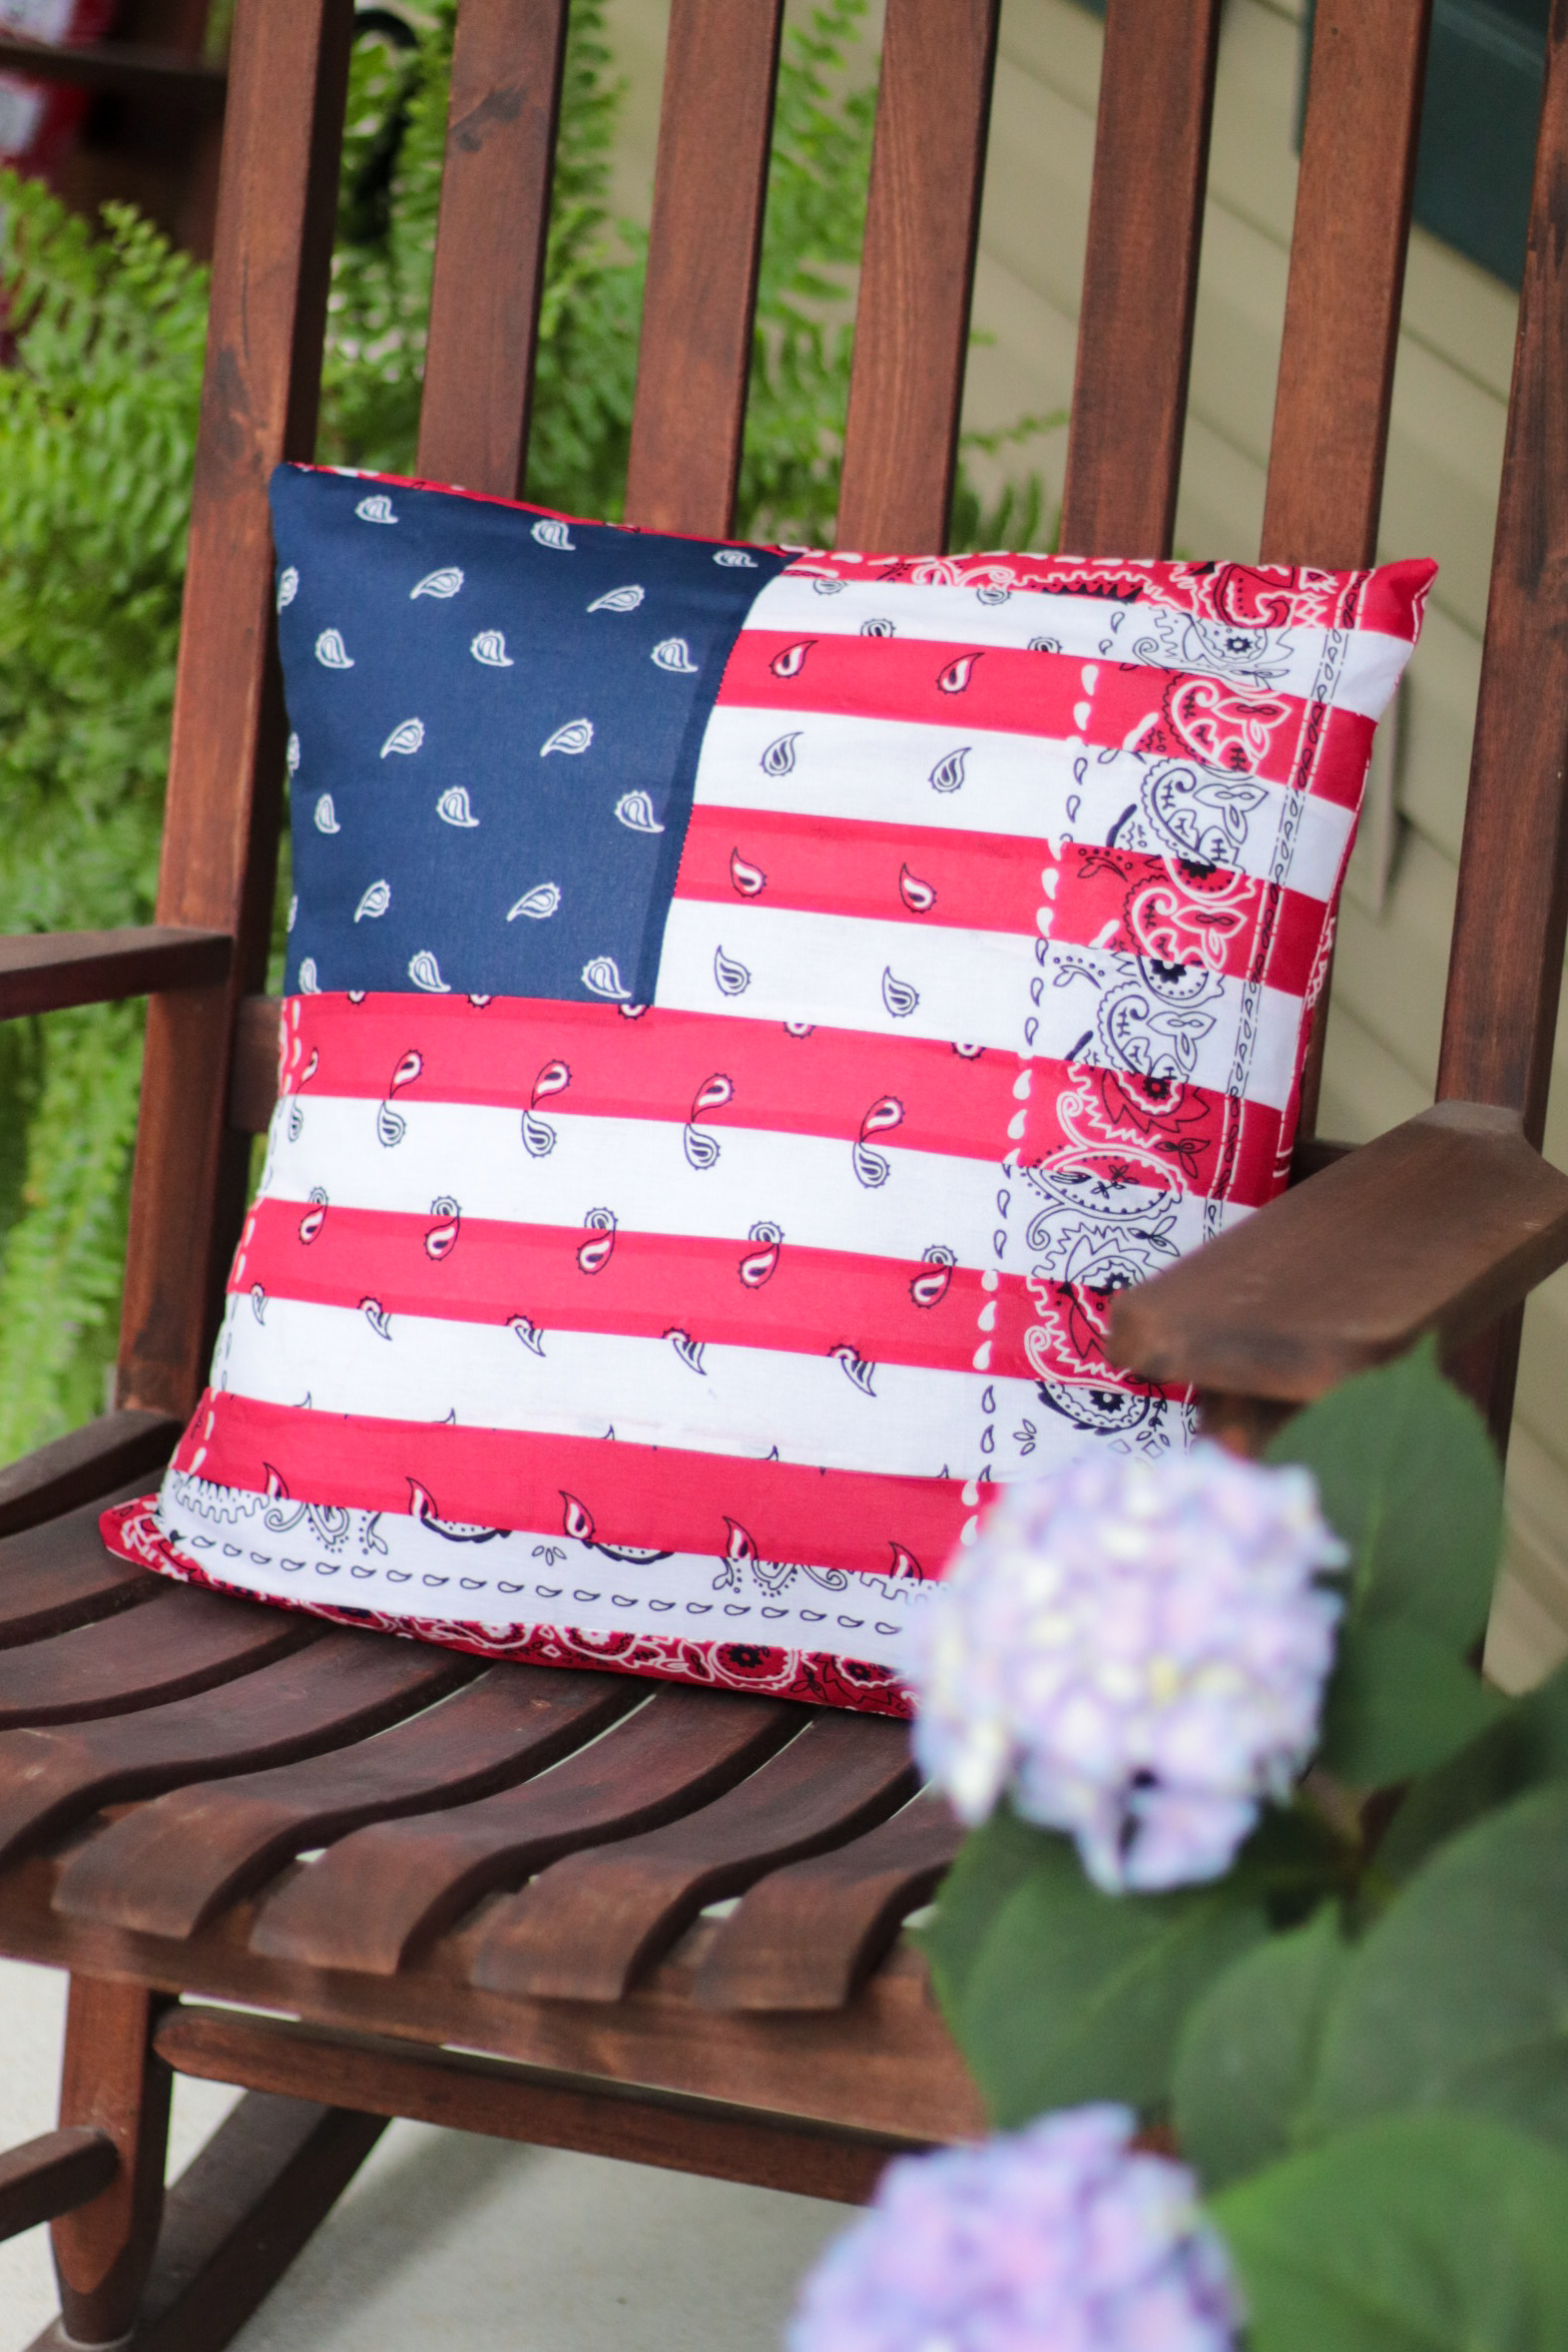
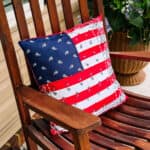
Turn red, white, and blue bandanas into a festive bandana flag pillow. This beginner-friendly sewing project makes great summer decor.
You might also like my bandana tote bag tutorial, bandana bracelets, or bandana picnic blanket.
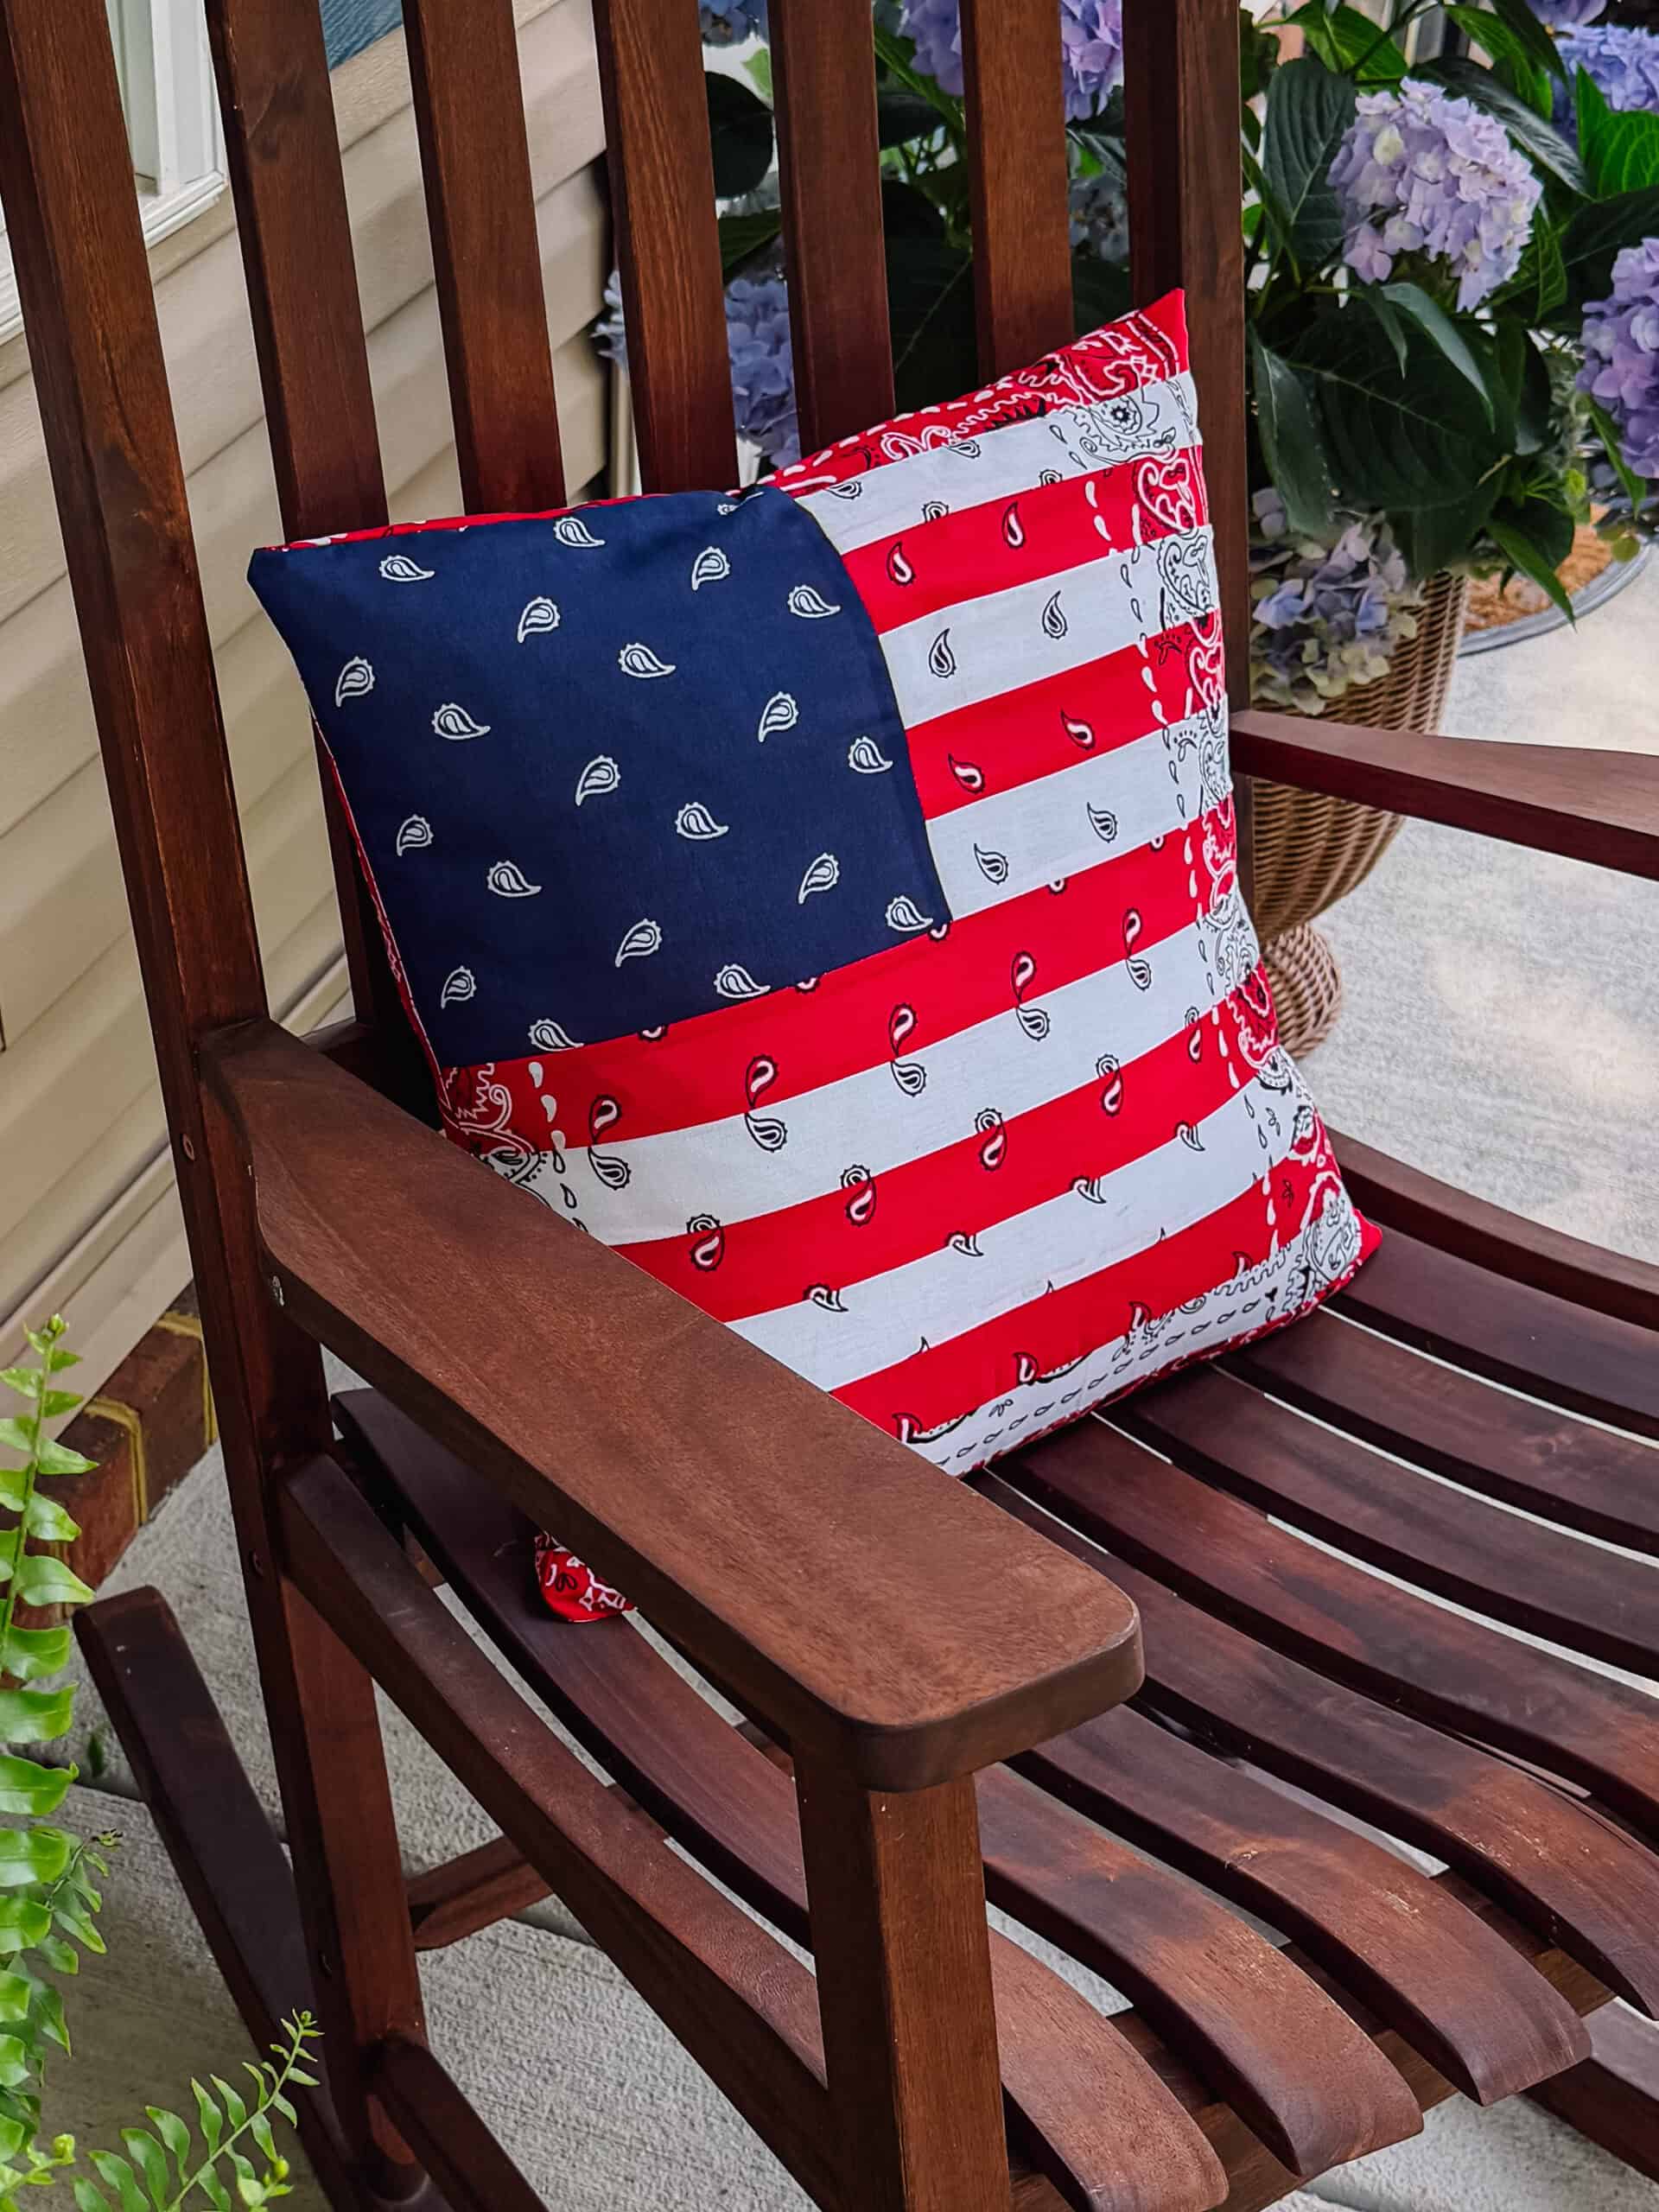
I love decorating for the seasons, but I don't love storing a bunch of extra pillows. That's why I almost always make pillow covers instead of full pillows. They take less fabric, are easier to store, and can be swapped out in minutes. This patriotic bandana flag pillow cover is one of my favorite summer sewing projects.
Why I Love This Craft
- It's budget-friendly. Bandanas are inexpensive and easy to find, making this a patriotic decorating project that doesn't cost much to make.
- The pillow cover is easy to store. I prefer making pillow covers instead of full pillows because they take up very little space when the season is over.
- It adds instant patriotic charm. The classic red, white, and blue bandana print gives this pillow a vintage Americana feel that's perfect for Memorial Day, the Fourth of July, and summer decorating.
- Easy to customize. Like the look of the pillow, but don't want to use bandanas? Use solid fabric instead!
Jump to:
Tips and Tricks
- Press as you sew. Taking a few extra minutes to iron your seams flat will give your flag pillow cover crisp lines and a more professional finish.
- Use a pillow form that's slightly larger than the cover. For a fuller, designer look, insert a pillow form that is 1–2 inches larger than your finished pillow cover size. These bandana pillow covers are 17" x17", the perfect size for an 18" x18" pillow form.
- Plan your layout before sewing. Lay out your red, white, and blue bandanas first to ensure your flag stripes and canton are balanced and centered before stitching anything together. This helps you avoid shifting pieces later and ensures a clean, intentional design.
Supplies
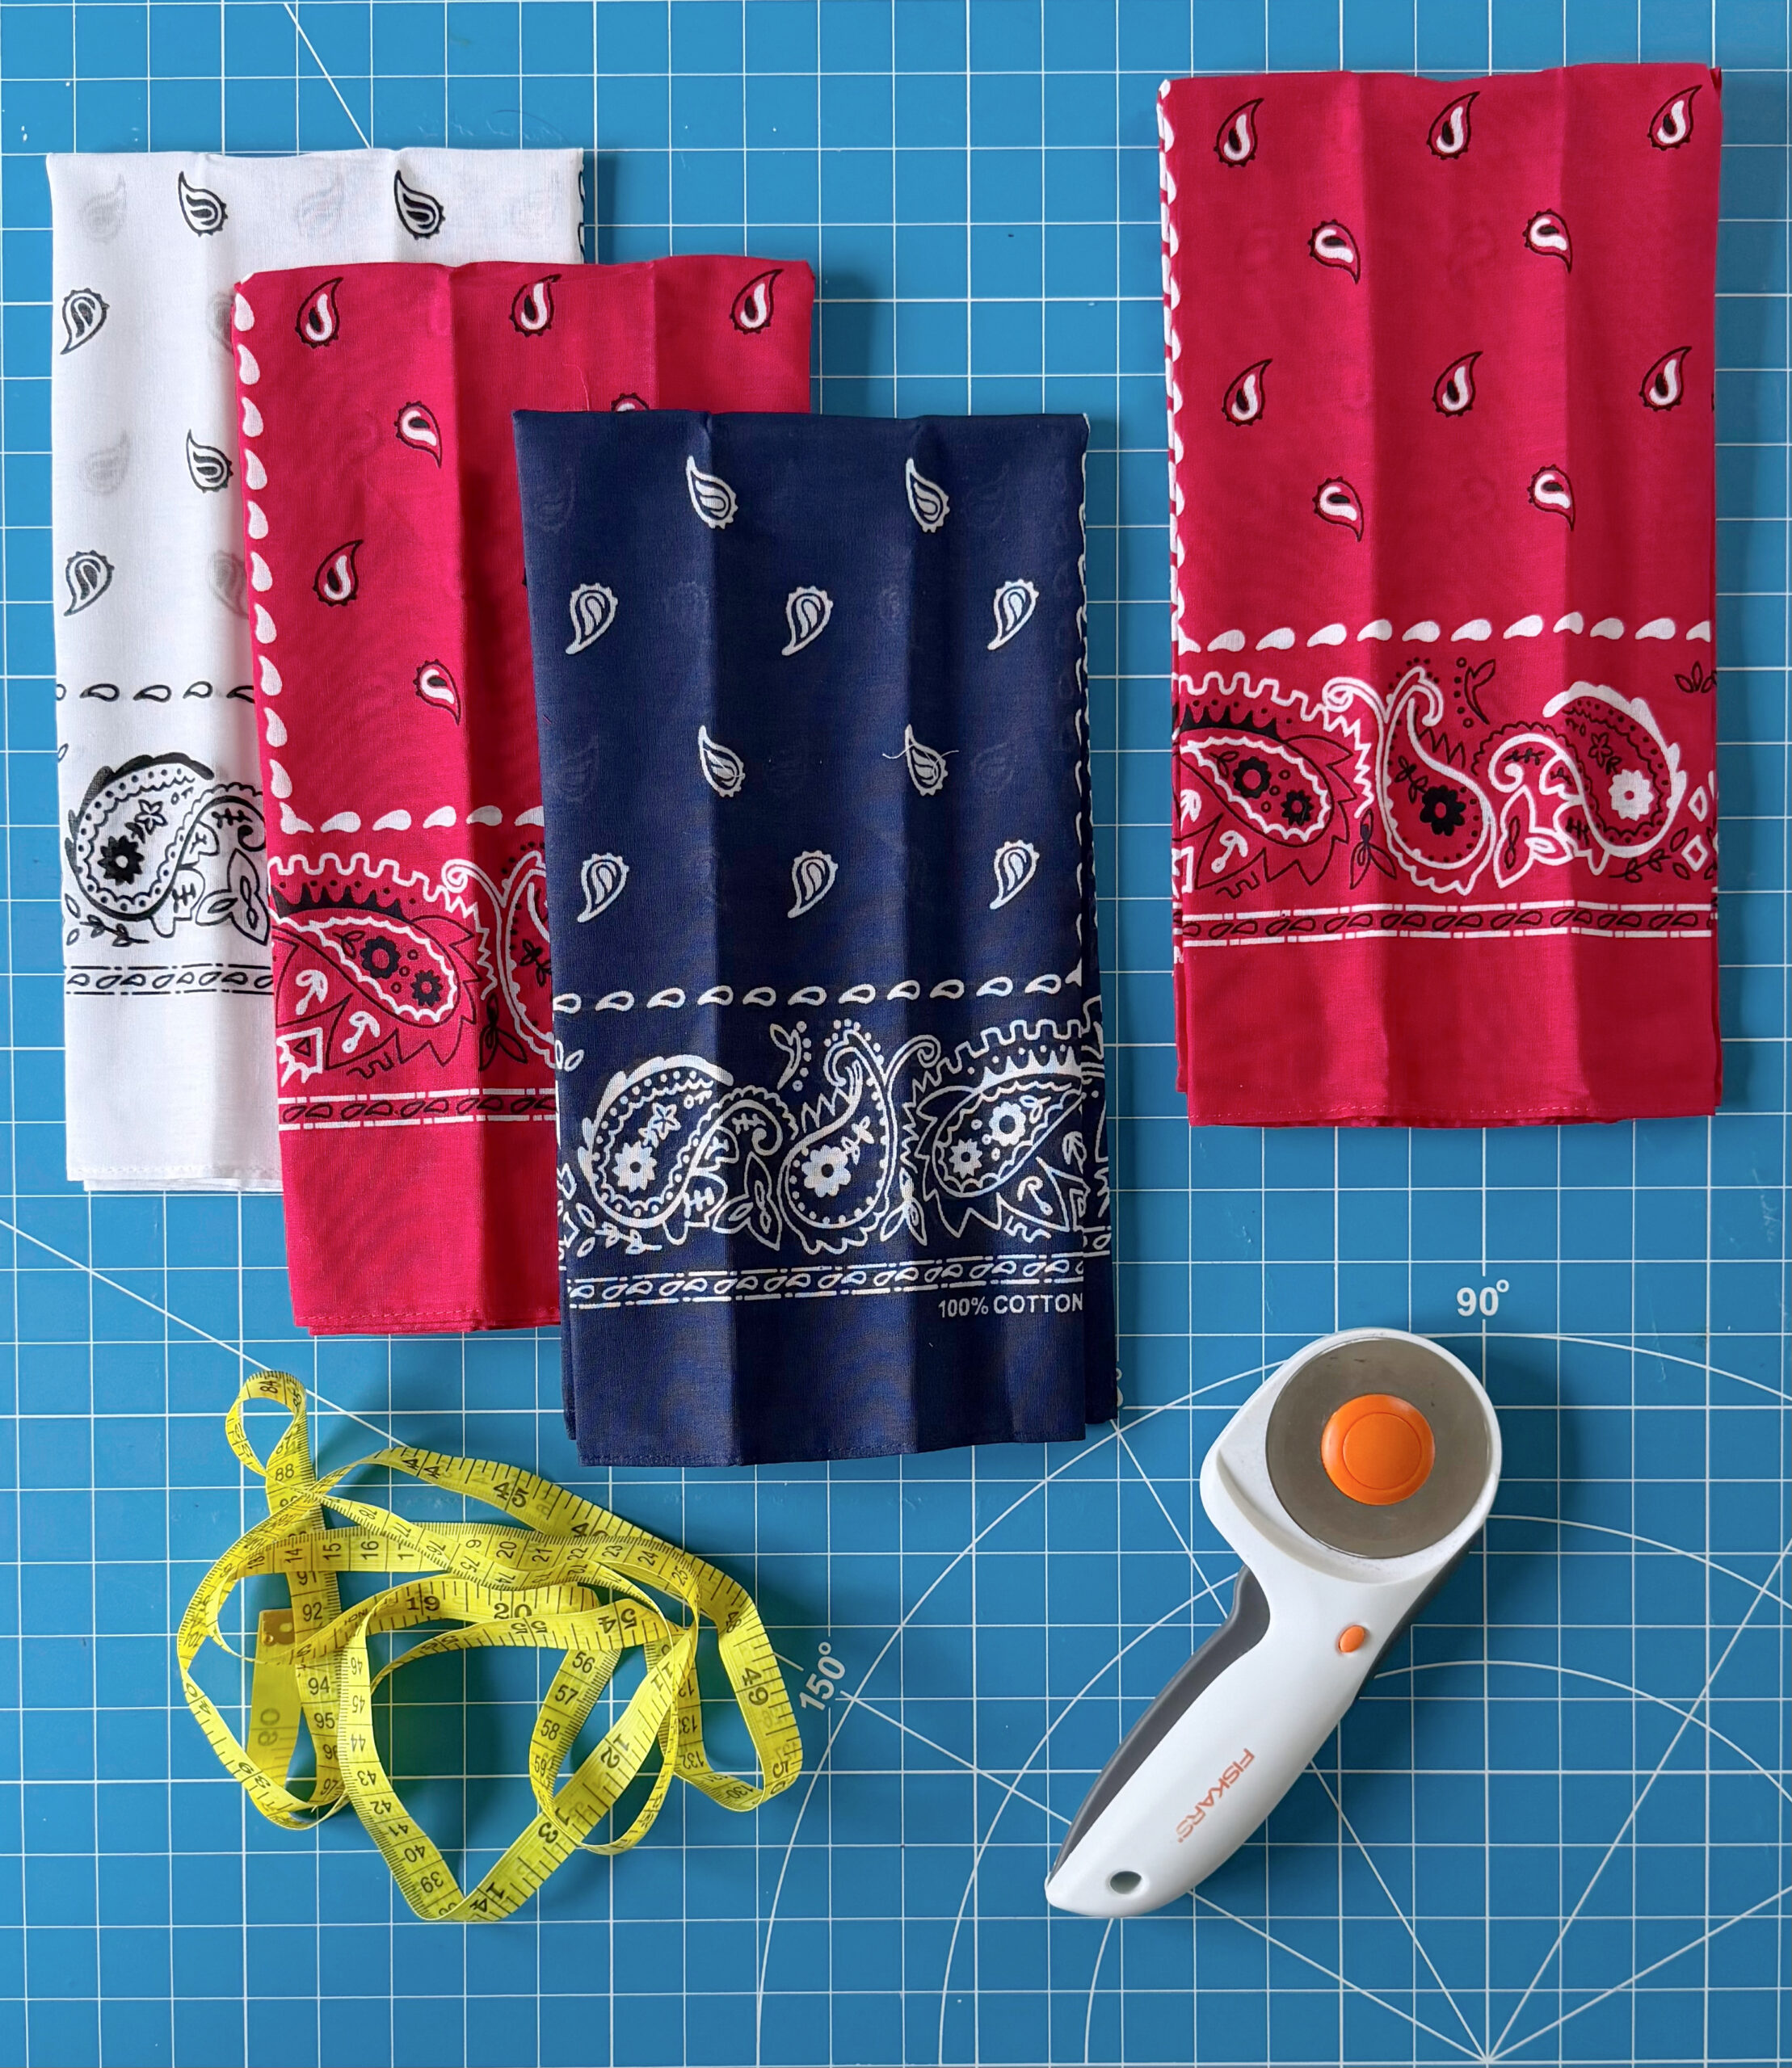
- Bandanas: You'll need 4 per pillow. White, red, and blue. The 4th bandana can be any color you'd like, as it will be on the back. I used red. My bandanas were 22"x22," which are pretty standard.
- Scissors or rotary cutter
- Measuring Tape
- Pillow Form
See the how-to card at the end of the post for full information on supplies and quantities.
Cutting Guide
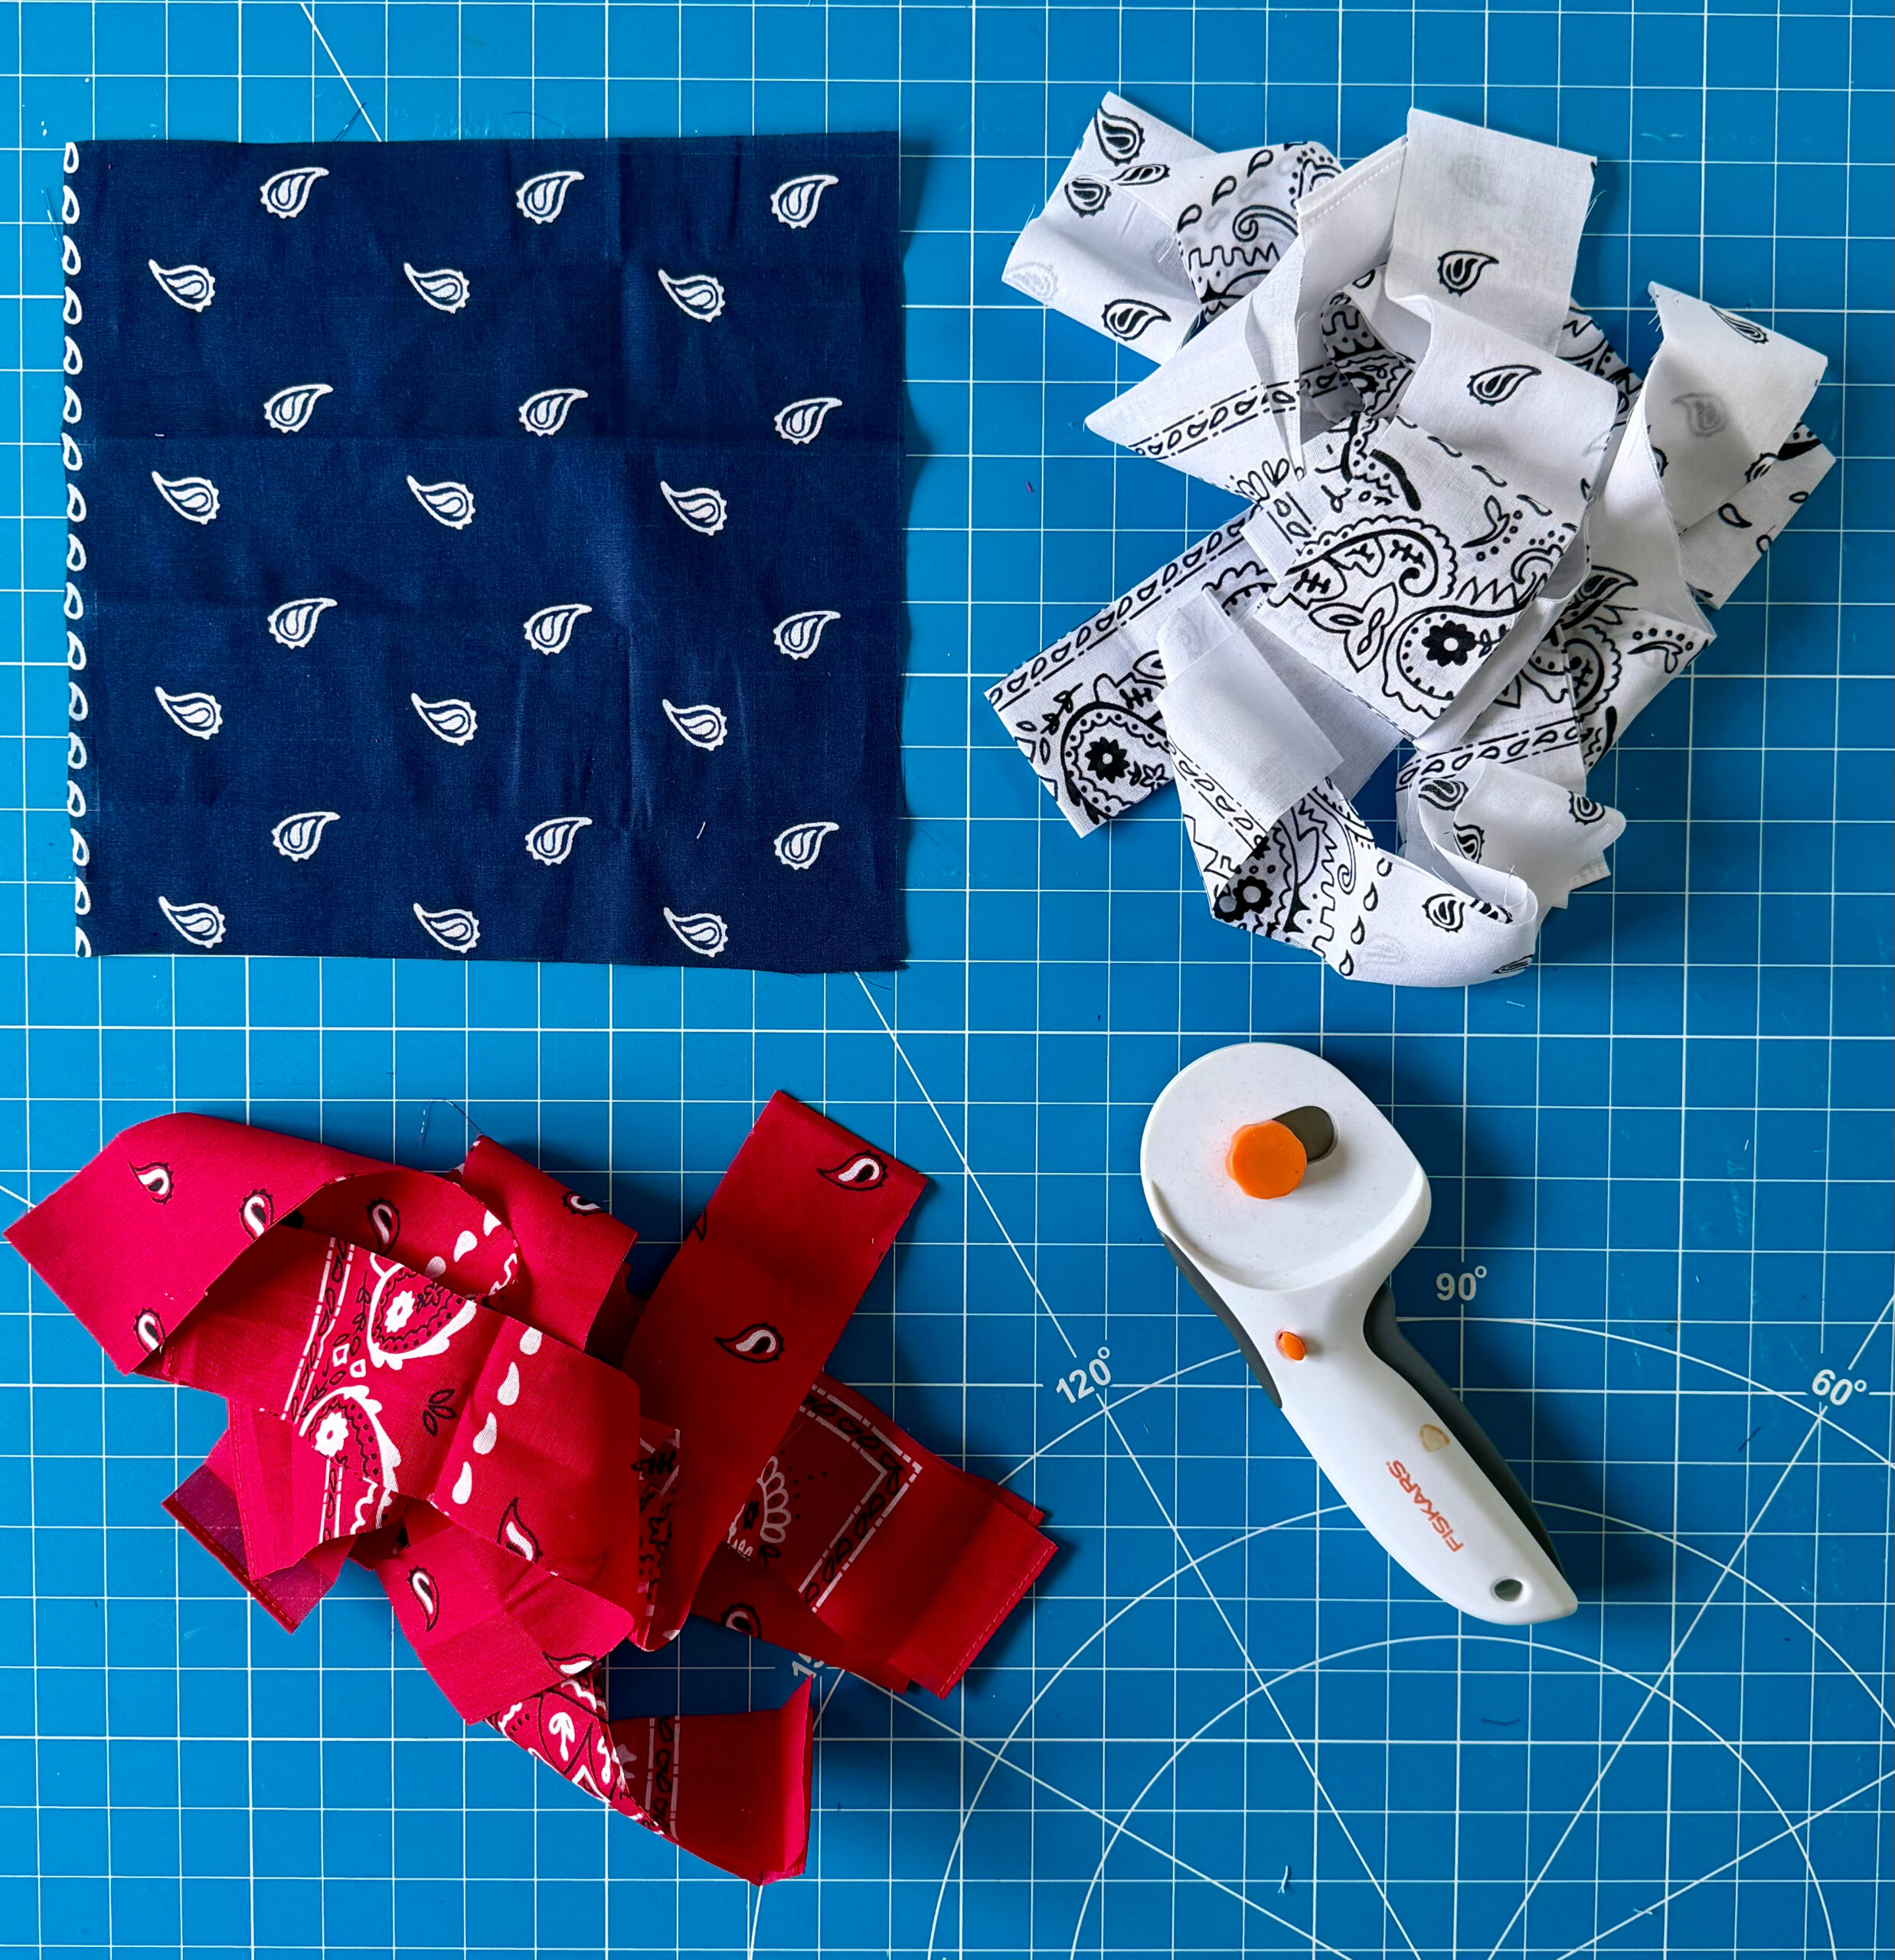
- 1 blue bandana: Cut a 9"x9" square.
- 1 red bandana: Cut into 2" wide strips that are the length of the bandana.
- 1 blue bandana: Cut into 2" wide strips that are the length of the bandana.
- 1 red bandana: Set aside to use later.
How To Make a Bandana Flag Pillow
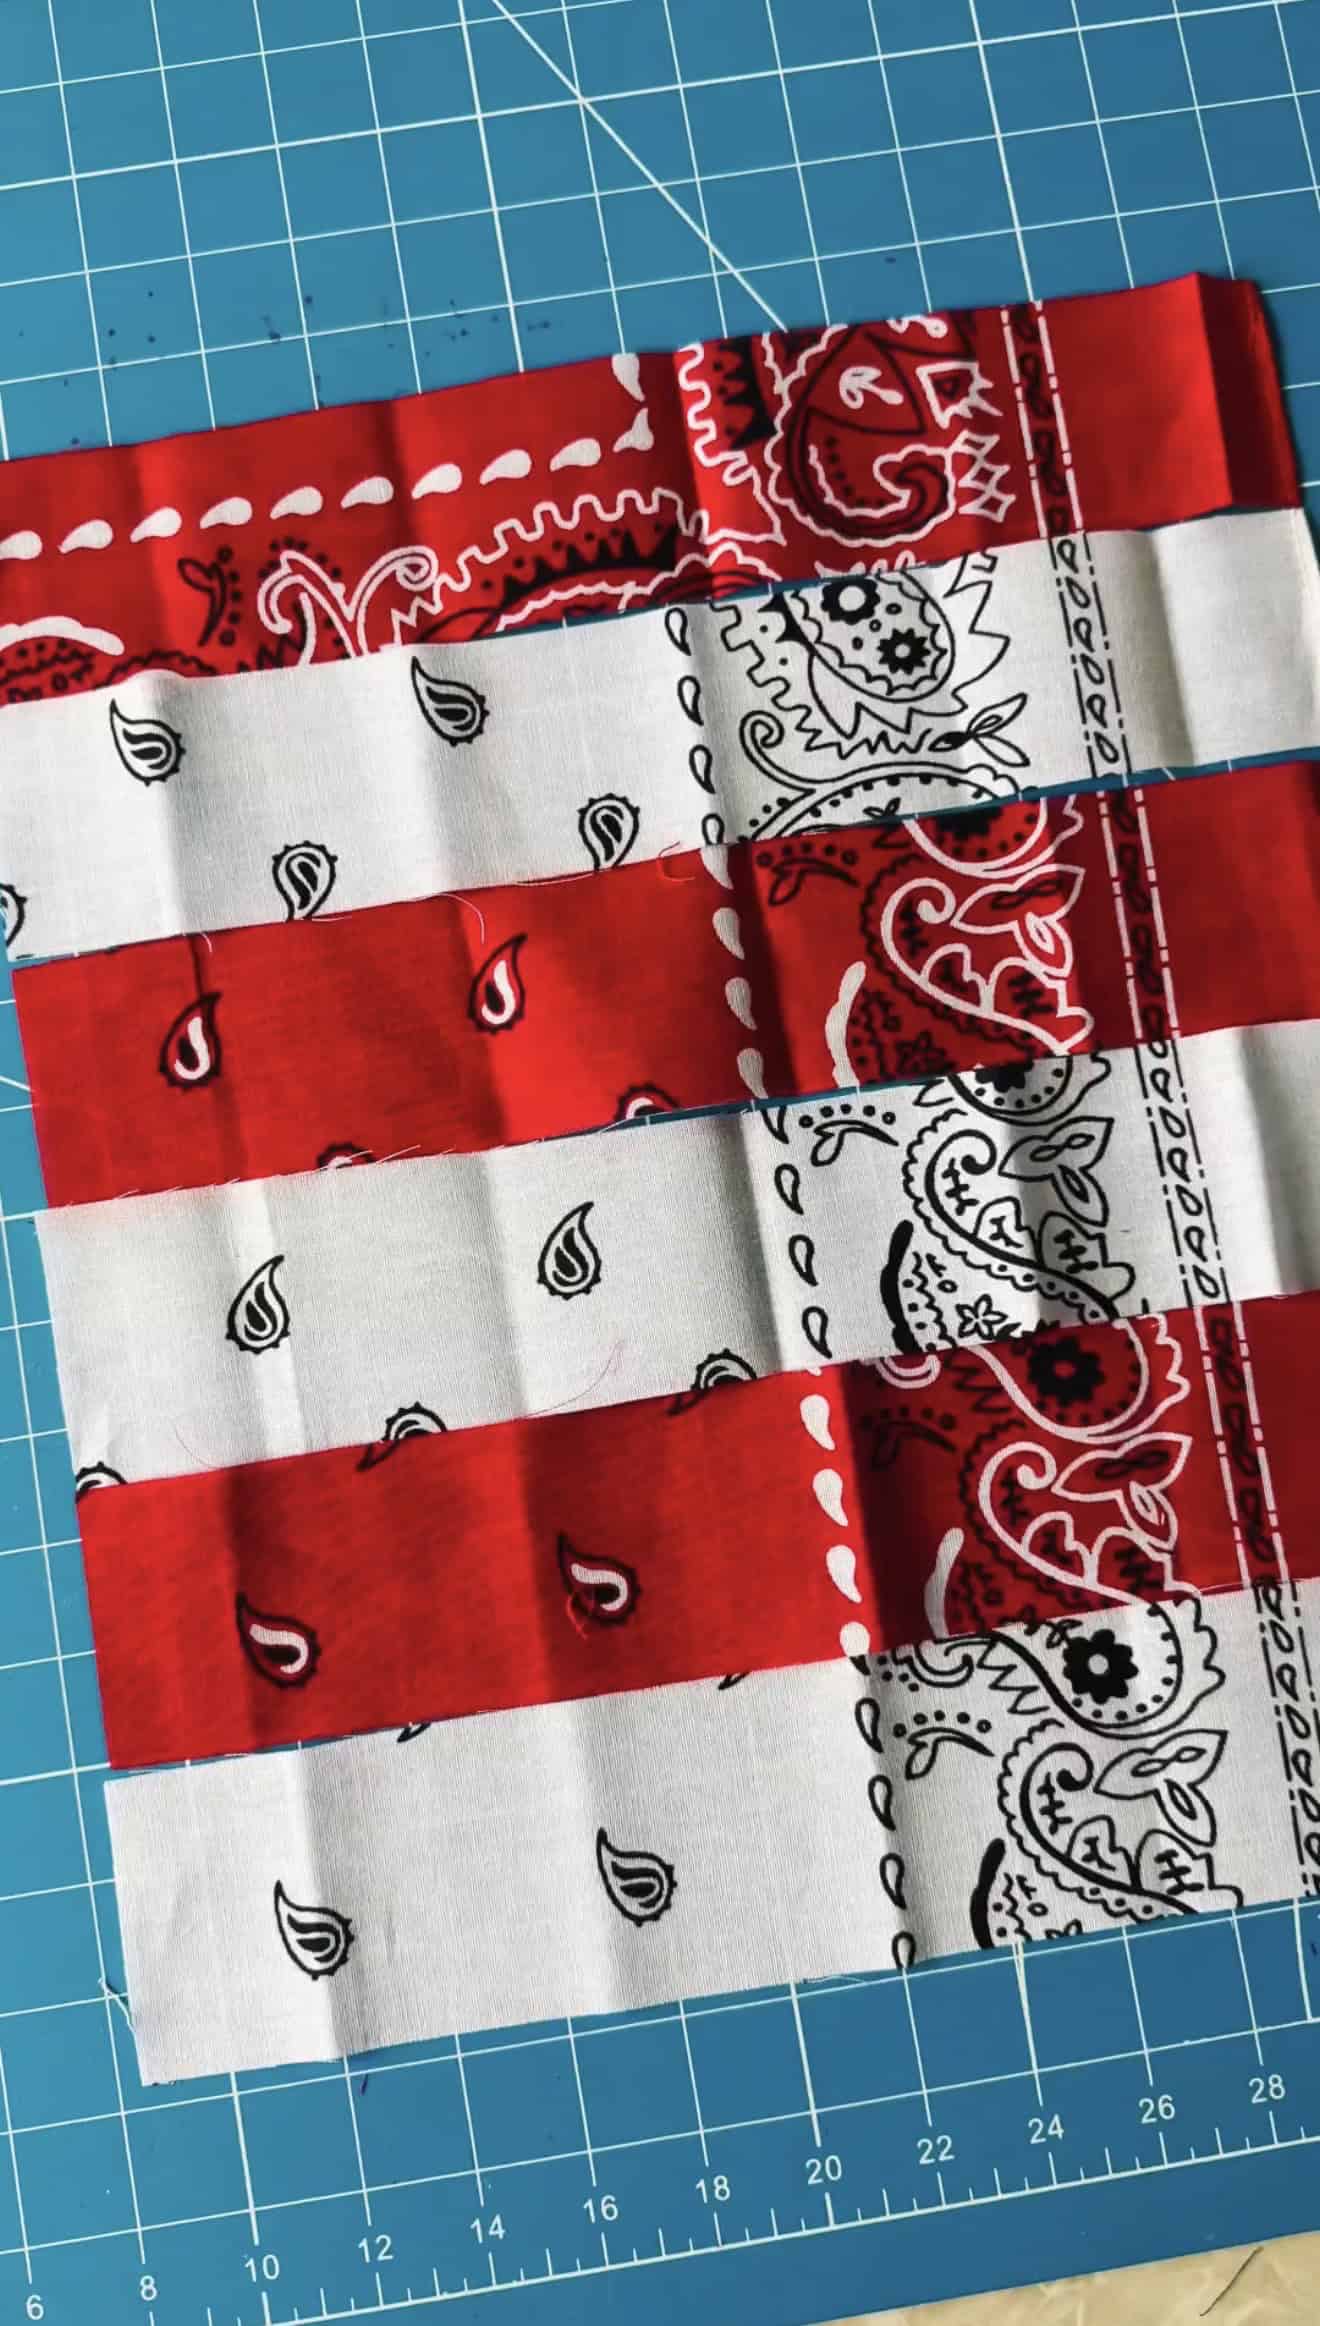
Step 1: Select 3 red strips and 3 white strips, then line them up, alternating red and white. Trim each strip to 10".
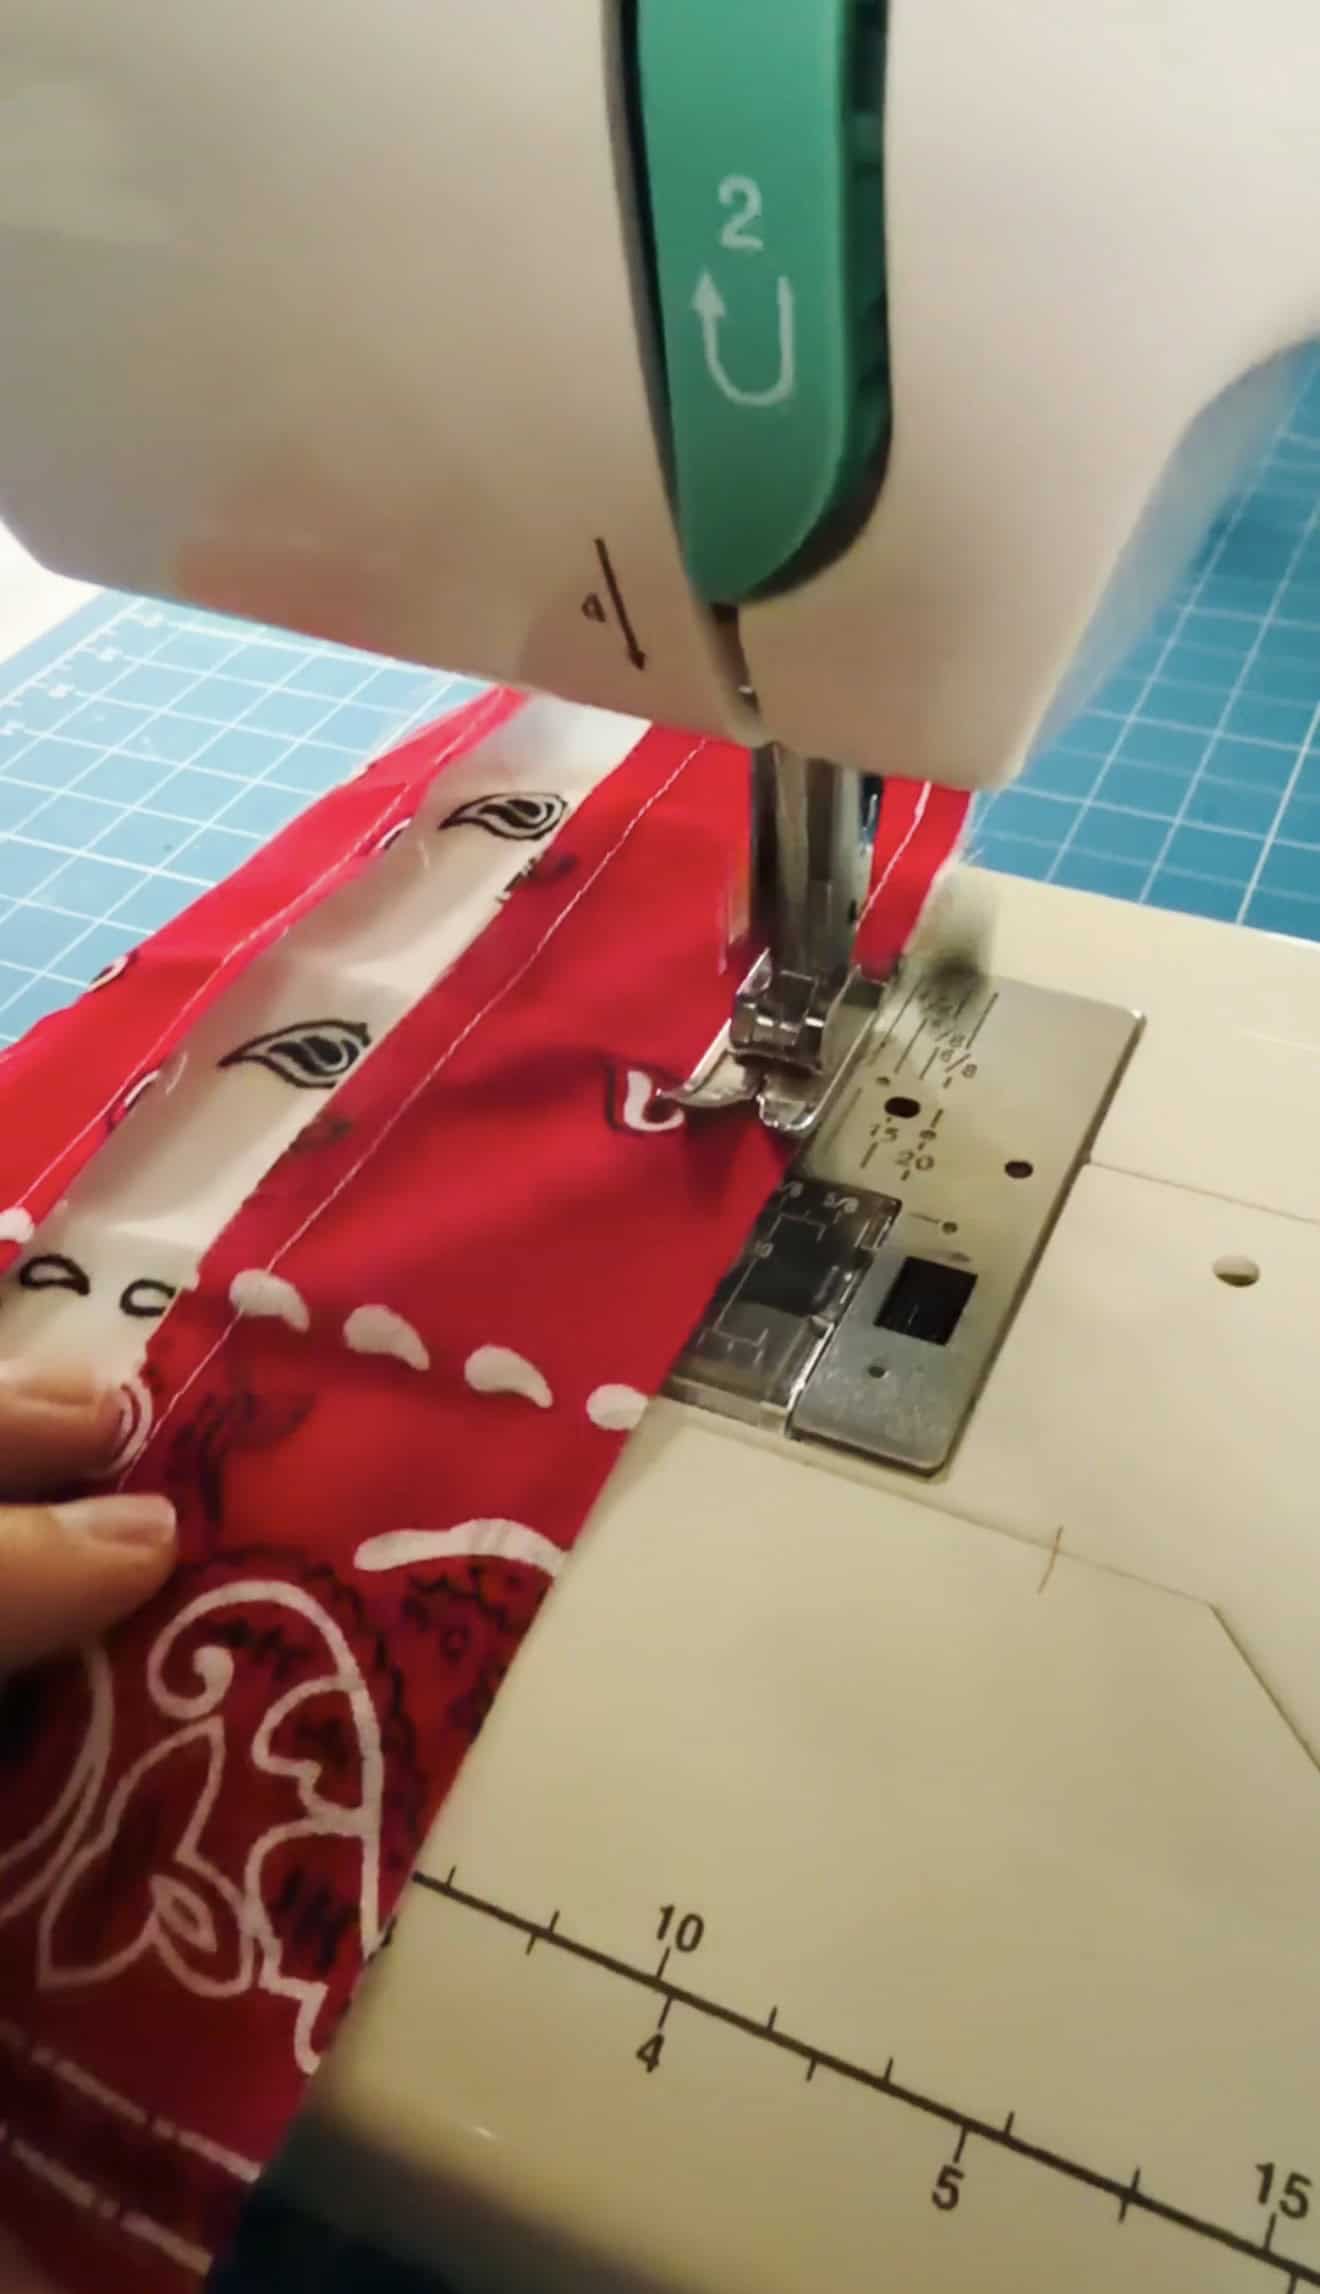
Step 2: Sew the strips together, beginning with a red strip and ending with a white strip. Use a ⅜" seam allowance. Iron seams flat.
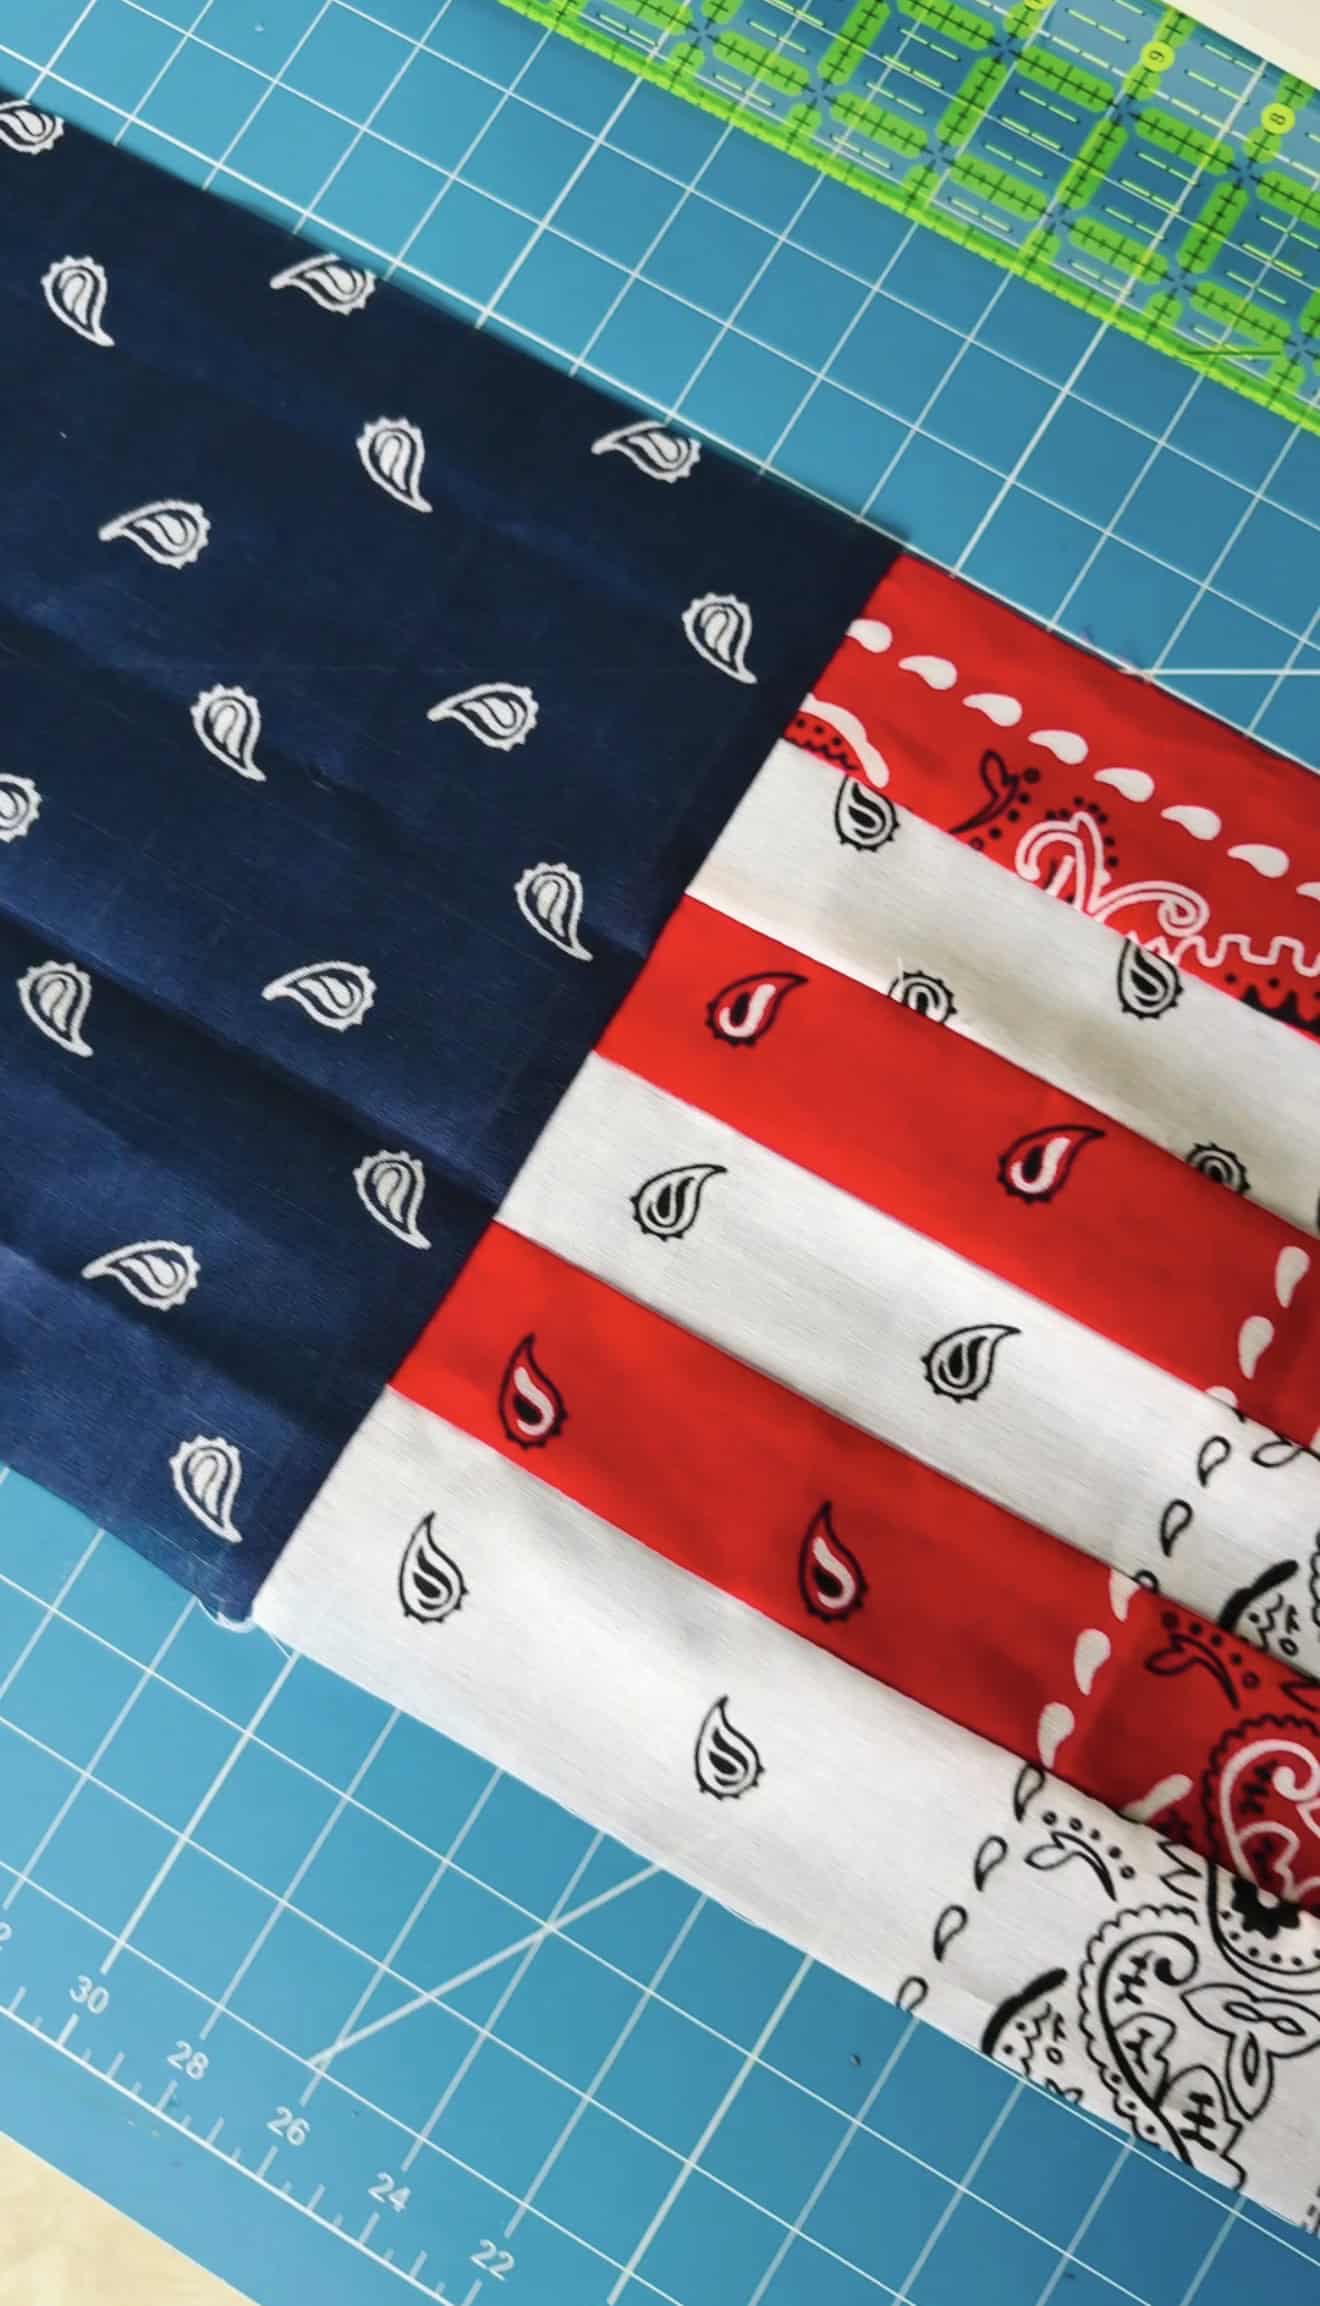
Step 3: Sew the 9"x9" square of blue fabric to the left of the red-and-white block of strips you just assembled. Iron seam flat.
Note: Don't worry if you have uneven edges; you'll square everything up later.
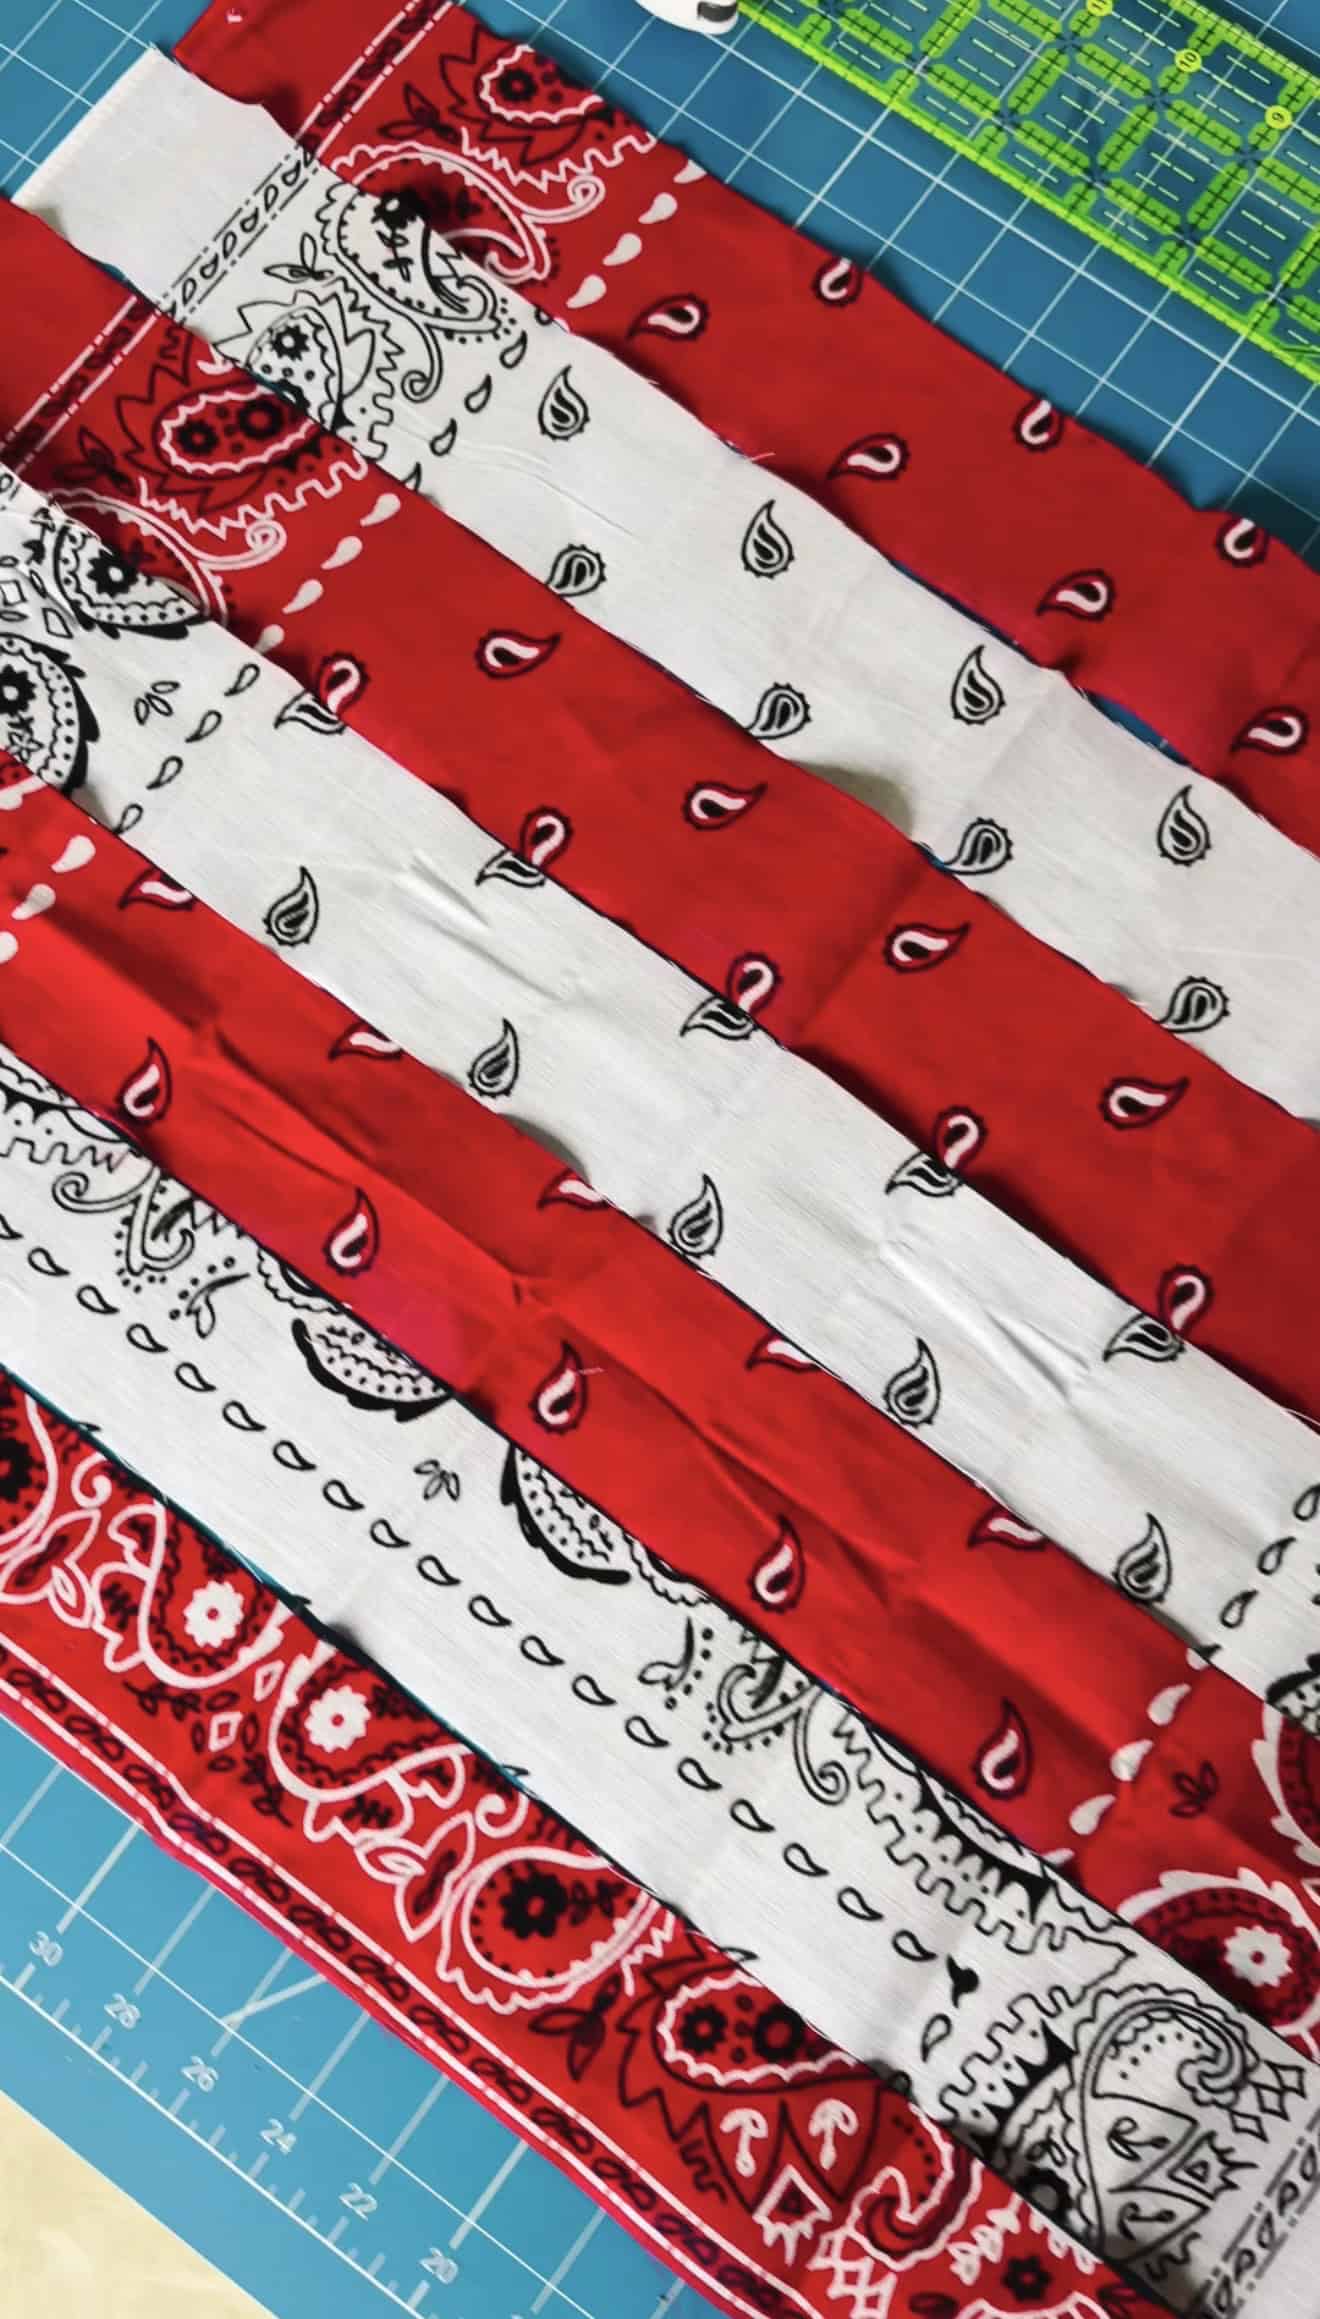
Step 4: Line up the remaining 7 strips and sew them together, alternating red and white. Trim each strip to 18.5" long.
Note: Bandanas come in a variety of patterns and won't look exactly like mine. I lined mine up so that the edge sections matched, but you can arrange yours however you'd like.
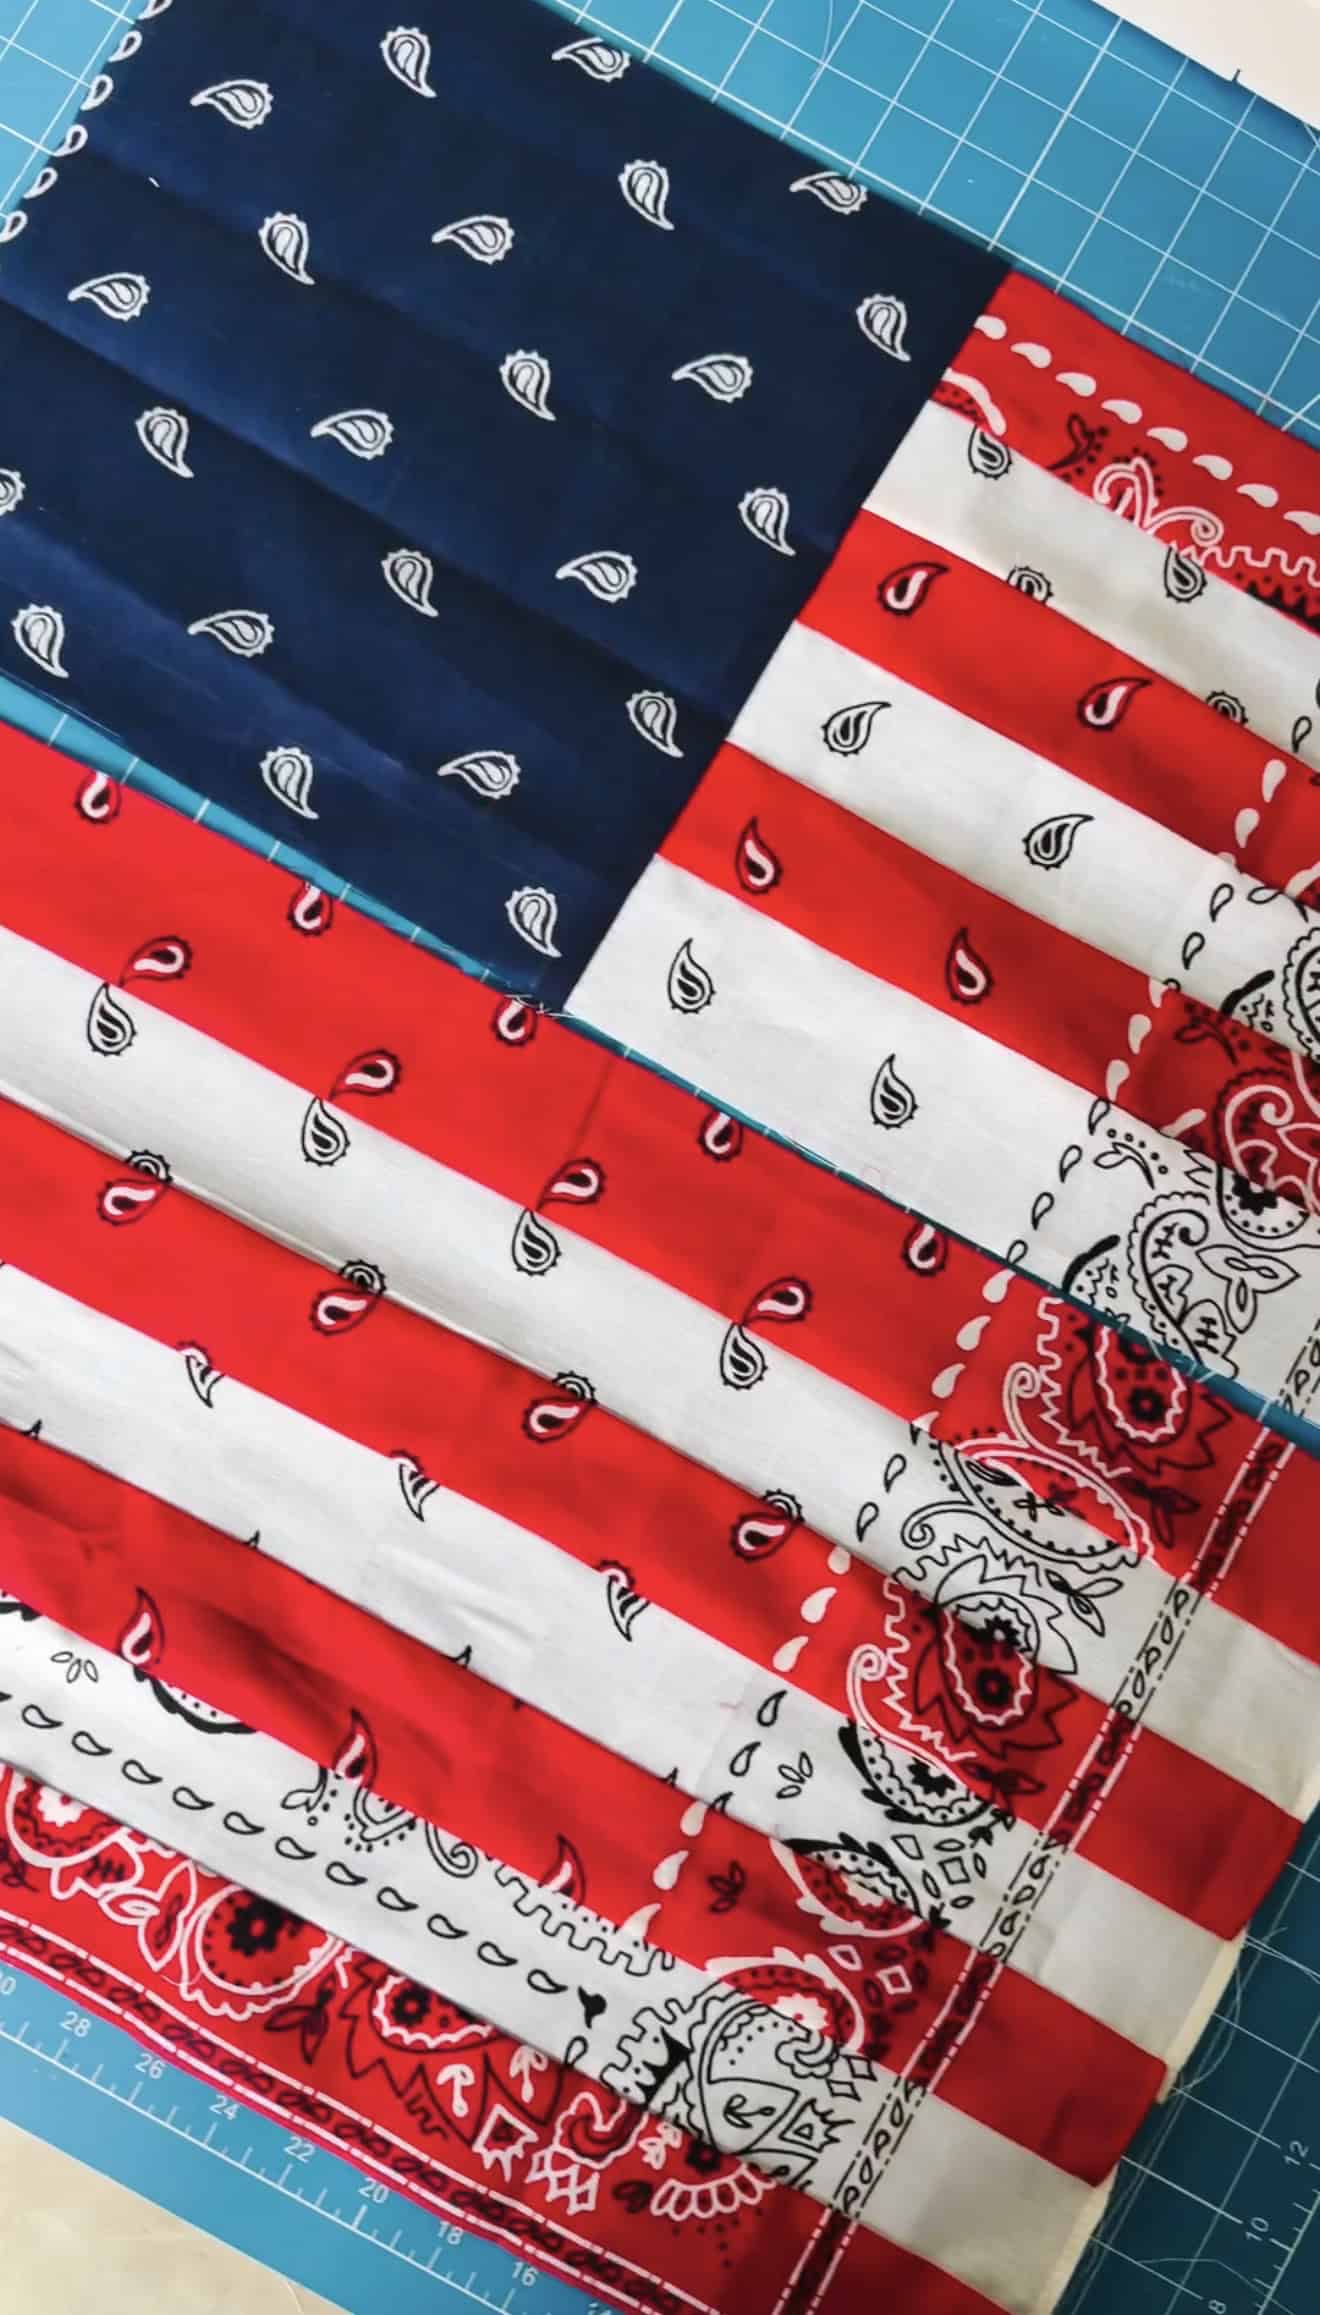
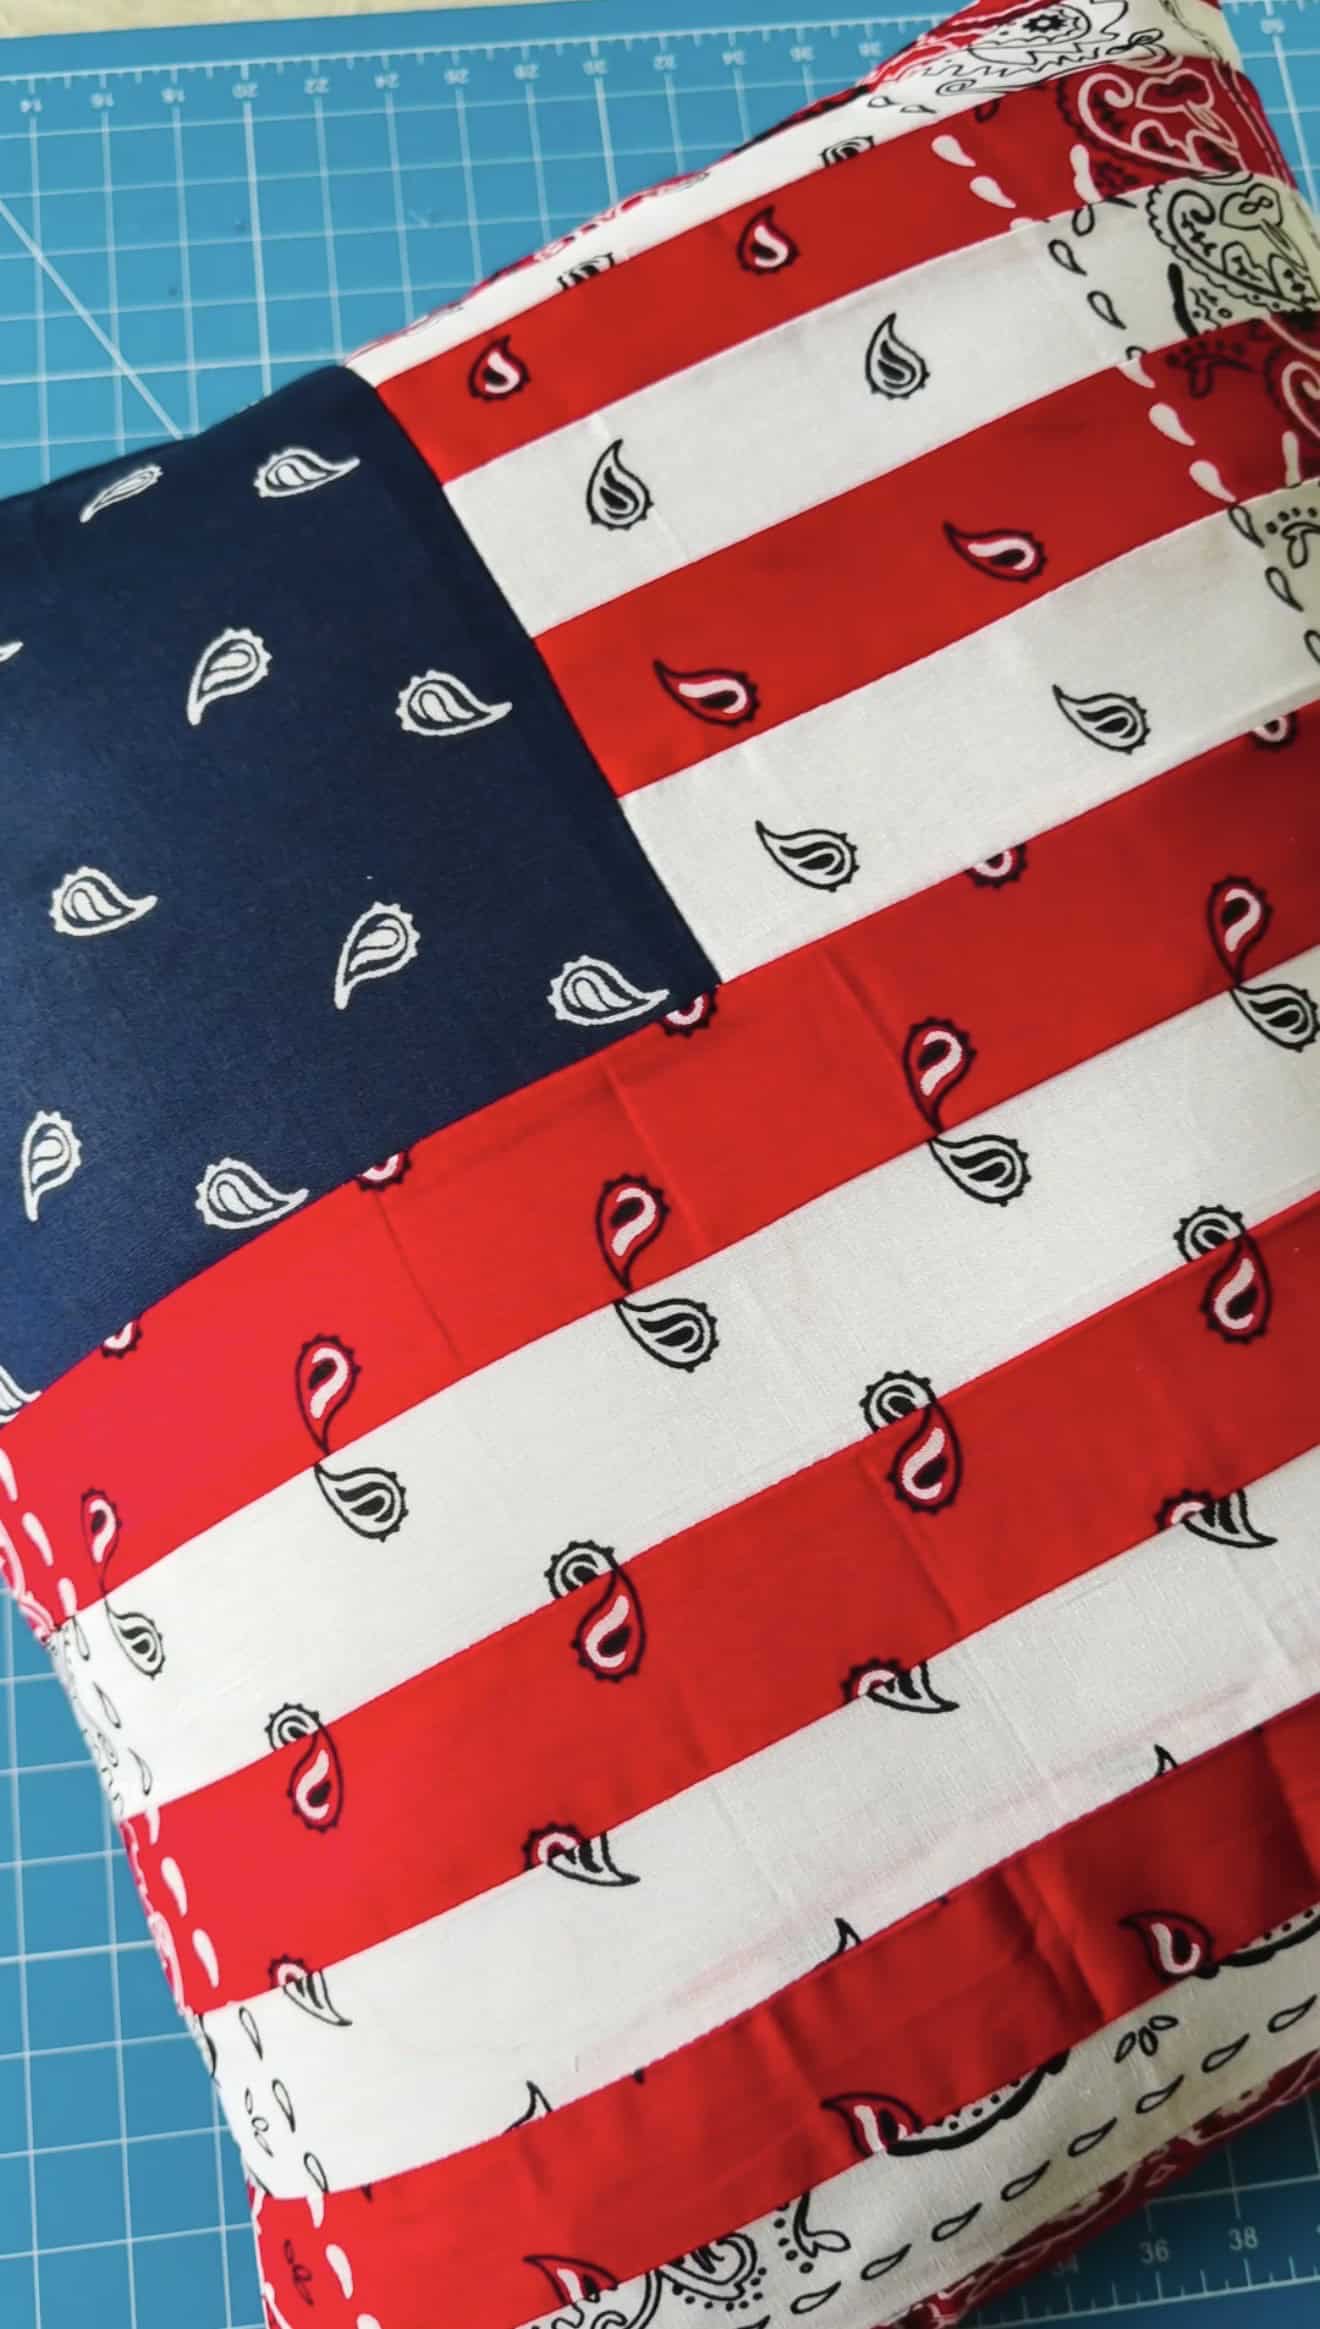
Step 5: You should now have 2 sections. The top part of the flag and the bottom.
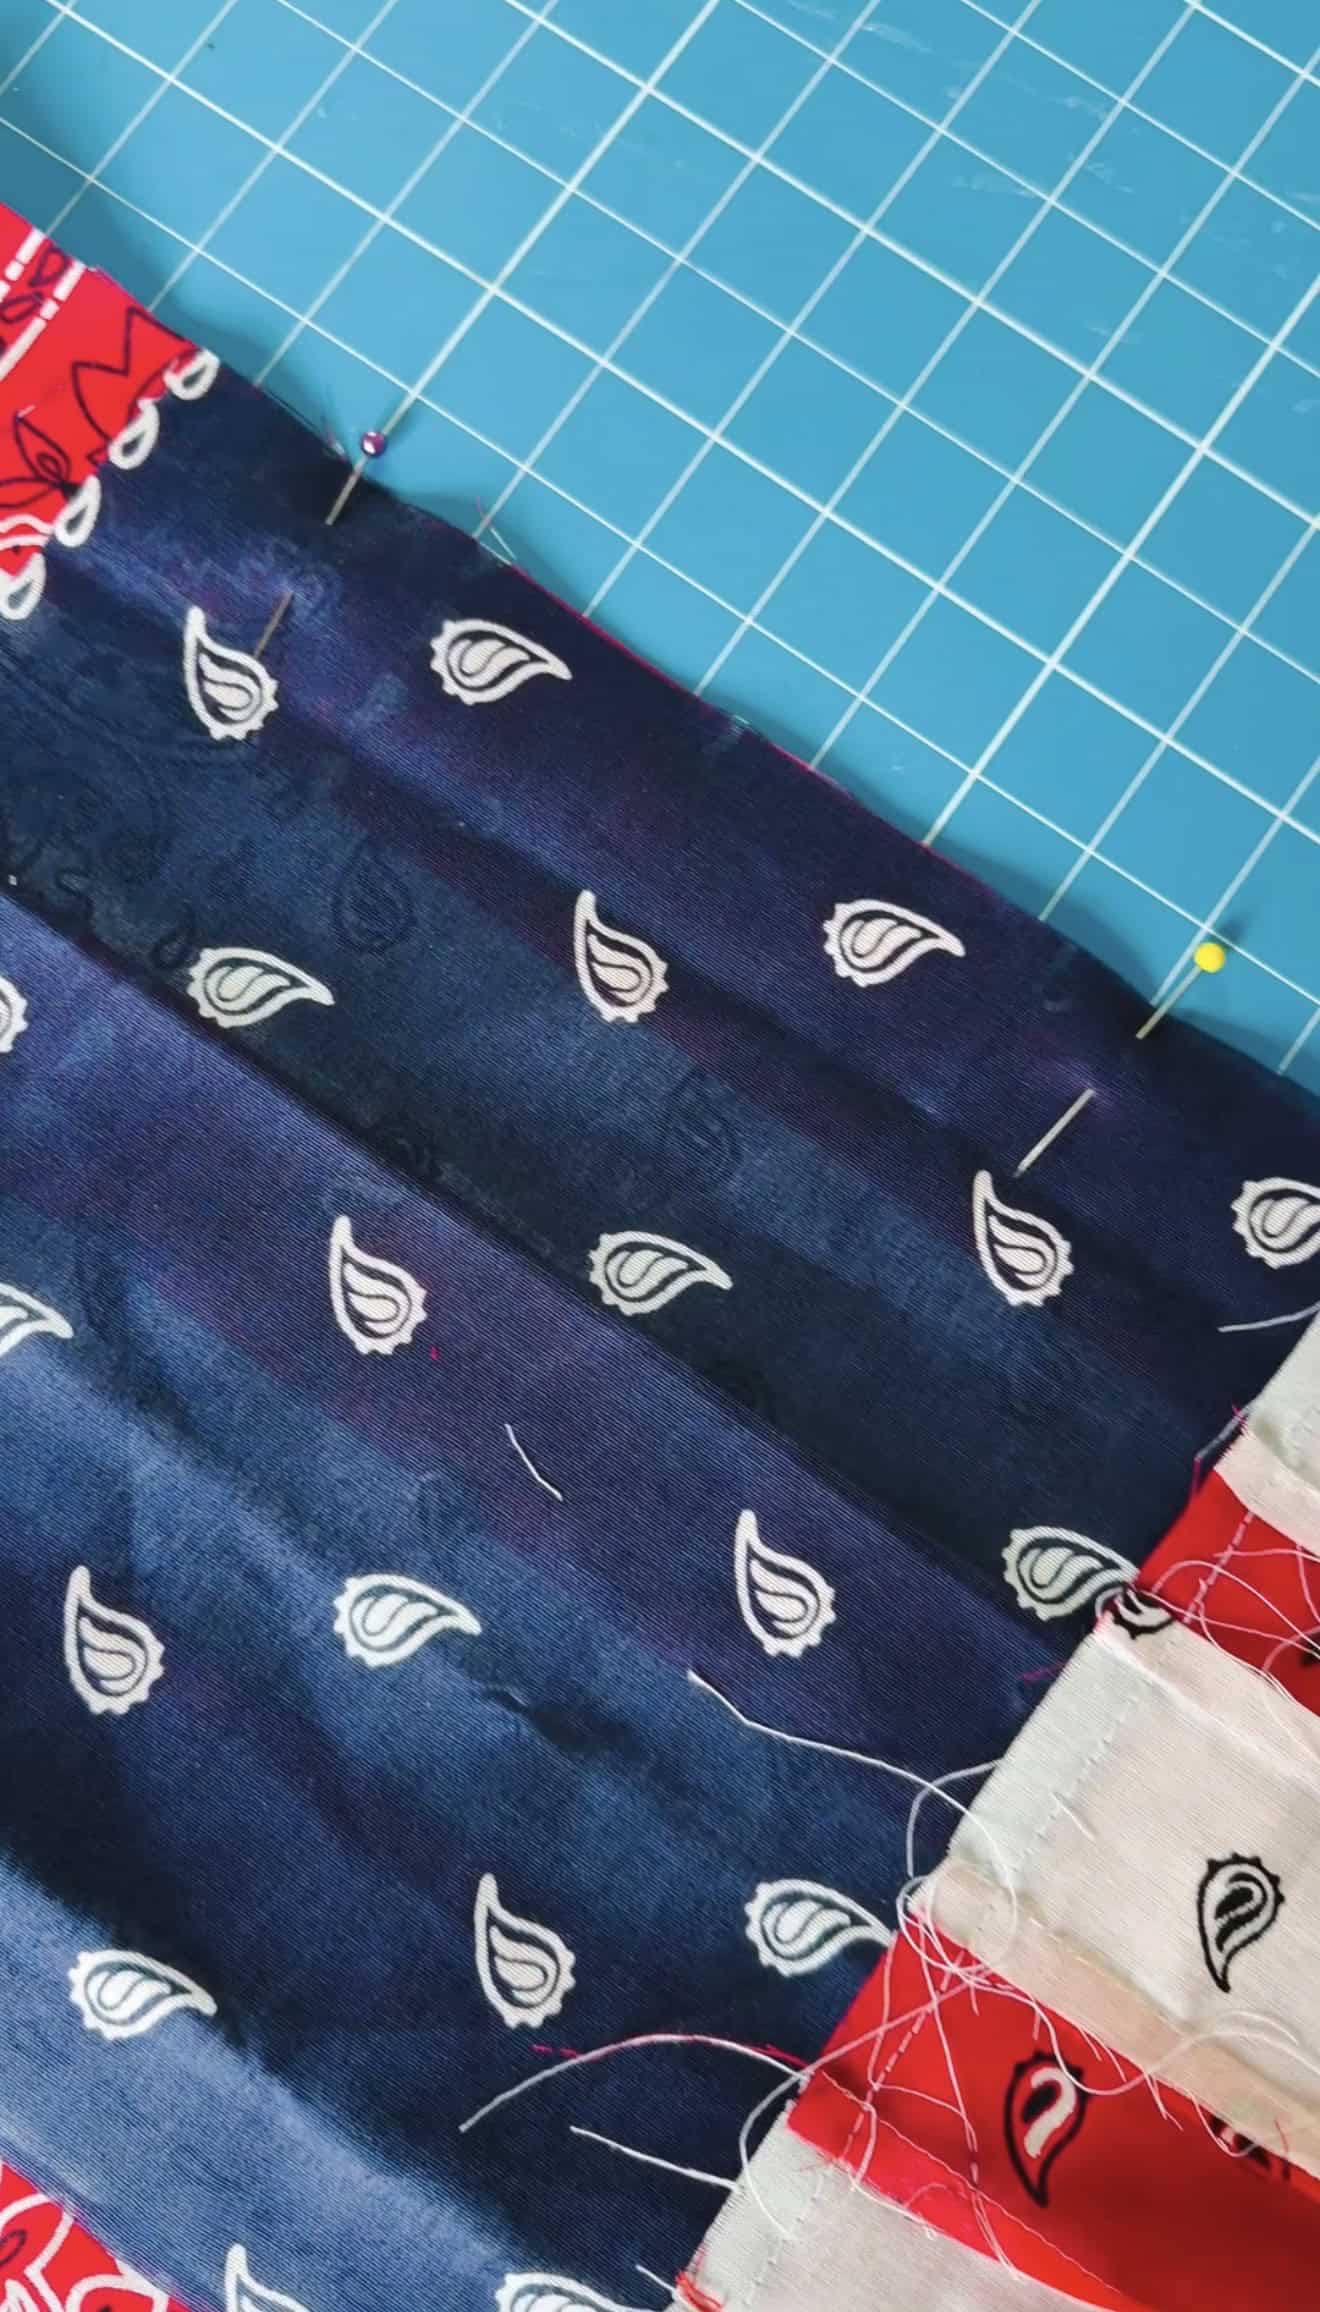
Step 6: Pin the top of the flag, with the edges lined up and the right sides of the fabric touching. Sew. Open flat and iron seam.
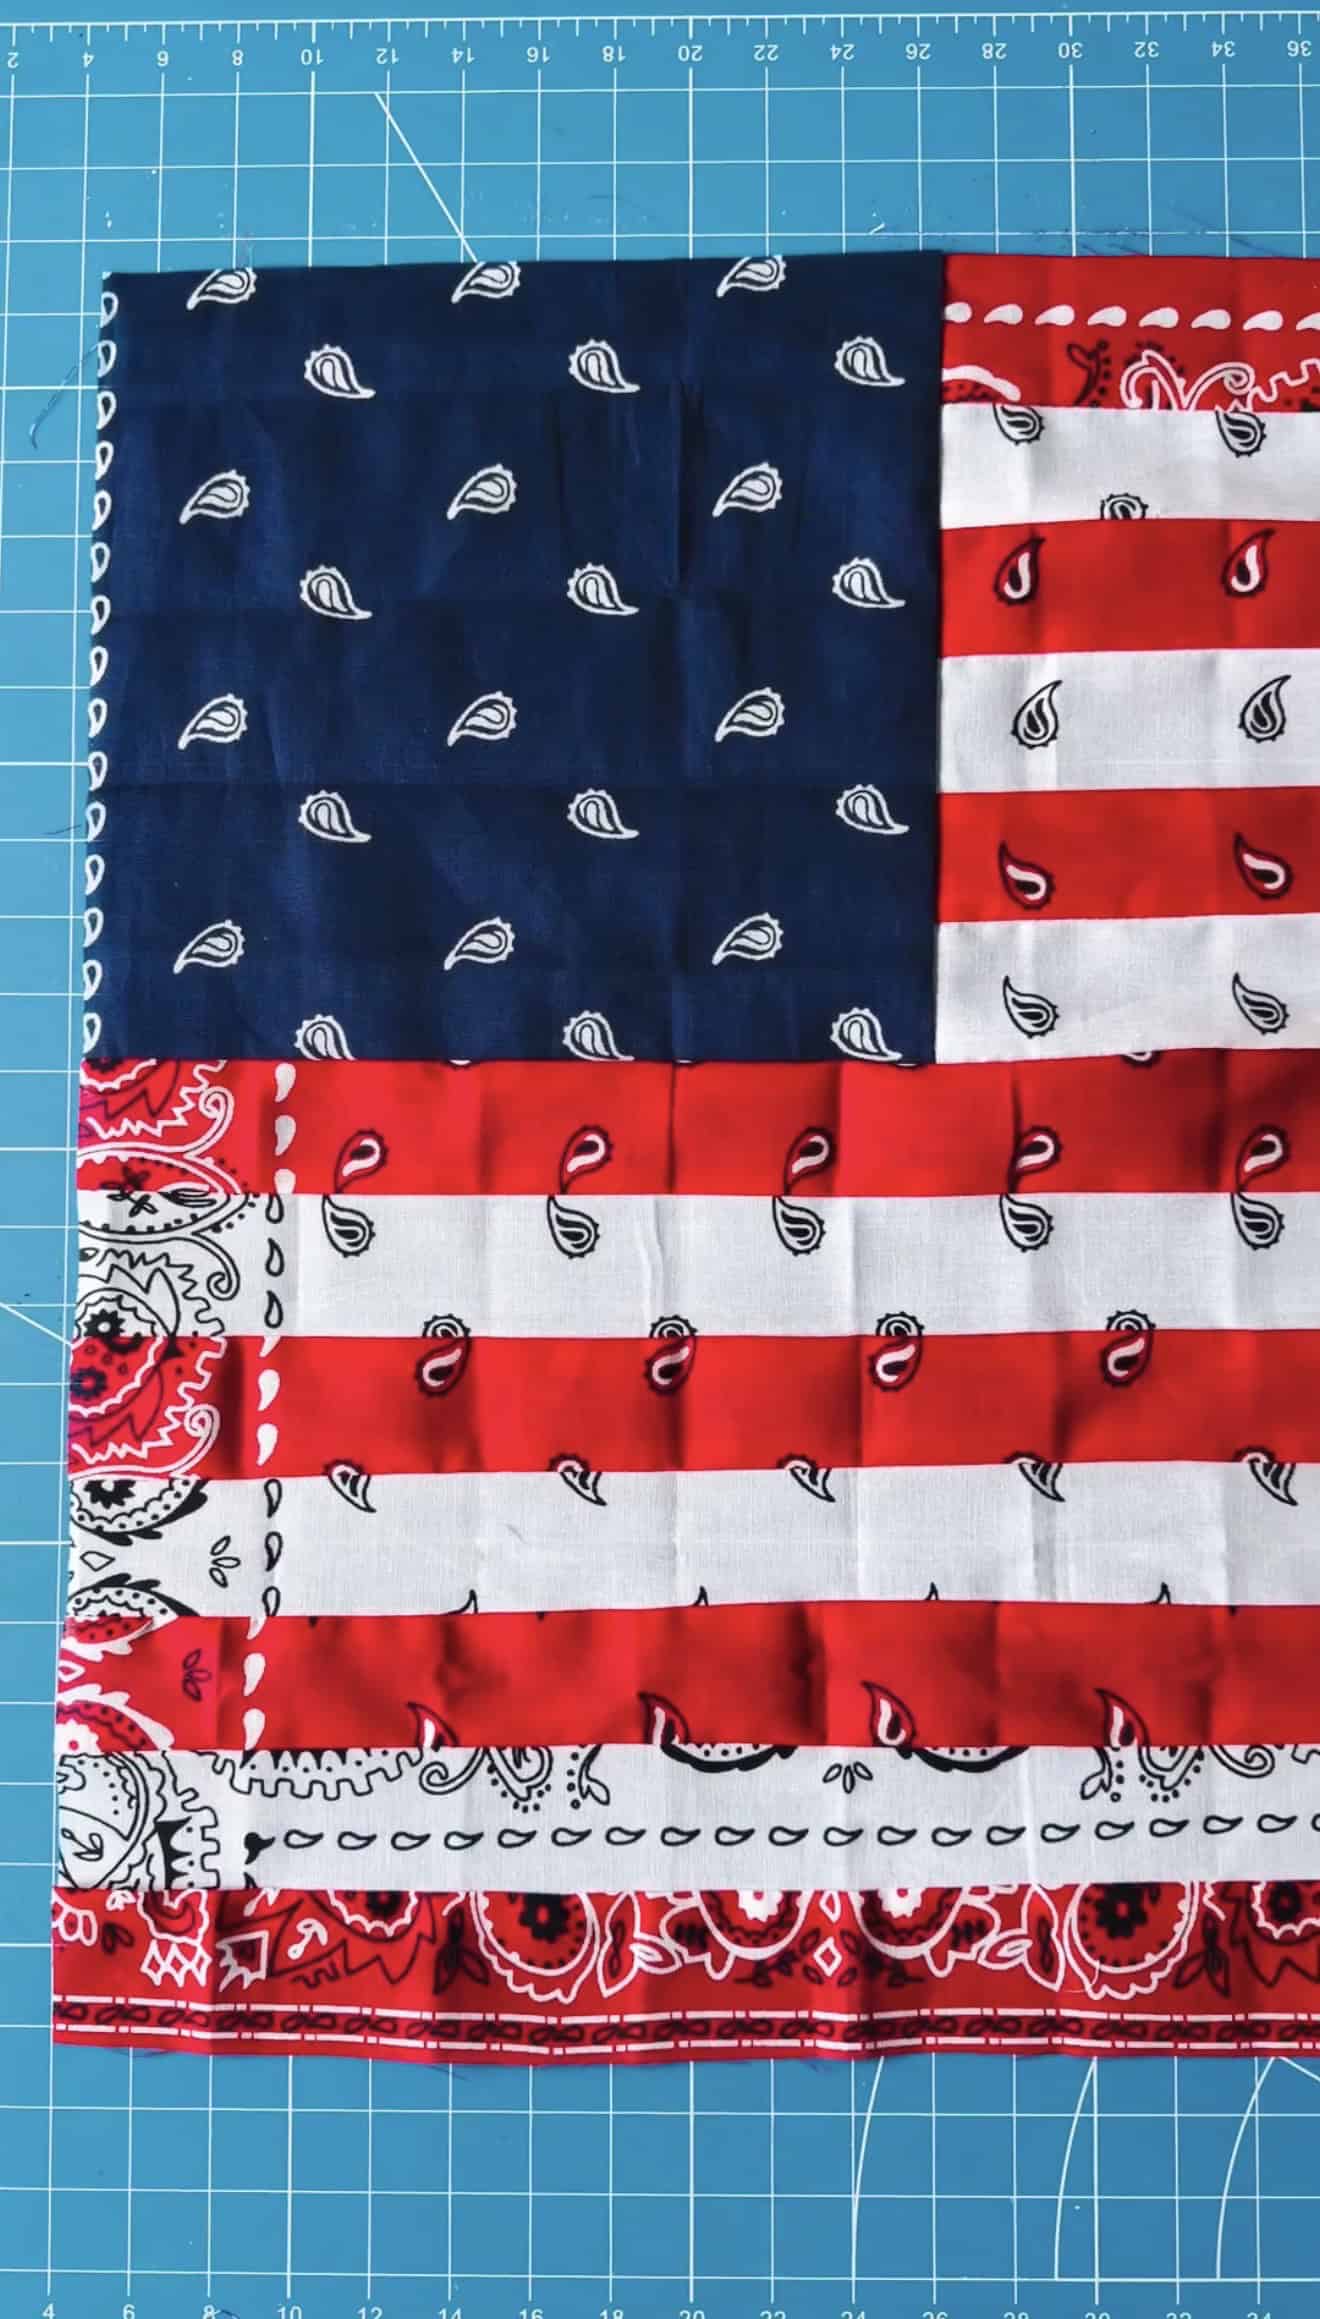
Step 7: Square up the pillow front by trimming each side to 18".
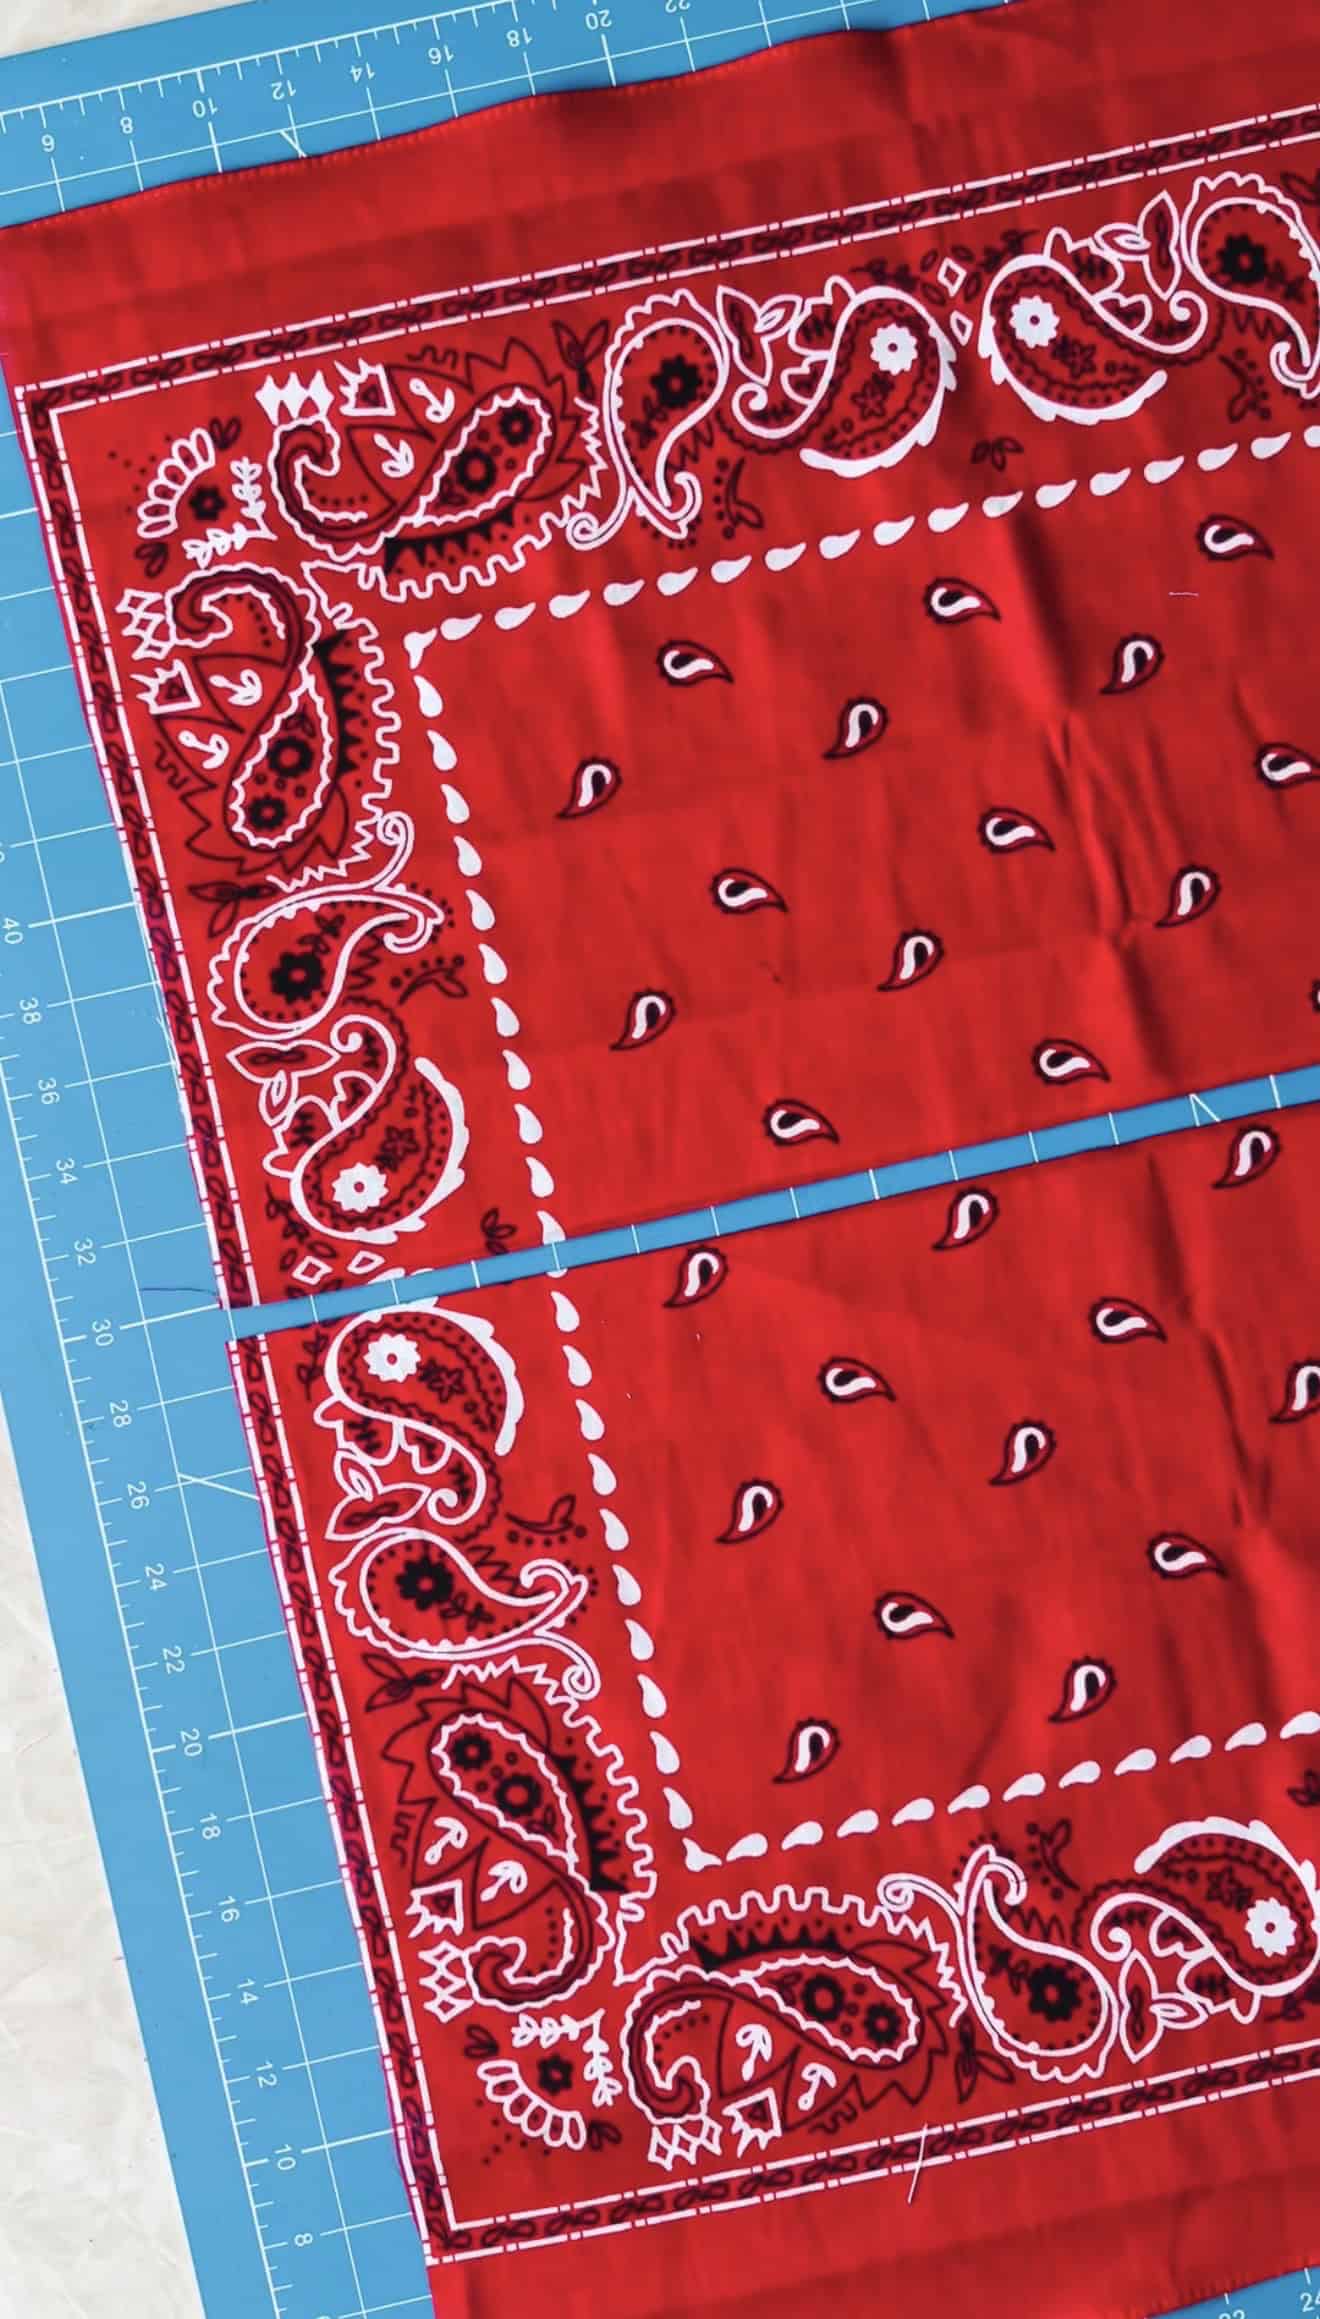
Step 8: Trim the 4th bandana to 18" wide (cut the trim off of the left and right side). Then cut the bandana in half. DO NOT trim the top and bottom edges.
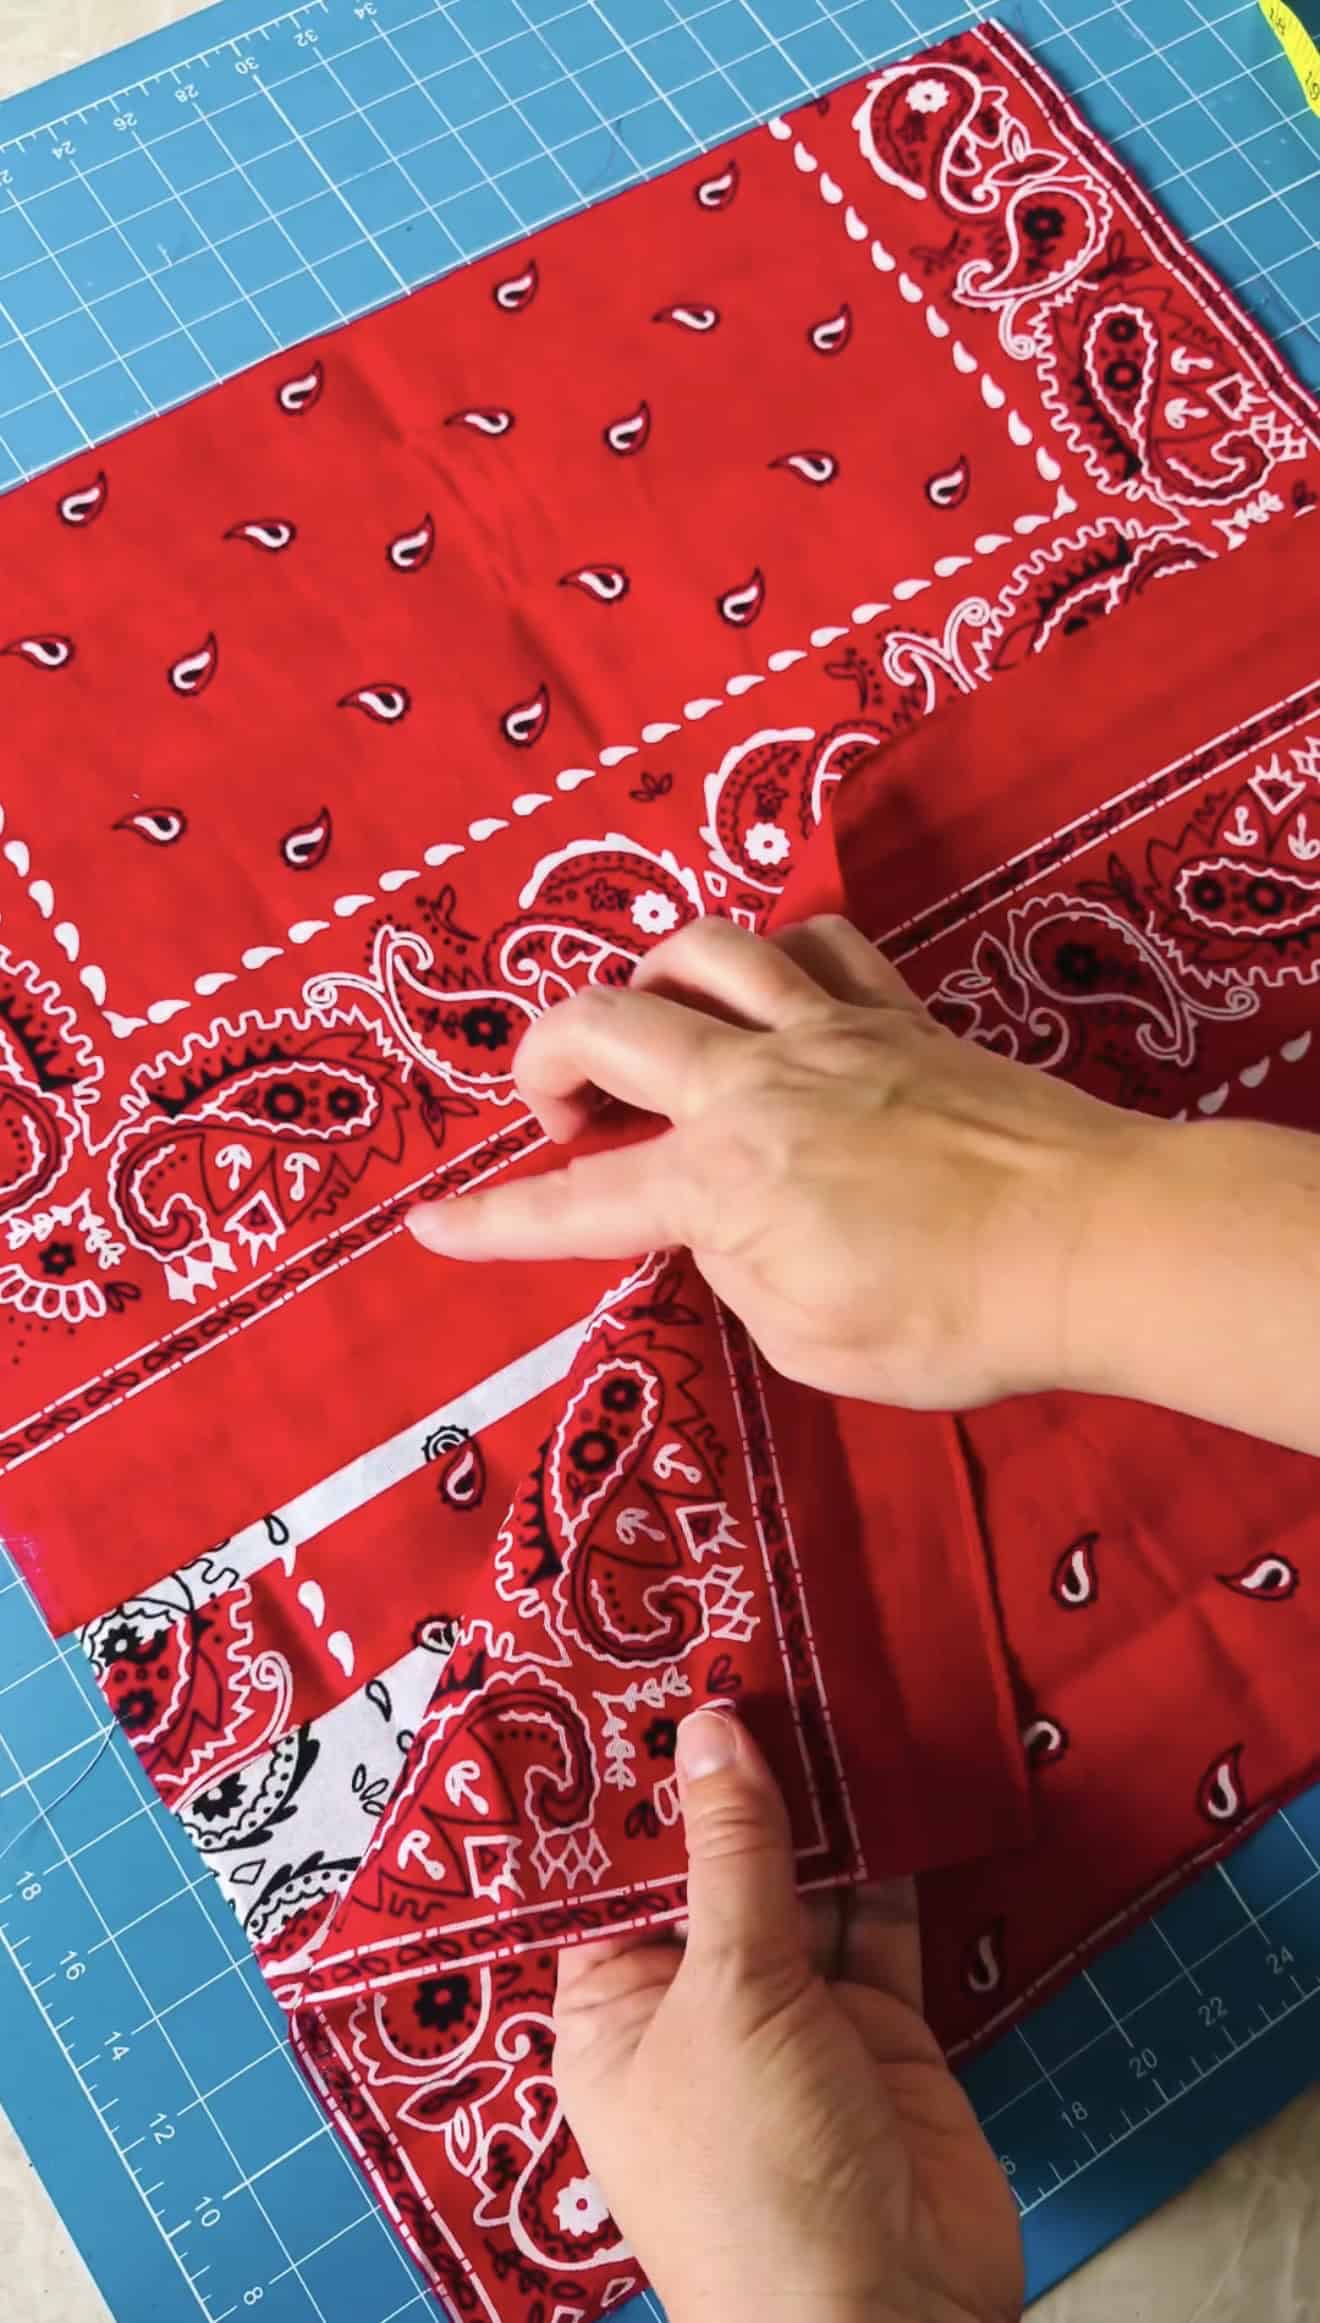
Step 9: Lay the front of the pillow cover onto your work surface. Place one red bandana piece over the top section, lining up raw edges on the top and sides. Place the other red bandana piece on the bottom, lining up raw edges on the bottom and sides. Pin around the perimeter to hold everything in place.
Sew around the entire perimeter using a ⅜" seam allowance.
Note: The finished edges of the red bandana will overlap at the center by a few inches. This is what you want.
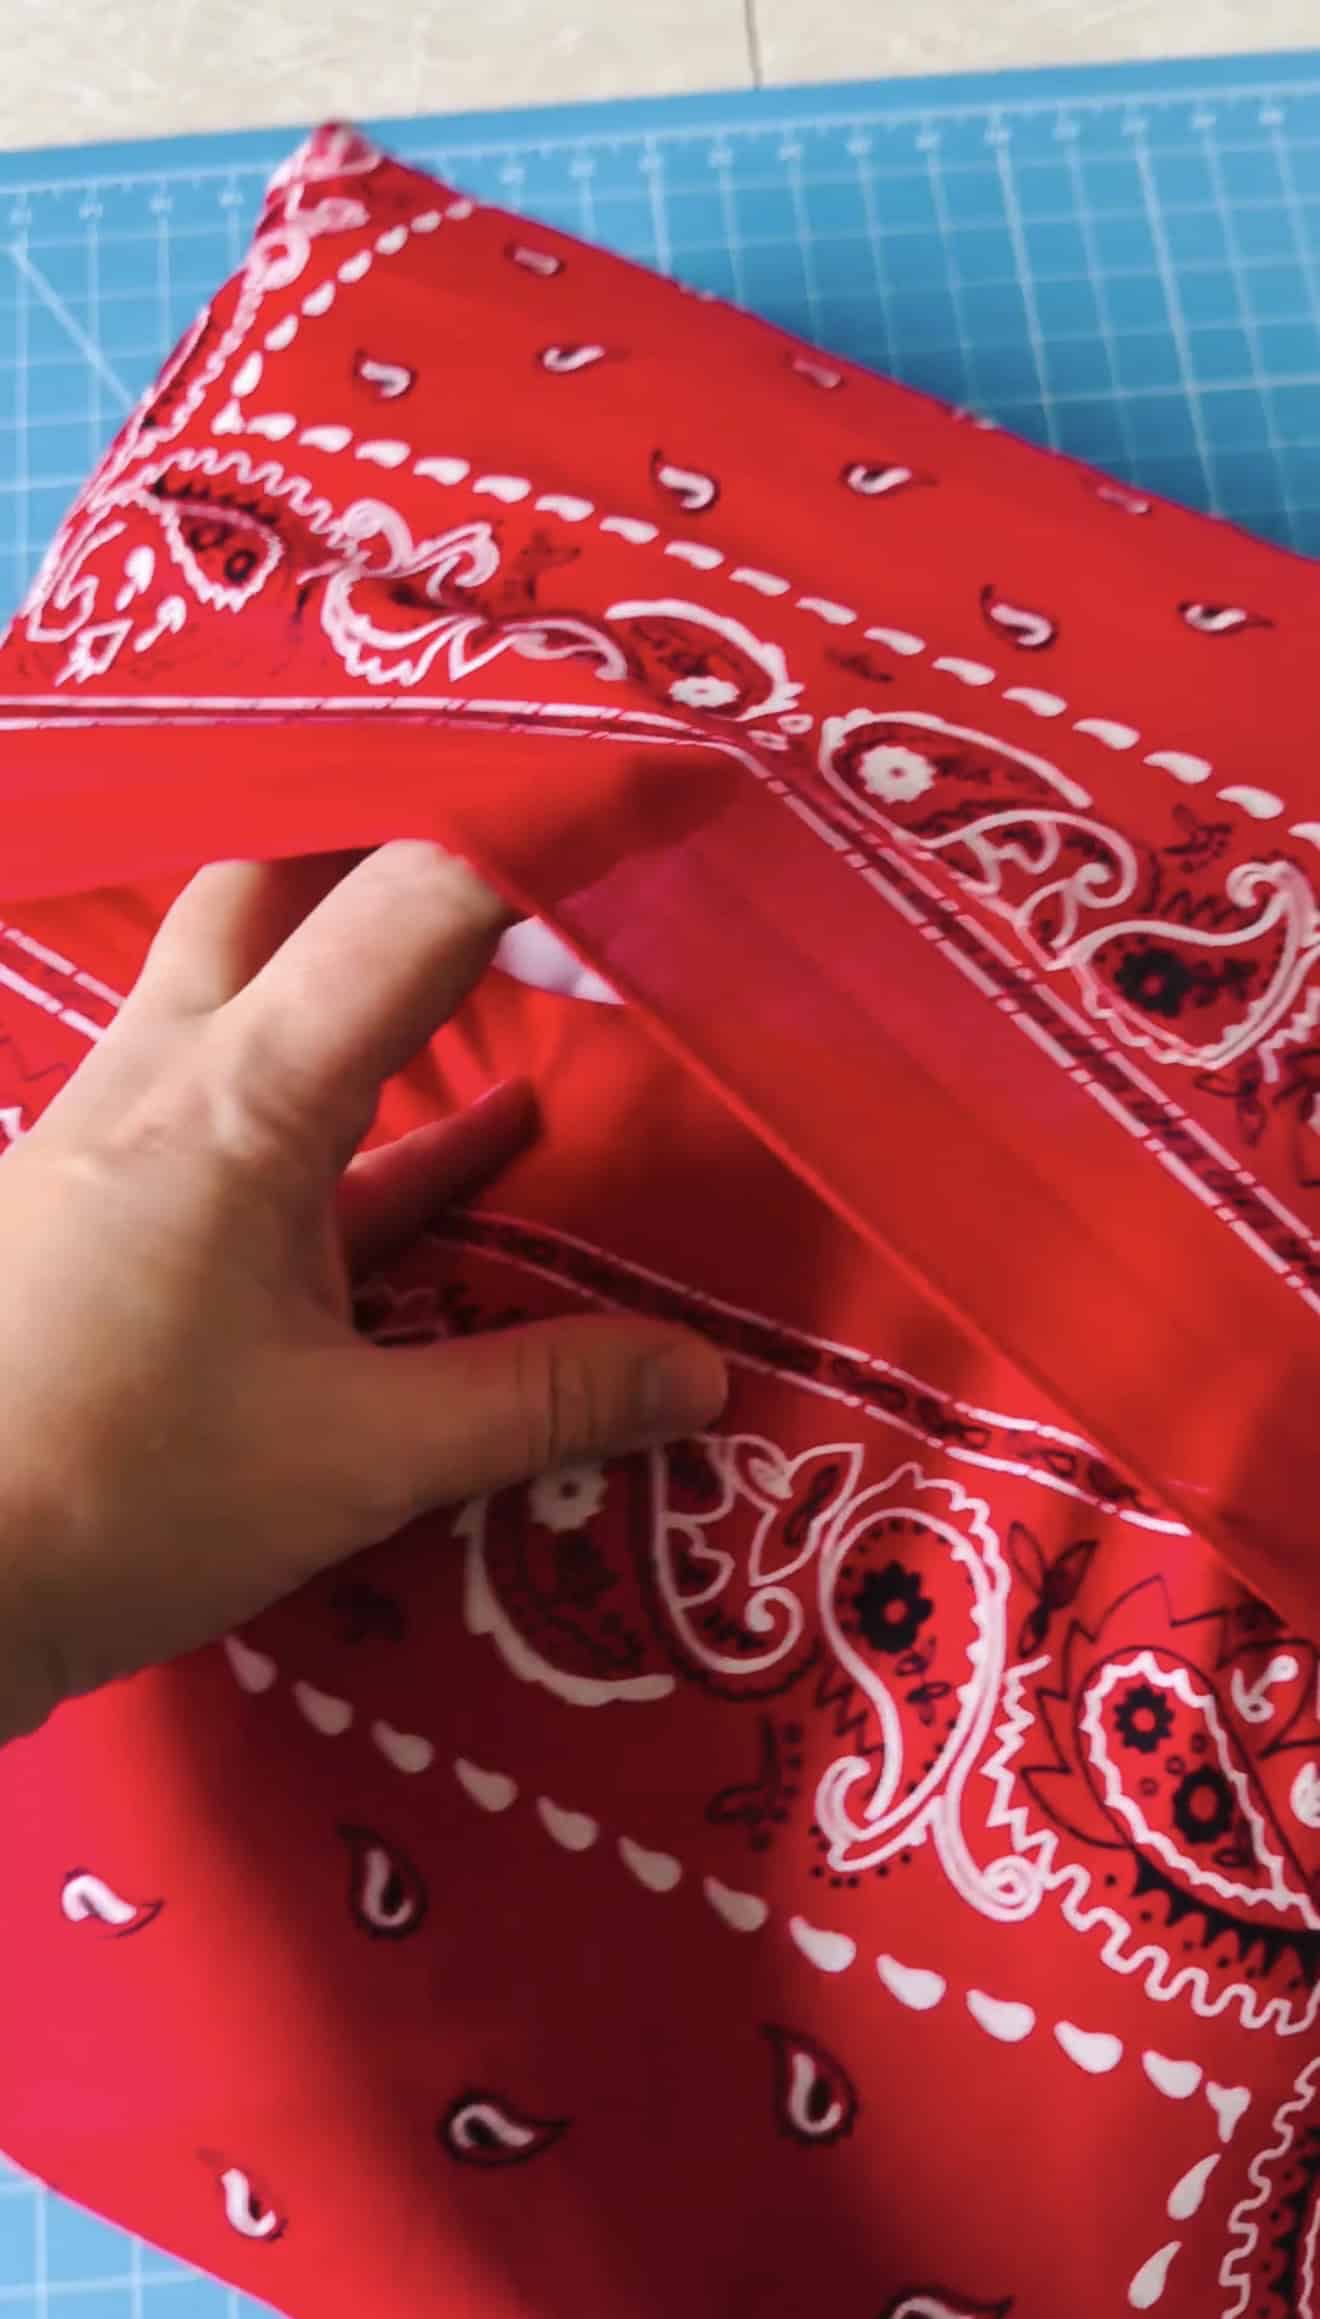
Step 10: Turn the pillow cover right-side-out through the opening in the back.
Insert the pillow form inside the pillow cover. This is what the front of the pillow will look like.
Step 11: This is what the back of the pillow will look like.
Bandana pillow covers are machine washable.
Throw Pillow Cover FAQs
It’s a pillow cover with overlapping fabric panels on the back that allow you to insert and remove the pillow form without zippers or buttons.
Absolutely! Cotton, linen, and quilting fabric all work well as long as they are pre-washed and pressed before sewing.
For a full, plush look, choose a pillow form that is 1–2 inches larger than your finished cover size. This helps the pillow feel more stuffed and keeps the corners looking crisp.
No. The envelope style is designed to be simple and beginner-friendly without any closures.
I lined up my pattern on the sides, but you don't need to. Because bandanas already have bold prints and a slightly rustic feel, small mismatches or imperfect alignment actually add to the charm. This is a relaxed, beginner-friendly project—so focus on getting your colors and flag layout right, and don’t stress over perfect pattern matching.
More Patriotic Posts To Check Out


MADE THIS CRAFT AND LOVED IT? 💛 Please leave a STAR rating and COMMENT below! Post it to Facebook or Pinterest to easily share with friends!
Bandana Flag Pillow
Equipment
- sewing machine and thread
- scissors or rotary cutter
- measuring tape
- pins
Materials
- 1 red bandana
- 1 white bandana
- 1 blue bandana
- 1 bandana (any color you'd like for the back of the pillow cover)
- 18"x18" pillow form
Instructions
Cutting Guide
- 1 blue bandana: Cut a 9"x9" square.1 red bandana: Cut into 2" wide strips that are the length of the bandana.1 blue bandana: Cut into 2" wide strips that are the length of the bandana.1 red bandana: Set aside to use later.
- Select 3 red strips and 3 white strips, then line them up, alternating red and white. Trim each strip to 10".
- Sew the strips together, beginning with a red strip and ending with a white strip. Use a ⅜" seam allowance. Iron seams flat.
- Sew the 9"x9" square of blue fabric to the left of the red-and-white block of strips you just assembled. Iron seam flat.Note: Don't worry if you have uneven edges; you'll square everything up later.
- Line up the remaining 7 strips and sew them together, alternating red and white. Trim each one so that it is about 18.5" long.Note: Bandanas come in a variety of patterns and won't look exactly like mine. I lined mine up so that the edge sections matched, but you can arrange yours however you'd like.
- You should now have 2 sections. The top part of the flag and the bottom.
- Pin the top of the flag, with the edges lined up and the right sides of the fabric touching. Sew. Open flat and iron seam.
- Square up the pillow front by trimming all of the sides to 18".
- Trim the 4th bandana to 18" wide (cut the trim off of the left and right side). Then cut the bandana in half. DO NOT trim the top and bottom edges.
- Lay the front of the pillow cover onto your work surface. Place one red bandana piece over the top section, lining up raw edges on the top and sides. Place the other red bandana piece on the bottom, lining up raw edges on the bottom and sides. Pin around the perimeter to hold everything in place.Note: The finished edges of the red bandana will overlap at the center by a few inches. This is what you want.
- Sew around the entire perimeter using a ⅜" seam allowance. Turn the pillow cover right-side-out through the opening in the back.
- Insert the pillow form inside the pillow cover.


Leave a Reply