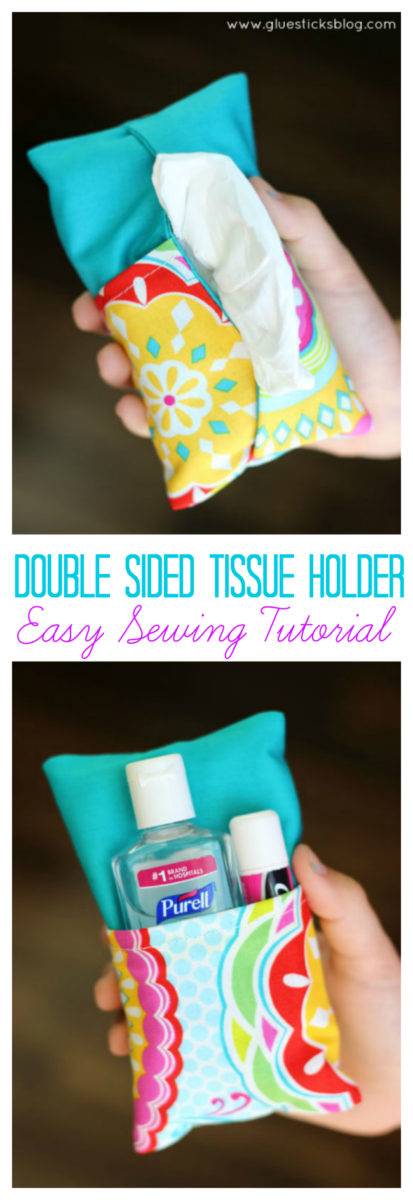
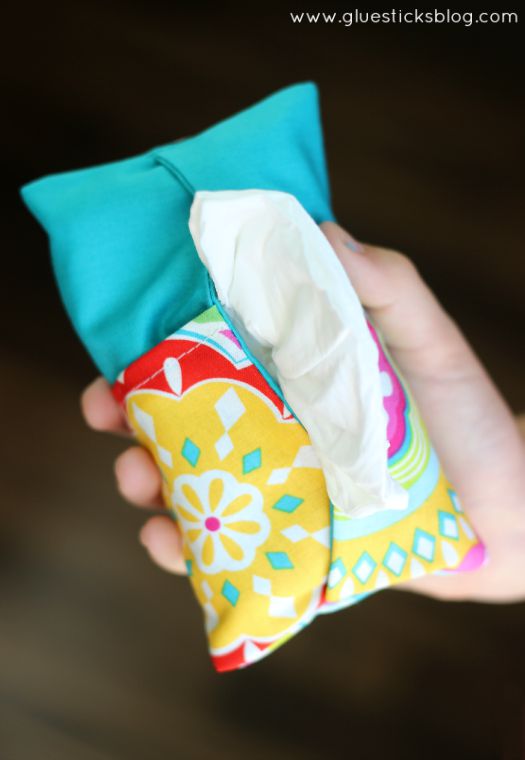
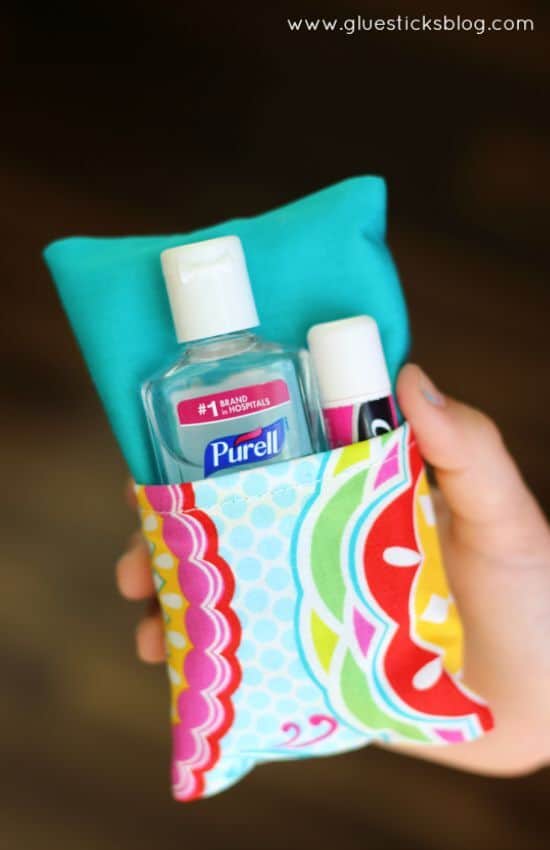
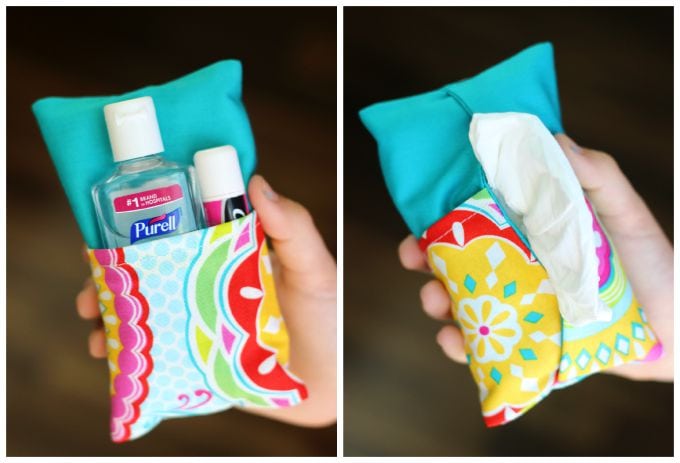
A two-sided tissue holder pouch is perfect for cold and flu season. One side can hold a pack of tissues, and the other side can hold a mini bottle of sanitizer and a lip gloss! Watch our video tutorial or scroll down for a step-by-step photo tutorial!
Watch our step by step video!
With cold and flu season approaching I decided to make some little tissue pouches to put in the kid's backpacks and one for my purse. They all like the single sized tissue packs, but they don't always hold up well being tossed around in a bag with books and binders.

For 60 more sewing projects, check out my sewing book for kids!
How to sew a two-sided tissue holder for your purse or backpack.
Supplies:
- Fabric Scraps
- Thread
- Measuring Tape
- Tissue Pouch (2x4.5") (affiliate)
- PURELL® Advanced Hand Sanitizer
- Lip gloss, optional
fabric tissue holder Instructions.
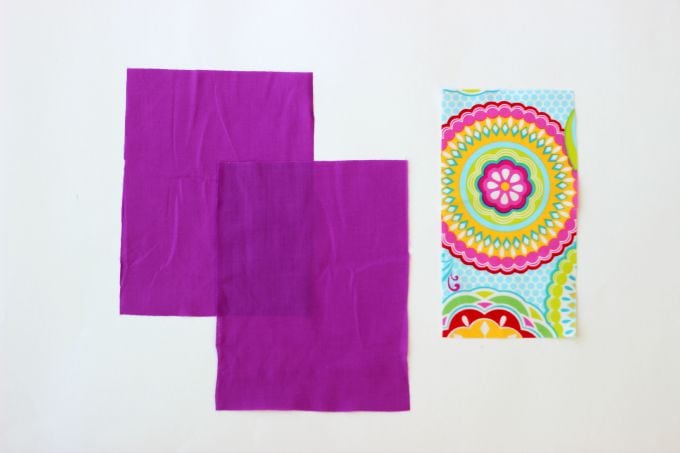
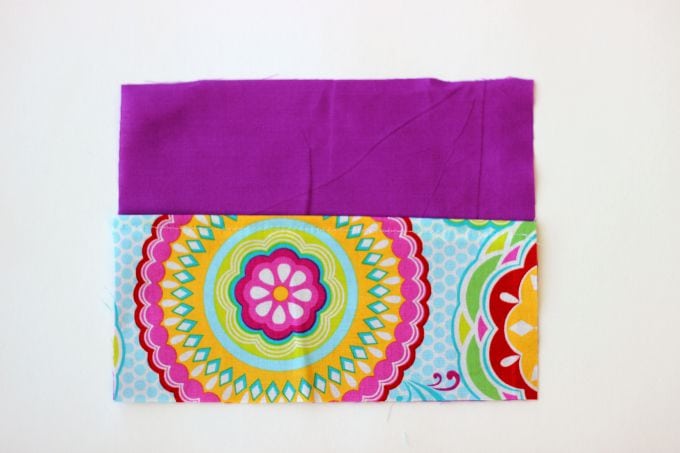
1. Cut your fabrics. You will need 1 main fabric for the body and 1 contrasting fabric for the pocket.
Body: (cut 2) 5 ¾" x 7 ½"
Pocket: (cut 1) 4" x 7 ½"
Seam allowance ¼"
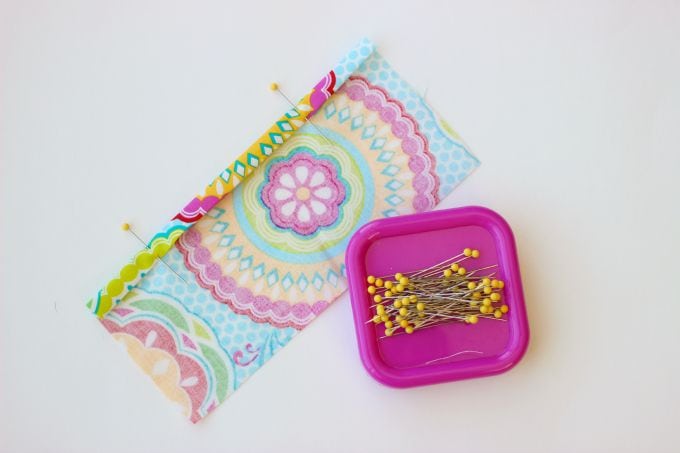
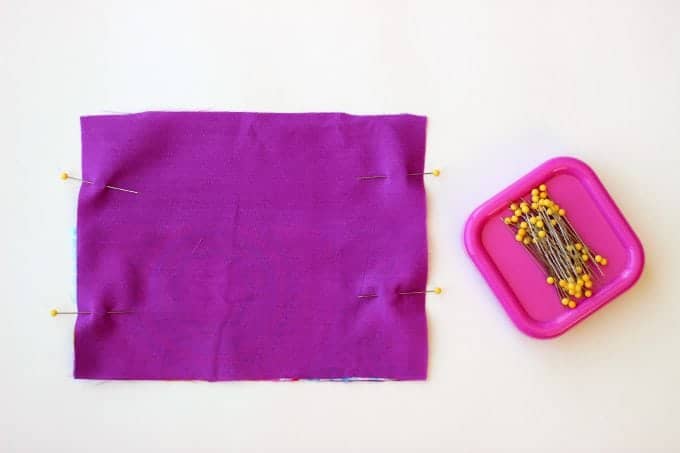
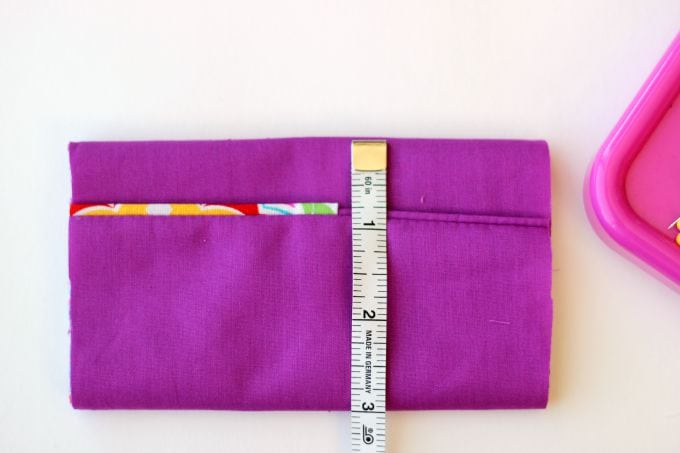
5. Pin sides and stitch both sides closed, leaving the top and bottom open.
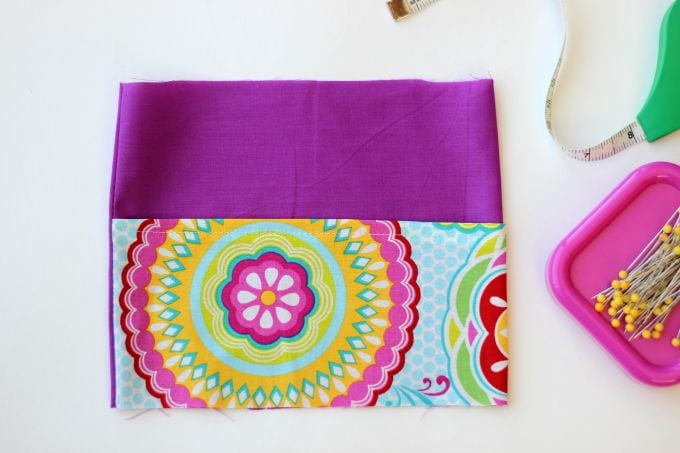
7. Press seams flat.
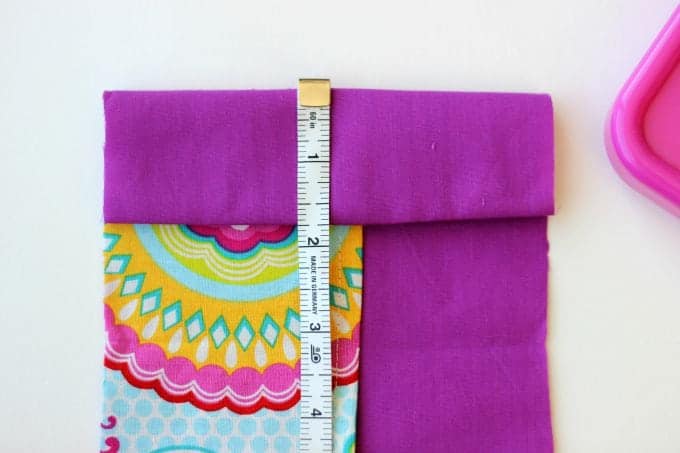
9. Fold the top down 1 ¾".
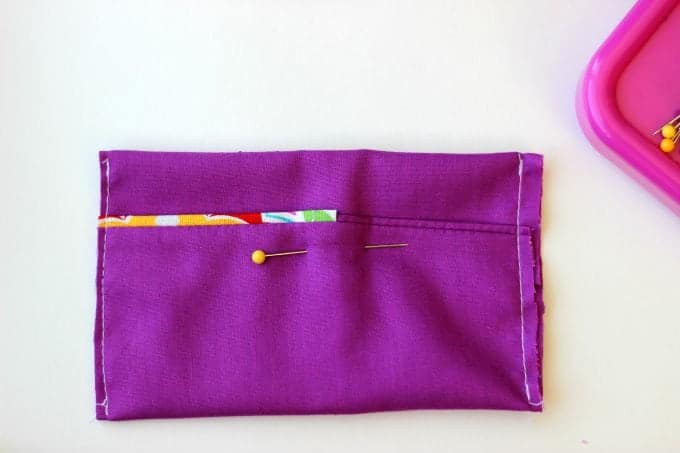
12. Stitch sides closed and trim close to seam.
13. Turn right side out.
You're going to love this double-sided tissue holder so much you'll want to make a few more to keep on hand for gifts!
This post was sponsored by GOJO Industries, the makers of Purel and contains affiliate links. This post is a refresh of my original tutorial, first shared in 2015.
You might also like...
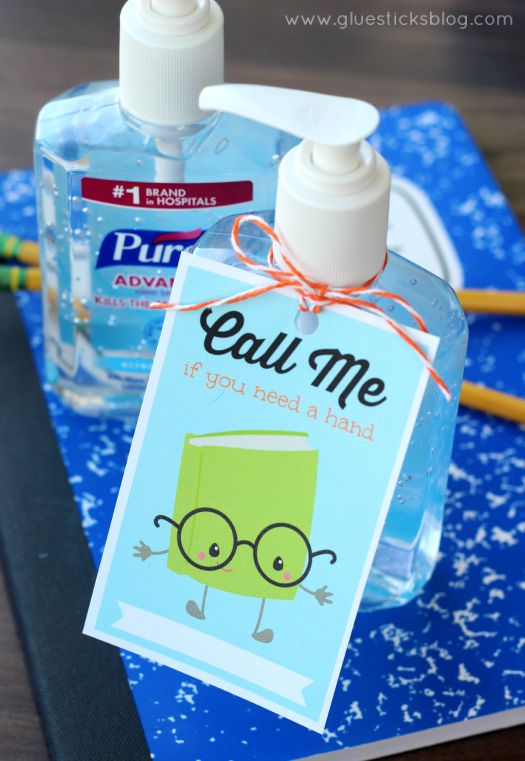
Hand Sanitizer Printable for Teachers


Ellen says
I was thinking of making the pocket slightly taller and putting a strip of adhesive velcro.
Brandy says
Let me know how it turns out!
Ellen says
I love this and mine came out great! But, Is there a way to prevent the items in the pocket from falling out if this goes inside a purse or otherwise tips over? I'd like to make the items tighter or more secure inside the pocket somehow.
Brandy says
Hi Ellen! Hmm…I’m not sure how you’d secure the items more. My kids have these in their backpacks and they haven’t had any issues.
Rhonda says
Thank you for this idea! I have so many hand sanitizers and I wasn't sure what to do, now I have a plan. You saved the day(year)!
Brandy says
Awesome! Glad to help! 🙂
Jacalyn Cummings says
I am confused in my attempt to make the double sided tissue holder. In step 4 your instructions say to place the 2nd body piece (right side down) on top of the 1st body piece and the pocket. Then you are to
sew the side seams only and then turn the project inside out. Once you turn it inside out, only the right sides of the fabric on both body pieces should be showing. However, in step 8 you are showing the wrong side of the fabric when the right side should be showing. This is the point at which I am confused. In step 4, should the 2nd body fabric piece be placed with the right side up so when you turn it at the end, the right side shows?
Brandy says
Hi Jacalyn! In step 8, only the right sides of the fabric are showing. Have you watched the step by step video? It's a much better explanation of the process than the tutorial if you are a visual learner like me!
carlee says
Yay, I think I found my daughters COVID approved Christmas gifts! She is so excited to make these!
Brandy says
Yay! They’ve always been a hit for teacher gifts for us!
Linda says
Thank you so much for the pattern and great instructions. I can’t wait to pick out some cute scraps and get started.
Brandy says
Yay! They are so perfect for cold and flu season---and a great way to use up fabric scraps. Win win!
Bev says
These are so quick and easy to put together and sew. What took most of the time was me trying to decide what fun fabrics I wanted to use.! Thanks for sharing this pattern
Brandy says
Same! Haha, deciding on the fabric is the hardest part! So glad they turned out for you!
Donna says
Hi, I love this pattern and made 7 for Christmas gifts last year! I’m making more this year for my Bible study class, but I have a question: what type of tissues in the travel packs did you use, that they pop out like that? The only ones I can find are folded in the pack and don’t come out like the one in your pictures. This is a great pattern, and I know I’ll be using it many times!
Brandy says
Hi Donna! I pulled the tissue out so that it would be visible in the photo. They didn't pop out like that on their own, but for photo purposes (so that the reader could tell what the pouch was for) I gently pulled one out. So the ones you bought are the same ones that I have!