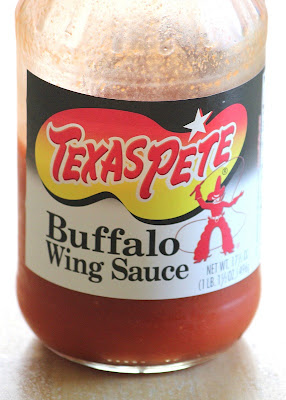
I LOVE buffalo chicken! Wings, pizza, you name it. My favorite buffalo flavoring is Texas Pete's wing sauce. Usually when you make wings you combine hot sauce with butter. Not with Texas Pete's. With this, you simple toss your chicken in the sauce. Done. The flavor is awesome. Not too spicy, but enough kid to be buffalo sauce. I used some inspiration from Skinnytaste and came up with a dinner that we really enjoyed. And the chicken was just as flavorful and juicy the next day for lunch!
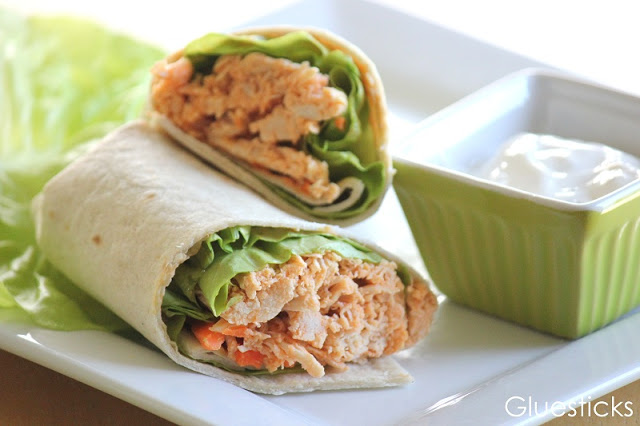
Buffalo Chicken Wraps
4 chicken breast halves
2 T. chicken base (I use Tone's brand. Bouillon cubes work too)
½ c. diced onion
2 garlic cloves
¾ c. buffalo wing sauce
shredded carrots
lettuce
tortillas/wraps
dipping sauce
Cover chicken with water in a medium sauce pan. Add chicken base or bouillon and dissolve. Bring to a boil and add onions and garlic. Reduce heat to medium and simmer about 30-40 minutes.
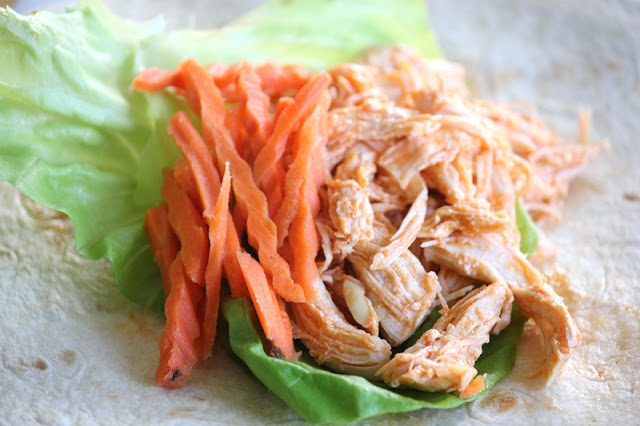
Remove chicken and shred. Toss with wing sauce.
On a warmed tortilla, add chicken, lettuce, carrots and any additional topping you'd like.
Serve with your favorite dipping sauce
Hello Kitty Sandwiches
So I've really been having fun trying to makes lunchtime fun. Especially when friends come over. It doesn't take long to make the sandwiches. The tedious part is searching the cupboards for things to use and the clean-up. So I might as well make them when lots of kids can enjoy them...if I'm going to put the effort into it anyways!
The boys have been enjoying time at Cub Scout Day camp with Derrick this week. Kaylee is always the one left behind and doesn't have as many play dates. So we decided to do a very last minute invite to a couple of friends for lunch and see if anyone could come! Two were available to play and she was so excited.
So I thought for 3 little girls, a Hello Kitty lunch would be fun. The sandwiches look like pretty little cats, not so much Hello Kitty. At first I couldn't figure out why, but I think I should have put the whiskers closer to the edges of the sandwich and not in the center....But the girls loved them and shouted "It's Hello Kitty!!!" when they saw their plates. So I'll call it a success!
I made the sandwiches, then used a knife to cut out the bread around the ears. Kitchen scissors worked well to cut out the round head. Then I used mini M&Ms for the eyes, nose, and flower center, and a slice of apple (peel facing out) for the flower.
The whiskers are black icing from a tube that I had, but pretzels would have been fun too or maybe some fruit leather strips.
A little cup of grapes and another of spring shaped marshmallows and they were set!

Kaylee set up a little tea party and the girl shad a wonderful afternoon playing together!
You can my attempt at Angry Bird Sandwiches here.
Road Trip Binder for Kids: Road Trip Games, Map Activities and More!
Don't even think about going on your next road trip without a road trip binder for the kids! Filled with road trip games, activities, maps, and fun printables! The kids won't mind taking a break from their electronics to have some good old fashioned fun!
So the countdown is on until the day of our big move and we are preparing every day. Today I cleaned out the cupboards and freezer and washed all of my dry foods containers. Also went through and got rid of a ton of plastic food containers that didn't have lids. Now onto the next item of business...
One thing that we don't have to worry about anymore is keeping the kids busy on our trip. It's crazy how road trips have changed from when I was a kid! Holy cow! My parents never went out of state, we usually just stuck within a 1-2 hour radius from our house and I still remember being BORED to tears!Our kids are spoiled, but they've also been across so much more territory than I ever did as a child. We've driven from California to Alaska. From Alaska to Ohio and from Ohio to Utah (twice) on top of trips to Niagara Falls, Pennsylvania, etc. So I guess a bit of extra effort is required since we drag our kids all over the country! With a portable DVD player, books on tape, a new DS (ugh...yes, we caved and finally let our children get one to share on the trip), toys, new chapter books, and these new travel binders that I made, I think they will have fun!
Road Trip Binder for Kids: Road Trip Games, Map Activities and More!
The boys' binders are identical. Kaylee's is a scaled down version with lots of coloring pages and stickers instead of educational worksheets.
Each binder has a map of the US that they can check out and follow along. The front of each binder has our trip mapped out for them as well. They can follow along with little post-it flags.
The first several pages are road-trip games. Links to any printable I show can be found at the bottom of the post. Yay for free printables! What a time saver! The first is a state licence plate game. Both of our cars have Alaska plates so they can check those off....or should we make them find other cars with Alaska plates? Probably!
Next is an I-Spy game. I put post-it tabs and flags inside the binders to use as markers for games like bingo and to mark what they found.
A slug bug game (although I think we'll just look for cars in these colors too) and an Alphabet game. Those two are games we always played as kids, while traveling, and I play them with my kids now. I never thought of putting them on a printable to mark off though. Genius!
Another version of the I-Spy game with things to find.
I have a section for them to keep their ticket stubs and brochures from the attractions that we visit.
Also a place for them to keep their bonus travel tickets. The kids can earn tickets by catching Derrick or I saying the "Word of the Day". For example, if the word of the day is "Car", anytime we say it, and they catch it, they earn a travel ticket. Tickets are worth money and can be used to buy souvenirs along the way!
There is also an itinerary packet for each day of the trip in its own page protector. It tells them where we will end up each day, has a list of things to look for, tells them what the word of the day is, and includes a joke as well. The jokes are all different so they can share them with each other.
Each packet also includes a journal page for them to write or draw on.
There is also a math worksheet to do daily.
And a fun worksheet, like this hidden picture page. I found these books at Joann's awhile ago and the kids love them. There are word search, hidden pictures, mazes, educational worksheets that correlate with their grade level, etc.
I know that we could just give them snacks and a ton of movies and they would be happy (we've done it before and we will still do that this time too), but we would also like to create memories, and have them and interact with each other. So hopefully these games will help with that!
Since Derrick and I are driving in separate vehicles and I will be the one primarily driving with the children, we can use all of the fun interactive, and boredom buster ideas we can get!
3500 miles and 18 Days on the road, then another 2 months of hotel living before our house is finished......BRING IT. 😉
2016 Update! I've added more pages! These seek and find pages are so fun and the kids love them. Put them in page protectors and use a dry erase marker to mark off each picture! I've included the links at the bottom of the post with the rest of the free printables. Enjoy!


This is a very old post, and some of the blogs that I originally linked to are no longer around. Here are the printables still available:
Angry Bird Sandwiches
You can only read this post if you promise not to laugh....too hard. I wasn't sure if I was going to share this since they are the craziest little angry bird sandwiches ever, but the kids and their friends LOVED them. Seriously thought they were the best sandwiches ever....even with cheese eyebrows on top of strawberry jam and couldn't stop talking about them. Dallin even said to his buddy, "Did you know that my mom used to be a waitress? She knows how to do restaurant stuff." I didn't tell him that I didn't learn how to make sandwiches during college and when I waited tables, but that's ok. I'm glad he was proud of his mama. It was sweet.
I didn't have much time to think about these. Ruby was going to wake up from her nap soon and I wanted to make something fun for the kids after they went swimming.
I just cut out circles from bread with a mason jar, made the sandwiches, and then covered the top with jam for the pb&j ones and cheese for the meat & cheese ones. Then trimmed the yellow bird to a triangle. The eyes are marshmallows and mini m&ms and the beaks are cheese as well. The top feathers are gummies and the black eye brows are from a food pen. Everything was just raided from our pantry....our very empty pantry since I refuse to go shopping before we move except for fresh stuff!
That's about it.
Ok, I guess you can laugh if you want to. The picture makes me laugh 🙂
Snap Trap Wallet {for the boys!}
I feel like I am always sewing for my girls, but not as often for my boys. So when the need arose for a project for the little men of my life, I was excited to get to work. We had a yard sale recently and the kids had a lemonade stand set up. They were absolutely darling and did a great job. And when it was all said and done, they needed a place to store their little pile of cash.
So I decided to make them each a wallet.
Do you remember the slap bracelets we had as kids? Well, they are back and this wallet utilizes the "slap" function in keeping the top pocket closed. And do you know what you use to make it snap? A metal measuring tape! You learn something new every day! Thanks to Just Another Hang Up's tutorial, I was able to make these wallets for them and they were perfect for their needs.
A zippered pocket on the front...
With a slap style closure on the top.
Perfect for their bills and coins....
And an area for gum or a small toy.
(The slap closure secure enough for larger items, but not for coins.)
Aaron thought it was just about the coolest thing and couldn't figure out how I did it. Was it a snap? Was it magnetic? Magic?
Nope, just a measuring tape!
I can see myself making these for birthday gifts for the kid's friends. Maybe with a few bills stashed inside the pocket and a treat inside the snap pocket. Perfect! and such a great way to use up some scrap fabric.
Monster Cupcakes

Monster stuff in May? Did I get ahead of myself and post 5 months early? Nope! Aaron's kindergarten class did a Monster unit right before school got out. Monster activities, snacks, costumes, movie, games, etc. It was a blast!
The kids were asked to dress in costume and we didn't have any monster themed outfits for him to wear. The night before costume day, I sat down and added a bit of life to this stained t-shirt.
I used felt scraps. I began cutting and sewing, cutting and sewing...about 30 minutes later I had this tee and matching eye ball headband for him to wear. He loved it and I loved that this old shirt looked new again. Projects like these are fun. No pattern....just go with it!

I bought a bag of chocolate eye balls after Halloween since I knew that his class would be doing Monster week in the spring time. Talk about the easiest cupcakes E.V.E.R! They were super fun and quick to make.

And here is out goofy little monster all ready for school! He had a GREAT week and loved seeing all of the costumes that day. Including his teacher with feathers and a tail 😉
Micro Canvas Masterpieces {Gift Idea}
My little artists have been busy cranking out these fun little canvas masterpieces for Teacher's Appreciation gifts as well as gifts to Great-Grandmothers out in California and Oregon. I think they turned out darling and should be pretty easy to mail out next week.

I found these little art easels and canvas squares at Joann's. They are only 3-4" big and the little easels are the perfect compliment to them. They are $1.99 each, but I saw that they were having 50% off all canvas that day so I got them for $.99! So I bought enough for gifts and a few extras. When I got home I showed them to Derrick and he thought they would be great for Cub Scouts, so I went back a few days later and bought 20 more sets.

The kids didn't use brushes. Just their fingers. I showed them this little sample board that I made for the Cub Scouts.
Just a few ideas of ways they could use their finger/thumbprints to make pictures. My kids didn't really go off of that board, they just came up with their own. The only rule I had was that I wanted lots of color to fill the canvas.


And here are the little masterpieces. Ready to go. A few of them have a bit of detail work that they added with a Sharpie. And they signed the corners.
The kids named their paintings and I made tiny tags that just slip between the wood and the canvas in the back.
Vintage Inspired Embroidered Onesies
I think I'm in love! I absolutely love vintage embroidery and haven't done any embroidery in years. So I thought it might be fun to add a bit of detail to these plain white onesies for Ruby and it was SO much fun! And addicting! I don't think that she will have a plain white onesie in her drawer left soon.
I love how they turned out so sweet and classic. Bright colors, but subtle at the same time. And since embroidery floss is so inexpensive, and I inherited a bunch of it years ago....they were cheap too!
I think they'd make fun baby shower gifts for the future. Maybe add a little name on the bottom or an initial.
If anyone has a great way to transfer images to onesies, I'd love to hear about it. I printed out some designs that I liked and thought it would be as easy as putting it under the white onesie and tracing it. Wrong! It was very hard to see and it isn't that easy to draw on a onesie with a pencil. SO...I ended up looking at most of the designs and lightly free handing the basic shape with a pencil and then just stitching it on there without any guide to go by.
I'd love to do more intricate ones, so if you have ideas, I'm all ears. I used to have some of the old iron on designs from the 50s, but got rid of them on one of my craft closet clean out days and I'm kicking myself now!
I will attach links to the designs I found in case anyone else would like to try one too! I used google images to find these by simple typing in "vintage embroidery patterns".
After I embroidered each one I fused a piece of interfacing on the back to cover up the strings and any knots. I thought that would be nice and soft against baby's skin. Then I stitched a circle around the entire design, making sure to carefully tuck in any knot or thread so that it didn't irritate baby's skin. I stitched mostly circles, but with the bird pattern, I turned it into an embroidery hoop. Even though the interfacing was fusible, I knew it would peel after washing, so that is why I added the round hoop shapes. To keep the facing on. I've washed several of the onesies and they are holding up perfectly.
There are SO MANY darling designs out there. I can't wait to embroider more projects soon!
Frame Accented Music Wreath
I come from a very musical family. My Mom and siblings, 6 aunts, and many of my cousins play musical instruments and sing. My Mom has played the violin for over 40 years as well as the piano, guitar, mandolin, and hammered dulcimer. So I thought she might enjoy this wreath centered around her passion for her birthday.
I made a book wreath several years ago and that was fun, but I LOVED how these sheet music wreaths turned out.
After I made a violin framed one for my mom, I decided to make a piano one for my aunt who taught me how to play....for free. She gave up her time once a week for almost 2 years and taught me to play. In turn, I've taught piano for the past 8 years as well as played the organ and piano almost every Sunday for the past 15 years. What a blessing her gift was to me. So I made this one and it will be sent on its merry way to California. I hope she likes it.
And I may be partial to the piano, but out of the two, it is my favorite wreath.
The process is very simple and straight forward. I made sheet music roses---a ton of them. Here is the tutorial that I used to make mine. I used a hair clip to hold the tip to roll it nice and tight. It worked like a charm. Each wreath used 60-70 roses sp it was a good activity to do while watching a movie at night. We had a box of old sheet music and books that I used for this project. I think "Folsom Prison Blues" by Johnny Cash ended up on one of the sections of the wreath. I have no idea where that came from.
As you'll see by scrolling down to the bottom of the post, the violin frame was different than this one. The violin one was purchased at Michael's for $1. When I went back, they didn't carry them anymore so I found this one at Hobby Lobby with a coupon for $4. I loved it. I went online and printed out a wallet sized clip art image of a vintage piano and placed it inside of the frame. Then I pulled off the hinge on the back so that it would sit nice and flat against the wreath.

I cut strips of sheet music and started wrapping and hot gluing to cover the green foam. That way, if there are any gaps, the green won't show. This is only half of a wreath base. I used a serrated knife and cut the base into 2 sections. 2 wreaths for the price of one, and it is nice to have a flat back to make hanging it easier.
Then I glued. And glued and glued. 1 wreath took almost 4 full sized rods of hot glue. And I only got 1 glue burn....not too shabby.
I decided where I wanted my frame and hot glued it to the base. Then I glued the roses around it. Nice and tight together.
And here is the finished product. I LOVE it. Maybe someday I'll sit down and make one for myself, but for now I think I am done with making paper roses. I need a break!
I glued a loop on the back out of twine for a hanger and since the wreath is not very heavy, it worked out great.
It would also look nice on a shelf or top of a piano.
And here is my mom's violin wreath.
Thanks for looking!
- « Previous Page
- 1
- …
- 145
- 146
- 147
- 148
- 149
- …
- 157
- Next Page »


