Gluesticks Blog

menu icon
go to homepage
  • Summer
  • DIY
  • Recipes
  • About Me
  • Subscribe
    • Facebook
    • Instagram
    • Pinterest
  • subscribe
    search icon
    Homepage link
    • Summer
    • DIY
    • Recipes
    • About Me
    • Subscribe
    • Facebook
    • Instagram
    • Pinterest
  • ×
    Home

    DIY Wall Decals Made out of Scrapbook Paper (They're Removable!)

    May 20, 2010 By Brandy 65 Comments

    wall with child's artwork displayed on strings
    DIY wall decals made from scrapbook paper and contact paper. Peel and stick, removable, and perfect for kids rooms! Create any phrase or shapes you'd like!

    scrapbook letters displayed on wall
    We have a lot of empty wall space in the basement, so I decided to create yet another space to display my children's artwork (they already have one in their bedroom that is completely full....all the time).
    I simply strung up some ribbon with tacks and hung their artwork with tiny clothespins. It looked cute, but I thought it needed some sort of lettering above the display. Vinyl is great, but pricey and mostly comes in solid colors. I wanted to do something with some fun and colorful paper so I created these DIY wall decals!

    How To Make Your Own DIY Wall Decals

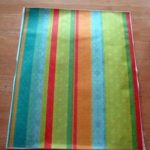
    DIY Wall Decals Made From Scrapbook Paper

    scrapbook decal of the letter G

    DIY wall decals made from scrapbook paper and contact paper. Peel and stick, removable, and perfect for kids rooms! Create any phrase or shapes you’d like!
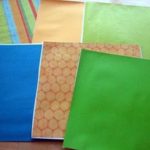
    • Scrapbooking Paper
    • Contact Paper
    • Mod Podge (or spray adhesive)
    • Foam Brush
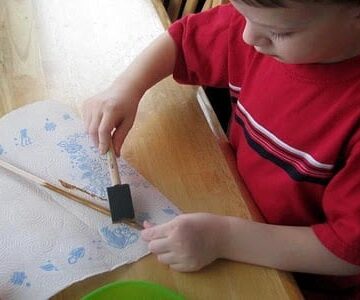
    1. Brush a layer of mod podge onto the top of a piece of contact paper, then place a sheet of paper on top of that.

      rainbow striped scrapbook paper adhered to contact paper

    2. Press down firmly and get rid of the air bubbles. Place under a board or something heavy to keep it flat while drying.

      various scrapbook paper adhered to contact paper

    3. Once the sheets have dried, they are ready to be cut!

      scrapbook decal of the letter G

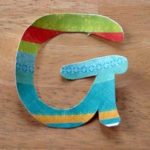
    4. You can use a cricut or stencils to cut into desired shapes.

    Note: I haven't tried spray adhesive, but would imagine that it would work just fine as an alternative method. Just spray and place a board over until set.

    I noticed a few of my corners and edges coming off of the contact paper when I went to peel the backings off. I guess the mod podge wasn't thick enough in those areas. I just added a little tacky glue to fix the small spots and they were good to go.

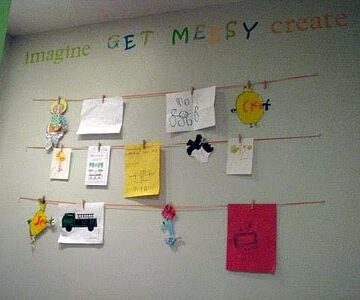
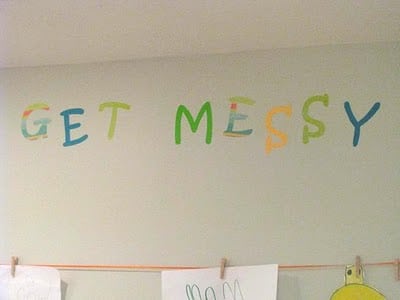
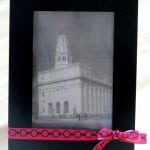
    Custom peel and stick letters that are nice and sturdy, easy to place onto a wall, reposition-able, and inexpensive!

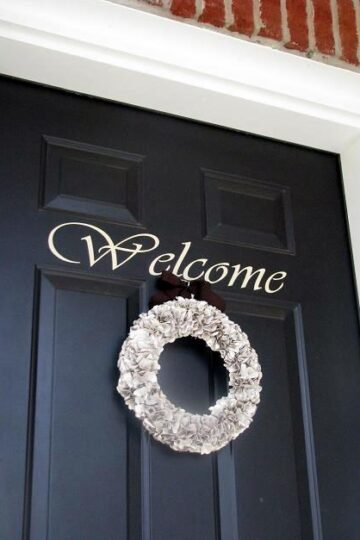
    And these aren't limited to lettering! The possibilities are endless especially with the huge variety of cricut cartridges. You can make all sorts of custom scenes for your wall.

    children's artwork displayed on wall hanging on string

    Our basement is brighter lit than most basements, but it is still hard to take a good picture down there. You get the idea.

    scrapbook lettering on wall spelling the word: create

     If you liked these DIY wall decals you might also like...
    child holding personalized alphabet book
    Personalized Alphabet Book
    paper star wreath hanging on black door
    Barn Star Paper Wreath 
    child holding paper pocket fan
    DIY Pocket Fan

    Chocolate Strawberries Teacher Gift Idea is Berry Sweet!

    May 9, 2010 By Brandy 9 Comments

    berry basket wrapped with ribbon

    This chocolate strawberries teacher gift is simple and sweet. Use the strawberry basket that the berries came in and wrap with a piece of decorative paper and ribbon.chocolate strawberries teacher gift idea

    I kept things simple for Teacher's Appreciation Day this year. NICE AND SIMPLE. I've had teachers say that their favorite gifts are cards from their students, and I totally get that! My favorite gifts are homemade cards from my kids. The boys each made a card for their teacher in their cute little handwriting and I made them each a basket of chocolate covered strawberries.

    berry basket wrapped in ribbon

    Chocolate Strawberries Teacher Gift Idea

    I was trying to think of a cute and creative way to package them when it dawned on me to just use the basket that they came in! Usually strawberry baskets are 1 lb. sized, but these one were smaller so they worked our great! Each teacher received 8 berries. I had some extra bulletin border from teaching preschool to Aaron last year and wrapped each basket in that and tied a ribbon around it. A piece of scrapbook paper would have worked out just fine if I didn't have the bulletin border.

    Here is a cute printable tag from Sweet Rose Studio that would be darling attached to this chocolate strawberries teacher gift. Looking for creative gift wrapping ideas for the holidays? I had so much fun making these Christmas inspired gifts using jars, ornaments, and to-go cups as my packaging!

    5 More Simple Gift Ideas for Teachers

    Apple with Packaged Caramel Sauce Gift Idea

    Hand Sanitizer Teacher Gift Idea

    Fruit and Chocolate Gift Basket Teacher Gift

    Double Sided Tissue Pouch Gift Idea

    I Carrot Lot About You Gift Idea 

    How to Make Chocolate Strawberries

    chocolate strawberries on baking sheet with parchment paper

    Making chocolate strawberries seems pretty self explanatory, but there are a few tips that I think would come in handy for first-timers.

    Use dry strawberries.

    This doesn't mean that you can't wash the berries. By all means, wash them! Just make sure they have a chance to dry completely so that the chocolate sticks to them better.

    Use room temperature strawberries.

    Cold strawberries will begin to sweat after they've been dipped in chocolate and will leak juice faster than room temperature strawberries.

    Use melting chocolate.

    I've made strawberries with both melted chocolate chips and melting chocolate and prefer melting chocolate. Ghirardelli meting wafers are my favorite and are delicious! Much better than chocolate flavored almond bark. You can also buy melting chocolate cups like I did in this post which are super easy to use. When you are done, just toss the cup. No clean up involved.

    Eat within a day or 2.

    Using room temperature strawberries only helps so much. After a day, the berries will begin to get juicy so make these the day you'd like to eat them, or the night before.

    Steps for Making Chocolate Strawberries

    • Melt Chocolate
    • Dip each strawberry into chocolate, letting excess drip off.
    • Place each strawberry on to a wax paper or parchment paper lined baking sheet.
    • Allow to set until chocolate has hardened. On the counter is best, but the refrigerator works in a pinch.

    Silver Leaf Transparency Photos

    May 3, 2010 By Brandy 10 Comments

    black frame with silver leaf temple image

    Transform any photo into a vintage looking print with gold or silver leaf transparency photos! These make great wedding gifts and are a fun project to make at craft afternoons with friends. This post contains affiliate links.

    black frame with black and white temple image inside
    I am making these temple photos with the young women at church this week. I taught a class several years ago in Kodiak for the women and it was a lot of fun. I had some supplies left over so I thought the girls would like to each have a temple photo in their room!
    These are very simple to make.

    Silver Leaf Transparency Photos

    First you'll need to decide on a photo that you'd like to use. If you are LDS and looking for a temple image you can print them for free on the church website.

    Note: If your printer is like mine and doesn't print on transparencies, you can take your photo that has been printed on plain copy paper and have Fed Ex/Kinkos print it onto a transparency for about .75.
    Then, lightly spray the back side of the transparency with spray adhesive (found at Walmart).
    Now comes the fun and messy part. Take sheets of imitation gold or silver leaf and gently lay them on the back of the photo. They don't have to fall perfectly or line up with each other. The messier the better because it gives it a cool vintage look. Keep laying the silver leaf sheets on until the entire surface is covered. Use a tissue/kleenex to dab the back to smooth out the silver leaf. If you use your fingers, it'll just stick to your fingers.

    Silver Leaf Transparency Photos

    black frame with black and white temple image inside

    Transform any photo into a vintage looking print with gold or silver leaf transparency photos! These make great wedding gifts and are a fun project to make at craft afternoons with friends.

    • transparency page
    • spray craft adhesive
    • silver leaf sheets
    • kleenex
    • scissors
    1. Print out black and white photo onto a clear transparency page.

    2. Then, lightly spray the back side of the transparency with spray adhesive.

    3. Now comes the fun and messy part. Take sheets of imitation gold or silver leaf and gently lay them on the back of the photo.

    4. Keep laying the silver leaf sheets on until the entire surface is covered. Use a tissue/kleenex to dab the back to smooth out the silver leaf. If you use your fingers, it'll just stick to your fingers.
    5. Turn your transparency over and you will see your black and white image with a beautiful silver background. Trim it down to fit into your frame.

    The image shown here is a 3.5"x5". It only took 1 ½ sheets of silver leaf.

    5 more activities to make with Young Women:

    Prayer Bracelets
    Scripture Cookies
    Fluffy Flip Flops
    Double Sided Tissue Pouch
    Bottle Cap Key Chains

    Paper Bag Wreath Tutorial (Hydrangea Wreath)

    April 19, 2010 By Brandy 25 Comments

    brown paper bag wreath on front door
    Would you believe that this wreath is made out of paper bags? Use our paper bag wreath tutorial to create your own faux hydrangea wreath for under $5! A simple way to add a bit of beauty to your front door without spending a lot of money. This post contains affiliate links.

    brown paper bag tutorial faux hydrangea wreath

    I love hydrangeas and would love to have a yard full of those gorgeous flowers! Instead, I'll have to settle for faux hydrangeas in vases or hydrangea wreaths because our yard lacks one thing. SHADE. Any kind of shade. This wreath was a happy accident. I made it after seeing this one and decided to give it a coat of spray paint. Voila---a faux hydrangea wreath was born and I couldn't love it more! Looking at it, you'd never guess it was made from brown paper lunch sacks! And my cost was $1 for the foam ring at the Dollar Tree store. Even better!

    brown paper bag wreath on black door
    Ready to make your own faux hydrangea wreath out of paper bags? Let's get started!

    Paper Bag Wreath Tutorial

    Supplies
    • Brown paper bags (Walmart)
    • 3" Scalloped Punch (Amazon)
    • Hot Glue/Gun
    • Pencil or dowel
    • Wreath Base (Dollar Tree)
    • spray paint (cream colored)

    How to Make a Paper Bag Wreath

    Step 1: Cut out dozens and dozens of scalloped circles using your paper punch. You can also cut them out using a cricut or silhouette machine, but a paper punch works great. They are going to start to fall all over the place, so go ahead and get out a bowl to keep them in while you punch. Turn on your favorite show on Netflix and get punchin'!

    Step 2: Pick up the pencil and wrap one circle around the end. (Do you remember making tissue paper pictures in kindergarten? You know, the ones where you wrap tissue paper around a pencil, dip it in Elmer's glue then push it onto a paper? This is the same technique. Only use hot glue instead of Elmer's glue and push them onto a wreath base.) Wrap and gluing until the wreath is nice and full.

    Step 3: Give the wreath a light coat of cream colored spray paint. Repeat if desired.

    brown paper bag wreath hanging on wreath hanger

    5 More Wreath Tutorials That You May Like!

    Target Dollar Spot Pumpkin Wreath Tutorial: Stop by your local target, grab six $1 pumpkins from Bullseye’s Playground and Dollar Spot, then follow our Dollar Spot pumpkin wreath tutorial for a gorgeous wreath to hang on your front door!

    Citrus Greenery Wreath: Bright pops of citrus, greenery and gingham combine for an adorable & easy citrus wreath to make this summer!

    Spring Hydrangea Wreath: How to make a hydrangea wreath for a fraction of the price of a custom store bought one. In less than an hour!

    DIY Ornament Wreath: One of the most stunning wreaths, and I get so many compliments on it! Everyone needs an ornament wreath on their front door during the holiday season!

    Old Glory Patriotic Wreath Tutorial: A gorgeous wreath to hang during the summer months! This patriotic wreath tutorial is simple to make, quick, and inexpensive!

    FINALLY! A new purse!

    March 26, 2010 By Brandy 18 Comments

    floral handbag handing on door handle
    finished floral handbag on table
    I did it! I finally made myself a new purse. I loved my Eddie Bauer diaper bag, but I was ready for something a little prettier 🙂 I found a pattern over a year ago and knew that this would be the one I would make myself SOMEDAY when I got a chance. It's so much easier to find time to make and sew things for my kids and other people.
    floral hand bag and matching zipper pouch
    I bought a yard of fabric and used scraps of brown for lining. I had plenty left over to make this little bag to go inside to hold all of those things that end up falling to the bottom of the purse....like a million pens. And even more fabric left over for future projects, like maybe a little skirt for Kaylee.
    floral handbag hanging on door handle
    It has fun pleated detailing and a snap closure. And the best part about the pattern? It's FREE! Made By Rae has a wonderful printable pattern with easy instructions. It is a Buttercup Bag. Since I still have a little one in diapers, I altered the pattern to fit my needs. It is about 5" longer and 1" wider than the pattern. I also lengthened the strap.
    finished buttercup hand bag hanging on door handle

    Spring Topiary!

    March 15, 2010 By Brandy 25 Comments

    child painting wooden dowel with brown paint


    topiary in flower pot displayed on table 
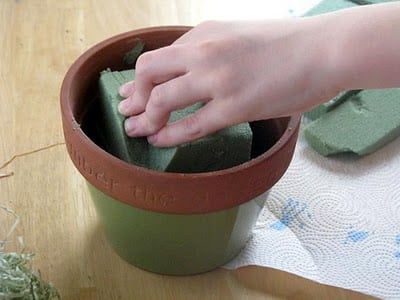
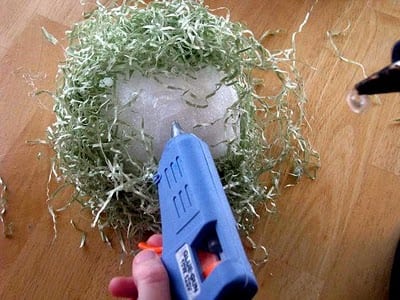
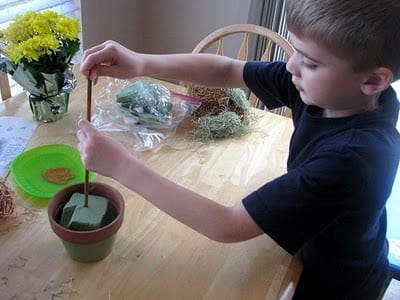
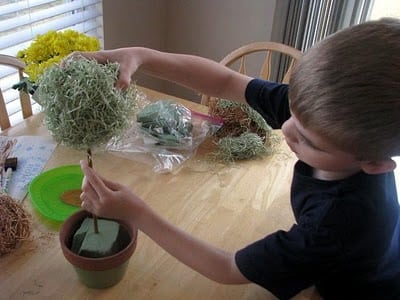
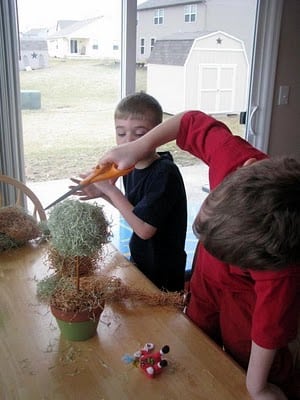
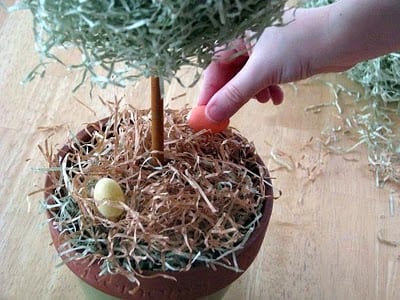
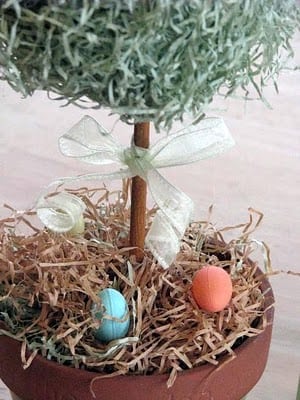
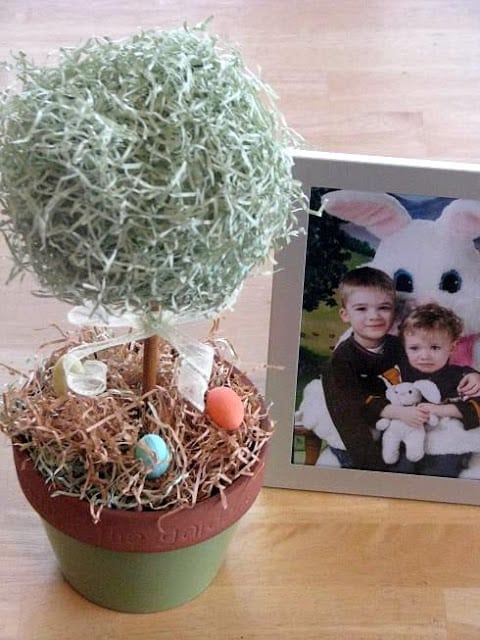
Here is a fun springtime topiary that the kids helped me make this week. We were able to use supplies that we already had from around the house to make it a no cost project. I love those!
    craft grass and paint and flower pot and styrofoam ball
    Supplies:
    Styrofoam ball, dowel (you can see it has been used for something else before...same with the ball)
    Easter grass (we used the stuff made from paper)
    paint
    pot
    floral foam
    accessories.
    child painting wooden dowel with brown paint
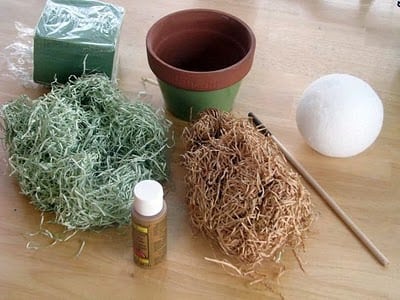
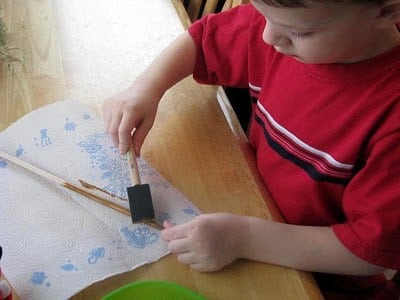
First, Aaron painted the dowel brown.


    hand placing floral foam into flower pot

    Dallin cut the floral foam down to size, with a little help. We hot glued it into the pot.

    hand hot gluing craft grass onto styrofoam ball

    They alternated on who glued and who placed the Easter grass on the ball.

    child placing dowel into floral foam
    Once the stick was dry, Dallin poked it into the foam and added the covered ball.
    child placing styrofoam ball on top of wooden dowel
    A little trimming...
    child trimming craft grass on styrofoam ball
    ...and a little more grass to cover the floral foam.
    child adding small plastic eggs inside pot
    Final touches: tiny plastic Easter eggs and a ribbon.

    finished spring topiary on table

    Plaster Kiddie Prints

    February 1, 2010 By Brandy 15 Comments

    child plaster handprint hung on wall

    3 plaster prints of children's hands on table 
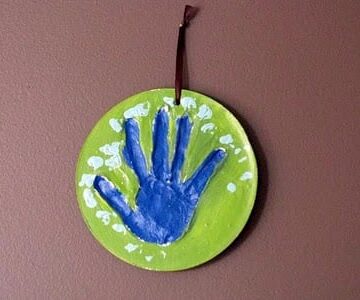
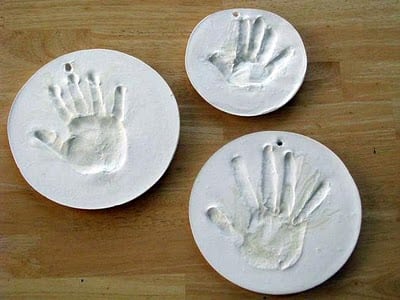
We had some plaster of paris in our craft closet that had been in there for YEARS. So I thought we'd finally do something with it. I mixed it up and poured it into some small frying pans. I let it sit 5 minutes so that it could begin to set up. Then I sprayed the kid's hands with non stick spray and dipped them into the plaster. I also added a hole with a straw so that we could hang them.
    24 hours later they were ready to paint!
    children painting plaster prints 
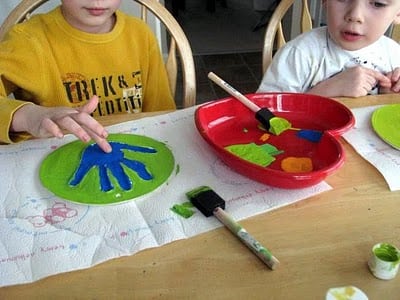
We used acrylic paint. The kids had fun customizing their plates.
    toddler painting plaster handprint 
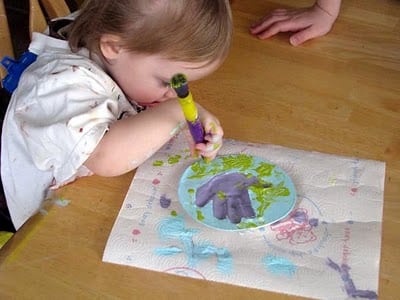
Kaylee had a little help with the blue paint, but did the green accents all by herself 🙂 We let them dry, then I added a coat of mod podge on the front and the back to seal it and make it smooth.
    toddler plaster handprint hanging on wall 
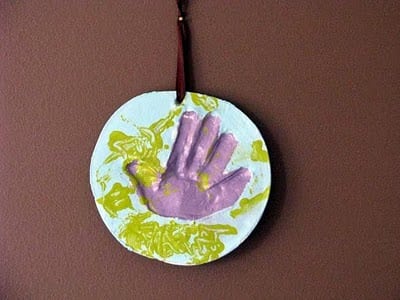
Here they are! They've been done for 4 days and the kids keep asking when we are going to hang them up!

    child plaster hand print on wall When the basement is done, these will be the first things we put up! Perfect for the toy room. And perfect as keepsakes of their little hands for us to have forever!
    child plaster hand print hung on wall


    Little Sofa Makeover

    January 14, 2010 By Brandy 48 Comments

    vintage step2 child sofa
    vintage step2 kids sofa
    So this was my first re-upholstery project. I started small, lol. A friend gave this little couch to us recently, and while it was in excellent shape and super clean... it needed a make-over. It was the perfect size for Kaylee and we've been wanting to get her a little chair anyways.
    I bought a yard and a half of one of my favorite fabrics at Joann's and a can of Krylon Fusion spray paint (for plastic) at Walmart.
    vintage step2 kids sofa painted black and reupholstered
    I used the old slip cover as a pattern. The only tricky part with making the new slipcover was figuring out the pivot points (where the foam wedges meet so that it folded up correctly), but it ended up being a lot of fun and easy to do.little girl sitting on child sofa
    She loves it! Look at those little cup holders---perfect for movies in our basement....which is almost finished!
    little girl sitting on sofa with cushion extended 
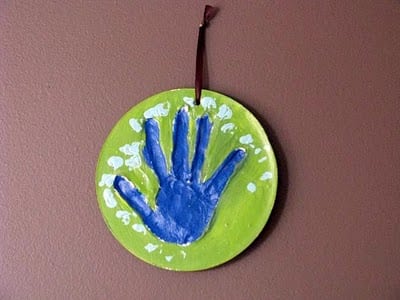
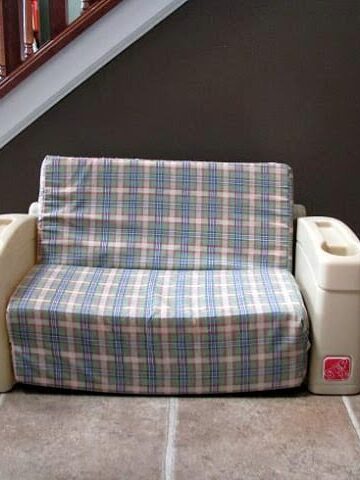
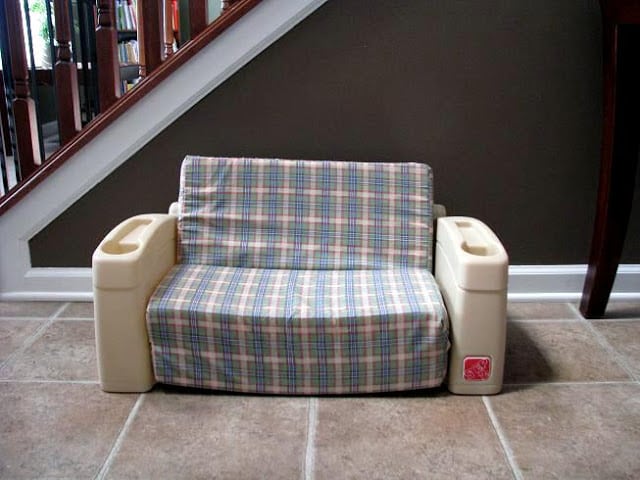
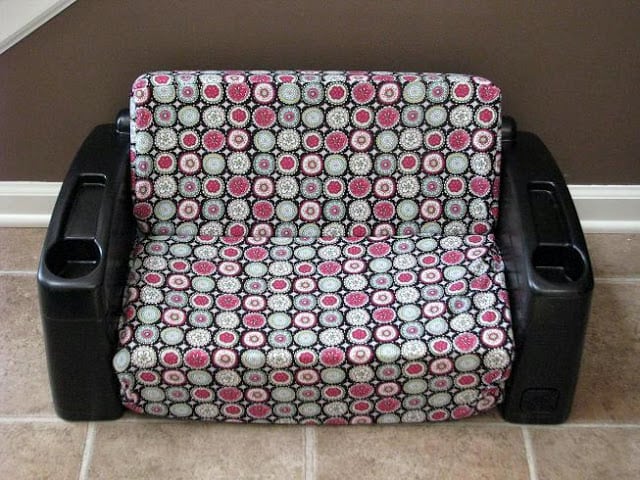
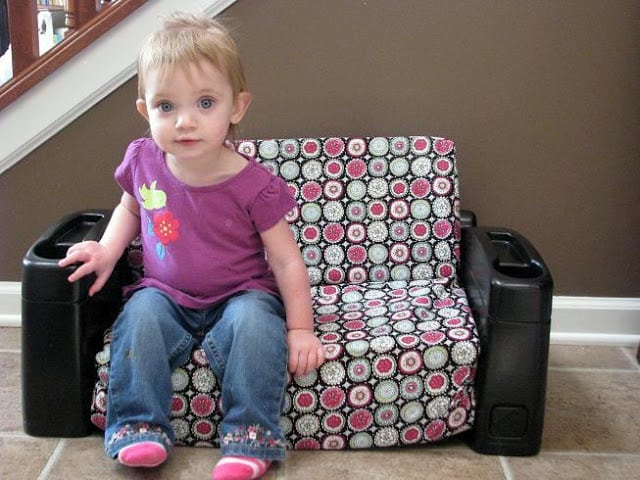
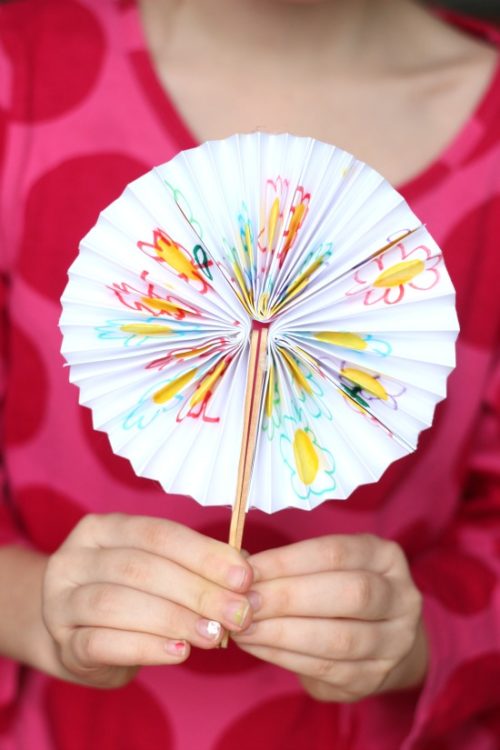
Checking out the fold out feature 🙂
    Amazing what a little paint and fabric can do!


    Marble Magnets!

    November 19, 2009 By Brandy 5 Comments

    marble magnets with photos glued behind
    clear flat marbles with glue and magnets and foam brush
    My friend, Tania, taught me how to make these fun magnets a couple of years ago in Kodiak. We made them for the parents of the kids that we babysat that year. They turned out so cute! I love being down in the lower 48 around the holidays. It is SO MUCH EASIER to find craft supplies! We couldn't get these marbles on the island, so her sister sent her some from Maine. Now all I have to do is go down the street to Joann's or the Dollar Tree store---and spend a lot less---no shipping!
    To make some of your own all you need to do is brush a thin layer of mod podge on the back of the marble (on the flat side). Apply a circle of scrapbook paper, a photo, or a little crayon masterpiece (like the one Aaron is doing below).
    painting mod podge onto back of flat marble
    Let dry. Then add a magnet onto the back using some tacky or all purpose craft glue and let dry. That's it!
    2 finished marble magnets made with scrapbook paper
    Here are some with paper behind.
    4 marble magnets made with kids drawings
    Aaron's crayon drawings. He made these as gifts.
    2 marble magnets made with photos


    • « Previous Page
    • 1
    • …
    • 155
    • 156
    • 157

    Welcome!

    I'm Brandy! I love to create and share my ideas through easy-to-follow recipes and tutorials.

    More about me

    As an Amazon Associate, I make a small commission on qualifying purchases.

    sew with me kids sewing book
    My Book

    Summer Posts

    • Cherry pie on prep mat.
      Best Cherry Pie Recipe
    • Bandanna Picnic Blanket Tutorial
    • diy tiki torch planter on black plant stand
      DIY Tiki Torch Planter (Table or Stand) + Video
    • slab pie on white plate
      Peach Slab Pie
    • toddler playing with dinosaur garden
      Dinosaur Garden For Kids (Fairy Garden) (Video)
    • water bottle sewing tutorial
      Color Block Fabric Water Bottle Holder Tutorial
    • strawberry pie with whipped cream on top.
      Fresh Strawberry Pie Recipe (Video)
    • slice of ice cream cake on spatula
      Oreo Ice Cream Sandwich Cake
    See more Summer →

    Latest Posts

    • 3 walnut brownies stacked.
      Katharine Hepburn's Brownie Recipe
    • Arms with stacks of bandana bracelets on them.
      Easy DIY Bandana Bracelets
    • Stack of colorful bandana hair bows.
      How To Make Easy Bandana Hair Bows (No-Sew)
    • White candles decorated with wax candle pens.
      How to Decorate Candles with Wax Candle Pens
    • Slice of Chessmen banana pudding on a metal spatula.
      Chessmen Cookie Banana Pudding (Easy No Bake Recipe)
    • Chocolate cake coated in ganache and mini chocolate chips.
      Best Chocolate Pudding Bundt Cake

    Footer

    ↑ Back to Top

    About

    • Privacy Policy
    • Accessibility Policy

    Newsletter

    • Sign Up! for emails and updates

    Contact

    • Contact

    As an Amazon Associate, I earn from qualifying purchases.

    Copyright © 2025 Gluesticks Blog