
Making homemade rock candy is a fun science experiment and a delicious treat all in one! Watching sugar crystals slowly grow over several days is fascinating for both kids and adults, making this an excellent STEM activity for classrooms, homeschool lessons, rainy days, or summer break.
Looking for more science experiments for kids? Check out our collection of easy science experiments using household ingredients!
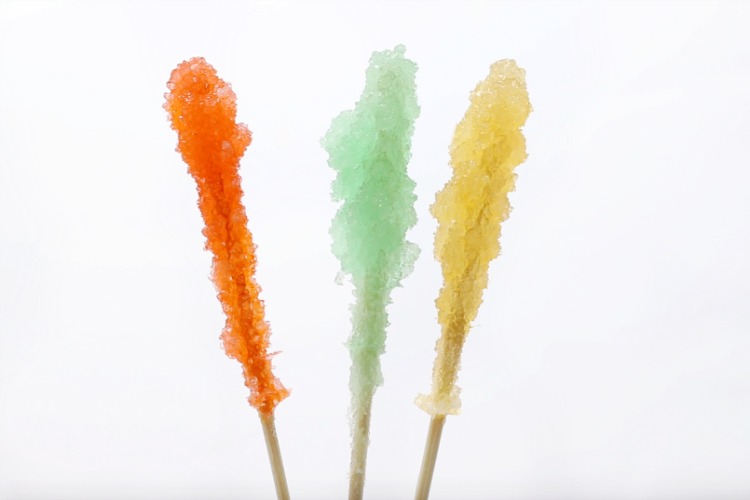
Although rock candy takes about 5–7 days to fully grow, the process is simple, inexpensive, and well worth the wait. All you need are a few pantry staples, glass jars, wooden skewers, and a little patience.
What Is Rock Candy?
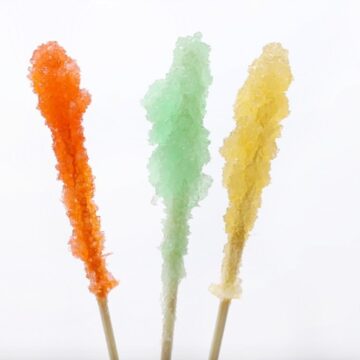
Rock candy is made by allowing sugar crystals to slowly grow from a supersaturated sugar solution. As the syrup cools and the water gradually evaporates, sugar molecules attach to the wooden stick or string, forming the large sparkling crystals that make rock candy so unique. Because you can actually watch the crystals form over time, this project doubles as both a homemade candy recipe and a fun science experiment.
We've made homemade rock candy several times over the years and recently updated this post with new photos and a step-by-step video. Every batch turns out a little differently, but that's part of the fun!
We made a huge batch using 8 cups of water and 20 cups of sugar, which filled about 12 small jars. You definitely don't need to make that much! As long as you keep the same water-to-sugar ratio, you can easily make a smaller batch with great results.
Jump to:
Why You'll Love Making Homemade Rock Candy
- A fun science experiment kids can watch day by day.
- Only a handful of inexpensive pantry ingredients.
- Perfect for STEM lessons, homeschool, and science fairs.
- Customize every jar with different colors and flavors.
- Makes fun party favors and homemade gifts.
What Others Are Saying
We put our skewers through unbleached coffee filters to keep the dust and pet hair out of our jars but allow for evaporation. It seemed to work well.---Julie
I love this activity. I have 3 daughters and we made this one of the nights events during a 12 girl sleep over. I used the smaller mason jars and labeled each jar with the girls names. I did a test 2 weeks before and found that you really need to have a very good sugar base started on each stick to get the best results. We used the solid food coloring and hard candy flavoring. To help with keeping the bugs away I used some of those outdoor pop up nets you use for outdoor dinners over your plates. The girls loved that they got to see a progress report every evening on their Instagrams. Day seven they were all over after school to collect their rock candy. Thank you---Robert
The Science Behind Rock Candy
Rock candy forms because you're creating a supersaturated sugar solution, meaning the hot water contains more dissolved sugar than it can normally hold at room temperature. As the solution cools, the extra sugar has nowhere to stay dissolved, so it begins attaching to the sugar-coated skewer. Over several days, those tiny crystals continue growing until you've created edible rock candy.
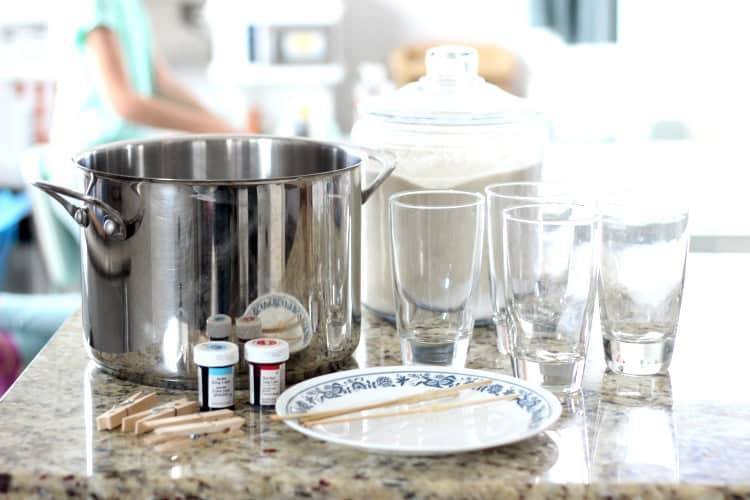
Ingredients
- Granulated Sugar: Sugar is the star of this project. As it crystallizes, it forms the beautiful rock candy crystals.
- Water: Hot water dissolves the sugar, creating the supersaturated solution needed for crystal growth.
- Food Coloring: Food coloring gives each batch its fun appearance. Use one color per jar or experiment with different colors.
- Flavoring (Optional): Add a few drops of candy flavoring or extracts after removing the syrup from the heat.
- Wooden Skewers or Rock Candy Sticks: The rough surface gives sugar crystals something to attach to while they grow.
See the recipe card for full information on ingredients and quantities.
How To Make Rock Candy
Step 1: Prepare the Skewers
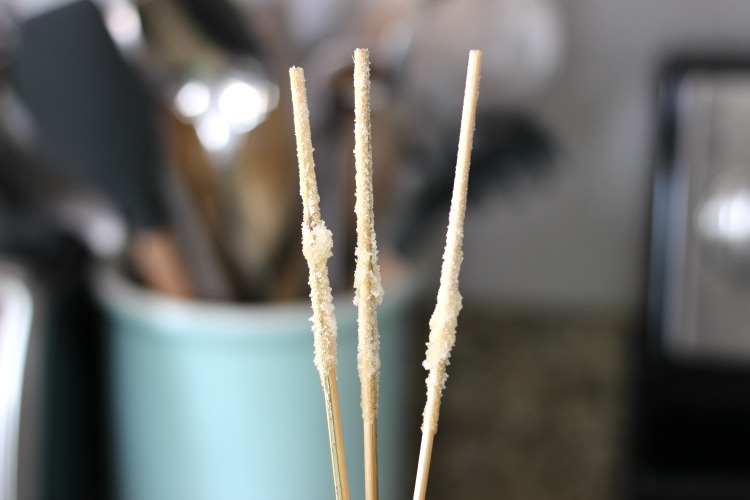
Trim down your skewers to a reasonable size to fit in whatever jars or cups that you will be using. You'll also want to get rid of the point. Dip them in water, then roll in sugar.
Let the sticks dry completely and set aside. This will give the sugar a base (something to stick to when it starts to crystallize).
Step 2: Make the Sugar Syrup
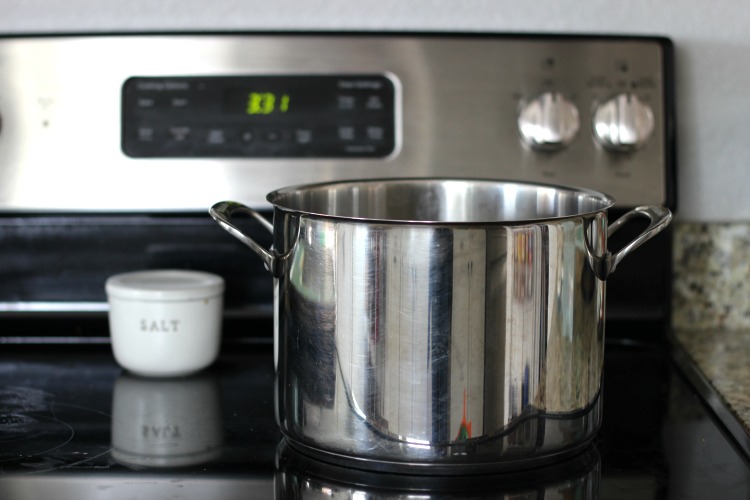
Heat water on medium-high heat in. a saucepan or large pot (depending on how much syrup you want to make) When it starts to simmer/boil begin adding sugar until you reach a 1:2 to just shy of a 1:3 water-sugar ratio. The mixture will take longer to dissolve the more sugar you add (totally normal). Keep stirring with a wooden spoon until completely dissolved. Remove from heat. CAUTION: it is very HOT!
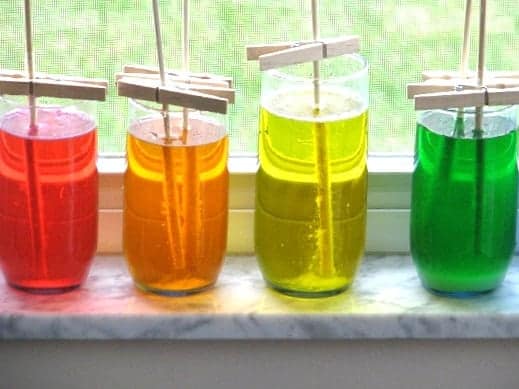
Step 3: Fill the Jars
Ladle the syrup into your jars using a funnel to catch spills. Add food coloring and, if desired, a few drops of candy flavoring to each jar. Grape, cherry, orange, and lemon are all delicious choices!
Allow the liquid in the mason jars to cool down a bit. Warm or room temperature. Attach a clothespin to each skewer (the ones you dipped in sugar and let dry) and place in the jar.
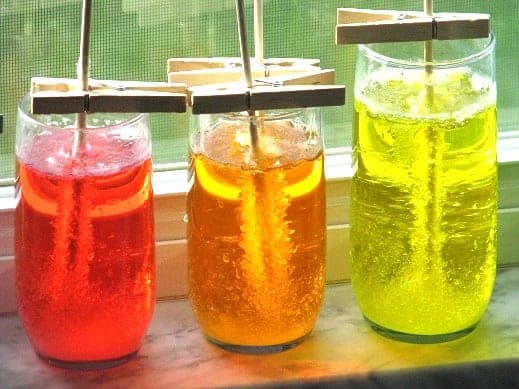
Step 4: Let the Crystals Grow
Place the jars in a location where they won't be bumped or disturbed. Over the next several days, you'll begin to see tiny sugar crystals form and gradually grow larger. Resist the temptation to move the jars too often—the less they're disturbed, the better your crystals will develop.
Step 5: Remove and Dry the Rock Candy
Carefully lift the rock candy out of the jar and allow the excess syrup to drip back into the jar. Place the rock candy on a parchment-lined baking sheet or wire rack and let it dry for 1–2 hours before serving or wrapping for gifts.
Don't worry about any hardened sugar left behind in the jars—it's easy to remove! Simply fill each jar with very hot water and let it soak for 15–30 minutes. The sugar will dissolve on its own, and any stubborn pieces can be gently loosened with a butter knife or silicone spatula before washing the jar as usual.
How to Store Rock Candy
Once completely dry, wrap each stick in plastic wrap or store it in an airtight container in a cool, dry place. Homemade rock candy will keep for up to one year if protected from moisture.
Tips & Tricks
- Make sure your jars are perfectly clean.
- Use plenty of sugar. A supersaturated syrup is the key to crystal growth.
- Allow the syrup to cool slightly before adding the sugar-coated skewers.
- Don't bump or move the jars while crystals are growing.
- Keep the sticks from touching the sides or bottom of the jar.
- For larger crystals, store the jars away from direct sunlight. Our crystals are small because we grow ours on a windowsill. We like seeing the light shine through the glass and watching the crystals grow.
- For faster growth, place them in a warm location.
- Be patient! Every batch grows a little differently.
What to Expect Each Day
Day 1: The sugar syrup is clear and fully dissolved. Everything looks pretty quiet.
Day 2: Tiny sugar crystals may begin forming on the skewer and around the edges of the jar.
Day 3–4: Crystal clusters become much more noticeable as they continue to grow.
Day 5–7: Most batches are ready to remove and enjoy.
1–2 Weeks: Leave the sticks longer if you'd like larger crystals, provided they aren't attached to the bottom or sides of the jar.
Rock Candy FAQs
The most common cause is not enough sugar in the syrup. The solution must be fully saturated for crystals to form.
This usually means the stick was touching the bottom of the jar or undissolved sugar settled there.
Yes! Stir candy flavoring or extracts into the syrup after removing it from the heat.
The sugar crystals act as "seed crystals," giving new crystals something to grow on.
Absolutely. The crystals will simply be clear.
Cloudiness usually happens when undissolved sugar remains in the syrup or the solution was disturbed while crystals were forming.
Yes. They're simply hardened sugar.
Yes. In fact, many people find wooden skewers produce larger crystals because the rough surface gives the sugar more places to attach.
Freshly removed rock candy is coated in sugar syrup. Let it air dry on a wire rack or parchment-lined baking sheet for 1–2 hours so the excess syrup hardens before serving or wrapping.
Glass jars work best because they can safely hold the hot sugar syrup and allow you to watch the crystals grow. Plastic or foam cups may warp or melt when filled with the hot syrup.
If your family enjoyed making homemade rock candy, be sure to try more of my kid-friendly science experiments and easy homemade treats.
More Kitchen Science For Kids

MADE THIS RECIPE AND LOVED IT? 💛 Please leave a STAR rating and COMMENT below! Post it to Facebook or Pinterest to easily share with friends!
Homemade Rock Candy Recipe
Equipment
- funnel
- glass jars
- clothespins
- large pot
Ingredients
- Granulated sugar lots of sugar
- Water
- Food Coloring concentrated for brighter colors
- Wooden Candy Sticks or Bamboo Skewers
- flavoring optional, Lorann is my favorite brand
Instructions
- Trim down your skewers to a reasonable size to fit in whatever jars or cups that you will be using. You'll also want to get rid of the point. Dip them in water, then roll in sugar.
- Let the sticks dry completely and set aside. This will give the sugar a base (something to stick to when it starts to crystallize).
- Heat water on medium-high heat in. a saucepan or large pot (depending on how much syrup you want to make) When it starts to simmer/boil begin adding sugar until you reach a 1:2 to just shy of a 1:3 water-sugar ratio. The mixture will take longer to dissolve the more sugar you add (totally normal). Keep stirring with a wooden spoon until completely dissolved. Remove from heat. CAUTION: it is very HOT!
- Ladle the syrup into your jars using a funnel to catch spills. Add food coloring and flavorings to each jar, if you’d like wouldn't grape, cherry, orange or lemon flavoring be delicious?).
- Allow the liquid in the mason jars to cool down a bit. Warm or room temperature. Attach a clothespin to each skewer (the ones you dipped in sugar and let dry) and place in the jar.
- Place your jars in a safe location and watch the crystals grow!After 5–7 days, or once the sugar crystals have reached your desired size, carefully lift the rock candy out of the jar. Hold it over the jar for 30–60 seconds to allow any excess sugar syrup to drip off.Place the rock candy on a parchment-lined baking sheet or wire rack and let it air dry for 1–2 hours. This allows the sticky syrup on the surface to harden into a crisp sugar coating, making the rock candy easier to handle and enjoy.
Notes
- You can create as much or as little syrup as you'd like as long as you keep the same sugar/water ratio. You are making a nice, sticky, sugary syrup.
- If after 24 hours you don't see any crystal growth, pour each jar of syrup back into the pan (separately) and add more sugar. ¼ c. or so and heat once more until it is a syrup consistency. Roll the sticky skewers in sugar and add them to the jar once more after the syrup has cooled down to be warm (not hot) or room temperature.
- Make sure the skewer isn't touching the bottom or sides of jar/glass. They need room to grow. One skewer per jar works best for regular-sized jars.




Wendi and Matt says
Can I use another type of sugar say honey?
Thanks!
Wendi and Matt says
This comment has been removed by the author.
Sharon says
wonder if you could use unsweetened koolaid pkts and that would give you color and flavor at the same time?
Darry says
I love the unsweetened koolaid idea!!
Brandy says
Mama B- I'm not sure. I've just always seend them int he stores with wooden skewers. Good luck!
Mama-tbull- Oh no! I'm not sure what went wrong. As long as they are in a warm sunny location and there is at least a 2 to 1 sugar/water ratio, I'm not sure what else could have gone wrong. Was there a good coating of sugar on the skewers so that the crystals had something to grow on?I wish I could help more. Give it a few more days before throwing in the towel.
mama_tbull says
I used your instructions, and we're on day 3 with no crystals forming on the sticks. What do you think I did wrong?
Mama B says
Does anyone know if you *have* to use the wooden skewers? I have some of the paper-ish lollipop sticks on hand and wonder if those would work?
Peggy says
Thank you so very much for the reminder! I think the last time I made these was over 10 years ago. We didn't dip the skewers in sugar first so there was some coverage issues. We did make them in clear plastic containers so we could easy break any lingering crystals out and then reheated them and the syrup to make more rock candy. Once again thank you for the reminder! I know what we are going to be making for the cousins for christmas!!
manda1027 says
I wonder, could you use kool aid to color and flavor the sugar water?? Just a thought?
Kim H. says
This is such a cool idea! I can't wait to enjoy this with my kids!
Ashlyn says
This is AWESOME!! I've always loved rock candy and so do my two boys!! We are so doing this and SOON!! Thanks!! 🙂
Brandy says
@Rebecca, I'm not sure, but I don't see why not! As long as it is still a thick sugary syrup mixture again when it's heated up again I would think it would work!
@Damienne, yes you can! I just didn't have any!
Have a great week ladies!
Brandy
Gluesticks
Rebecca says
This is amazing. Can you heat up the leftover syrup and start re-use it?
-Rebecca
Mischa says
I LOVE this idea! I'm taking my kids to Disneyland in December and want to make all the treats we eat there this time instead of spending so much $$ buying it all. This is one we'll be making...and doing it together.
Thanks for sharing!
Mischa
http://barelykeepingittogether.blogspot.com/
MB@YarnUiPhoneApp says
I'm with Damienne...and would adding alcohol work for adult versions? I can see myself eating these, drinking an adult bev of some sort and trying to knit!
Damienne says
This is going to sound stupid, I'm sure, but would flavor extracts work with this? I'd love to make flavored rock candy!
Cyn McMillan says
Extracts are what I use!