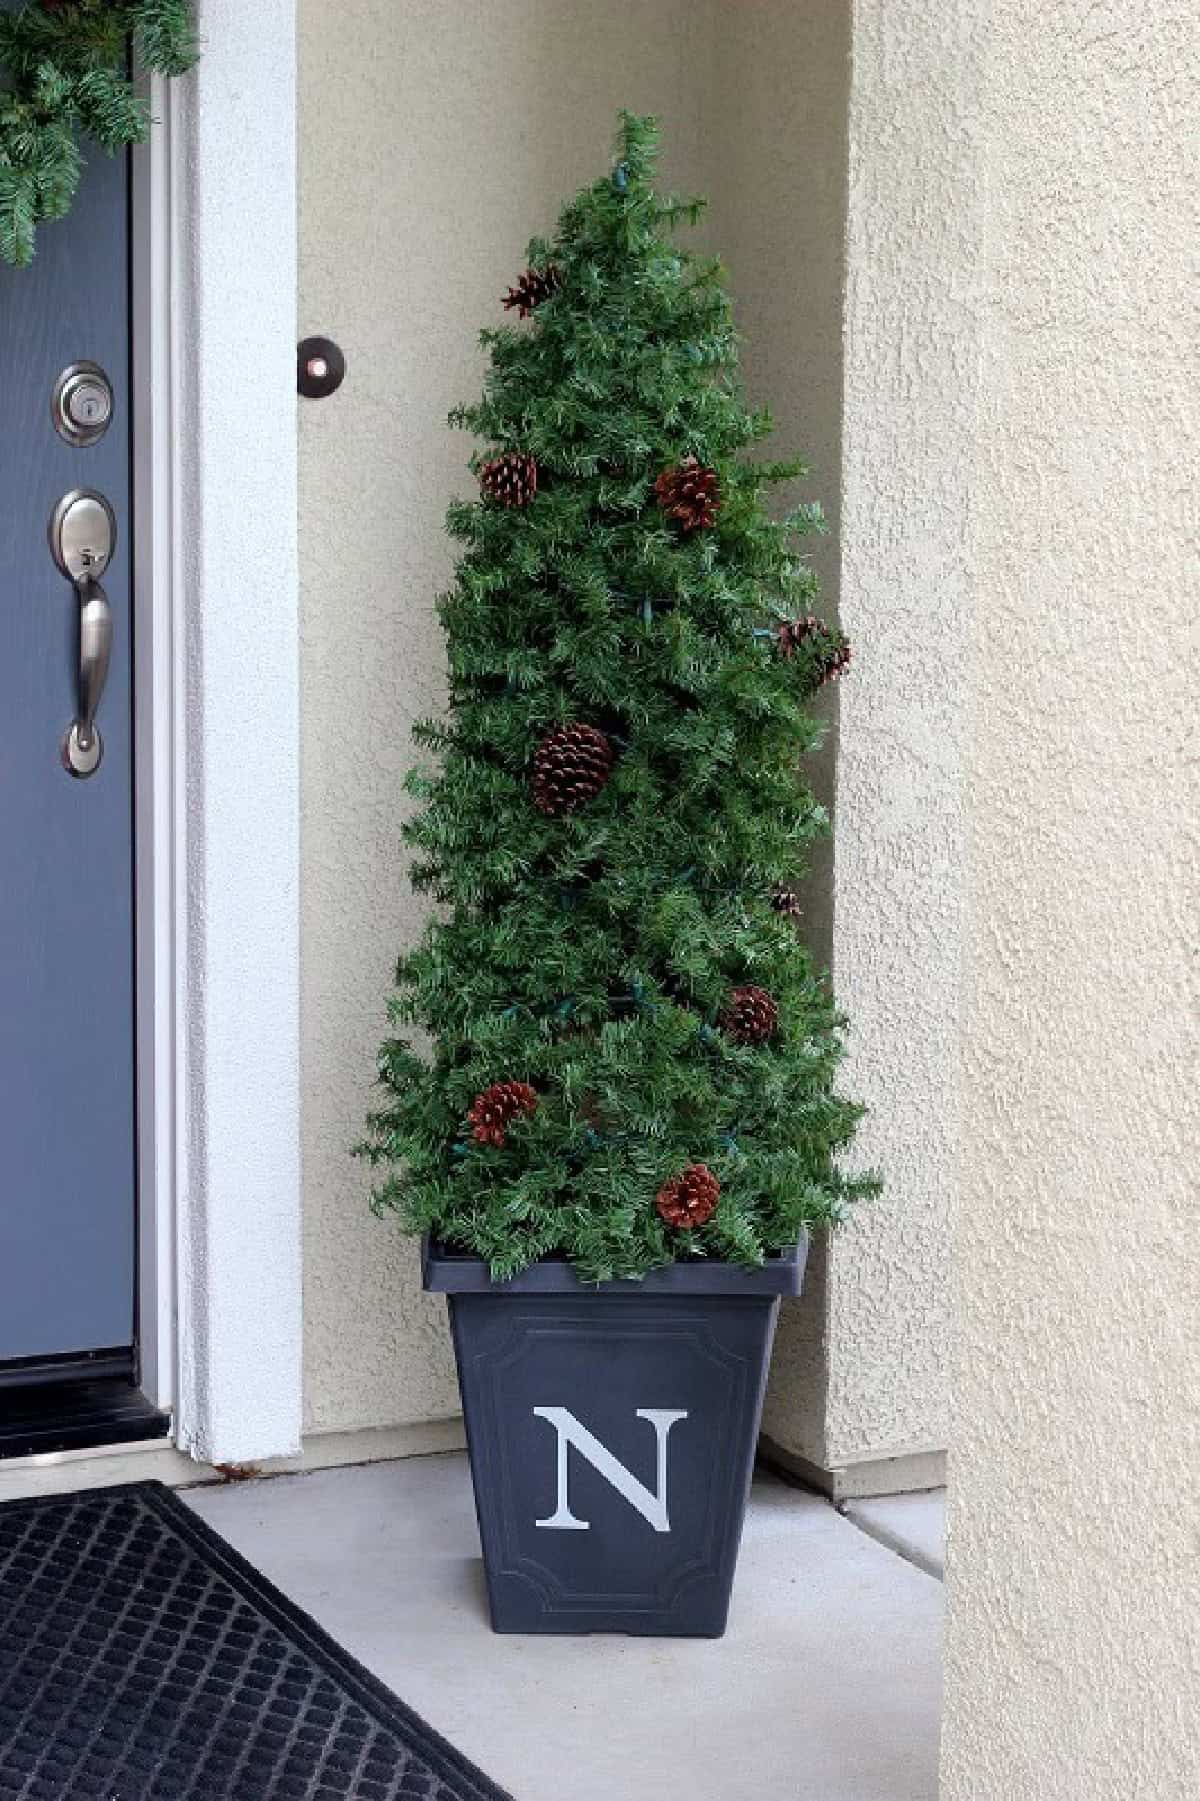
This evergreen tomato cage topiary is stunning and perfect for the holidays. Create a set of topiaries for your porch at a fraction of the cost of store-bought ones.
How pretty would this topiary look on your porch with our winterberry wreath or bottle brush tree wreath for the holidays?
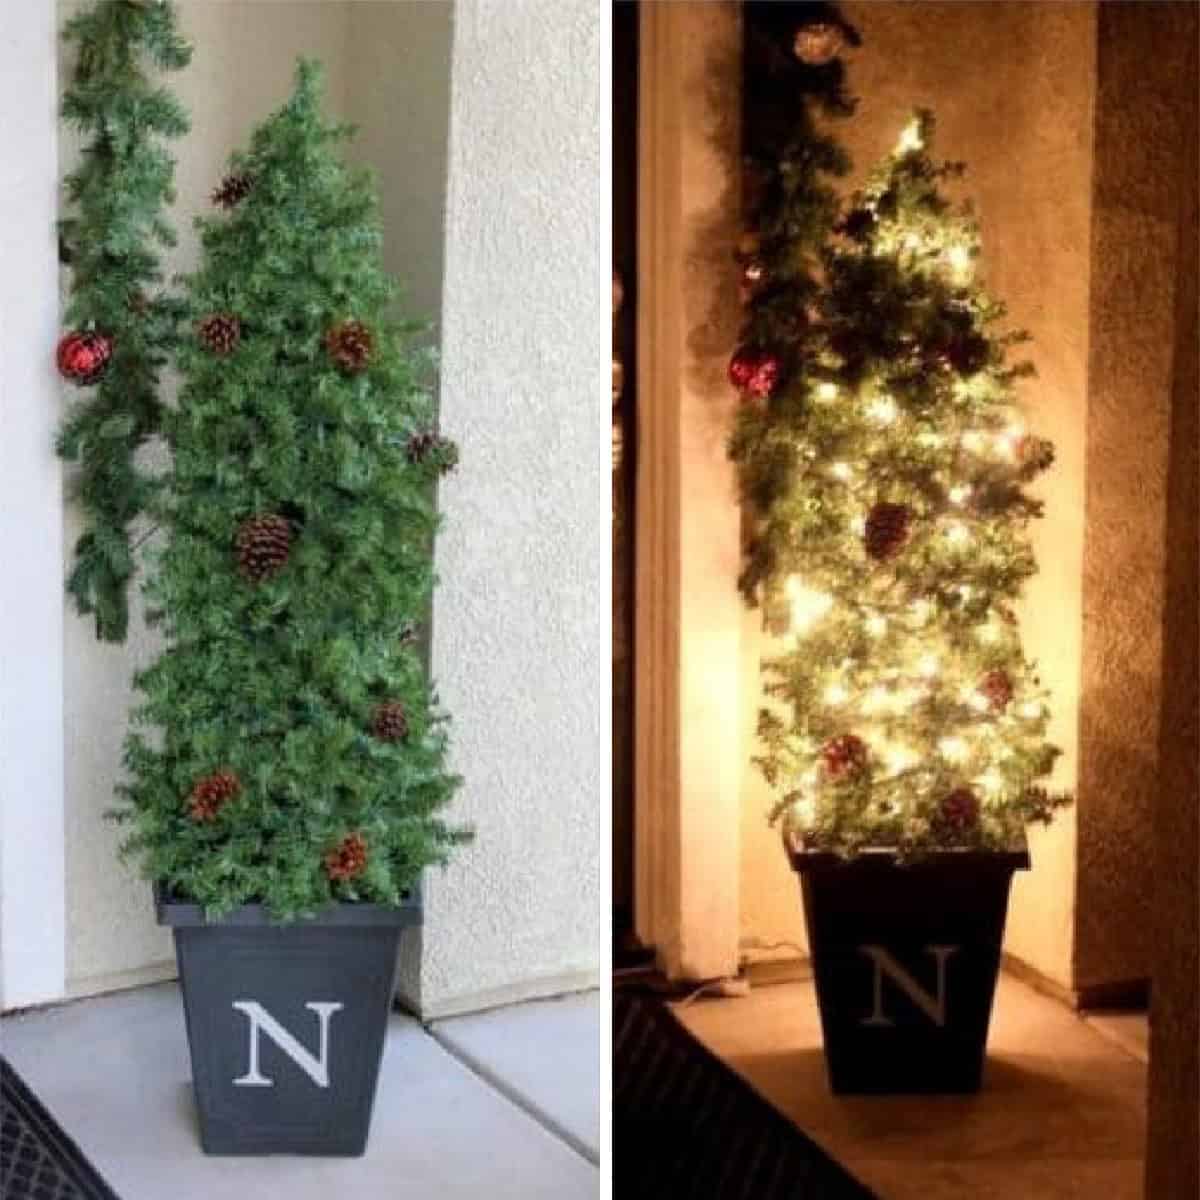
I am so excited to share my tomato cage topiary! This evergreen topiary is incredibly quick and easy to assemble.
Why I Like This Project
- Affordable to make. I've been wanting to get one on my front porch for years, but did not want to pay the price tag for pre-lit topiaries. They are ridiculously priced! Most that I have seen (this tall) are $75+ each. My DIY option is a fraction of the price.
- Basic supplies. These are made using a tomato cage for a frame and are nice and bushy. I added cinnamon-scented pine cones and white lights for a beautiful evening effect. They are exactly what I wanted! I will share the dimensions I used and where I bought my supplies, but you can alter them however you'd like.
- Durable and will last for years. I originally made these tomato cage topiaries in 2013. They lasted over 10 years and moved cross-country with me before the garland began to fall apart. TEN YEARS.
What Others Are Saying
Made a set for my porch! They aren't as pretty as yours, as I wasn't able to get the same garland as you, but I'm so happy with how they turned out.---Megan on FB
I love how my topiary turned out. I used colored lights and didn't add pinecones.---Laura on FB
Jump to:
Tips and Tricks
- Buy extra garland. When I was planning how I was going to do this, 2 packs of 12' garland seemed like it would be more than enough for 1 topiary. Well...it wasn't! My sweet and very patient husband stopped by the store on his way home from work and got me 2 more. Moral of the story: get extra just in case. You can always take it back!
- Weigh down the planter/pot: The topiaries are a little top-heavy once assembled. I used plastic pots that weren't that heavy, so I weighted them down with a bag of sand. If you use a plaster pot, you wouldn't need to do this.
- Wrap decorations with wire. If adding pinecones, ornaments, or other faux branches and floral picks, attach them to the topiary with wire. Simply wrap the wire around the bottom of the pinecone, then wrap the wire around a branch on the topiary.
Supplies
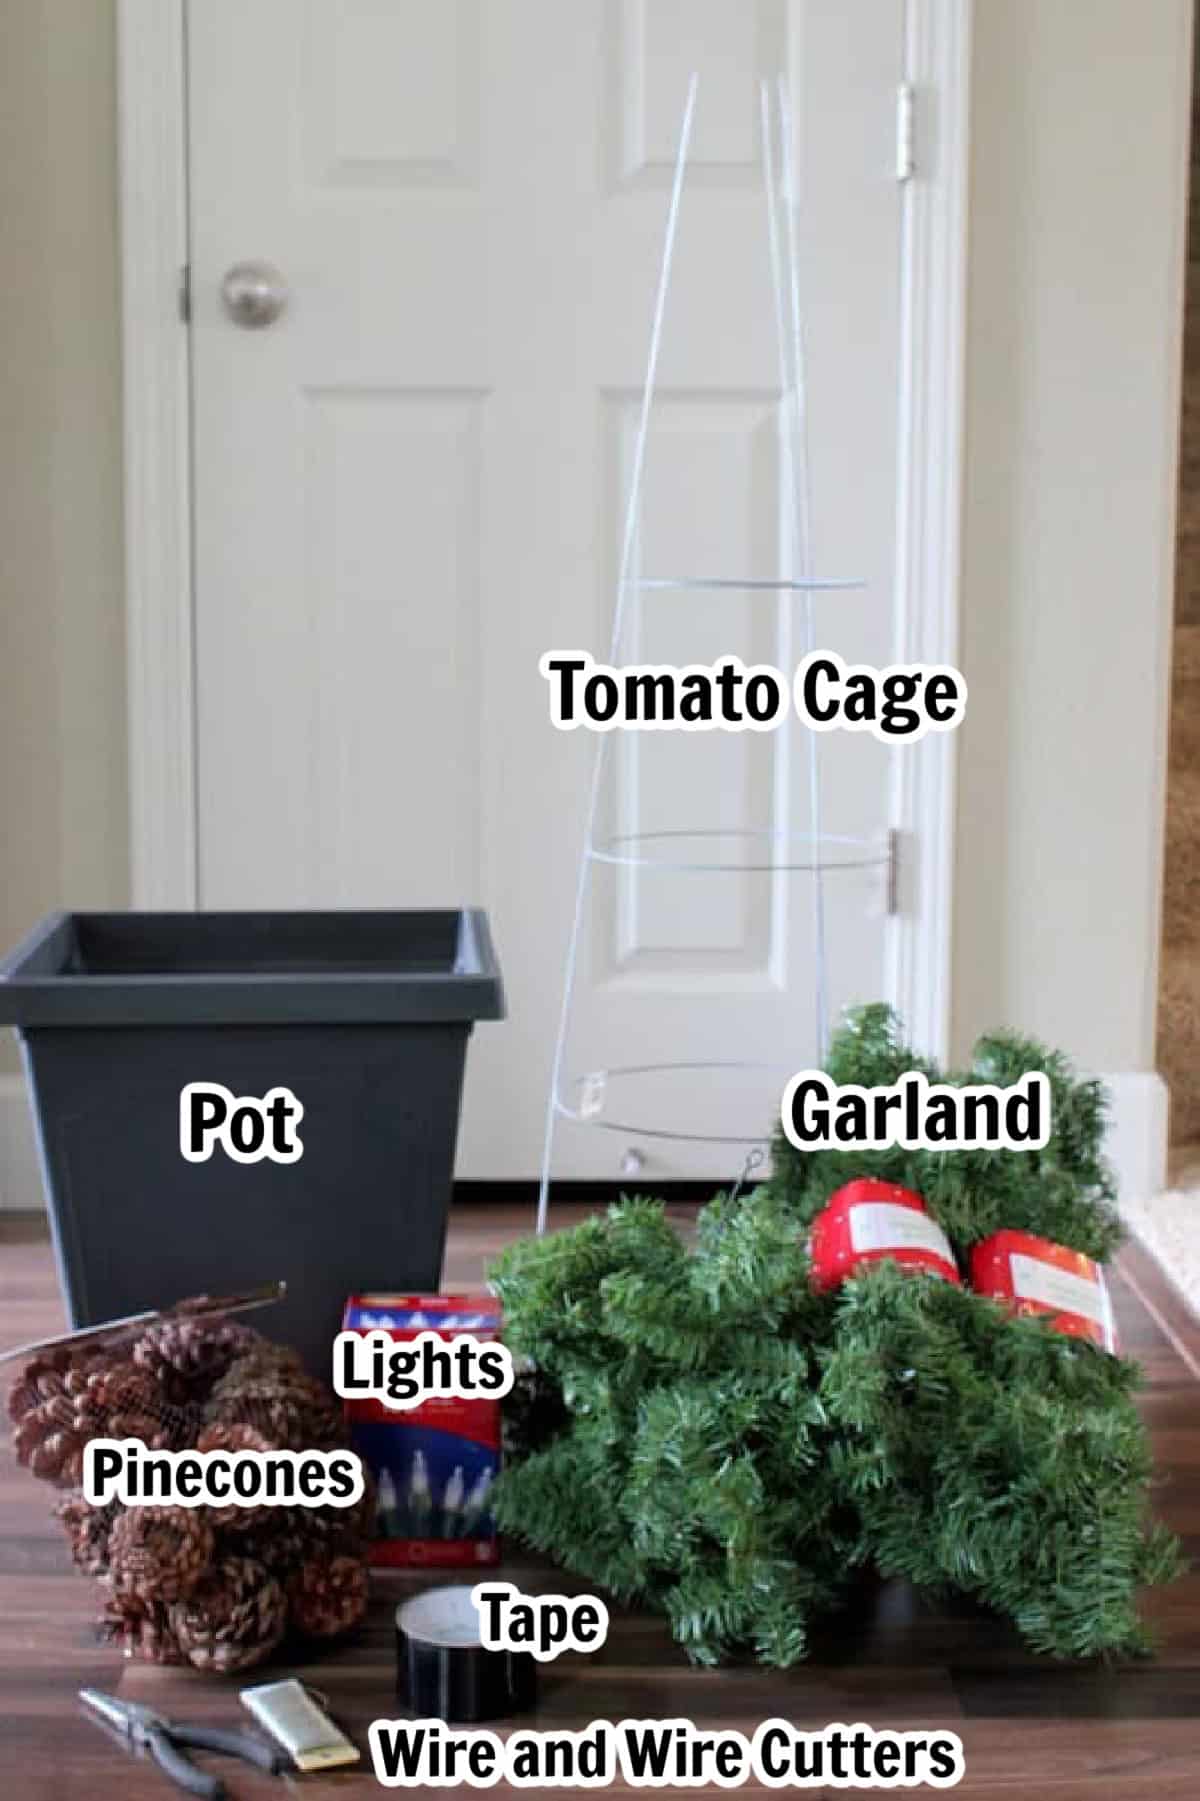
- 1 tomato cage, 42" tall with a 14" circular base {$3.48 @ Lowe's}
- 1 planter (mine is 15" tall, 14" wide) {$14 @ Home Depot}
- 4 (12') strands of garland {$5 each @ Walmart}
- Pine cones, optional {$4.99 @ Walmart}
- Wire for pine cones, optional
- wire cutters
- Duct tape
- 100 ct. white lights {$2.99 @ Lowe's}
How To Make A Tomato Cage Topiary
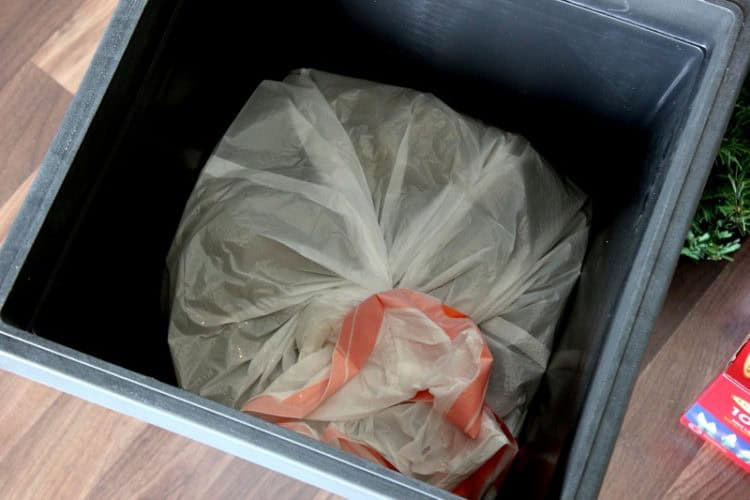
Step 1: If your pots are plastic and not very heavy, you will need to weigh them down to keep them from blowing over in the wind. I used sand in mine. Bricks would work too.
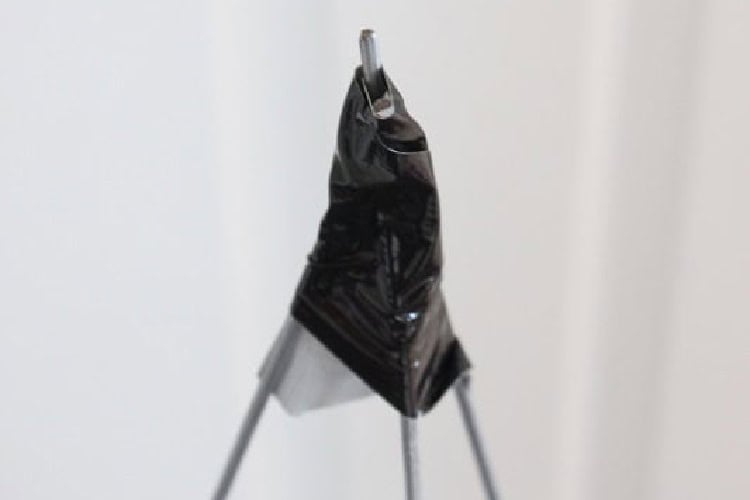
Step 2: Bring the ends of the tomato cage to a point and secure with duct tape.
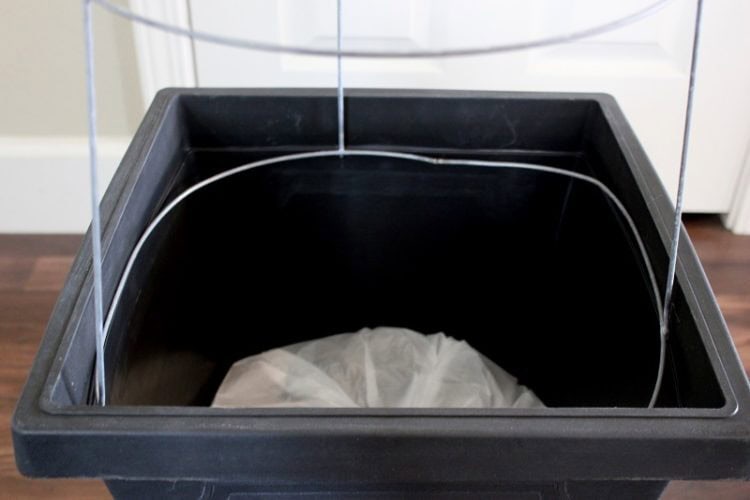
Step 3: Turn the cage upside down and place inside the planter. If your planter is square, bend the tomato cage a bit so that it fits snugly inside.
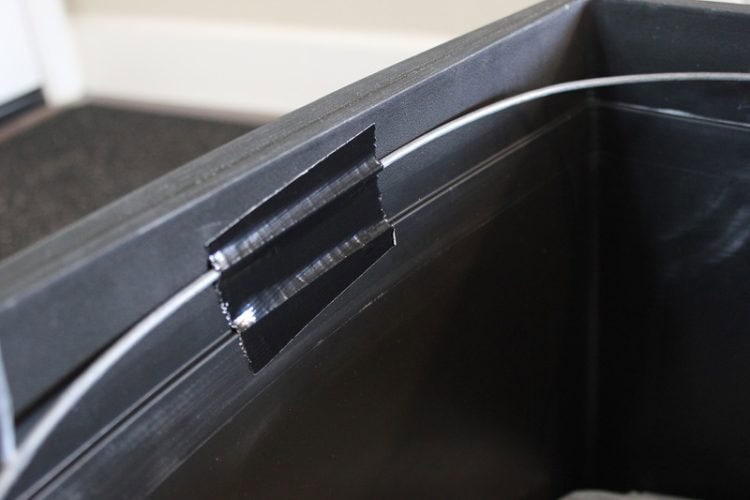
Step 4: Secure each side with duct tape.

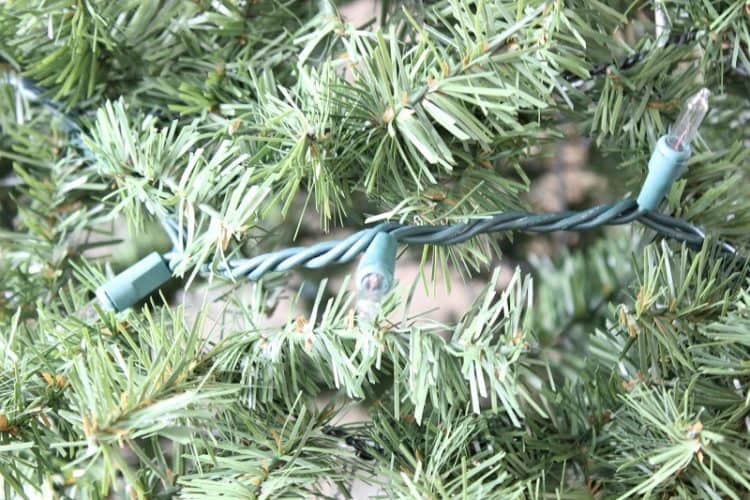
Step 5: Beginning at the top, start wrapping your cage with your garland. Wrap/twist a few of the small wired branches around the cage legs as you go to keep it nice and secure.

Step 6: Here is what it looks like after using 1 garland. Repeat with the remaining garlands. Separate and “fluff” your twig branches until nice and full.
Step 7: String with lights.
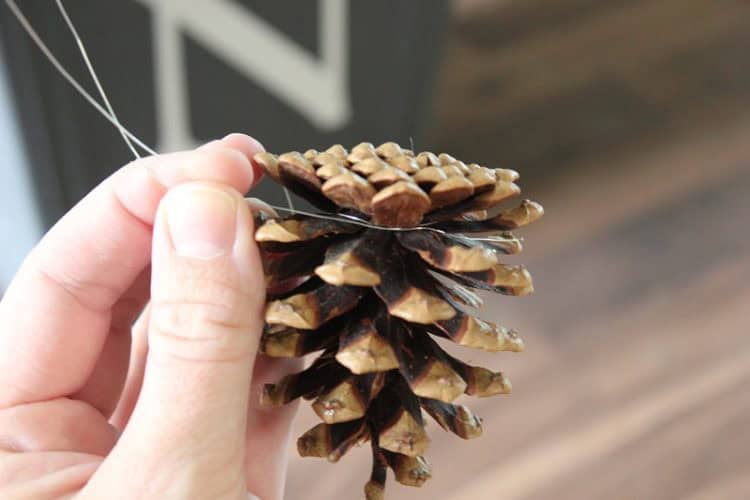
Step 8: The pine cones are optional, but they will fill in the tree and add a decorative touch. I wrapped the ends with some thin gauge wire and then wrapped them around the branches of the tree.
Topiary FAQs
It's best to cover the topiaries to keep them from getting dusty during storage. A large trash bag works well. Remove the topiary from the pot, and place a trash bag over the tomato cage topiary. Store pot separately.
This is entirely personal preference. The size of the topiary will be the height of the tomato cage, plus the height of the pot. I used 42" tomato cages and a 15" pot. This created a topiary that was almost 5' tall.
These topiaries hold up well on a front porch. Weigh the pot down with sand or bricks if it is lightweight. The garland is water-resistant, but I would keep it under a covered porch to prevent fading over time.
More Holiday Crafts To Make


MADE THIS CRAFT AND LOVED IT? 💛 Please leave a STAR rating and COMMENT below! Post it to Facebook or Pinterest to easily share with friends!

Evergreen Tomato Cage Topiary
Equipment
- duct tape
Materials
- 1 tomato cage 42″ tall with a 14″ circular base
- 1 planter
- 4 12' strands of garland
- pinecones optional
- wire for pinecones optional
- 1 100 ct. white lights
Instructions
- If your pots are plastic and not very heavy you will need to weigh them down to keep them from blowing over in the wind. I used sand in mine. Bricks would work too.
- Bring the ends of the tomato cage to a point and secure with duct tape.
- Turn the cage upside down and place inside the planter. If your planter is square, bend the tomato cage a bit so that it fits snugly inside.
- Secure each side with duct tape.
- Beginning at the top, start wrapping your cage with your garland. Wrap/twist a few of the small wired branches around the cage legs as you go to keep it nice and secure.
- Separate and “fluff” your twig branches until nice and full.
- String with lights.
- The pine cones are totally optional, but I thought they would fill in the tree and add a decorative touch. I wrapped the ends with some thin gauge wire and then wrapped them around the branches of the tree.


Linda says
Lovely tutorial for creating your own topiary. Creative and oh so cute, Thanks for sharing at DI&DI.
karyld2016 says
I've made these before and they are so fun! Mine never look quite as festive as yours do though... 🙂 I'll have to try and up my game this year. Thanks for sharing!
Joyce L says
Really nice! Thank you! I too am a Crafter and Penny Pincher. I have 2 - 10in wide & 13in high white planters I bought yrs ago for this very project. I finally elongated my bottom front porch step to extend beyond the rails to place a planter w/topiary on each. They were on clearance at Target for abt $6 ea! I also already have a pine cone lighted topiary in my living room next to my copper wall fireplace also on clearance from Target (slightly damaged) for abt $10 that I talked them down to $7 since it's center foam base was broken. I've had them all for abt 5yrs or more now. I wanted to put evergreens in the planters. I even thought of buying the expensive faux topiary bushes because I wanted the beauty year round, but you have inspired me to do this another way! Thank you! I re-coned and lighted the pine cone topiary in my living room that stays lit year round. It acts as a soft night light for those late night fridge raids! Lol! I may just use my Cricket for the initial but I usually stencil. I will put quick set cement in mine to weigh it down and secure as I've had my hard earned money and time spent on past self-made adornments stolen. I think I will also have to chain mine to the railings unfortunately. But I love the holidays, so I won't be defeated nor discouraged! Thank you again for sharing! ...Oh yeah! ...Because I've had my Event Planning business for 25+yrs, I have a huge collection of things I'd buy on clearance with every intension of using them. So I'm doing a Winter Cleaning and came across several faux garland! Including the 50ft you mentioned and I got mine at Home Depot for less than $5 (agn on clearance) as well as a 15in pre lit wreath for abt $5/9 and several boxes of indoor/outdoor lights all on clearance! I'm finally going to put them to use. I donated several boxes of holiday decorations (Easter & Halloween) and party and baby shower decorations to 3 different organizations (Lupas, VVA & Purple Heart) that pickup in my area. I'm proud of myself and I know my husband and kids are glad as well. Thank you again! I can't wait to get started!
Brandy says
Joyce, that's awesome! If I had thought ahead I could have purchased my supplies on clearance the year before too. So smart. Good luck on your topiaries! I need to go through and clean up my stash too! 🙂
Kim Wynn says
This would be so cute with the mini-ornaments, too. Hmmm, I feel a project coming on....Thanks for the idea!
Melissa says
How big is your vinyl letter
Brandy says
Hi Melissa, it is about 7".
Designing Bee says
LOVE this idea!! I can't wait to make this for my home! Making these would be so cute to add to the home for the holidays. I like how this is cost saving while still being able to decorate a nice piece like this one. The options of adding the decor to the tree also add to the fun. Thank you for this idea!
Jennifer says
I have a ?. Did you cut the garland into sections? Seems there are "ends" everywhere sticking out, making it look like a proper branch. You did a very nice job. Your instructions didn't mention cutting the garland, just wrapping and tying so I thought I'd check. Thanks in advance.
Brandy says
Hi Jennifer! Thank you! I didn't cut the garland, just wrapped and wrapped! And lots of "fluffing" the wires to have them go all different directions. Hope that helps! 🙂
Dyneen Polluconi says
Your post is perfect timing! Was just going to spend $120 for 2, so thank you very much 🙂
C.S. Weaver says
They really look terrific. I love the pine cone addition and the initial. Really makes them special. They look like they could have cost a bunch.
Brandy says
Thanks! If I hadn't made them myself they would have cost a lot. And it was such a simple diy project! Have a wonderful week!
silverhairmadam11965 says
Just lovely. I have been thinking about this same thing for a long time. You have just given me the push to get it done. Thanks.
Brandy says
You're welcome! Have a wonderful holiday season!
Christie M says
Oh- this just went to the top of my to-do list! Love,love,love!
Brandy says
Thanks Christie! They are so easy to make!
Gretchen@Boxy Colonial says
ooh, love these! I just bought boxwoods for my planters, but if I manage to kill those, I'm keeping this in mind 🙂
Brandy says
Ooo, I would love boxwoods, but I don't have much of a green thumb. I'm sure yours will do fine and look beautiful!
Kim Mason-Judice says
Wow. You've inspired me, once again. You are awesome. Happy Holidays!
Brandy says
Happy Holidays to you too! And thanks!!
Amy says
Those look great!! I also love the color of your front door. Did you paint it yourself?
Brandy says
Hi Amy! It came that way, thankfully! I don't think I'd be up for repainting it! Thank you for your sweet comment!
Kim says
LOVE! I'm scared to do this but loved your detailed, precise, succinct directions so I just may have to try making one. I was eyeing these in Walgreen's today but they looked cheesy.
Brandy says
Go for it!! Seriously! It seems harder than it is and the result is so stunning at night! 🙂